Why restore Windows Server 2003 system image backup?
With the daily use of Windows Server 2003, there are many unexpected factors that could cause the system crash or cause a hard drive failing to our computer. These factors may be, hardware conflict, bad ram, hard disk drives overload, viruses or hacker attack, software conflict, power supply problems, and some unknown reasons.
We can clone hard drive in Windows Server 2003 to solve hard disk drive overload or failure. Yet to fix all of them, we have another two choices. One is to re-install the operating system, settings, and all applications, which may cost us hours. However, if we backup C drive for Server 2003 ahead of time, we can choose the other quick and fast way, restore the computer from system image backup.
How to restore Windows Server 2003 system files?
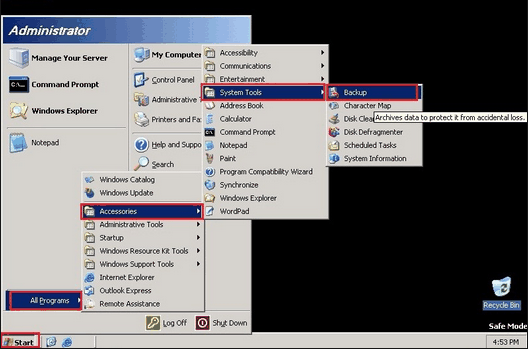
First of all, we might think of using Windows Server 2003 internal backup tool to restore the operating system. Nevertheless, Windows Server 2003 does not embed with one automatic system restore feature like Windows XP, Vista do. Due to this factor, the system doesn’t automatically create restore points for the computer current state. This means we cannot restore Windows Server 2003 to previous state.
In this case, two options are placed in front of us. One is to download System Restore. The other option involves manually creating a restore point for the computer’s current state using Windows Server 2003’s System State.
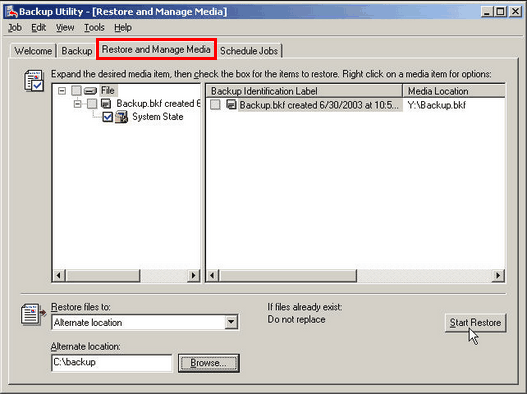
Click “Restore and Mange Media” tab after backup system state, check the box next to “System State”, and start the restore.
Before we use this tanglesome and roundabout method to do a system restoration, there is one thing we should pay attention to: Windows Server 2003 Backup utility (NTBackup.exe) is a backup and restore tool that based on files. This means it will backup and restore file-by-file. As the master server of companies or organizations, it is inevitable to producing masses of files, registries, photos and so on.
Thus, either to backup Windows Server 2003 or to restore Windows Server backup image is a time-consuming thing for NTBackup. We could imagine how much time it would cost to restore the operating system, settings, and so many applications.
Even worse, what if the system fails without a reason before we have enough time to do a system backup? We can re-install applications but we may lose our important personal data forever.
Software to restore Windows Server system backup image
Fortunately, there is one alternative backup and restore software could help us restore Windows Server 2003 system state backup safely and fast--AOMEI Backupper Server edition, which designed for Windows Server backup and disaster recovery, system migration for both physical and virtual Windows Server 2003/2008/2012(including R2).
This software supports system backup, incremental backup, differential backup, schedule backup and system restore, disk restore, universal restore as well as for advanced users, command line backup and restore. Other than backup and restoration, there are plenty of helpful features in this program.
To sum up, it provides us powerful backup and recovery management to safeguard our data and minimize server downtime as well as ensure business continuity.
Restore Windows Server 2003 with AOMEI Backupper
If the system refuses to start, we can create a bootable disk with AOMEI Backupper. Backup is the base of restore. Therefore, if there is no ready system image backup, create one with AOMEI Backupper firstly by linking the very first chaining. Note that the target disk or partition will be overwritten after restoration, so we’d better backup important data in advance if necessary.
In the first place, download AOMEI Backupper Server, install and launch it. This software has a 30-day free trial, so just enjoy it.
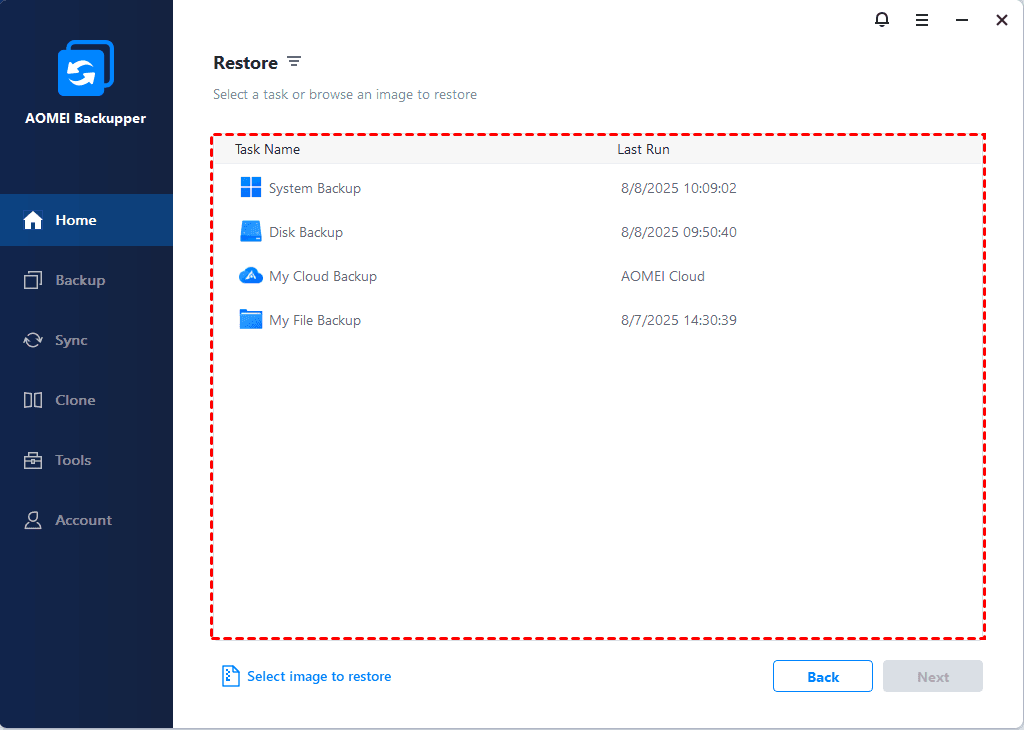
Step 1. Choose “Restore” in the left panel. Click "Select Task" to choose the system image. If the image file was stored in other places, select “Select Image File” to browse.
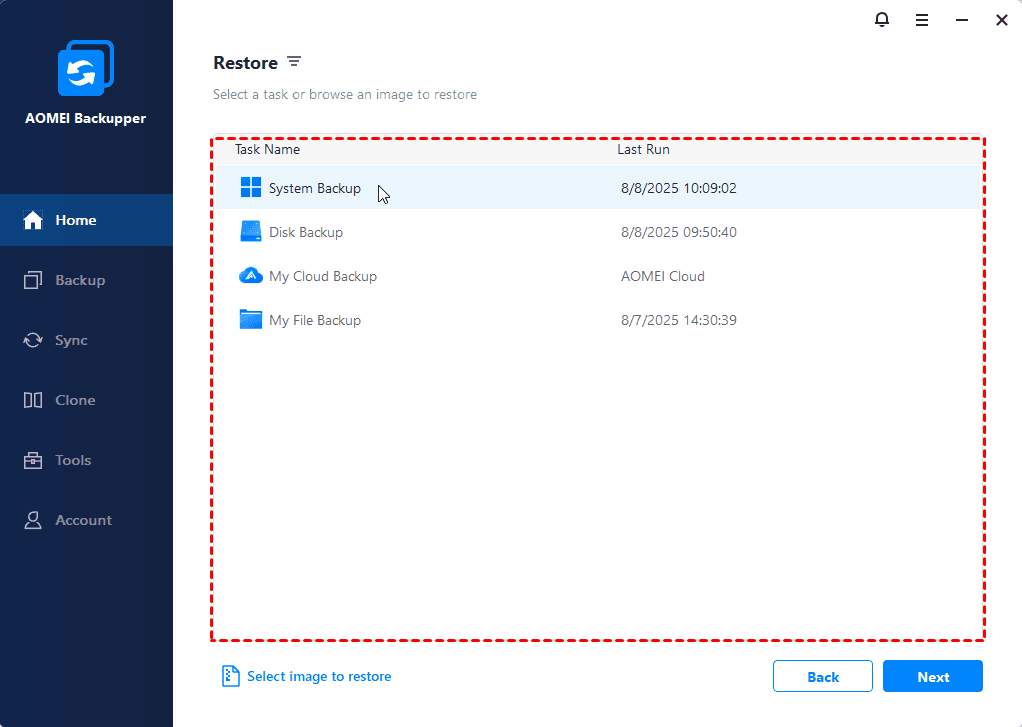
Step 2. Select the backup image.
Step 3. Choose the backup point. If you want to restore the system image to another place please click "Restore system to other location" to make it.
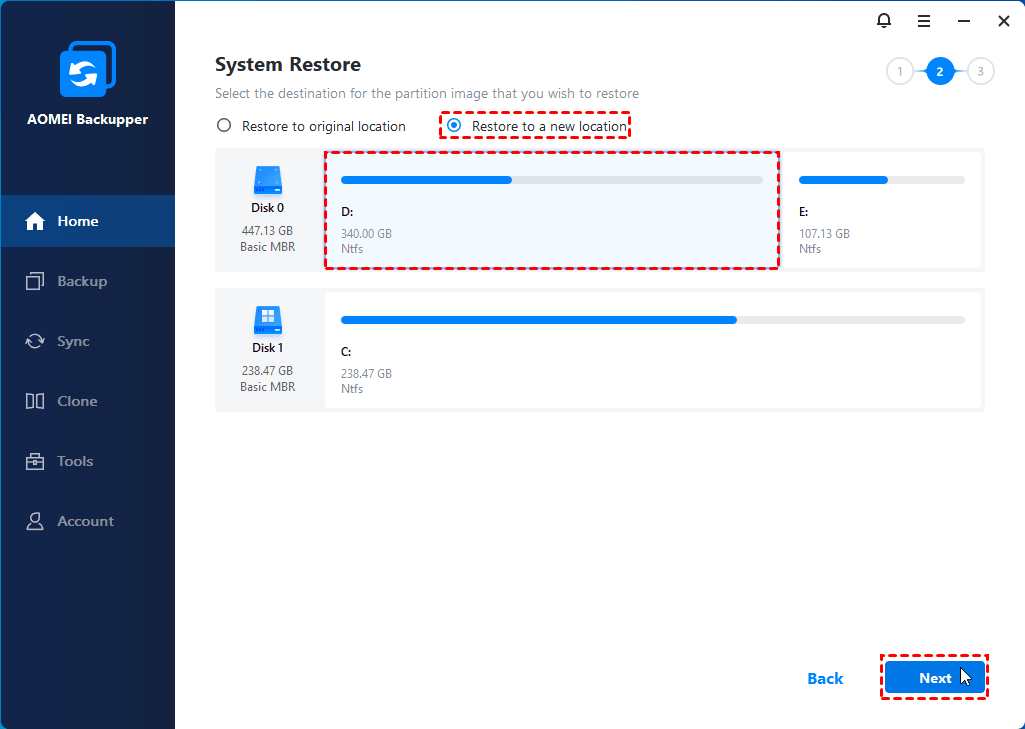
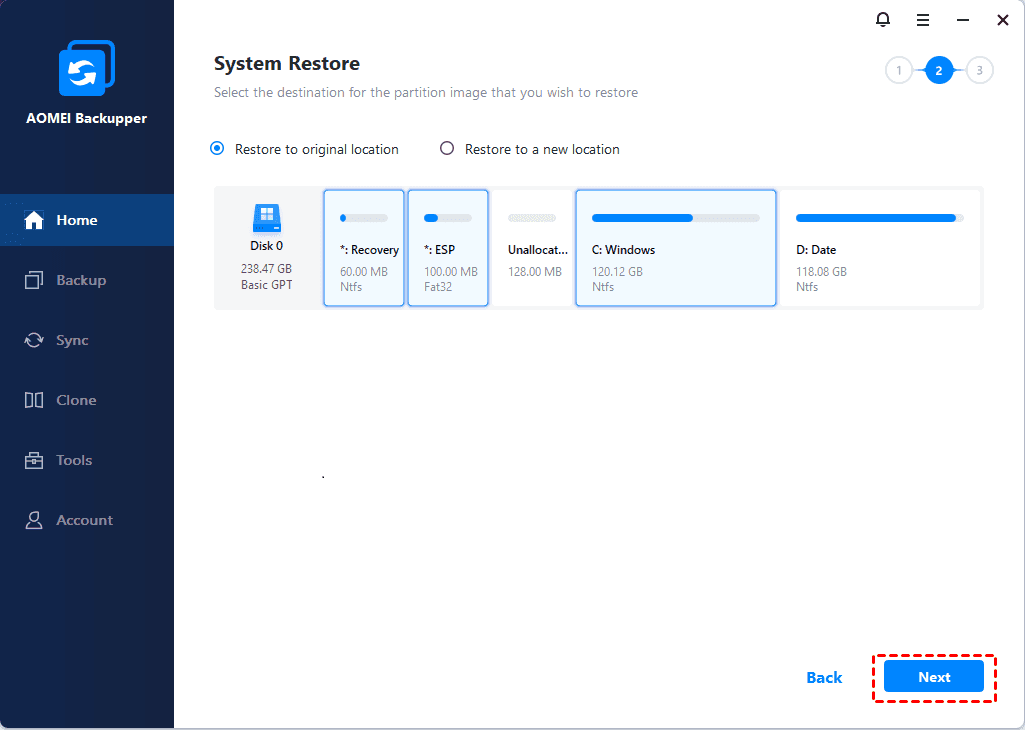
Step 4. Select the location if you are planning to restore to another place.
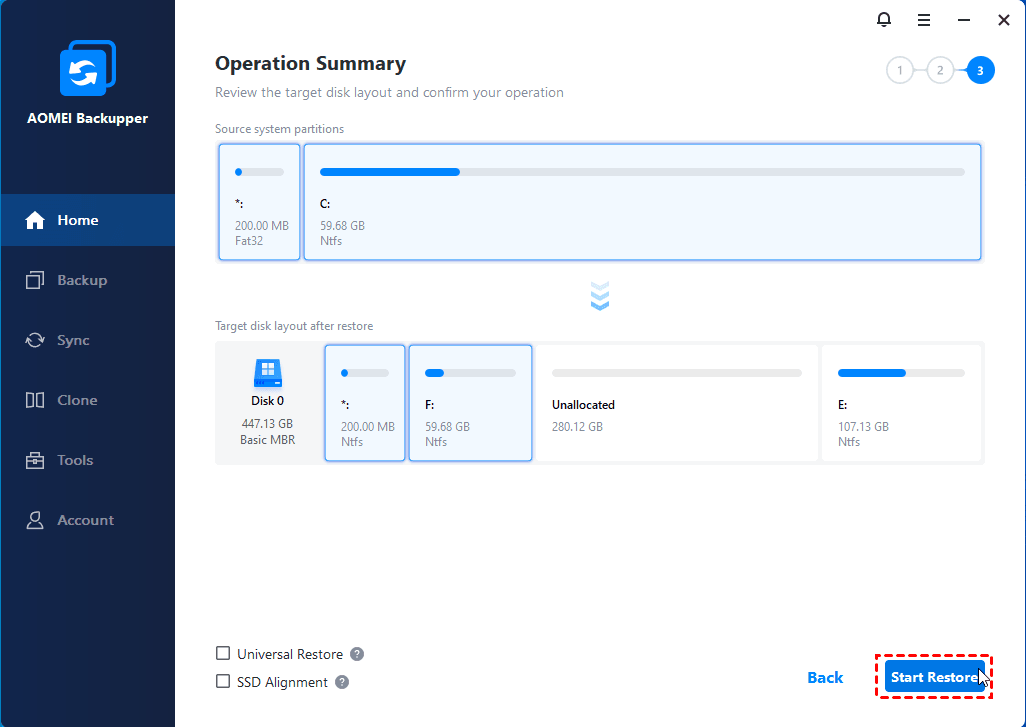
Step 5. Check Operation Summary. Then click “Start Restore”.
A pop-up window will prompt us to restart the computer later. Then, the operations will be completed under the Restart mode.
Tips:
Edit Partition: we can change the size of the partition using drag bar.
SSD Alignment: if the destination disk is SSD, this function could help us accelerating its writing and reading speed.
You can restore system image backup in Windows Server 2019 with this software as well.
About Universal Restore
If you would like to restore Windows Server 2003 (R2) system image backup to a dissimilar hardware computer, before pressing Start Restore, check Universal Restore option to ensure it will boot normally after the restoration.
1. After restoring Windows Server 2003 (R2) to a computer with dissimilar hardware, it may be necessary to enter license codes to reactivate Windows, Office, etc.
2. Some drivers (such as the video/sound card drivers, display driver, NIC drivers, etc.) are not installed by Universal Restore for dissimilar hardware. As these drivers will not affect system startup, they can be installed manually after the restoration.
Tidak ada komentar:
Posting Komentar