CentOS 6 Linux Base Docker Image
http://clusterfrak.com/docker_images/base/centos6/
https://www.youtube.com/watch?v=s948NKa1I1I
Description:
This instruction set will show how to build a base container image using CentOS Linux 6. This container image is the image used for many of the appcontainers images found on the docker hub.
CentOS 6 Linux Base Minimal Install - 136 MB (tags: latest, 6) CentOS 6 Linux Base with Ansible - 188 MB (tags: ansible, ansible-6)
This container is built from centos:6.9, (393/445 MB Before Flatification)
Installation Steps:
Install official CentOS 6 GPG Key:
rpm --import /etc/pki/rpm-gpg/RPM-GPG-KEY-CentOS-6
Install the Epel Repository:
yum install -y epel-release
rpm --import http://download.fedoraproject.org/pub/epel/RPM-GPG-KEY-EPEL-6
s
Install the Remi Repository:
cd /etc/yum.repos.d/;
curl -O http://rpms.famillecollet.com/enterprise/remi-release-6.rpm;
rpm -Uvh remi-release-6*.rpm;
rpm --import /etc/pki/rpm-gpg/RPM-GPG-KEY-remi
rm -fr *.rpm
Modify Remi Repo to enable remi base and PHP 7.1:
sed -ie '/\[remi\]/,/^\[/s/enabled=0/enabled=1/' /etc/yum.repos.d/remi.repo;
sed -ie '/\[remi-php71\]/,/^\[/s/enabled=0/enabled=1/' /etc/yum.repos.d/remi-php71.repo
Update the OS and install required packages:
yum clean all;
yum -y update;
The following packages are also installed on the :ansible variant only
yum update ansible
The following configuration is also set on the ansible variant only
curl "https://bootstrap.pypa.io/get-pip.py" -o "/tmp/get-pip.py" && \
python /tmp/get-pip.py && \
pip install pip --upgrade && \
rm -fr /tmp/get-pip.py && \
mkdir -p /etc/ansible/roles || exit 0 && \
echo localhost ansible_connection=local > /etc/ansible/hosts
mkdir -p /etc/ansible/roles || exit 0 && \
echo localhost ansible_connection=local > /etc/ansible/hosts
Cleanup:
Remove the contents of /var/cache/ after a yum update or yum install will save about 150MB from the image size
yum clean all
rm -f /etc/yum.repos.d/*.rpm; rm -fr /var/cache/*
Cleanup Locales:
for x in `ls /usr/share/locale | grep -v -i en | grep -v -i local`;do rm -fr /usr/share/locale/$x; done && \
for x in `ls /usr/share/i18n/locales/ | grep -v en_`; do rm -fr /usr/share/i18n/locales/$x; done && \
rm -fr /usr/share/locale/ca* /usr/share/locale/den /usr/share/locale/men /usr/share/locale/wen /usr/share/locale/zen
cd /usr/lib/locale;
localedef --list-archive | grep -v -i ^en | xargs localedef --delete-from-archive;
mv -f locale-archive locale-archive.tmpl;
build-locale-archive
Set the default Timezone to EST:
cp /etc/localtime /root/old.timezone && \
rm -f /etc/localtime && \
ln -s /usr/share/zoneinfo/America/New_York /etc/localtime
Remove Man Pages and Docs to preserve Space:
rm -fr /usr/share/doc/* /usr/share/man/* /usr/share/groff/* /usr/share/info/*;
rm -rf /usr/share/lintian/* /usr/share/linda/* /var/cache/man/*
Set the Terminal CLI Prompt:
Copy the included Terminal CLI Color Scheme file to /etc/profile.d so that the terminal color will be included in all child images
#!/bin/bash
if [ "$PS1" ]; then
    set_prompt () {
    Last_Command=$?
    Blue='\[\e[01;34m\]'
    White='\[\e[01;37m\]'
    Red='\[\e[01;31m\]'
    YellowBack='\[\e[01;43m\]'
    Green='\[\e[01;32m\]'
    Yellow='\[\e[01;33m\]'
    Black='\[\e[01;30m\]'
    Reset='\[\e[00m\]'
    FancyX=':('
    Checkmark=':)'

    # If it was successful, print a green check mark. Otherwise, print a red X.
    if [[ $Last_Command == 0 ]]; then
        PS1="$Green$Checkmark "
    else
        PS1="$Red$FancyX "
    fi
    # If root, just print the host in red. Otherwise, print the current user and host in green.
    if [[ $EUID == 0 ]]; then
        PS1+="$Black $YellowBack $TERMTAG $Reset $Red \\u@\\h"
    else
        PS1+="$Black $YellowBack $TERMTAG $Reset $Green \\u@\\h"
    fi
    # Print the working directory and prompt marker in blue, and reset the text color to the default.
    PS1+="$Blue\\w \\\$$Reset "
    }

    PROMPT_COMMAND='set_prompt'
fi
Prevent the .bashrc from being executed via SSH or SCP sessions:
echo -e "\nif [[ -n \"\$SSH_CLIENT\" || -n \"\$SSH_TTY\" ]]; then\n\treturn;\nfi\n" >> /root/.bashrc && \
echo -e "\nif [[ -n \"\$SSH_CLIENT\" || -n \"\$SSH_TTY\" ]]; then\n\treturn;\nfi\n" >> /etc/skel/.bashrc
Set Dockerfile Runtime command:
Default command to run when lauched via docker run
CMD /bin/bash
Dockerfile:
###########################################################
# Dockerfile to build the CentOS 6.9 Base Container
# Based on: library/centos:6.9
# DATE: 11/25/16
# COPYRIGHT: Appcontainers.com
###########################################################

# Set the base image in namespace/repo format.
# To use repos that are not on the docker hub use the example.com/namespace/repo format.
FROM library/centos:6.9

# File Author / Maintainer
MAINTAINER Rich Nason rnason@appcontainers.com

###########################################################
#*********************  APP VERSIONS  *********************
###########################################################


###########################################################
#***********  OVERRIDE ENABLED ENV VARIABLES  *************
###########################################################

ENV TERMTAG CentOS6Base

###########################################################
#**************  ADD REQUIRED APP FILES  ******************
###########################################################

# Import keys and fix passwd issue.
RUN rpm --import /etc/pki/rpm-gpg/RPM-GPG-KEY-CentOS-6

###########################################################
#***************  UPDATES & PRE-REQS  *********************
###########################################################

# Clean, Update, and Install... then clear non English local data.
RUN yum clean all && \

# Install required packages
yum -y install epel-release && \
rpm --import http://download.fedoraproject.org/pub/epel/RPM-GPG-KEY-EPEL-6 && \

# Download and install the Remi repository
cd /etc/yum.repos.d/ && \
curl -O http://rpms.famillecollet.com/enterprise/remi-release-6.rpm && \
rpm -Uvh remi-release-6*.rpm && \
rpm --import /etc/pki/rpm-gpg/RPM-GPG-KEY-remi && \
rm -fr *.rpm && \

#Enable the remi repo
sed -ie '/\[remi\]/,/^\[/s/enabled=0/enabled=1/' /etc/yum.repos.d/remi.repo && \
# sed -ie '/\[remi-php55\]/,/^\[/s/enabled=0/enabled=1/' /etc/yum.repos.d/remi.repo && \
sed -ie '/\[remi-php71\]/,/^\[/s/enabled=0/enabled=1/' /etc/yum.repos.d/remi-php71.repo && \

# Now that epel is installed, clean all again and update
yum clean all && \
yum -y update && \
# yum -y install ansible && \

# Remove yum cache this bad boy can be 150MBish
yum clean all && \
rm -fr /var/cache/*

###########################################################
#***************  APPLICATION INSTALL  ********************
###########################################################

# Install pip and configure ansible
# RUN curl "https://bootstrap.pypa.io/get-pip.py" -o "/tmp/get-pip.py" && \
# python /tmp/get-pip.py && \
# pip install pip --upgrade && \
# rm -fr /tmp/get-pip.py && \
# mkdir -p /etc/ansible/roles || exit 0 && \
# echo localhost ansible_connection=local > /etc/ansible/hosts

###########################################################
#**************  POST DEPLOY CLEAN UP  ********************
###########################################################

# Remove locales other than english
RUN for x in `ls /usr/share/locale | grep -v -i en | grep -v -i local`;do rm -fr /usr/share/locale/$x; done && \
for x in `ls /usr/share/i18n/locales/ | grep -v en_`; do rm -fr /usr/share/i18n/locales/$x; done && \
rm -fr /usr/share/locale/ca* /usr/share/locale/den /usr/share/locale/men /usr/share/locale/wen /usr/share/locale/zen && \
cd /usr/lib/locale && \
localedef --list-archive | grep -v -i ^en | xargs localedef --delete-from-archive && \
mv -f locale-archive locale-archive.tmpl && \
build-locale-archive

# Set the default Timezone to EST
RUN cp /etc/localtime /root/old.timezone && \
rm -f /etc/localtime && \
ln -s /usr/share/zoneinfo/America/New_York /etc/localtime

# Remove documentation to cut down the image size
RUN rm -fr /usr/share/doc/* /usr/share/man/* /usr/share/groff/* /usr/share/info/* && \
rm -rf /usr/share/lintian/* /usr/share/linda/* /var/cache/man/*

# Rebuild the RPM Database
RUN rm -f /var/lib/rpm/__db* && \
rpm --rebuilddb

###########################################################
#*************  CONFIGURE START ITEMS  ********************
###########################################################

ADD termcolor.sh /etc/profile.d/PS1.sh
RUN chmod +x /etc/profile.d/PS1.sh

# Add the following to prevent any additions to the .bashrc from being executed via SSH or SCP sessions
RUN echo -e "\nif [[ -n \"\$SSH_CLIENT\" || -n \"\$SSH_TTY\" ]]; then\n\treturn;\nfi\n" >> /root/.bashrc && \
echo -e "\nif [[ -n \"\$SSH_CLIENT\" || -n \"\$SSH_TTY\" ]]; then\n\treturn;\nfi\n" >> /etc/skel/.bashrc

CMD /bin/bash

###########################################################
#************  EXPOSE APPLICATION PORTS  ******************
###########################################################


###########################################################
#***************  OPTIONAL / LEGACY  **********************
###########################################################
Building the image from the Dockerfile:
docker build -t build/centos .
Packaging the final image:
Because we want to make this image as light weight as possible in terms of size, the image is flattened in order to remove the docker build tree, removing any intermediary build containers from the image. In order to remove the reversion history, the image needs to be ran, and then exported/imported. Note that just saving the image will not remove the revision history, In order to remove the revision history, the running container must be exported and then re-imported.
Run the container build:
docker run -it -d \
--name centos \
build/centos \
/bin/bash
The run statement should start a detached container, however if you are attached, detach from the container
CTL P + CTL Q
Export and Re-import the Container:
Note that because we started the build container with the name of centos, we will use that in the export statement instead of the container ID.
docker export centos | docker import - appcontainers/centos:latest
Verify:
Issuing a docker images should now show a newly saved appcontainers/centos image, which can be pushed to the docker hub.
Run the container:
docker run -it -d appcontainers/centos:latest
Dockerfile Change-log:
05/19/2017 - Update to 6.9, PHP 7.1
03/25/2017 - Created separate build/tags for raw base and base with ansible installed
11/28/2016 - Update to OS, add vim, and ansible as it will replace runconfig scripts
06/11/2016 - Update to 6.8
12/14/2015 - Update to 6.7 official, epel change.
09/29/2015 - Add Line to .bashrc to prevent additions to the basrc to be run from SSH/SCP login
08/07/2015 - Upgrade to CentOS 6.7
07/07/2015 - Squueze more space.. reduced from 270MB to 137MB
05/06/2015 - Updated configuration scripts, pre import GPG repo keys
04/27/2015 - Removed Locales other than English to conserve over 100MB
04/06/2015 - Changed Postgres Repo from postgresql9.3 postgresql-9.4


This post shows students and new users steps to install and configure ownCloud on Ubuntu Linux with Nginx and Let’s Encrypt free SSL certificate.
ownCloud is an open-source, self-hosted file sync and share platform similar to Dropbox, OneDrive, and other proprietary online storage services. ownCloud enables private cloud services on users’ servers. It is extensible via its app and can be installed on mobile and desktops to access & sync your files, contacts, and data across all devices and platforms.
If you’re looking for a self-hosted file share and sync platform, ownCloud should be a good place to start. We’ll show you how to install and configure ownCloud on your own Ubuntu server with a link to the Let’s Encrypt SSL post.
Also, for students and new users learning Linux, Ubuntu Linux is the easiest place to start learning. Ubuntu is the modern, open-source Linux operating system for desktops, servers, and other devices.
Follow the steps below to start installing and configuring ownCloud on Ubuntu Linux.
How to install Nginx on Ubuntu Linux
As mentioned above, we will use the Nginx web server to run ownCloud. ownCloud requires a web server to function, and Nginx is the most popular open-source web server available today.
To install Nginx on Ubuntu, run the commands below:
After installing Nginx, the commands below can stop, start and enable Nginx services to start up every time your server starts up.
To test whether Nginx is installed and functioning, open your web browser and browse to the server’s IP address or hostname.
http://localhost
If you see the above page in your browser, Nginx works as expected.
How to install MariaDB on Ubuntu Linux
A database server is required for ownCloud to function. ownCloud stores its content in a database, and MariaDB is probably the best database server available to run ownCloud.
MariaDB is fast, secure, and the default server for almost all Linux servers. To install MariaDB, run the commands below:
After installing MariaDB, the commands below can stop, start and enable MariaDB services to start up when the server boots.
Next, run the commands below to secure the database server with a root password if you were not prompted to do so during the installation.
When prompted, use the guide below to answer:
To verify and validate that MariaDB is installed and working, log in to the database console using the commands below:
You should automatically be logged in to the database server since we initiated the login request as root. Only the root can log in without a password and from the server console.
The server was successfully installed if you see a similar screen.
How to install PHP on Ubuntu Linux
Also, PHP is required to run ownCloud. PHP packages are added to Ubuntu repositories. The versions of the repositories might not be the latest. If you need to install the latest versions, you’ll need to add a third-party PPA repository.
Run the commands below to a third-party repository with the latest versions of PHP.
At the time of this writing, the latest PHP version is 8.0.
Next, run the commands below to install PHP 8.0 and related modules.
Next, you’ll want to change some PHP configuration settings that work great with ownCloud. Run the commands below to open the PHP default configuration file.
Then change the line settings to be something like the lines below. Save your changes and exit.
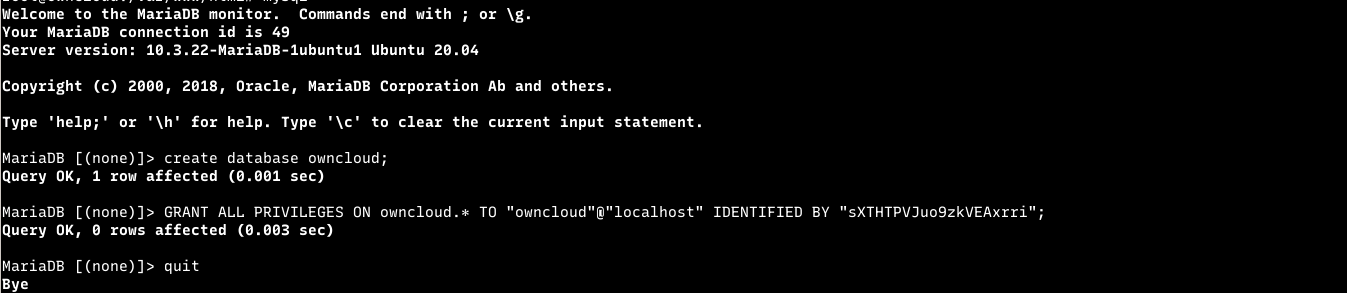
How to create ownCloud database on Ubuntu
At this point, we’re ready to create our ownCloud database. As mentioned above, ownCloud uses databases to store its content.
To create a database for ownCloud, run the commands below:
Then create a database called owncloud
CREATE DATABASE owncloud;Next, create a database user called ownclouduser and set a password
Then grant the user full access to the database.
Finally, save your changes and exit.
How to download ownCloud on Ubuntu
We’re ready to download ownCloud and begin configuring it. First, run the commands below to download the latest version of ownCloud from its repository.
Next, extract the downloaded content into the Nginx root directory. This will create a folder called owncloud.
Then run the command below to allow the www-data user to own the new owncloud directory.
How to configure Nginx for ownCloud
We have downloaded ownCloud content into a new folder we called ownCloud. Let’s configure Nginx to create a new server block with our ownCloud website. You can create as many server blocks with Nginx.
To do that, run the commands below to create a new configuration file called owncloud. Conf in the /etc/nginx/sites-available/ directory to host our ownCloud server block.
In the file, copy and paste the content below into the file and save.
upstream php-handler {
    server unix:/var/run/php/php7.4-fpm.sock;
}
server {
    listen 80;
    listen [::]:80;
    root /var/www;
    index  index.php index.html index.htm;
    server_name  example.com;


  location ^~ /owncloud {

        client_max_body_size 512M;
        fastcgi_buffers 8 4K;
        fastcgi_ignore_headers X-Accel-Buffering;

        gzip off;

        error_page 403 /owncloud/core/templates/403.php;
        error_page 404 /owncloud/core/templates/404.php;

        location /owncloud {
            rewrite ^ /owncloud/index.php$uri;
        }

        location ~ ^/owncloud/(?:build|tests|config|lib|3rdparty|templates|changelog|data)/ {
            return 404;
        }
        location ~ ^/owncloud/(?:\.|autotest|occ|issue|indie|db_|console|core/skeleton/) {
            return 404;
        }
        location ~ ^/owncloud/core/signature\.json {
            return 404;
        }

        location ~ ^/owncloud/(?:index|remote|public|cron|core/ajax/update|status|ocs/v[12]|updater/.+|oc[sm]-provider/.+|core/templates/40[34])\.php(?:$|/) {
            fastcgi_split_path_info ^(.+\.php)(/.*)$;
            include fastcgi_params;
            fastcgi_param SCRIPT_FILENAME $document_root$fastcgi_script_name;
            fastcgi_param SCRIPT_NAME $fastcgi_script_name;
            fastcgi_param PATH_INFO $fastcgi_path_info;
            fastcgi_param modHeadersAvailable true;
            fastcgi_read_timeout 180;
            fastcgi_pass php-handler;
            fastcgi_intercept_errors on;
            fastcgi_request_buffering off;
        }

        location ~ ^/owncloud/(?:updater|oc[sm]-provider)(?:$|/) {
            try_files $uri $uri/ =404;
            index index.php;
        }

        # Adding the cache control header for js and css files
        # Make sure it is BELOW the PHP block
        location ~ /owncloud/.*\.(?:css|js) {
            try_files $uri /owncloud/index.php$uri$is_args$args;
            add_header Cache-Control "max-age=15778463" always;
            add_header X-Content-Type-Options "nosniff" always;
            add_header X-Frame-Options "SAMEORIGIN" always;
            add_header X-XSS-Protection "1; mode=block" always;
            add_header X-Robots-Tag "none" always;
            add_header X-Download-Options "noopen" always;
            add_header X-Permitted-Cross-Domain-Policies "none" always;
            access_log off;
        }

        location ~ /owncloud/.*\.(?:svg|gif|png|html|ttf|woff|ico|jpg|jpeg|map|json) {
            try_files $uri /owncloud/index.php$uri$is_args$args;
            add_header Cache-Control "public, max-age=7200" always;
            access_log off;
        }
    }
}
Save the file and exit.
After saving the file above, run the commands below to enable the new file that contains our ownCloud server block and other important Nginx modules.
Restart Nginx after that.
Reload Nginx when the configuration is above.
Now that ownCloud is downloaded, and the necessary services are configured, open your browser and start the ownCloud installation by visiting your server’s domain name or IP address followed by /owncloud :
However, we want to protect our server with Let’s Encrypt free SSL certificates. So, continue below to learn how to generate a Let’s Encrypt SSL certificate for websites.
How to setup Let’s Encrypt for ownCloud
We have written a great post on generating and managing Let’s Encrypt SSL certificates for the Nginx web server. You can use that post to apply it here for your ownCloud website.
To read the post on how to generate Let’s Encrypt SSL certificates for a website, click on the link below:
How to Setup Let’s Encrypt on Ubuntu Linux with Nginx
If you successfully generate a Let’s Encrypt SSL certificate, you should reopen the server block for our ownCloud website by running the commands below.
The new ownCloud server block configurations should look similar to the line below. Take notes of the highlighted lines.
upstream php-handler {
    server unix:/var/run/php/php7.4-fpm.sock;
}

server {
    listen 80;
    listen [::]:80;
    root /var/www;
    index  index.php index.html index.htm;
    server_name  example.com www.example.com;

    include snippets/well-known.conf;

    return 301 https://$host$request_uri;
}

server {
    listen 443 ssl http2;
    listen [::]:443 ssl http2;
    root /var/www;
    index  index.php index.html index.htm;
    server_name www.example.com;

    ssl_certificate /etc/letsencrypt/live/example.com/fullchain.pem;
    ssl_certificate_key /etc/letsencrypt/live/example.com/privkey.pem;
    ssl_trusted_certificate /etc/letsencrypt/live/example.com/chain.pem;

    ssl_protocols TLSv1 TLSv1.1 TLSv1.2 TLSv1.3;
    ssl_ciphers ECDHE-ECDSA-AES128-GCM-SHA256:ECDHE-RSA-AES128-GCM-SHA256:ECDHE-ECDSA-AES256-GCM-SHA384:ECDHE-RSA-AES256-GCM-SHA384:ECDHE-ECDSA-CHACHA20-POLY1305:ECDHE-RSA-CHACHA20-POLY1305:DHE-RSA-AES128-GCM-SHA256:DHE-RSA-AES256-GCM-SHA384;

    add_header Strict-Transport-Security "max-age=31536000;  includeSubDomains";

    include snippets/well-known.conf;

    return 301 https://example.com$request_uri;
}

server {
    listen 443 ssl http2;
    listen [::]:443 ssl http2;
    root /var/www;
    index  index.php index.html index.htm;
    server_name example.com;

    ssl_certificate /etc/letsencrypt/live/example.com/fullchain.pem;
    ssl_certificate_key /etc/letsencrypt/live/example.com/privkey.pem;
    ssl_trusted_certificate /etc/letsencrypt/live/example.com/chain.pem;

    ssl_protocols TLSv1 TLSv1.1 TLSv1.2 TLSv1.3;
    ssl_ciphers ECDHE-ECDSA-AES128-GCM-SHA256:ECDHE-RSA-AES128-GCM-SHA256:ECDHE-ECDSA-AES256-GCM-SHA384:ECDHE-RSA-AES256-GCM-SHA384:ECDHE-ECDSA-CHACHA20-POLY1305:ECDHE-RSA-CHACHA20-POLY1305:DHE-RSA-AES128-GCM-SHA256:DHE-RSA-AES256-GCM-SHA384;

    ssl_prefer_server_ciphers on;
    ssl_session_cache shared:SSL:50m;
    ssl_session_timeout 1d;
    ssl_session_tickets off;

    ssl_stapling on;
    ssl_stapling_verify on;
    resolver 8.8.8.8 8.8.4.4 valid=300s;
    resolver_timeout 30s;

    ssl_dhparam /etc/ssl/certs/dhparam.pem;

    add_header Strict-Transport-Security "max-age=31536000;  includeSubDomains";


 location / {
        return 301 https://$server_name:443$request_uri;
    }

  location ^~ /owncloud {

        client_max_body_size 512M;
        fastcgi_buffers 8 4K;
        fastcgi_ignore_headers X-Accel-Buffering;

        gzip off;

        error_page 403 /owncloud/core/templates/403.php;
        error_page 404 /owncloud/core/templates/404.php;

        location /owncloud {
            rewrite ^ /owncloud/index.php$uri;
        }

        location ~ ^/owncloud/(?:build|tests|config|lib|3rdparty|templates|changelog|data)/ {
            return 404;
        }
        location ~ ^/owncloud/(?:\.|autotest|occ|issue|indie|db_|console|core/skeleton/) {
            return 404;
        }
        location ~ ^/owncloud/core/signature\.json {
            return 404;
        }

        location ~ ^/owncloud/(?:index|remote|public|cron|core/ajax/update|status|ocs/v[12]|updater/.+|oc[sm]-provider/.+|core/templates/40[34])\.php(?:$|/) {
            fastcgi_split_path_info ^(.+\.php)(/.*)$;
            include fastcgi_params;
            fastcgi_param SCRIPT_FILENAME $document_root$fastcgi_script_name;
            fastcgi_param SCRIPT_NAME $fastcgi_script_name;
            fastcgi_param PATH_INFO $fastcgi_path_info;
            fastcgi_param HTTPS on;
            fastcgi_param modHeadersAvailable true;
            fastcgi_read_timeout 180;
            fastcgi_pass php-handler;
            fastcgi_intercept_errors on;
            fastcgi_request_buffering off;
        }

        location ~ ^/owncloud/(?:updater|oc[sm]-provider)(?:$|/) {
            try_files $uri $uri/ =404;
            index index.php;
        }

        # Adding the cache control header for js and css files
        # Make sure it is BELOW the PHP block
        location ~ /owncloud/.*\.(?:css|js) {
            try_files $uri /owncloud/index.php$uri$is_args$args;
            add_header Cache-Control "max-age=15778463" always;
            add_header X-Content-Type-Options "nosniff" always;
            add_header X-Frame-Options "SAMEORIGIN" always;
            add_header X-XSS-Protection "1; mode=block" always;
            add_header X-Robots-Tag "none" always;
            add_header X-Download-Options "noopen" always;
            add_header X-Permitted-Cross-Domain-Policies "none" always;
            access_log off;
        }

        location ~ /owncloud/.*\.(?:svg|gif|png|html|ttf|woff|ico|jpg|jpeg|map|json) {
            try_files $uri /owncloud/index.php$uri$is_args$args;
            add_header Cache-Control "public, max-age=7200" always;
            access_log off;
        }
    }
}
Save the file above, then restart Nginx and PHP using the commands below.
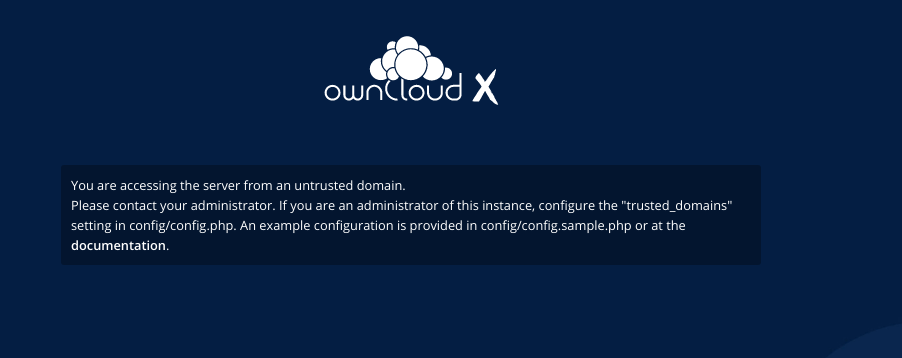
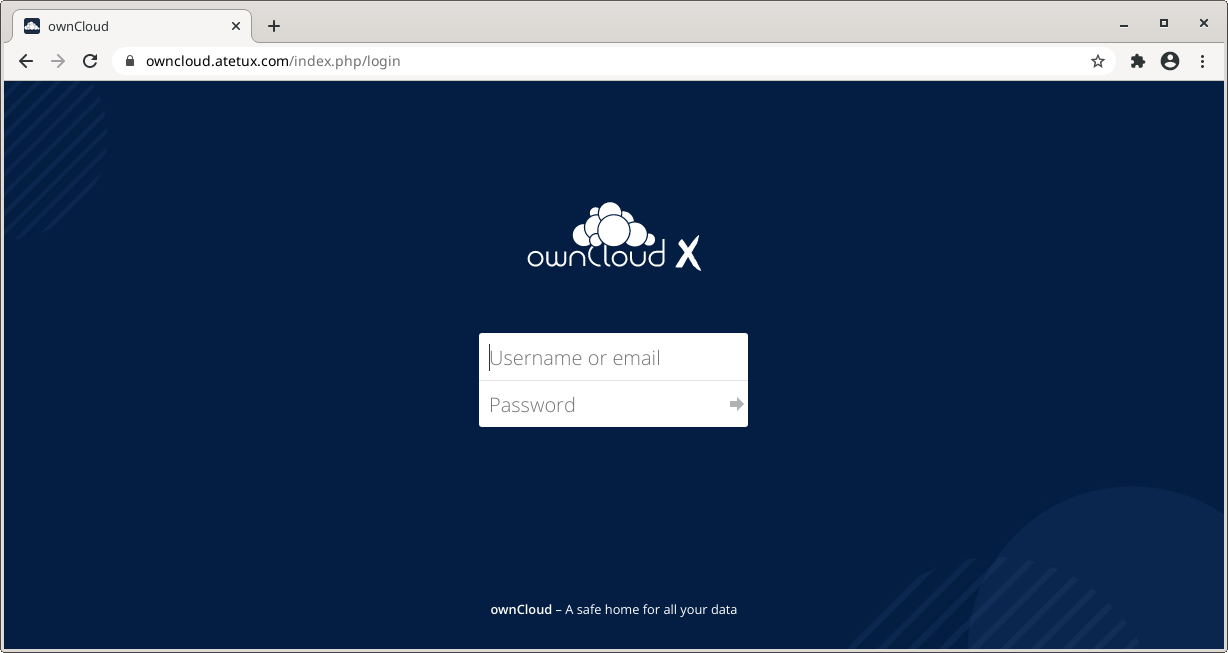
Finally, if everything went as planned, you should be able to start the ownCloud setup wizard by browsing to the server hostname or IP address over HTTPS.
An ownCloud setup wizard should appear. Follow the wizard to complete the setup.
Click Finish setup
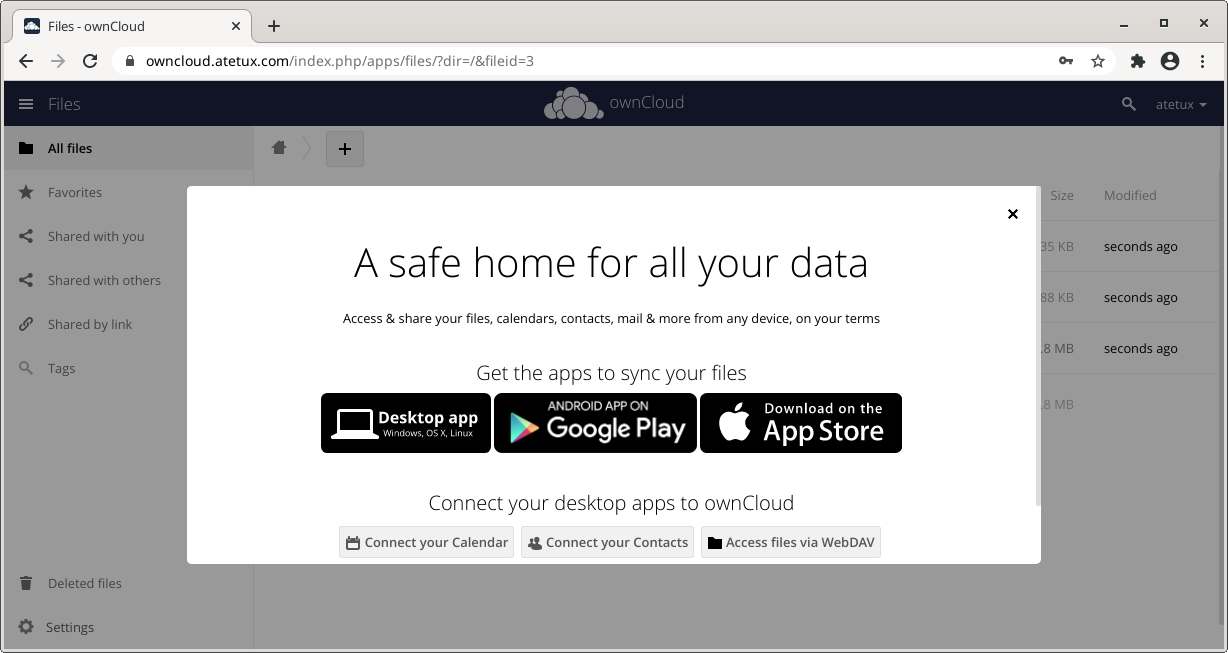
Wait for the setup to complete. Then log in and begin configuring your environment.
That should do it!
Conclusion:
This post showed you how to set up ownCloud on Ubuntu Linux with Nginx and Let’s Encrypt. Please use the comment form below if you find any errors above or have something to add.