How to Install vsftpd FTP Server with SSL/TLS on CentOS 8
FTP is a widely used protocol used for transferring files between server and client. There are a lot of open-source FTP servers available now a day including, FTPD, VSFTPD, PROFTPD, and pureftpd. Among them, VSFTPD is a secure, fast and most widely used protocol around the world. It is also called "Very Secure File Transfer Protocol Daemon". It also supports SSL, IPv6, explicit and implicit FTPS.
In this tutorial, we will show you how to install VSFTPD on CentOS 8 server and secure it with SSL/TLS.
Prerequisites
- A server running CentOS 8.
- A root password is configured on your server.
Install VSFTPD
By default, VSFTPD is available in the CentOS 8 default repository. You can install it by running the following command:
dnf install vsftpd -y
Once the installation is completed, start the VSFTPD service and enable it to start after system reboot with the following command:
systemctl start vsftpd
 systemctl enable vsftpd
At this point, your VSFTPD server is installed and running. You can now proceed to the next step.
Create a User for VSFTPD
Next, you will need to create a new user for VSFTPD. So you can access your FTP server using this user.
Run the following command to create a new user called vyom as shown below:
adduser vyom
Next, set the password for a user vyom with the following command:
passwd vyom
Once you are done, you can proceed to the next step.
Configure VSFTPD
Next, open the VSFTPD default configuration file located at /etc/vsftpd directory as shown below:
nano /etc/vsftpd/vsftpd.conf
Change the following lines:
anonymous_enable=NO
local_enable=YES
write_enable=YES
local_umask=022
dirmessage_enable=YES
xferlog_enable=YES
connect_from_port_20=YES
xferlog_std_format=YES
listen=NO
listen_ipv6=YES
pam_service_name=vsftpd
userlist_enable=NO
Save and close the file when you are finished. Then, restart the VSFTPD service and verify the status of the service with the following command:
systemctl restart vsftpd
 systemctl status vsftpd
You should see the following output:
? vsftpd.service - Vsftpd ftp daemon
   Loaded: loaded (/usr/lib/systemd/system/vsftpd.service; disabled; vendor preset: disabled)
   Active: active (running) since Fri 2020-02-21 00:43:57 EST; 6s ago
  Process: 2698 ExecStart=/usr/sbin/vsftpd /etc/vsftpd/vsftpd.conf (code=exited, status=0/SUCCESS)
 Main PID: 2699 (vsftpd)
    Tasks: 1 (limit: 6102)
   Memory: 1020.0K
   CGroup: /system.slice/vsftpd.service
           ??2699 /usr/sbin/vsftpd /etc/vsftpd/vsftpd.conf

Feb 21 00:43:57 centos8 systemd[1]: Stopped Vsftpd ftp daemon.
Feb 21 00:43:57 centos8 systemd[1]: Starting Vsftpd ftp daemon...
Feb 21 00:43:57 centos8 systemd[1]: Started Vsftpd ftp daemon.
At this point, your VSFTPD server is configured. You can now proceed to all the VSFTPD through SELinux and firewall.
Configure Firewall and SELInux
By default, SELinux is enabled in CentOS 8. So you will need to configure SELinux for VSFTPD.
You can configure SELinux to allow FTP access with the following command:
setsebool -P allow_ftpd_full_access=1
Next, you will need to allow FTP service through firewalld. You can allow it with the following command:
firewall-cmd --zone=public --permanent --add-service=ftp
Next, reload the firewalld service to apply the firewall configuration changes:
firewall-cmd --reload
At this point, your firewall and SELinux is configured to allow incoming FTP connection from the remote system. You can now proceed to test the FTP connection.
Connect to VSFTPD Server
Your VSFTPD server is now installed and configured. Now, it's time to connect the FTP server from the client system.
To do so, go to the Client system and run the following command to connect your FTP server:
ftp 172.20.10.3
You will be asked to provide your FTP user and the password as shown below:
Connected to 172.20.10.3.
220 (vsFTPd 3.0.3)
Name (172.20.10.3:root): vyom
331 Please specify the password.
Password:
230 Login successful.
Once the connection has been established successfully, you should see the following output:
Remote system type is UNIX.
Using binary mode to transfer files.
ftp>
Now, type exit and hit Enter button to exit from the FTP sessions.
Configure VSFTPD with TLS Support
For security reasons, it is a good idea to encrypt the FTP transmissions with SSL/TLS. To do so, you will need to generate an SSL certificate and configure the VSFTPD server to use it.
First, you will need to install the OpenSSL package in your system. You can install it with the following command:
dnf install openssl -y
Once installed, create a new directory to store the SSL certificate:
mkdir /etc/ssl/private
Next, generate a self-signed certificate with the following command:
openssl req -newkey rsa:2048 -nodes -keyout /etc/ssl/private/vsftpd.key -x509 -days 365 -out /etc/ssl/private/vsftpd.crt
Provide all the required information as shown below:
Generating a RSA private key
...+++++
...........+++++
writing new private key to '/etc/ssl/private/vsftpd.key'
-----
You are about to be asked to enter information that will be incorporated
into your certificate request.
What you are about to enter is what is called a Distinguished Name or a DN.
There are quite a few fields but you can leave some blank
For some fields there will be a default value,
If you enter '.', the field will be left blank.
-----
Country Name (2 letter code) [XX]:IN
State or Province Name (full name) []:GUJ
Locality Name (eg, city) [Default City]:JUN
Organization Name (eg, company) [Default Company Ltd]:IT
Organizational Unit Name (eg, section) []:IT
Common Name (eg, your name or your server's hostname) []:ftpserver
Email Address []:hitjethva@gmail.com
After generating the SSL certificate, you will need to configure VSFTPD to use this certificate.
Open the VSFTPD default configuration file as shown below:
nano /etc/vsftpd/vsftpd.conf
Add the following lines at the end of the file:
#Path of the SSL certificate
rsa_cert_file=/etc/ssl/private/vsftpd.crt
rsa_private_key_file=/etc/ssl/private/vsftpd.key
#Enable the SSL
ssl_enable=YES
allow_anon_ssl=NO
force_local_data_ssl=YES
force_local_logins_ssl=YES
#TSL is more secure than SSL so enable ssl_tlsv1_2.
ssl_tlsv1=YES
ssl_sslv2=NO
ssl_sslv3=NO
require_ssl_reuse=NO
ssl_ciphers=HIGH
#Enable SSL debugging to store all VSFTPD log.
debug_ssl=YES
Save and close the file when you are finished. Then, restart the VSFTPD service to apply the changes:
systemctl restart vsftpd
At this point, your VSFTPD server is configured to use an SSL certificate. You can now proceed to the next step.
Verify VSFTPD TLS Connection
Your VSFTPD server is now secured with SSL/TLS support. Next, try to connect your FTP server from the command-line as shown below:
ftp 172.20.10.3
You should see the error in the following output:
Connected to 172.20.10.3.
220 (vsFTPd 3.0.2)
Name (172.20.10.3:root): vyom
530 Non-anonymous sessions must use encryption.
Login failed.
421 Service not available, remote server has closed connection
ftp>
You can not connect to your VSFTP server from the command-line client. Because it does not support SSL/TLS support.
So you will need to download and test the VSFTPD connection using an FTP client which supports TLS connections.
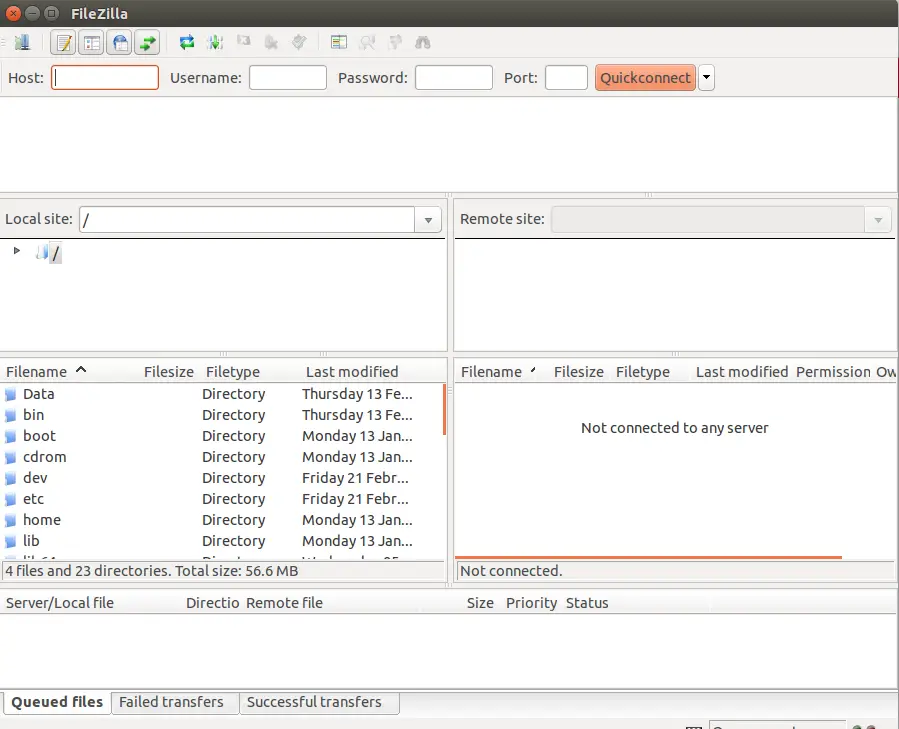
To do so, go to the Client system and install the FileZilla client package.
After installing the FileZilla, open the FileZilla software as shown below:
Next, Open the Site Manager as shown below:
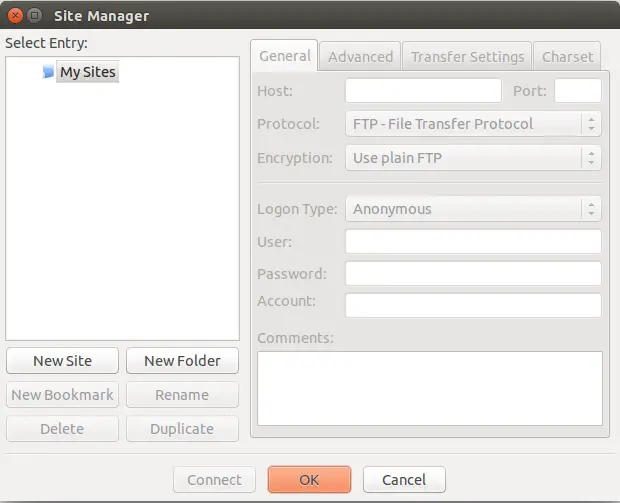
Click on the New Site button to add a new FTP connection as shown below:
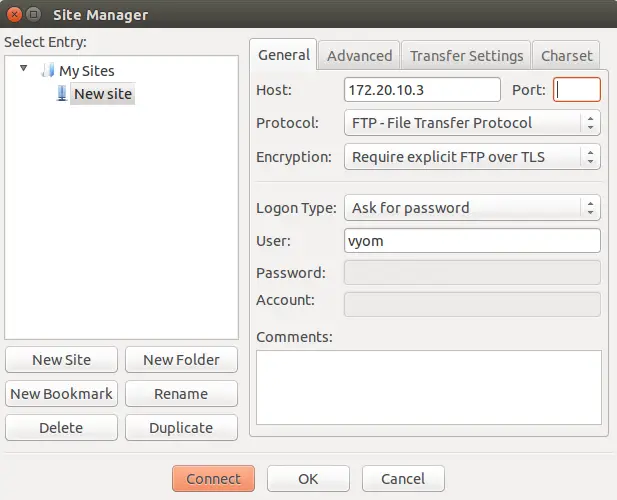
Provide your FTP server IP, Select FTP protocol, Select "Use explicit FTP over TLS", Select ask for password, provide the username of your FTP server and click on the Connect button. You will be asked to provide password of the FTP user as shown below:
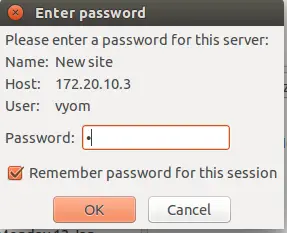
Provide your FTP password and click on the OK button. You will be asked to verify the certificate being used for the SSL/TLS connection as shown below:
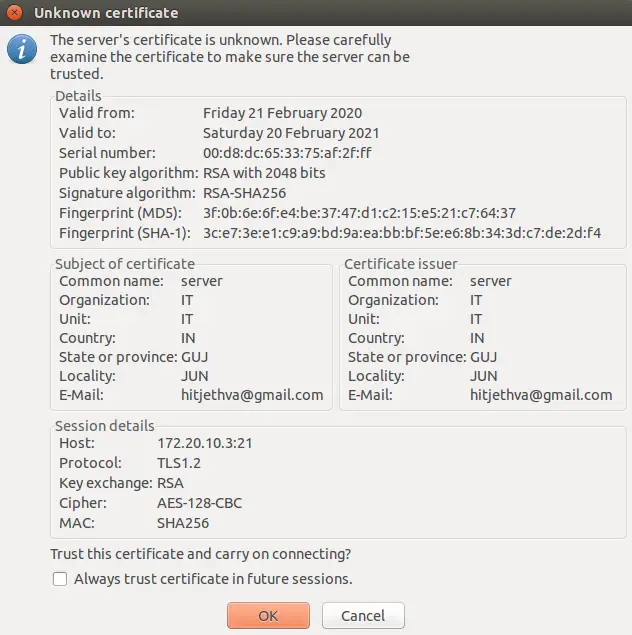
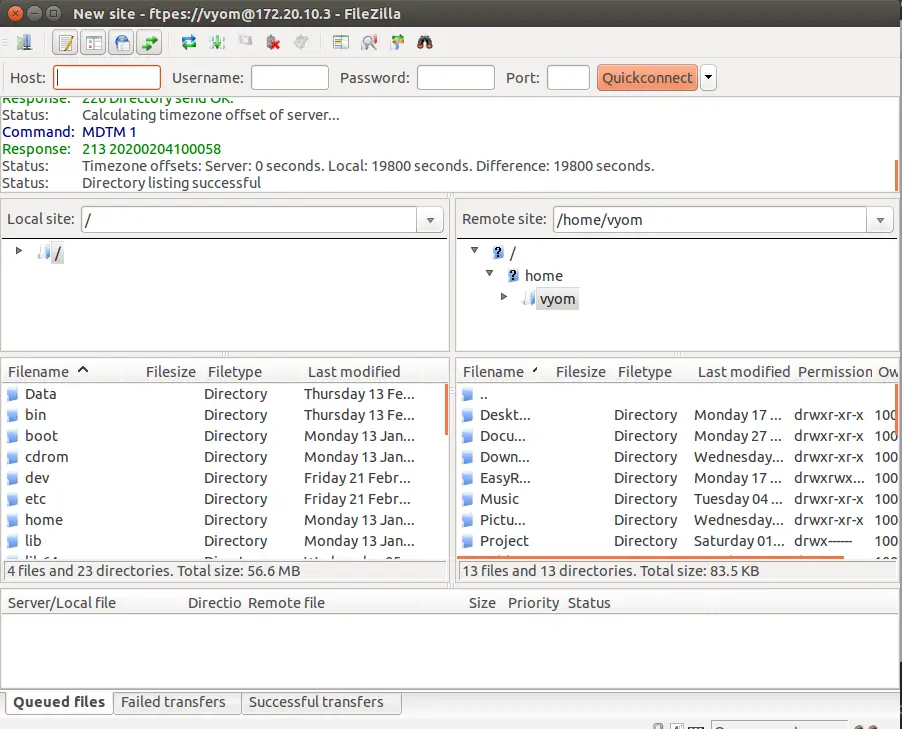
Click on the OK button to verify the certificate. Once the connection has been established successfully, you should see the following screen:
Conclusion
In the above guide, we have installed VSFTPD server on CentOS 8. We have also configured the VSFTPD server to use SSL/TLS certificate. Your FTP server is now secured. Feel free to ask me if you have any questions.