A Samba4-based Active Directory-compatible domain controller that supports printing services and centralized Netlogon authentication for Windows systems, without requiring Windows Server. Since 1992, Samba has provided a secure and stable free software re-implementation of standard Windows services and protocols (SMB/CIFS).
No default passwords: For security reasons there are no default passwords. All passwords are set at system initialization time.
Ignore SSL browser warning: browsers don't like self-signed SSL certificates, but this is the only kind that can be generated automatically without paying a commercial Certificate Authority.
$ mysql --user root --password
Enter password:
Welcome to the MySQL monitor.  Commands end with ; or \g.
Type 'help;' or '\h' for help. Type '\c' to clear the current input statement.

mysql>
Username for OS system administration:
Login as root except on AWS marketplace which uses username admin.
When you are adding a new disk to an existing Linux system, you will need to format and partition it, add a file system to it, and then mount the disk to some path where you plan to access it from. This might sound complex or like a lot of steps, but it really only takes a few minutes. The following tutorial will make it very easy.
In this tutorial, we will cover the step by step instructions to add a new hard drive or solid state drive to an existing Linux system. We will show the steps for both command line and GUI methods, so you can follow along with set of instructions you are most comfortable with. Let’s get started.
In this tutorial you will learn:
How to format and partition a disk with fdisk
How to add a new file system with mkfs
How to mount and access the new disk
How to prepare a new disk via GUI
How to add new disk to existing Linux system
Software Requirements and Linux Command Line Conventions
Category
Requirements, Conventions or Software Version Used
Privileged access to your Linux system as root or via the sudo command.
Conventions
# – requires given linux commands to be executed with root privileges either directly as a root user or by use of sudo command $ – requires given linux commands to be executed as a regular non-privileged user
How to add new disk to exisiting Linux system step by step instructions
There are two sections below. In the first one, we add a new disk via command line. If you would prefer the GUI method, scroll down to the next section you see.
Add new disk via command line
Open a terminal and type the following commands to format your new hard drive or solid state drive:
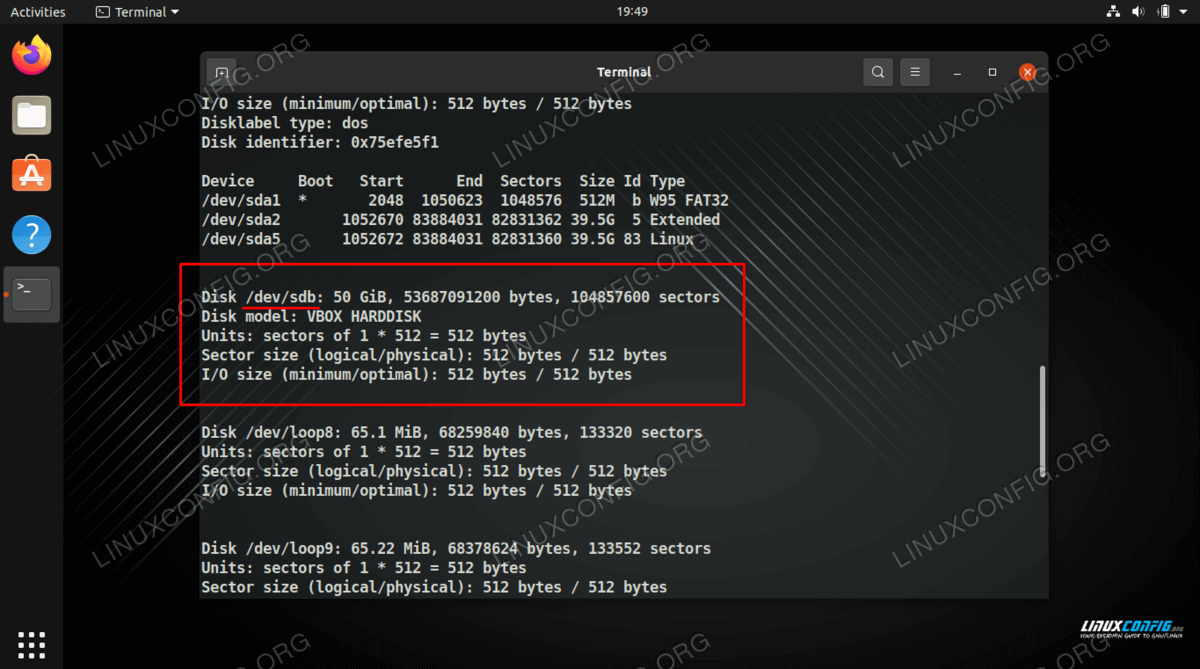
First, let’s figure out how to identify the new drive we wish to format. The name should start with /dev/sd and then a letter. Type the following command in terminal to see:
$ sudo fdisk -l
Find your device name in the fdisk output
In our example, the new drive has been assigned /dev/sdb device path. To create a new partition on the empty disk, we will provide it as argument to fdisk:
$ sudo fdisk /dev/sdX
The fdisk utility awaits our commands. We would like to create a new partition, so we press “n”.
Command (m for help): n
We are to create a primary partition, so the answer to the next question is “p”.
Partition type
   p   primary (0 primary, 0 extended, 4 free)
   e   extended (container for logical partitions)
Select (default p): p
The next questions are about partition number, first and last sector, which will determine the actual size of the partition. In our example we are creating a single partition that will cover the disk, and default values are first partition, first available sector to start, and last sector to end with, which is just what we need. So we will accept the defaults for these questions.
Partition number (1-4, default 1):
First sector (2048-104857599, default 2048):
Last sector, +/-sectors or +/-size{K,M,G,T,P} (2048-104857599, default 104857599):

Created a new partition 1 of type 'Linux' and of size 50 GiB.
The partition is now complete, but as the utility points out on start, the changes are in-memory only until we write them out to the disk. This is on purpose and the warning is in place for a good reason: by writing out the changes to the disk, we destroy anything that resided on the sector range we cover with our new partition. We are sure there will be no data loss, so we write the changes to disk:
Command (m for help): w
The partition table has been altered.
Calling ioctl() to re-read partition table.
Syncing disks.
We are finished partitioning the new drive with fdisk utility
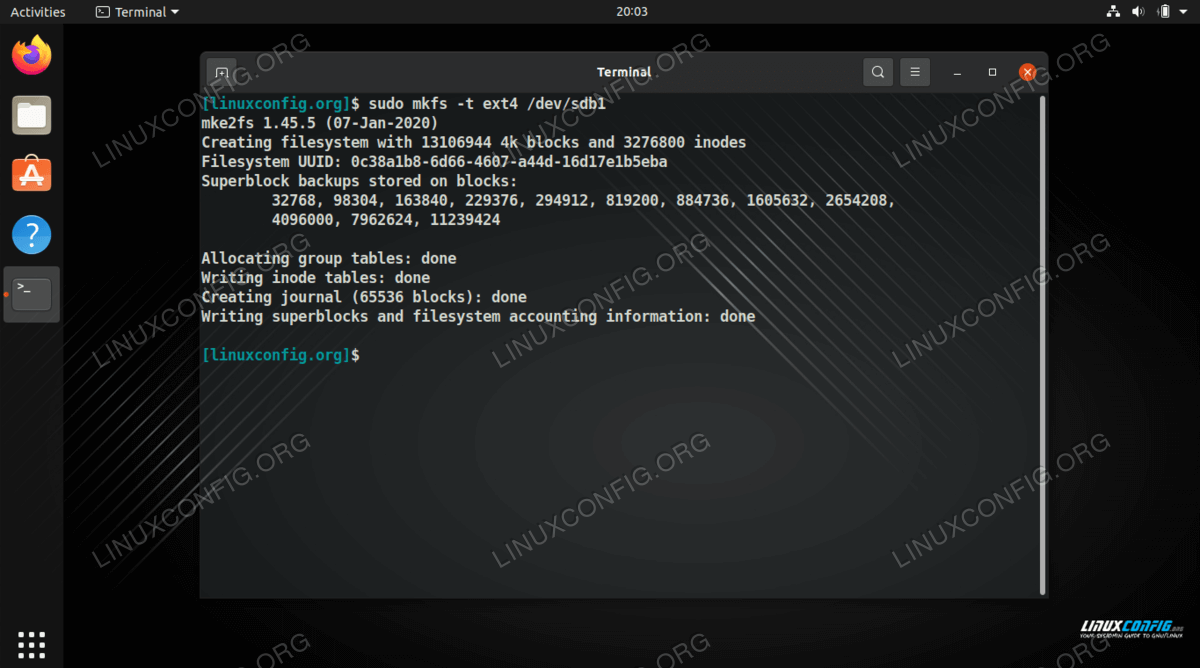
Next, we still need to add a file system to our hard disk. Our new partition is under the device path of /dev/sdb1 (use fdisk -l command to see your own). Use the mkfs command to format the disk with any file system you would like. In this example, we are using ext4, which is the recommended file system for new HDDs and SSDs on Linux:
$ sudo mkfs -t ext4 /deb/sdX1
Formatting our new disk with the ext4 file system
We will now use the mount command to mount the newly formatted partition on our system. We will mount our new disk to the /media/disk directory.
$ sudo mkdir -p /media/disk
$ sudo mount /dev/sdb1 /media/disk
That’s all there is to it. You can now access your newly formatted drive under the /mount/disk directory or where ever you decided to mount it. To make the drive get mounted automatically, see our guide on configuring the /etc/fstab file.
Add new disk via GUI
Depending on what Linux distribution you are using, the screenshots below may not match up with exactly what you see on your own screen. We are using Ubuntu Linux in these steps and the GNOME desktop environment, but the process should be mostly the same no matter what distro you are on. The key point is that you will need to find and open your operating system’s disk utility software.
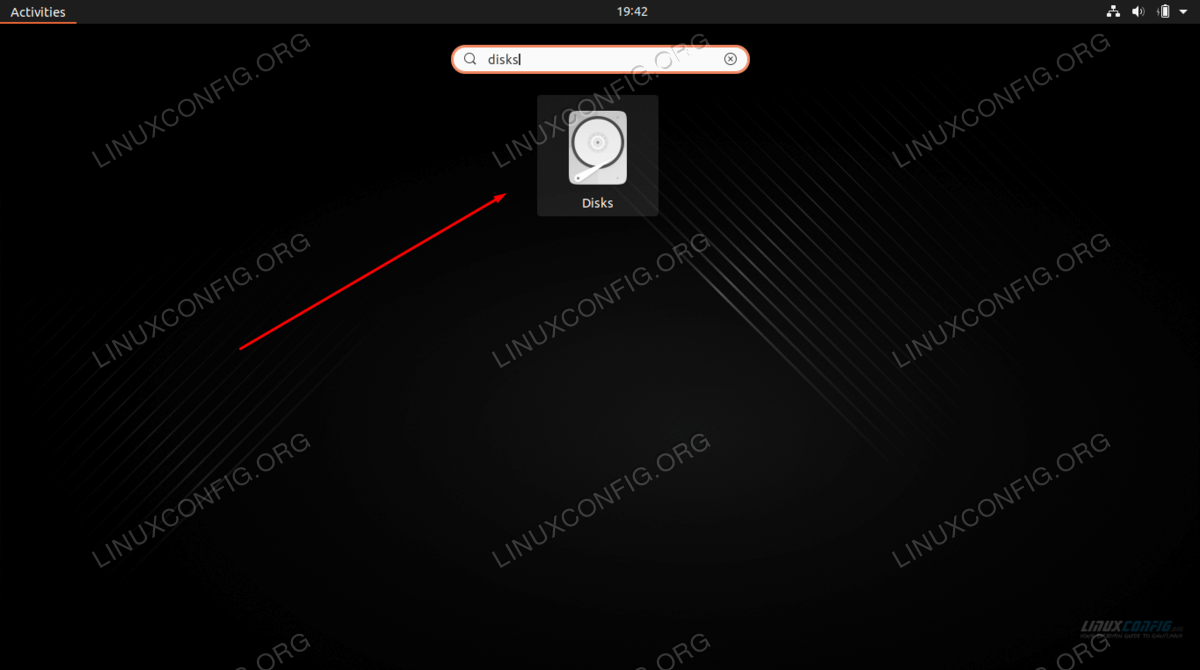
Get started by opening your system’s disk management application.Open the disk utility software from the application launcher
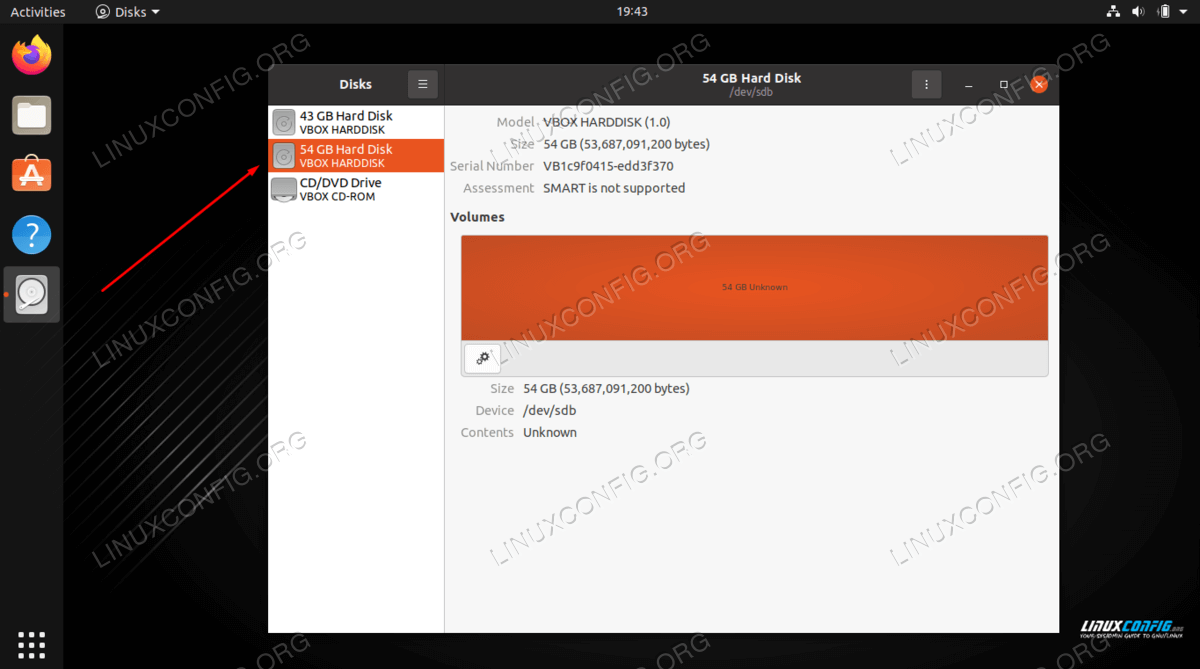
You should see your new disk listed among the other storage devices on your system. Make sure you select the one that you wish to format.The disk is listed among the other storarge devices on the system
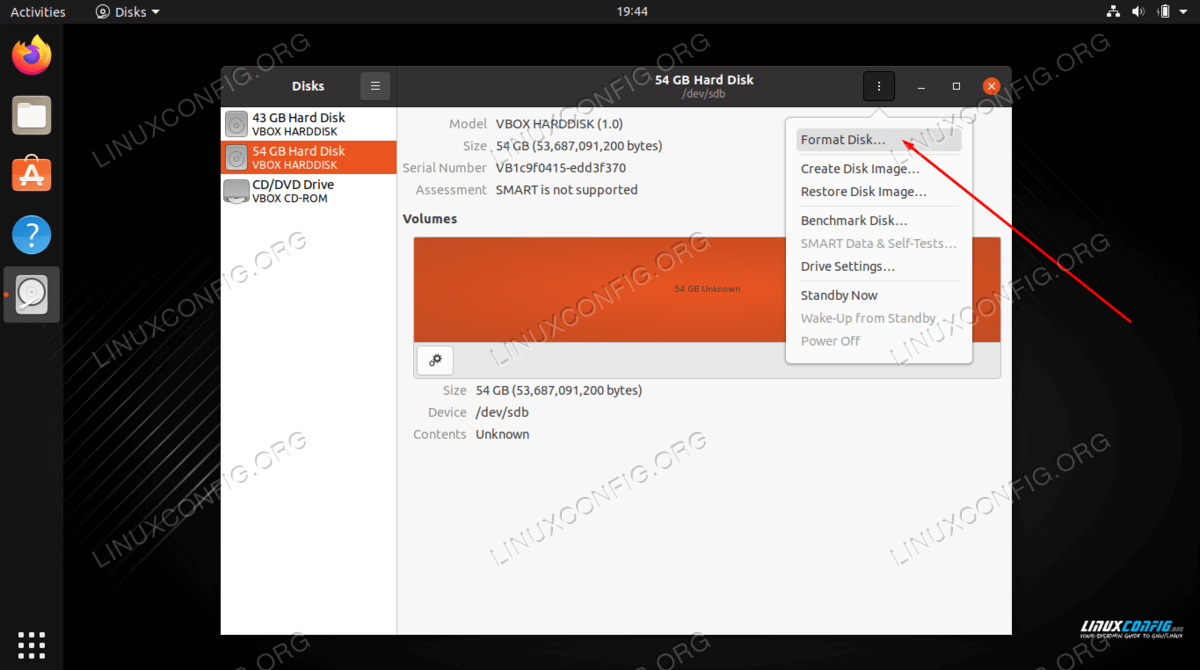
You will have several options on what to do with this drive. Click the one that says “Format Disk” or something similar.Select to format disk from the menu of options
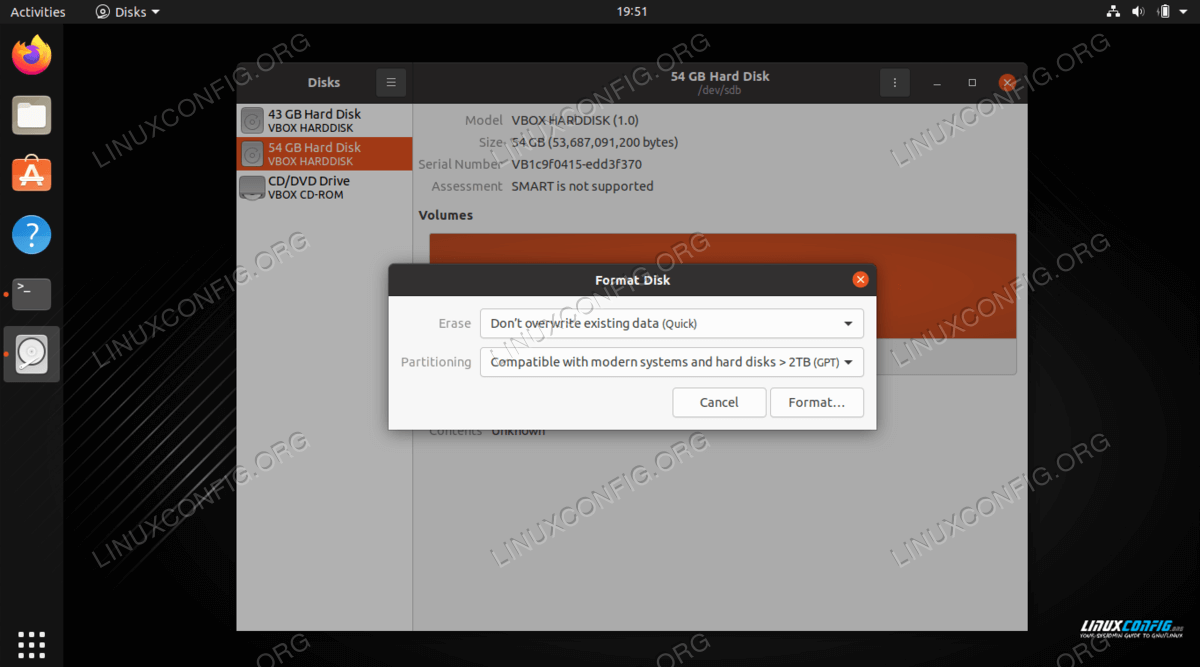
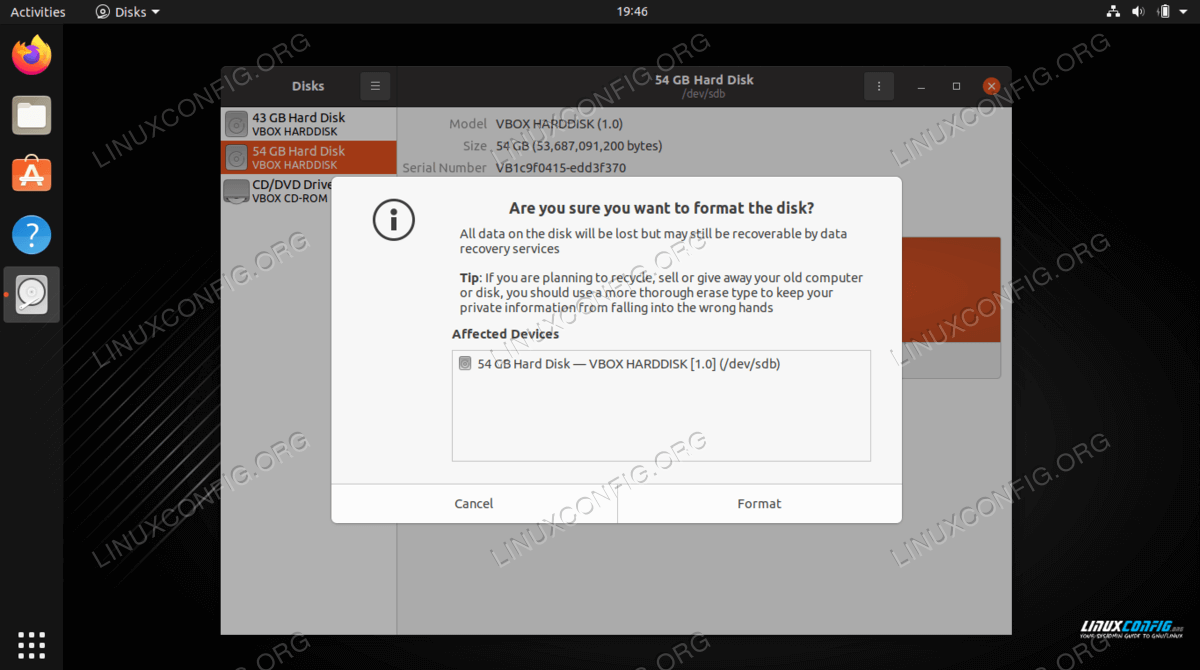
On our test system, we have a few different options for erasing and partitioning our new disk. A quick format will not securely erase the current data on the disk but it will perform the formatting very quickly, as the name implies. The other option is to rewrite the disk with all zeros (not necessary in the majority of situations). You can also create a MBR or GPT table, or apply no partitioning. If you are not sure, just leave the defaults selected and click “Format.”Choose formatting options or just leave the defaults
As mentioned earlier in the guide, this process will completely erase the contents in your disk. The formatting software warns us once again to make sure we are aware, then it wipes the drive completely.
Confirmation box about wiping the hard drive
That’s all there is to it. If you chose the quick format option, the whole process should only take a matter of seconds. If you would like to learn how to do this via command line, which is more universal across all Linux systems, we cover that in the previous section.
You are reading a sample chapter from the Ubuntu 11.04 Essentials book.
Purchase the fully updated Ubuntu 20.04 Essentials book in eBook ($9.99) or Print ($36.99) format
Ubuntu 20.04 Essentials Print and eBook (ePub/PDF/Kindle) edition contains 36 chapters and over 310 pages
One of the first problems encountered by users these days is that they run out of disk space to store data. Fortunately disk space is now one of the cheapest of all IT commodities. In this chapter we will look at the steps necessary to integrate a new disk drive into an Ubuntu system.
This tutorial assumes that the new physical hard drive has been installed on the system and is visible to the operating system. The best way to do this is to enter the system BIOS setup during the boot process and ensure that the BIOS sees the disk drive. Sometimes the BIOS will provide a menu option to scan for new drives. If the BIOS does not see the disk drive double check the connectors and jumper settings (if any) on the drive.
Finding the New Hard Drive in Ubuntu
Assuming the drive is visible to the BIOS it should automatically be detected by the operating system. Typically, the disk drives in a system are assigned device names beginning hd or sd followed by a letter to indicate the device number. For example, the first device might be /dev/sda, the second /dev/sdb and so on.
The following is output from a system with only one physical disk drive:
ls /dev/sd*
/dev/sda  /dev/sda1  /dev/sda2  /dev/sda5
This shows that the disk drive represented by /dev/sda is itself divided into three partitions, represented by /dev/sda1, /dev/sda2 and /dev/sda5.
The following output is from the same system after a second hard disk drive has been installed and detected by the operating system:
ls /dev/sd*
/dev/sda   /dev/sda1  /dev/sda2 /dev/sda5 /dev/sdb
As shown above, the new hard drive has been assigned to the device file /dev/sdb. At this point the drive has no partitions shown (because we have yet to create any).
Creating Linux Partitions
The next step is to create one or more Linux partitions on the new disk drive. This is achieved using the fdisk utility which takes as a command-line argument the device to be partitioned (in this case /dev/sdb):
sudo fdisk /dev/sdb
[sudo] password for johndoe:
Device contains neither a valid DOS partition table, nor Sun, SGI or OSF disklabel
Building a new DOS disklabel with disk identifier 0xc2fe324b.
Changes will remain in memory only, until you decide to write them.
After that, of course, the previous content won't be recoverable.

Warning: invalid flag 0x0000 of partition table 4 will be corrected by w(rite)

Command (m for help):
In order to view the current partitions on the disk enter the p command:
Command (m for help): p

Disk /dev/sdb: 2147 MB, 2147483648 bytes
255 heads, 63 sectors/track, 261 cylinders
Units = cylinders of 16065 * 512 = 8225280 bytes
Disk identifier: 0xc2fe324b

   Device Boot      Start         End      Blocks   Id  System
As we can see from the above fdisk output, the disk currently has no partitions because it is a previously unused disk. The next step is to create a new partition on the disk, a task which is performed by entering n (for new partition) and p (for primary partition):
Command (m for help): n
Command action
   e   extended
   p   primary partition (1-4)
p
Partition number (1-4):
In this example we only plan to create one partition which will be partition 1. Next we need to specify where the partition will begin and end. Since this is the first partition we need it to start at cylinder 1 and since we want to use the entire disk we specify the last cylinder as the end. Note that if you wish to create multiple partitions you can specify the size of each partition by cylinders, bytes, kilobytes or megabytes.
Partition number (1-4): 1
First cylinder (1-261, default 1):
Using default value 1
Last cylinder or +size or +sizeM or +sizeK (1-261, default 261):
Using default value 261
Now that we have specified the partition we need to write it to the disk using the w command:
Command (m for help): w
The partition table has been altered!

Calling ioctl() to re-read partition table.
Syncing disks.
If we now look at the devices again we will see that the new partition is visible as /dev/sdb1:
ls /dev/sd*
/dev/sda  /dev/sda1  /dev/sda2  /dev/sda5 /dev/sdb  /dev/sdb1
Now that the disk has been successfully partitioned, the next step is to create a file system on our new partition.
Creating a Filesystem on an Ubuntu Disk Partition
We now have a new disk installed, it is visible to Ubuntu and we have configured a Linux partition on the disk. The next step is to create a Linux file system on the partition so that the operating system can use it to store files and data. The easiest way to create a file system on a partition is to use the mkfs.ext3 utility which takes as arguments the label and the partition device:
sudo mkfs.ext3 -L /photos /dev/sdb1
mke2fs 1.40.2 (12-Jul-2007)
Filesystem label=/photos
OS type: Linux
Block size=4096 (log=2)
Fragment size=4096 (log=2)
262144 inodes, 524112 blocks
26205 blocks (5.00%) reserved for the super user
First data block=0
Maximum filesystem blocks=536870912
16 block groups
32768 blocks per group, 32768 fragments per group
16384 inodes per group
Superblock backups stored on blocks:
        32768, 98304, 163840, 229376, 294912

Writing inode tables: done
Creating journal (8192 blocks): done
Writing superblocks and filesystem accounting information: done

This filesystem will be automatically checked every 28 mounts or
180 days, whichever comes first.  Use tune2fs -c or -i to override.
Mounting a Filesystem
Now that we have created a new file system on the Linux partition of our new disk drive we need to mount it so that it is accessible. In order to do this we need to create a mount point. A mount point is simply a directory into which the file system will be mounted. For the purposes of this example we will create a /photos directory to match our file system label (although it is not necessary that these values match):
sudo mkdir /photos
The file system may then be manually mounted using the mount command:
sudo mount /dev/sdb1 /photos
Running the mount command with no arguments shows us all currently mounted file systems (including our new file system):
mount
/dev/sda1 on / type ext3 (rw,errors=remount-ro)
proc on /proc type proc (rw,noexec,nosuid,nodev)
/sys on /sys type sysfs (rw,noexec,nosuid,nodev)
varrun on /var/run type tmpfs (rw,noexec,nosuid,nodev,mode=0755)
varlock on /var/lock type tmpfs (rw,noexec,nosuid,nodev,mode=1777)
udev on /dev type tmpfs (rw,mode=0755)
devshm on /dev/shm type tmpfs (rw)
devpts on /dev/pts type devpts (rw,gid=5,mode=620)
lrm on /lib/modules/2.6.22-14-generic/volatile type tmpfs (rw)
securityfs on /sys/kernel/security type securityfs (rw)
/dev/sdb1 on /photos type ext3 (rw)
Configuring Ubuntu to Automatically Mount a Filesystem
In order to set up the system so that the new file system is automatically mounted at boot time, an entry needs to be added to the /etc/fstab file. This may be edited by issuing the following command in a terminal window:
sudo gedit /etc/fstab
The following example shows an /etc/fstab file configured to automount our /photos partition: