Get current zone
To see the current time zone for a session, try either of the following statements. Technically we are calling the SHOW command to display a run-time parameter.
SHOW timezone ;
…or…
SHOW time zone ;
US/Pacific
Time Zone Name
You can specify a proper time zone name. Most of these are continent/region.
SET TIME ZONE 'Africa/Casablanca';
…or…
SET TIME ZONE 'America/Montreal';
Standard SQL Command
Alternatively, you can use the SQL command defined by the SQL spec: SET TIME ZONE. In this syntax a pair of words TIME ZONE replace "timezone" (actual SQL command versus parameter name), and there is no "TO".
SET TIME ZONE 'UTC';
Choose a timezone from:
SELECT * FROM pg_timezone_names;
And set as below given example:
ALTER DATABASE postgres SET timezone TO 'Europe/Berlin';
https://stackoverflow.com/questions/6663765/postgres-default-timezone
Selasa, 21 April 2020
TIMEZONE-setting waktu ubuntu 18
Getting Current Date, Time and Timezone
Time synchronization is enabled on Ubuntu 18.04 by default using systemd's timesyncd service. Usetimedatectl to confirm that your system is set with time synchronization:$ timedatectl
Local time: Wed 2018-03-21 07:21:41 AEDT
Universal time: Tue 2018-03-20 20:21:41 UTC
RTC time: Tue 2018-03-20 20:21:42
Time zone: Australia/Sydney (AEDT, +1100)
System clock synchronized: yes
systemd-timesyncd.service active: yes
RTC in local TZ: no
timedatectl command output on Line 6 we can see that the Ubuntu time sync is enabled. Furthermore, Line 5 we can also see the configured timezone.Timezone settings
In order to have an accurate time and time synchronization to work properly, the system has to be configured with the correct timezone. Set your correct timezone before proceeding further by following our How to change timezone on Ubuntu 18.04 tutorial.Enable/Disable Time Synchronization
To turn off your Ubuntu time sync enter:$ sudo timedatectl set-ntp off
$ timedatectl
Local time: Wed 2018-03-21 07:44:53 AEDT
Universal time: Tue 2018-03-20 20:44:53 UTC
RTC time: Tue 2018-03-20 20:44:54
Time zone: Australia/Sydney (AEDT, +1100)
System clock synchronized: yes
systemd-timesyncd.service active: no
RTC in local TZ: no
If your time synchronization is disabled, execute the following linux command to enable your Ubuntu time sync:$ sudo timedatectl set-ntp onYour Ubuntu 18.04 system is now time synchronized.
Subscribe to Linux Career NEWSLETTER and receive latest Linux news, jobs, career advice and tutorials.
Test Time Sync on Ubuntu
The following linux commands will confirm that the time sync is set correctly.First, use the
date command to check the current date and time:$ date Wed 21 Mar 07:54:50 AEDT 2018Next, with time sync enabled set an incorrect time. For example the following linux command will set the time few minutes ahead:
$ sudo date 03210800
Wed 21 Mar 08:00:00 AEDT 2018
If your time synchronization is enabled correctly the time will reset to the synced time:
$ date
Wed 21 Mar 07:55:09 AEDT 2018
Next, disable Ubuntu systemd's timesyncd service:
$ sudo timedatectl set-ntp offSet an incorrect time, check the date and re-enable time sync:
$ sudo date 03210800
Wed 21 Mar 08:00:00 AEDT 2018
$ date
Wed 21 Mar 08:00:14 AEDT 2018
$ sudo timedatectl set-ntp on
$ date
Wed 21 Mar 07:55:45 AEDT 2018
If your time has switched back after you had re-enabled time synchronization then your Ubuntu time sync is enabled correctly.
--------------------------------------------------------------------------------------------------------------------------
Check Current Timezone Settings
Let's start by checking the current timezone settings. Use thetimedatectl command to show the current timezone and time:$ timedatectl
Local time: Tue 2018-06-06 10:27:34 PST
Universal time: Tue 2018-06-06 18:27:34 UTC
RTC time: Tue 2018-06-06 18:27:35
Time zone: Canada/Yukon (PST, -0800)
System clock synchronized: yes
systemd-timesyncd.service active: yes
RTC in local TZ: no
Another alternative to check current timezone on Ubuntu 18.04 system, if the above command from some reason fails, is to check for /etc/localtime symbolic link:$ ls -l /etc/localtime lrwxrwxrwx 1 root root 32 Jun 6 10:27 /etc/localtime -> /usr/share/zoneinfo/Canada/Yukon
Subscribe to Linux Career NEWSLETTER and receive latest Linux news, jobs, career advice and tutorials.
Show all Available Timezones
In order to change timezone on Ubuntu 18.04, we first need to obtain a timezone name of the timezone we wish to change to. This is usually a CONTINENT/CITY pair.The
timedatectl command comes again handy:$ timedatectl list-timezonesThe timezone list is quite extensive. Scroll page down and up with PgDn and PgUp key respectively.
Alternatively, use
grep command to narrow down your search. For example the bellow command will list all Europe cities:$ timedatectl list-timezones | grep -i europe Europe/Amsterdam Europe/Andorra Europe/Astrakhan Europe/Athens Europe/Belgrade Europe/Berlin Europe/Bratislava Europe/Brussels Europe/Bucharest Europe/Budapest Europe/Busingen ... Europe/ZurichNOTE:
The
timedatectl command is using /usr/share/zoneinfo/ directory to generate the timezone list.Change Timezone
Now that we know the timezone name we wish to change our timezone settings to, usetimedatectl command to set a new timezone.For example let's change timezone to
Europe/Bratislava:$ sudo timedatectl set-timezone Europe/BratislavaUsing the
timedatectl command is a preferred way on how to set a timezone on Ubuntu 18.04. However, note that you can also change timezone settings manually:NOTE:Changing the timezone using the manual method involving
ln command may take minute or so to take an effect.$ sudo unlink /etc/localtime $ sudo ln -s /usr/share/zoneinfo/Europe/Bratislava /etc/localtime
Confirm Timezone Change
Lastly, confirm your new timezone settings:$ timedatectl
Local time: Tue 2018-06-06 19:57:17 CET
Universal time: Tue 2018-06-06 18:57:17 UTC
RTC time: Tue 2018-06-06 18:57:18
Time zone: Europe/Bratislava (CET, +0100)
System clock synchronized: yes
systemd-timesyncd.service active: yes
RTC in local TZ: no
Alternatively, confirm a new timezone settings using ls command:$ ls -l /etc/localtime lrwxrwxrwx 1 root root 37 Jun 6 20:00 /etc/localtime -> /usr/share/zoneinfo/Europe/Bratislava
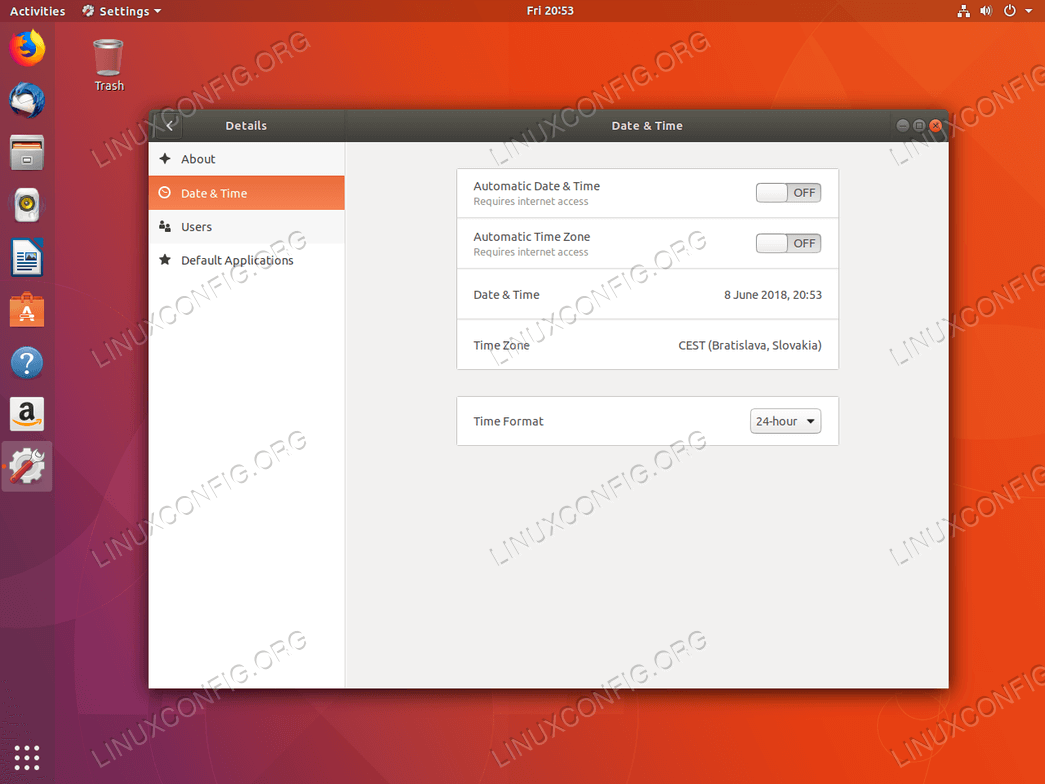
Change timezone from GUI
To change timezone from a default GNOME graphical user interface. Navigate toSettings-->Details-->Date & Time:
Current timezone.

Use search box to search for a city or find your timezone manually by mouse click.
New timezone is set.
---------------------------------------------------------------------------------------------------------------------
---------------------------------------------------------------------------------------------------------------------
Get current zone
To see the current time zone for a session, try either of the following statements. Technically we are calling the SHOW command to display a run-time parameter.
SHOW timezone ;
…or…
SHOW time zone ;
US/Pacific
Time Zone Name
You can specify a proper time zone name. Most of these are continent/region.
SET TIME ZONE 'Africa/Casablanca';
…or…
SET TIME ZONE 'Asia/Jakarta';
Standard SQL Command
Alternatively, you can use the SQL command defined by the SQL spec: SET TIME ZONE. In this syntax a pair of words TIME ZONE replace "timezone" (actual SQL command versus parameter name), and there is no "TO".
SET TIME ZONE 'UTC';
Choose a timezone from:
SELECT * FROM pg_timezone_names;
And set as below given example:
ALTER DATABASE postgres SET timezone TO 'Europe/Berlin';
https://stackoverflow.com/questions/6663765/postgres-default-timezone
SENDMAIL-install ubuntu
PHP sendmail using gmail in Linux (LAMPP)
Masih mengacu pada tulisan saya yang sejenis disini . Tetapi sekarang saya akan beritahukan caranya jika menggunakan linux ubuntu (untuk distro lain menyesuaikan saja)
Pada tutorial ini akan menjelaskan sendmail menjadi relay email untuk akun gmail anda.
INSTALL SENDMAIL
1 | apt-get install sendmail |
MEMBUAT GMAIL AUTH FILE
1 | cd /etc/mail |
2 | mkdir /etc/mail/auth |
3 | cd /etc/mail/auth |
4 | nano /etc/mail/auth/client-info |
Isi tulisan dengan format berikut:
1 | AuthInfo:smtp.gmail.com "U:root" "I:[username]@gmail.com" "P:[passwordgmail]" "M:PLAIN" |
2 | AuthInfo:smtp.gmail.com:587 "U:root" "I:[username]@gmail.com" "P:[passwordgmail]" "M:PLAIN" |
Membuat hashmap sesuai auth yang telah dibuat
1 | cd /etc/mail/auth |
2 | makemap -r hash client-info.db < client-info |
MEMBUAT KONFIGURASI SENDMAIL
1 | cd /etc/mail/ |
2 | nano /etc/mail/sendmail.mc |
isikan tulisan berikut sebelum MAILER. warning!! anda perlu memperhatikan tanda quote yang digunakan ya.. karena ada quote tipis dan single quote.
1 | # |
2 | FEATURE(`authinfo',`hash /etc/mail/auth/client-info.db')dnl |
3 | define(`SMART_HOST',`smtp.gmail.com')dnl |
4 | define(`RELAY_MAILER_ARGS', `TCP $h 587') |
5 | define(`ESMTP_MAILER_ARGS', `TCP $h 587') |
6 |
7 | define(`CERT_DIR', `/etc/mail/certs') |
8 | define(`confCACERT_PATH', `CERT_DIR') |
9 | define(`confCACERT', `CERT_DIR/ca-bundle.crt') |
10 | define(`confCRL', `CERT_DIR/ca-bundle.crt') |
11 | define(`confSERVER_CERT', `CERT_DIR/sendmail.pem') |
12 | define(`confSERVER_KEY', `CERT_DIR/sendmail.pem') |
13 | define(`confCLIENT_CERT', `CERT_DIR/sendmail.pem') |
14 | define(`confCLIENT_KEY', `CERT_DIR/sendmail.pem') |
15 |
16 | define(`confAUTH_MECHANISMS', `EXTERNAL GSSAPI DIGEST-MD5 CRAM-MD5 LOGIN PLAIN') |
17 | TRUST_AUTH_MECH(`EXTERNAL DIGEST-MD5 CRAM-MD5 LOGIN PLAIN') |
18 | # |
1 | m4 sendmail.mc > sendmail.cf |
2 | /etc/init.d/sendmail restart |
TEST HASIL KONFIGURASI
1 | echo "Just testing my sendmail gmail relay" | sendmail -s "Sendmail gmail Relay" yourmail@domain.com |
Semoga membantu.
Langganan:
Postingan (Atom)