Oracle XE 10g installation on the virtual image of “openSuse” linux (ORACLE VM VirtualBox)
17042011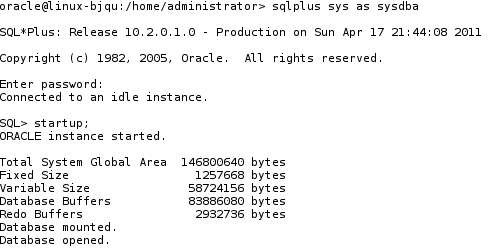 Next I’ll share the details of my first Oracle XE 10g installation on the virtual image of “openSuse” linux in Oracle VM VirtualBox.
I decided to install the Oracle 10g before to install the 11g version, because it is more simpler and thus I get prepared for the major installation of Oracle 11g.
At this moment my greatest desire is to use the “SQL*Plus”, which means that the installation is completed. But let’s go from the beginning.
- Download the Oracle server XE 10g “oracle-xe-10.2.0.1-1.0.i386.rpm”
The first step it’s download of the Oracle server from the Oracle website.
http://ftp.cs.stanford.edu/pub/fedora/6/i386/?C=D;O=A
- Install the rpm file “oracle-xe-10.2.0.1-1.0.i386.rpm”
Such as in the most installations it is necessary do it as root, and because the file is available in the RPM format must be used the “rpm” command:
1 | root@linux-bjqu:~# rpm –ivh oracle-xe-10.2.0.1-1.0.i386.rpm |
Bad luck!! At the first attempt, at the first command, I got the following error:
1 2 3 4 5 6 | Checking available swap space requirements ...Expected result: 48153MBActual Result: 8189MBCheck complete. The overall result of this check is: Failed <<<<Problem: The system does not have the required swap space.Recommendation: Make more swap space available to perform the install. |
The error indicates which it’s requires more memory RAM, therefore
is necessary extend the swap memory, this error it’s fixed in three steps:
- Create a new swap file with 1GB
1 | root@linux-bjqu:~# dd if=/dev/zero of=/swapfile1 bs=1024 count=1048576 |
- Change the permissions of the new swap file
1 | root@linux-bjqu:~# chmod 600 /tmp/swapfile1 |
- Set up the Linux swap area with this new file
1 | root@linux-bjqu:~# mkswap /swapfile1 |
- Activation of the swap space with the new swap file in real time
1 | root@linux-bjqu:~# swapon /swapfile1 |
- Check whether the swape space was updated
1 | root@linux-bjqu:~# free -m |
To avoid this error, it’s necessary in the previous post “Oracle VM VirtualBox” to define the memory RAM size with 1GB.
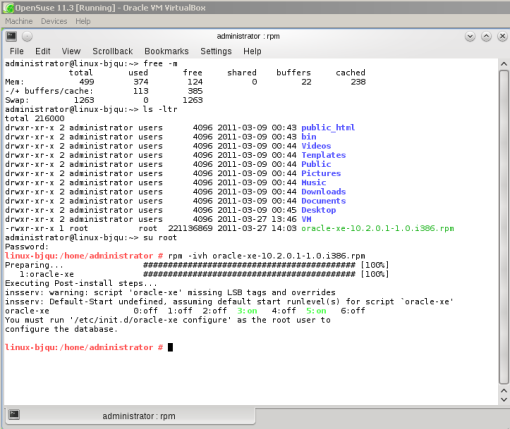
After this correction, it’s time to try the installation of the rpm once again:
1 | root@linux-bjqu:~# rpm –ivh oracle-xe-10.2.0.1-1.0.i386.rpm |
Now it seems that everything is going well:
As indicated in previous message the next step it’s to run the script
“/etc/init.d/oracle-xe configure” :
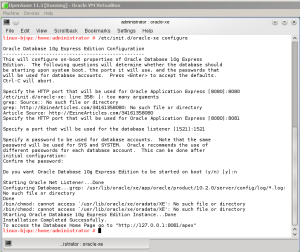
Install the rpm file"oracle-xe-10.2.0.1-1.0.i386.rpm "
It’s only needed to specify the standard values for the HTTP port(8081) that will be used for Oracle Application Express and the port for the database listener(1521), and finally to define the “sysdba” password.
- Define the password for the “oracle” linux user

The definition of the password for the “oracle” linux user it’s done through the root user
- Execute the script “createdb.sh”
The script “createdb” which is located in the directory “/usr/lib/oracle/xe/app/oracle/product/10.2.0/server/bin” must be executed by the “oracle” system user.
- Update the environment variables
In order to update the environment variables it’s needed to execute the script ”oracle_env.sh”.
By the way I list the information that I added in my “.profile”:
1 2 3 4 5 6 7 8 9 10 11 12 | ORACLE_BASE=/usr/lib/oracle/xe/app/oracle;export ORACLE_BASE;ORACLE_HOME=$ORACLE_BASE/product/10.2.0/server;export ORACLE_HOME;ORACLE_SID=XE;export ORACLE_SID;PATH=/home/administrator/bin:/usr/local/bin:/usr/bin:/sbin:/usr/sbin:/bin:/usr/bin/X11:/usr/X11R6/bin:/usr/games:/usr/lib/jvm/jre/bin:/usr/lib/oracle/xe/app/oracle:/usr/lib/oracle/xe/app/oracle/product/10.2.0/server/bin |
- Start up the database and listener
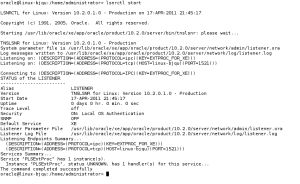
Finally it’s necessary start up the database, with the “oracle” system user:
and start the listener as shown in the below picture:
grep,
”Some people make the world special just by being in it”
Tidak ada komentar:
Posting Komentar