[Step by Step] How to Update vCenter 6.7 to 7.0
With VCSA you can upgrade vCenter in simplified steps. This article will show you the detailed steps of how to upgrade vCenter 6.7 to 7.0.
By Crystal / Updated on March 8, 2023
vCenter upgrade with the vSphere suite
As you may know, VMware ESXi and vCenter Server are 2 key components of VMware vSphere suite. While ESXi is the type-1 hypervisor on which you can create and run virtual machines and virtual appliances, vCenter Server is a service that acts as a central administrator for ESXi hosts connected in a network.
VMware ESXi and vCenter Server are upgraded with vSphere. As vSphere has upgraded to 7 (and 8 in August 2022), vCenter has upgraded to 7 as well. In order to experience timely feature updates and technical support, you may want your vCenter upgrade with the vSphere suite. This article will show you the detailed steps of how to update vCenter 6.7 to 7.0 via vCenter Server Appliance (VCSA).
![]()
How to upgrade vCenter 6.7 to 7.0 via VCSA
vCenter Server Appliance (VCSA) is a preconfigured virtual machine that is optimized for running vCenter Server and the associated services. It includes Photon OS, the vSphere authentication services, PostgreSQL, VMware vCenter Lifecycle Manager and Extension.
The presence of VCSA greatly simplifies the process to install vCenter, upgrade vCenter, migrate and restore vCenter. In this part, I will show you the detailed steps of vCenter upgrade via VCSA.
▶ Steps to upgrade vCenter 6.7 to 7.0
1. Download VMware vCenter Server Appliance 7.0 ISO image from the official site, and then mount the ISO image as a virtual DVD drive.
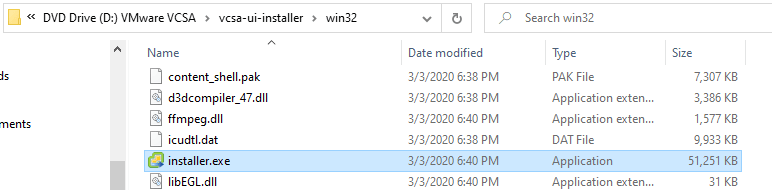
2. Navigate to vcsa-ui-installer\win32 directory and find installer.exe, right-click on installer.exe and select Run as administrator.
Note: If you are using Linux, navigate to vcsa-ui-installer\lin64 and run installer.exe.
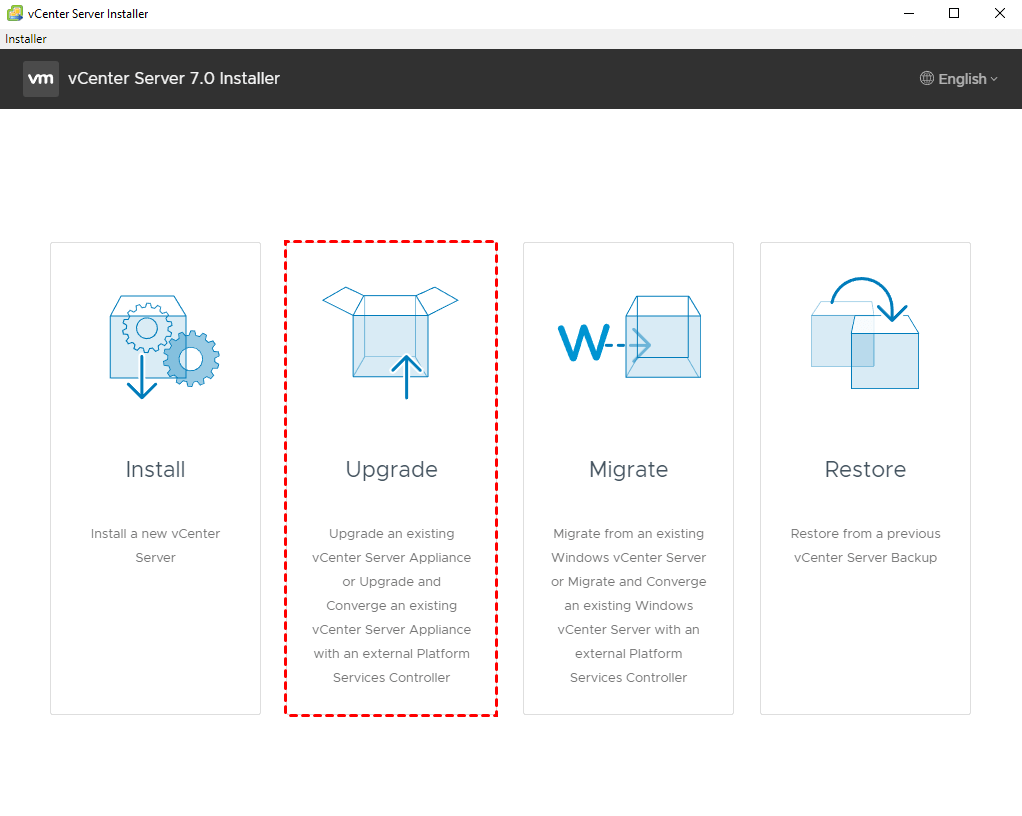
3. On the interface of vCenter Server Installer application, click Upgrade.
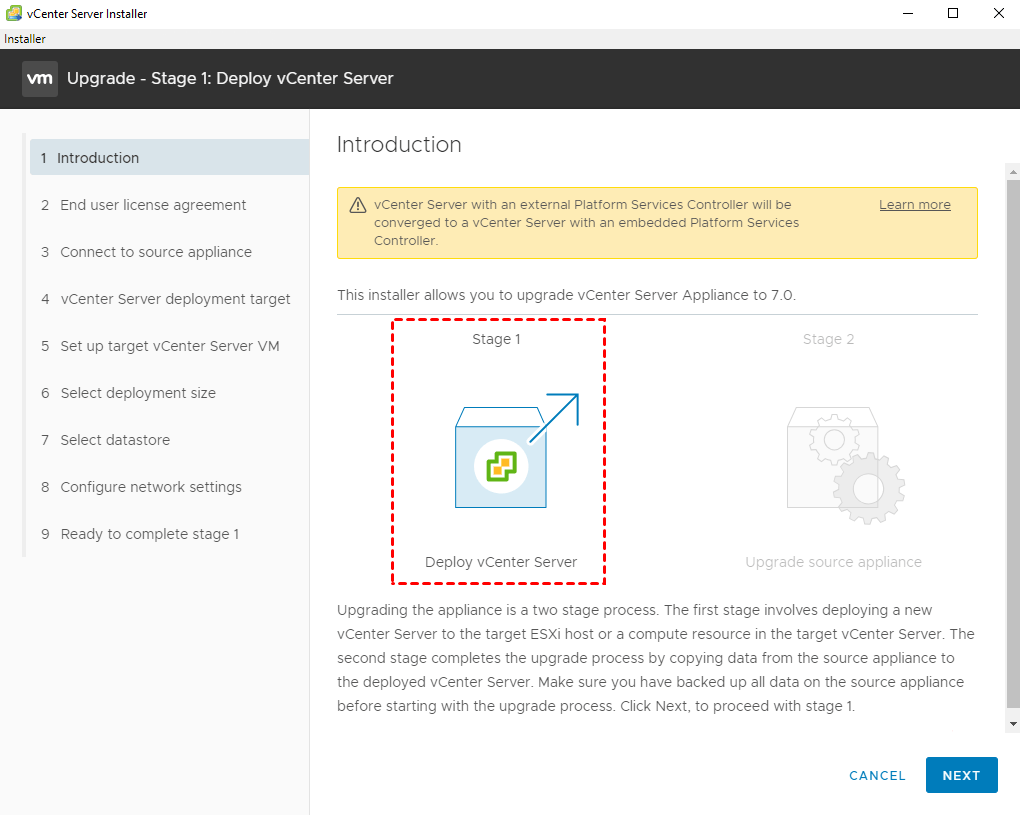
4. Follow the wizard of Stage 1 Deploy vCenter Server.
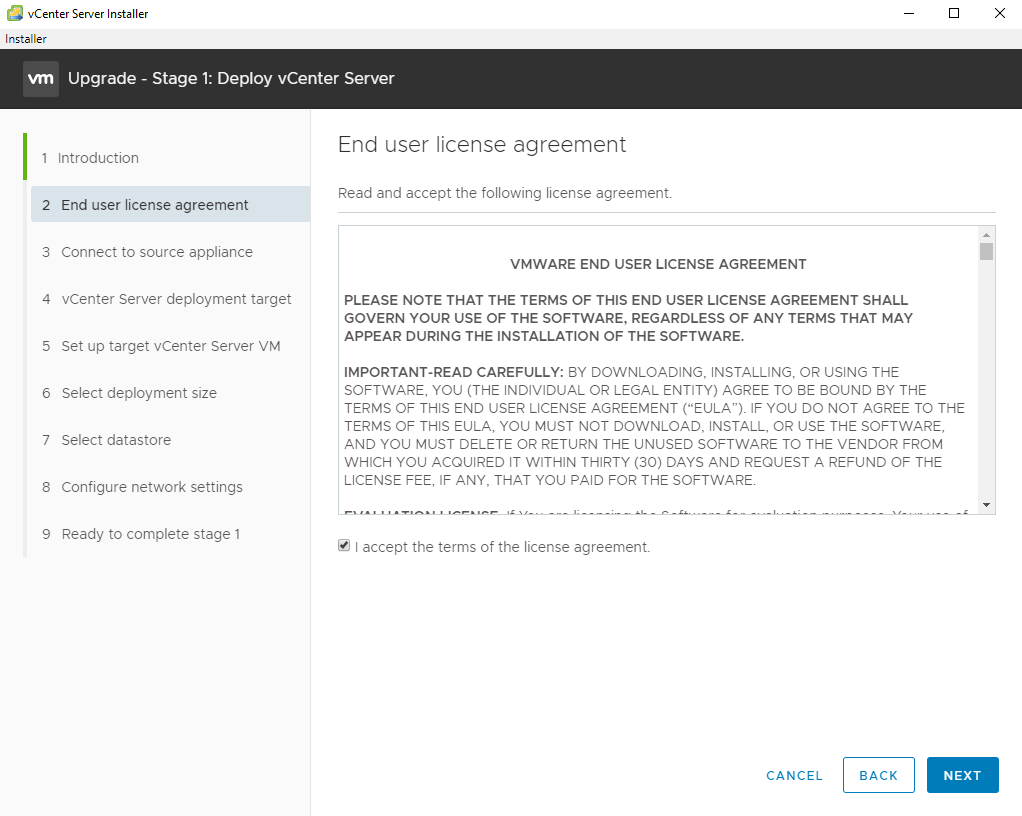
5. Select I accept the terms of the license agreement option, and click Next to continue.
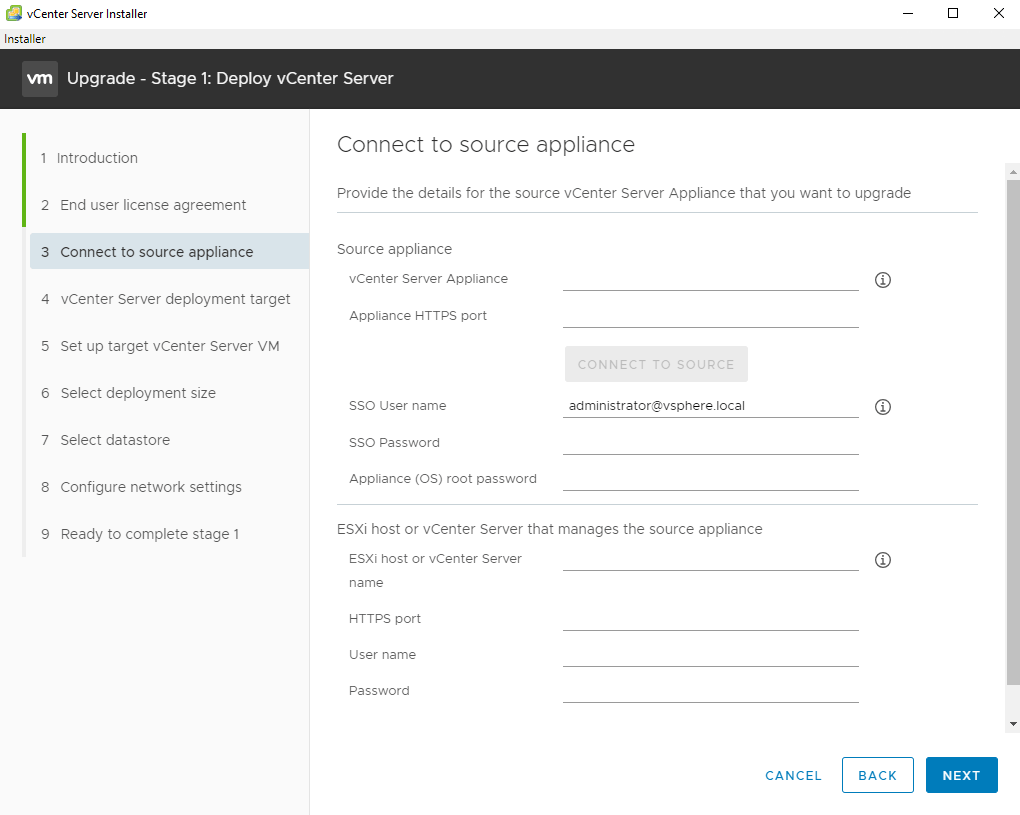
6. Provide the details for the source vCenter Server Appliance that you want to upgrade. Enter the existing VCSA FQDN or IP address and all of the login credentials for the existing VCSA and ESXi host.
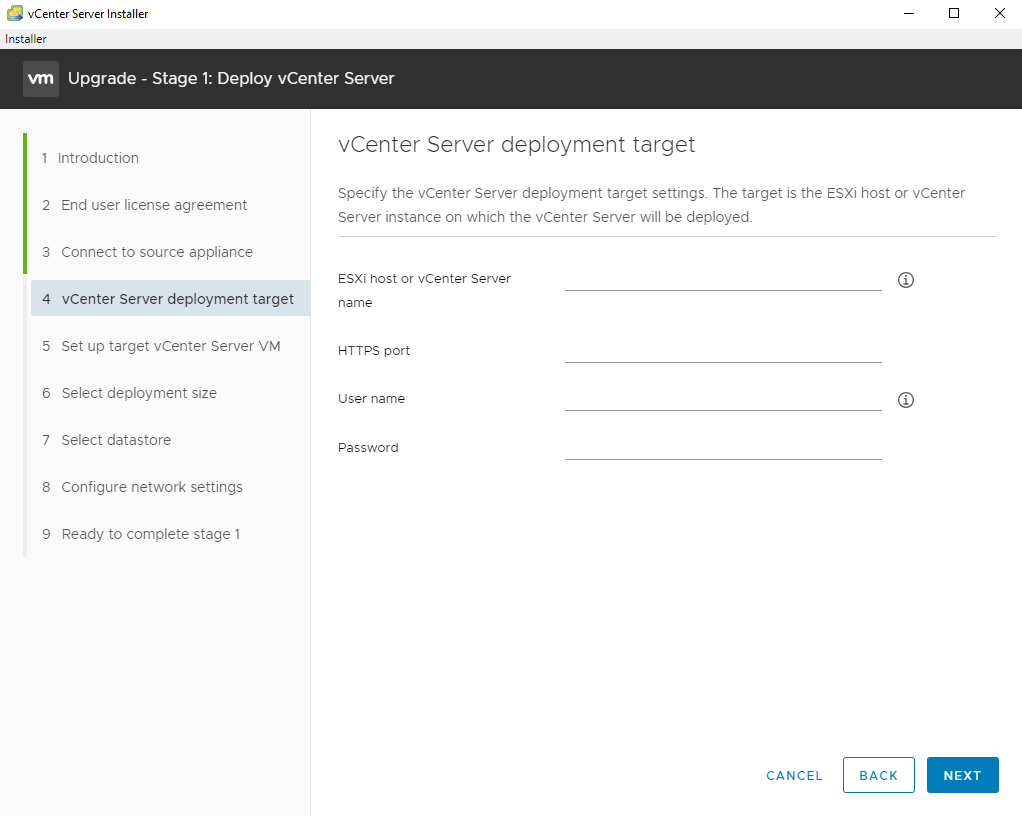
7. Specify the vCenter Server deployment target settings. The target is the ESXi host or vCenter Server instance on which the new vCenter Server Appliance 7.0 will be deployed.
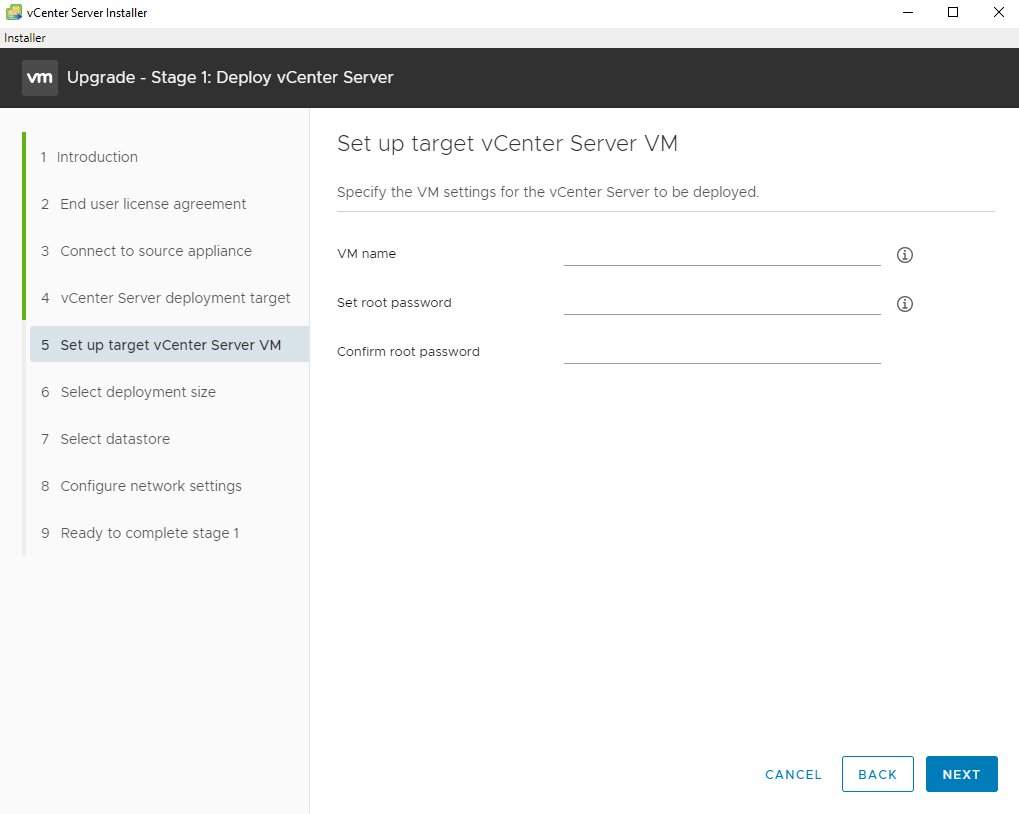
8. Specify the VM name and root password for the new vCenter Server 7.0 to be deployed.
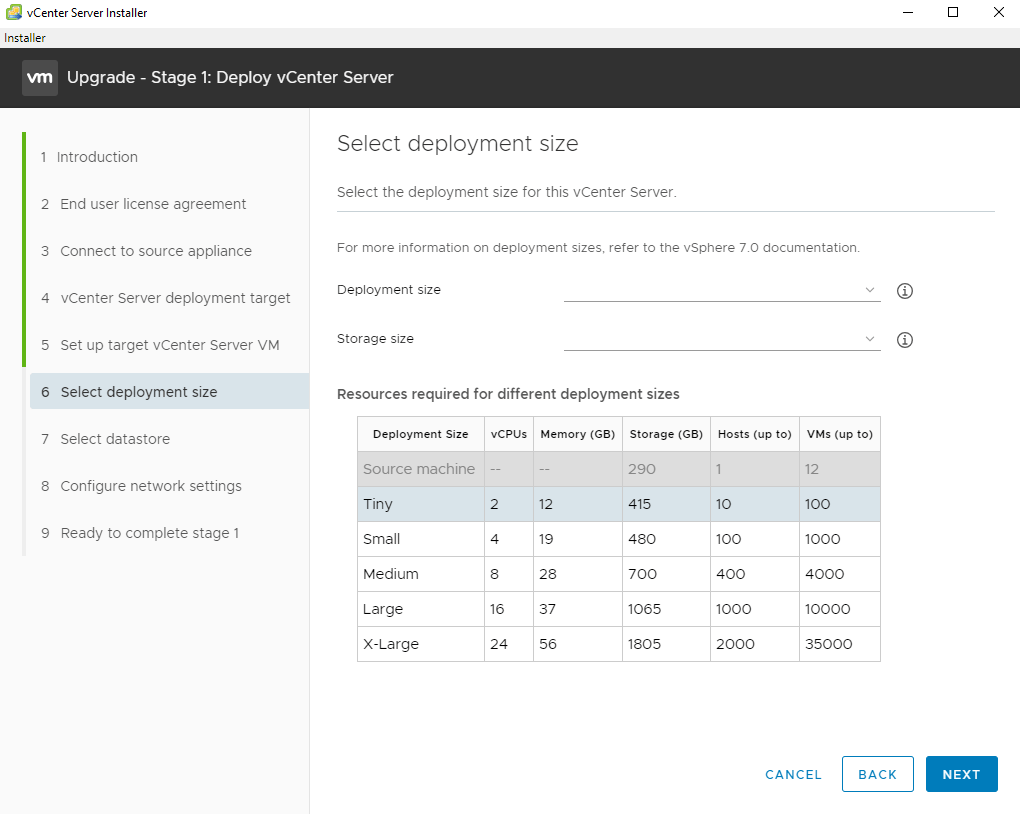
9. Select the deployment size for this vCenter Server. You can refer to the official chart of resources required for different deployment sizes.
10. Select the storage datastore for this vCenter Server. You can choose to show only compatible datastores.

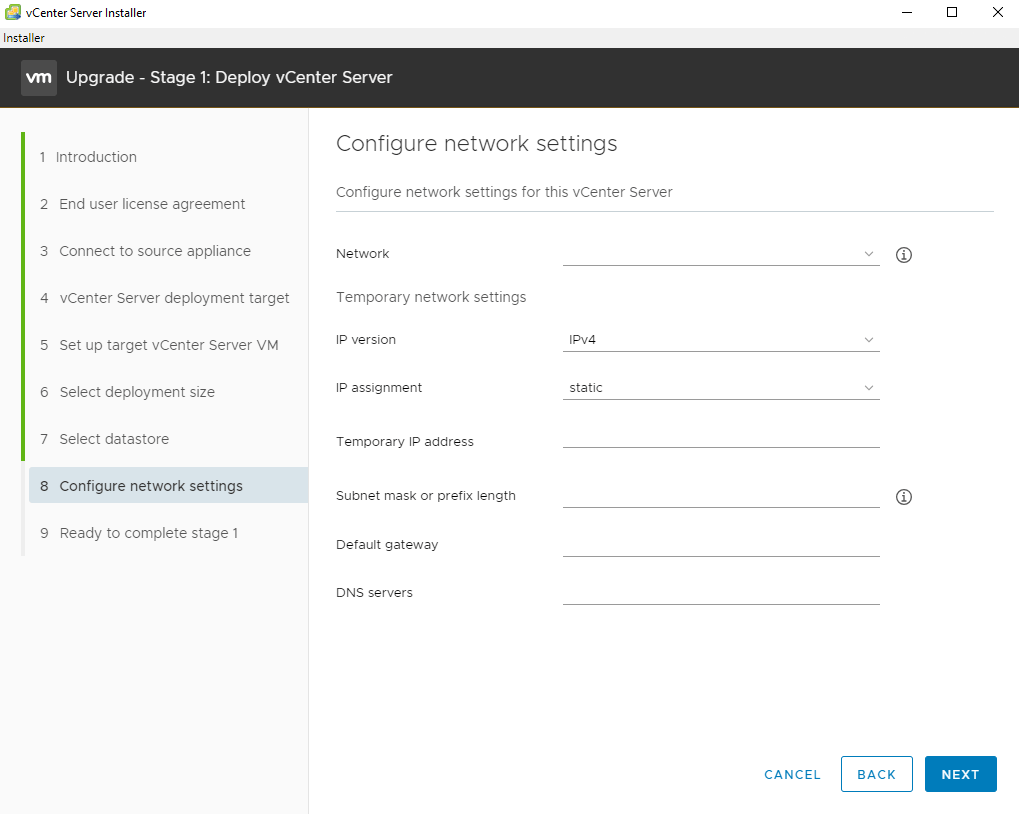
11. Configure network settings for this vCenter Server.
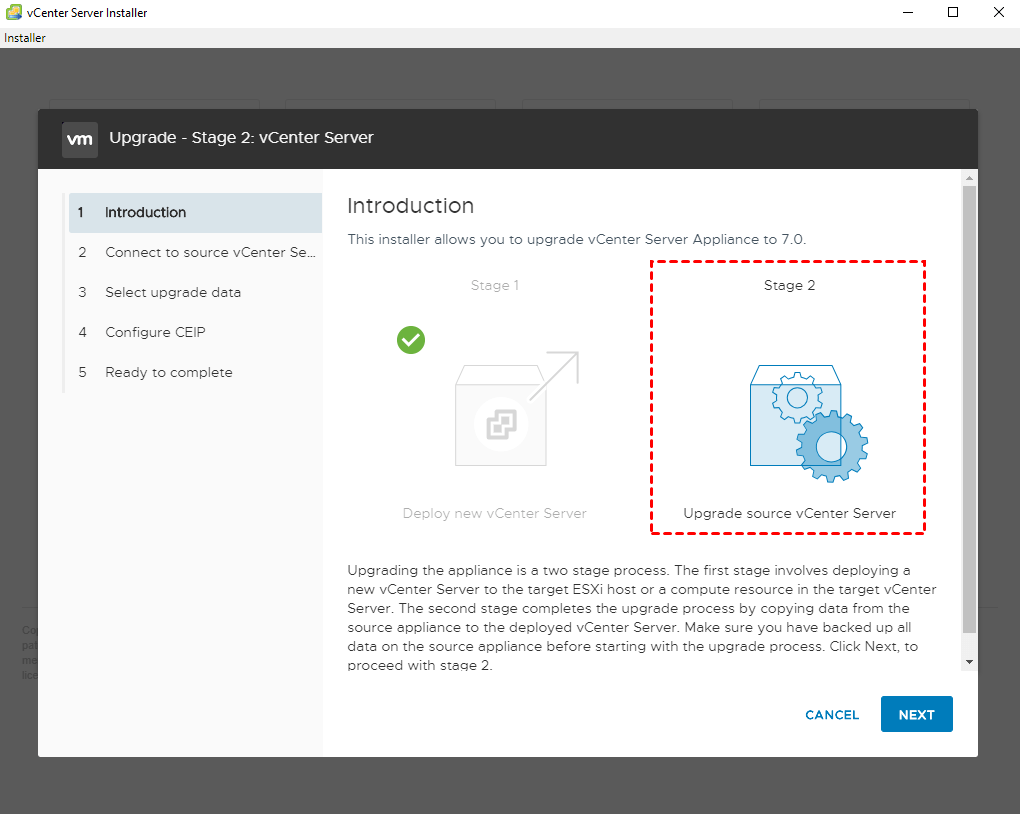
12. Review the settings and click Finish to initialize stage 1 deployment. When it completes, click Next to continue Stage 2 Upgrade source vCenter Server.
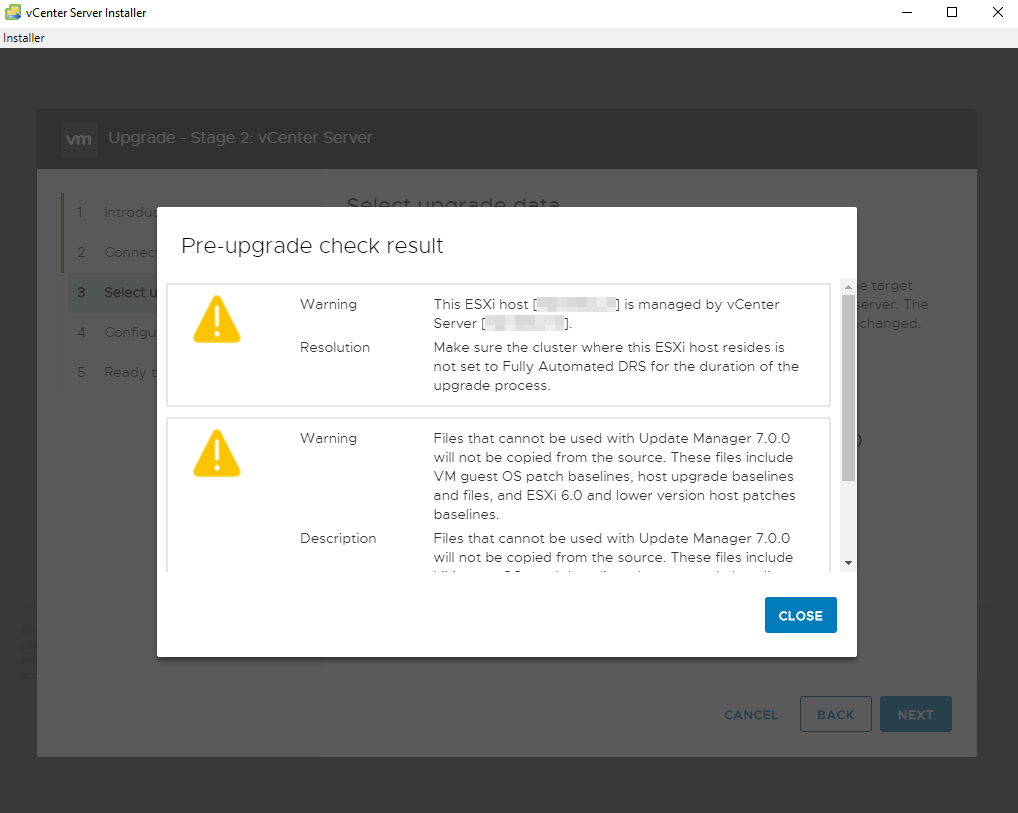
13. The installer will automatically run a Pre-Upgrade check on your existing VCSA. Check the results and then click on Next to continue.
Note: Be sure that DRS is disabled if you have more than one host.
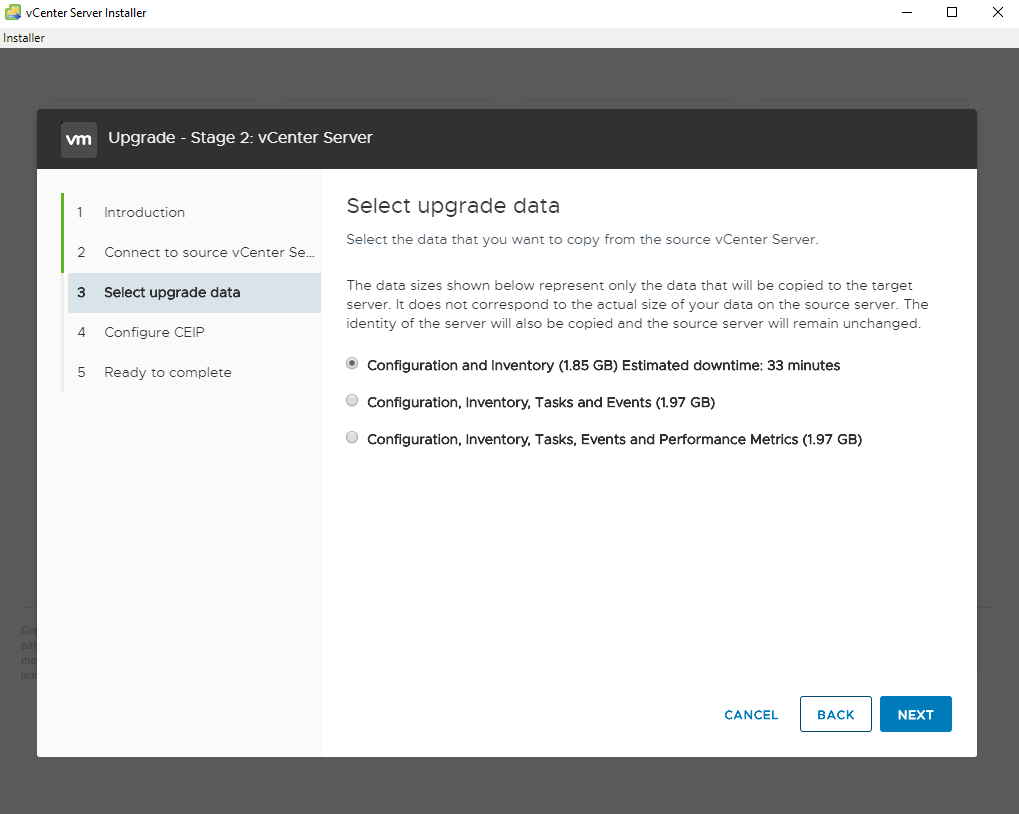
14. Select the data that you want to copy from the source vCenter Server.
15. Check the Join the VMware’s Customer Experience Improvement Program (CEIP) option and click Next to review the settings. Then you can click Finish to initialize the Upgrade.
Tidak ada komentar:
Posting Komentar