In my last post in this series, I gave you an overview of how Veeam Availability for Nutanix AHV works and how my lab environment is set up. In this post I’ll be showing you how to get your hands on Nutanix Community Edition and install it as a nested hypervisor on vSphere 6.7.
Note: This is post number 2 of a 7-part step-by-step integration guide. Links to the other posts in the series can be found at the bottom of the page.
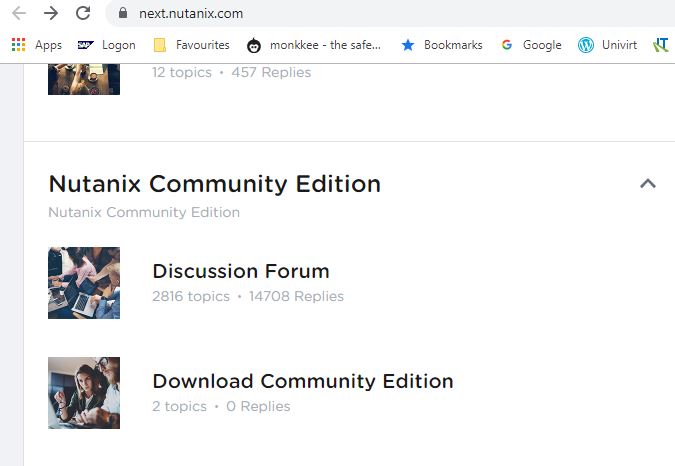
The first thing you’ll need to do, if you haven’t already, is to go to the Nutanix Next website and set up an account. Remember the login credentials because you’ll need them later on! Once you get access, login and scroll down to the section headed Nutanix Community Edition.
Note: I’m writing this update on March 26th, 2020. Today I noticed that the screenshot below is no longer valid for accessing Nutanix CE. For the moment, try this link.
Click on Download Community Edition:
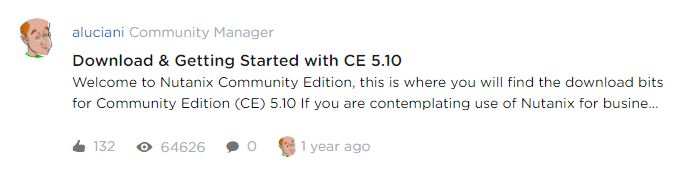
Now click on the topic entitled Download and Getting Started with CE 5.1.0:
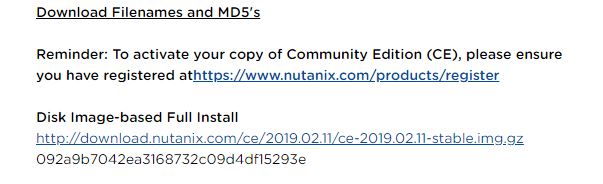
In our case, we’re going to need the Disk Image-based Full Install version. Click on the link for the file ending .img.gz to start the download:
The downloaded file is a compressed image so we need to extract it. Here I’m using WinRAR but you can use any compression tool that you prefer. I’ve right-clicked and selected Extract Here:

Now we’ll need to rename the disk image file so that it follows the naming convention used by vSphere virtual disks.
Note: In vSphere, each virtual disk is represented by two files – the disk file itself called <diskFileName>-flat.vmdk and a descriptor file called <diskFileName>.vmdk that contains some metadata about the disk file.
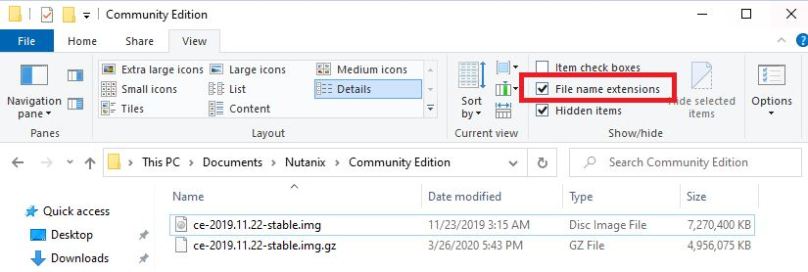
First, make sure that you can see the extensions of the files in this folder:
Right click on the extracted disk image file and select Rename:
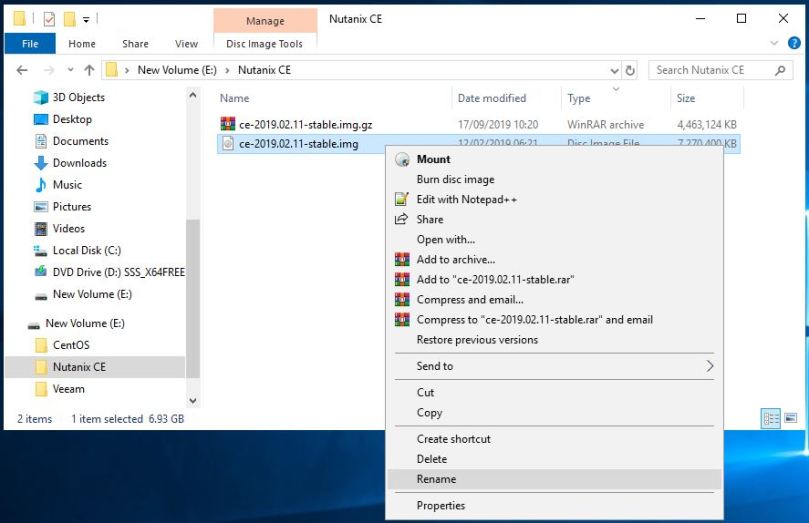
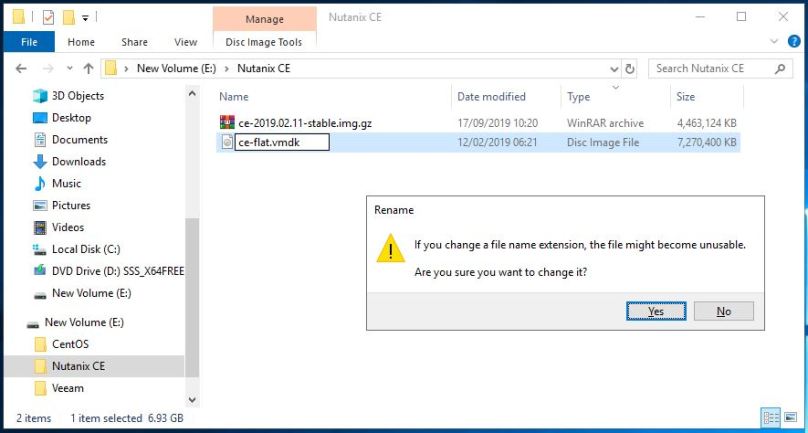
Call this file ce-flat.vmdk. You may be warned that by changing the file extension from .img to .vmdk the file may become unusable. Click Yes to accept the change:
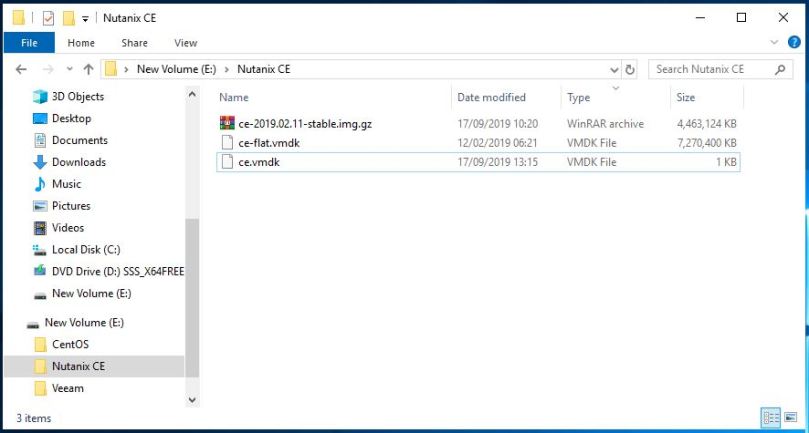
Now we’ll need to create a descriptor file called ce.vmdk. Luckily for us, Joep Piskaer has already created a file for us that you can view here. It’s a file with a .txt extension so you may need to create a text file called ce.vmdk and copy the lines into it.
For convenience, here are the lines of the file:
# Disk DescriptorFile
version=4
encoding="UTF-8"
CID=a63adc2a
parentCID=ffffffff
isNativeSnapshot="no"
createType="vmfs"

# Extent description
RW 14540800 VMFS "ce-flat.vmdk"

# The Disk Data Base
#DDB

ddb.adapterType = "lsilogic"
ddb.geometry.cylinders = "905"
ddb.geometry.heads = "255"
ddb.geometry.sectors = "63"
ddb.longContentID = "2e046b033cecaa929776efb0a63adc2a"
ddb.uuid = "60 00 C2 9b 69 2f c9 76-74 c4 07 9e 10 87 3b f9"
ddb.virtualHWVersion = "10"
So now we have the two disk files that we’ll need. We’ll be coming back to these a little bit later.
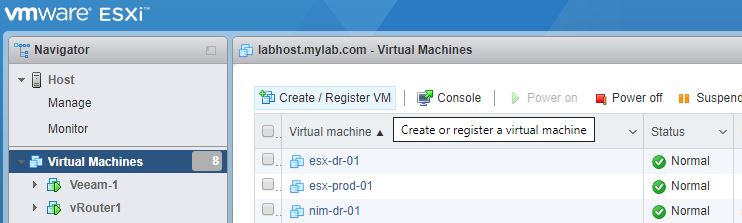
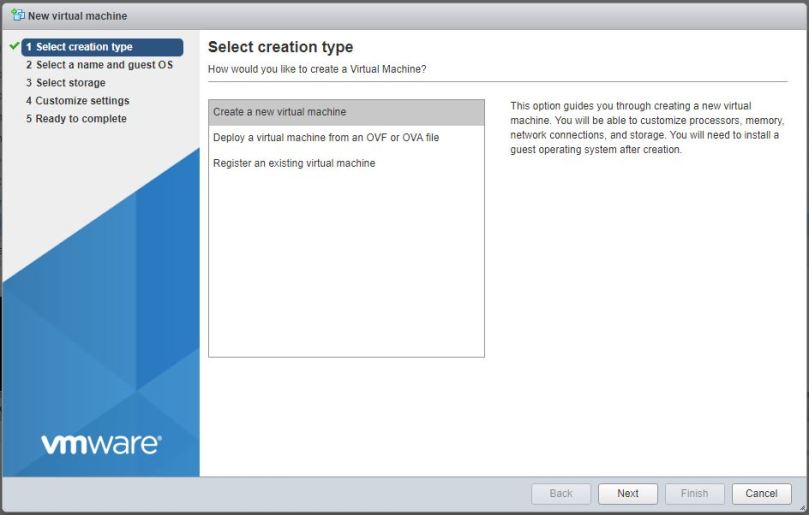
Now let’s create a virtual machine that will be our nested Nutanix system. Login to the vSphere web console. Go to the Virtual Machines section and click Create / Register VM:
Select the option to create a new virtual machine and click Next:
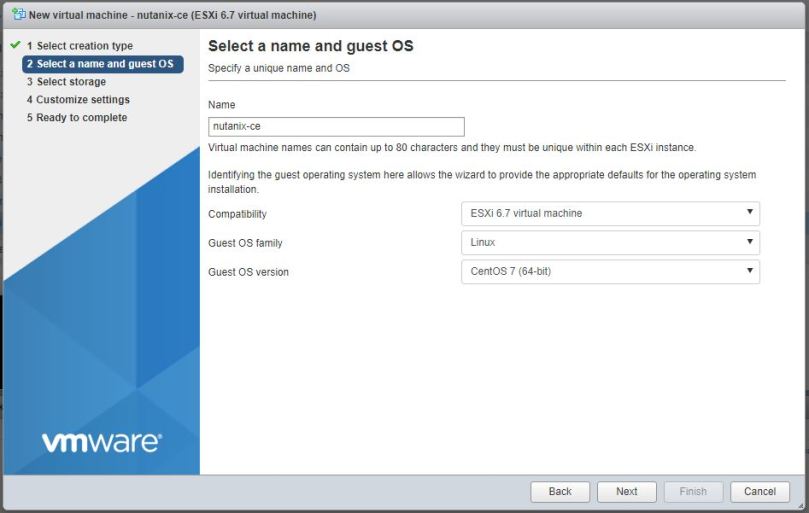
Give the VM a meaningful name. Set the OS family to Linux and the OS version to CentOS 7. Click Next:
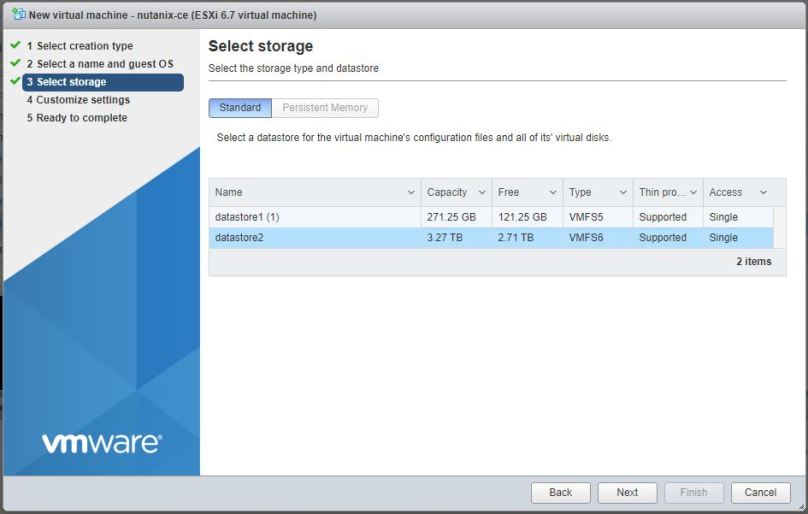
Select a datastore for the VM and click Next:
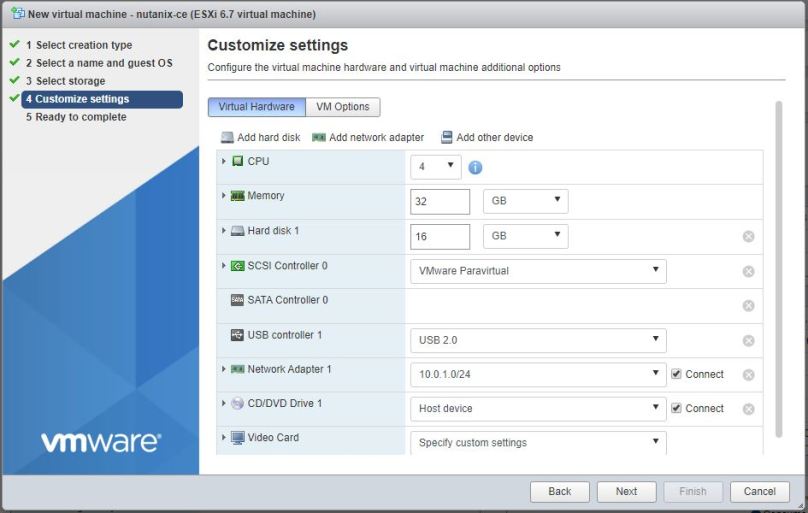
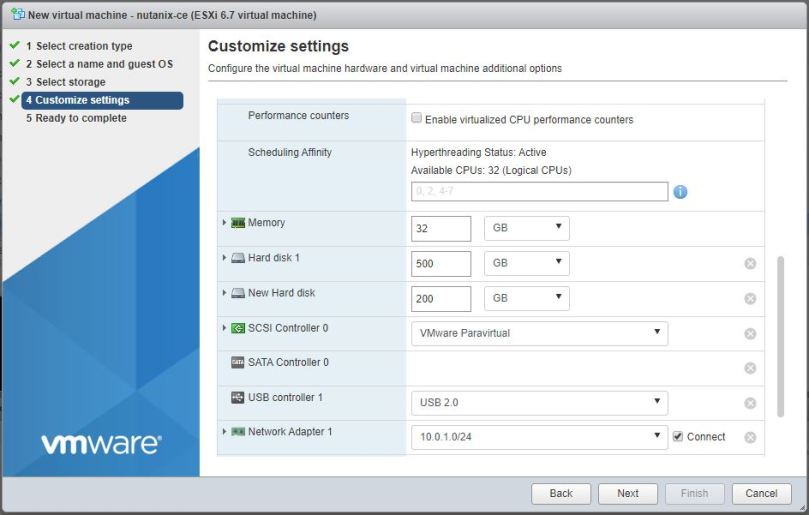
Now we’ll need to start customising the virtual hardware. First we’ll need to make a couple of changes to the CPU settings. Set the number of virtual CPUs to (at least) 4. In order for the nested system to be able to run its own VMs, we also need to check the Expose hardware assisted virtualization to the guest OS box:

Minimise the CPU settings section and set the memory to 32GB (any less and you won’t have enough memory to run any VMs in AHV):
Now we’re going to add a second hard drive (one will have been created automatically by the new VM wizard). Click Add hard disk -> New standard hard disk:
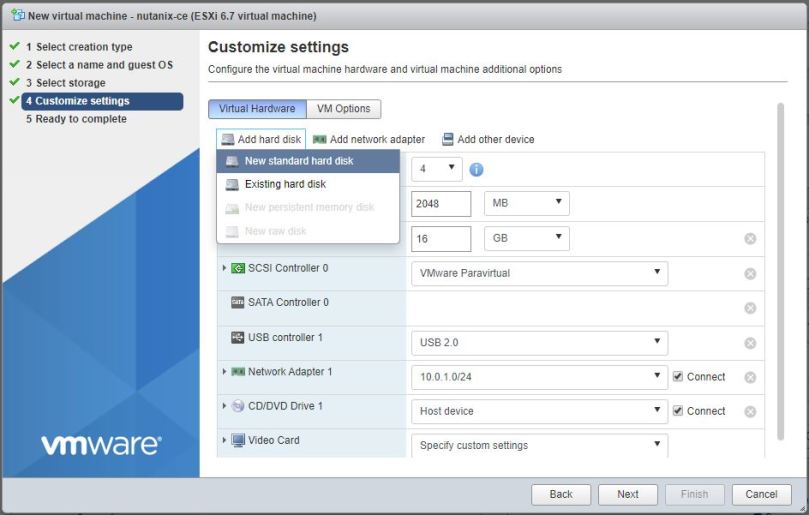
Set the disk sizes at 500GB and 200GB as shown:
Scroll down to the networking section and make sure that the adapter type is set to E1000e and that it is connected to the right virtual switch port group. Click Next:

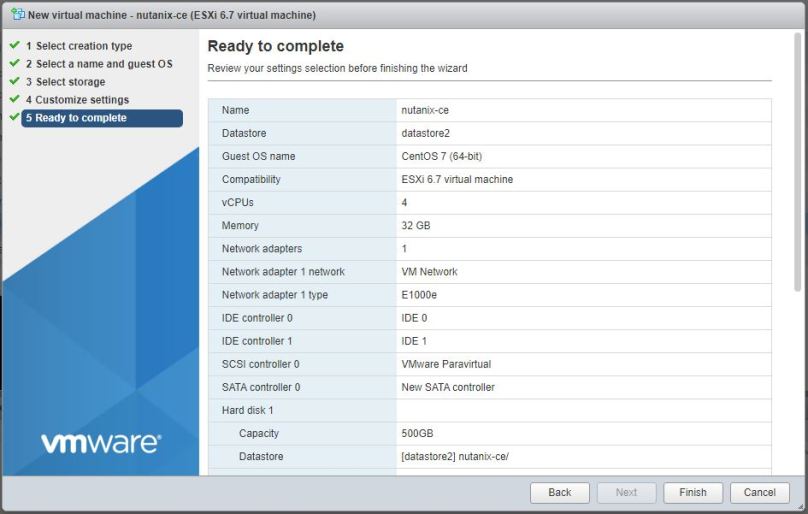
Review the VM settings and click Finish:
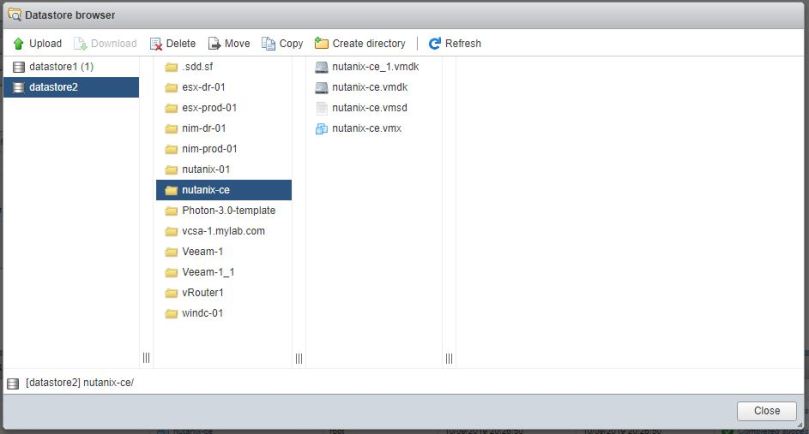
Now we’ll need to add the downloaded Nutanix CE disk image to the new VM. Use the vSphere client to browse the datastore we chose when creating the new VM:
Browse to the folder where the VM files for the new VM are stored are click on the Upload button:
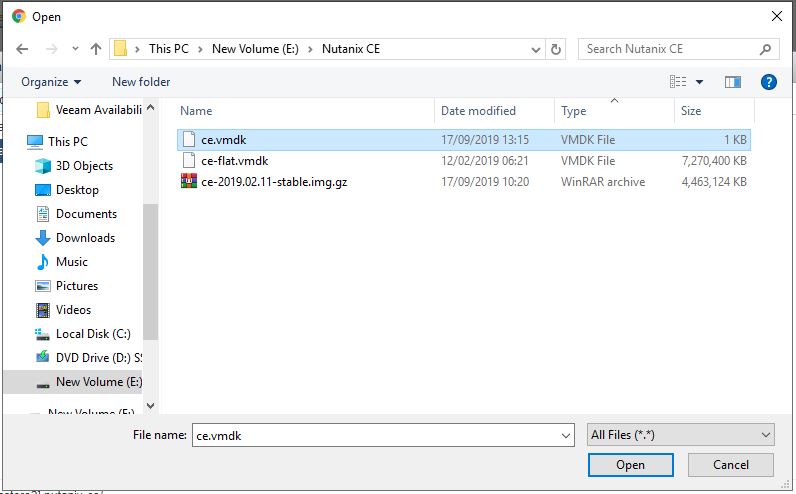
Select each of the vmdk files in turn and upload them to the datastore (the ce.vmdk file will upload almost instantaneously; the ce-flat.vmdk file is quite large so you may want to go for a cup of coffee while it uploads):
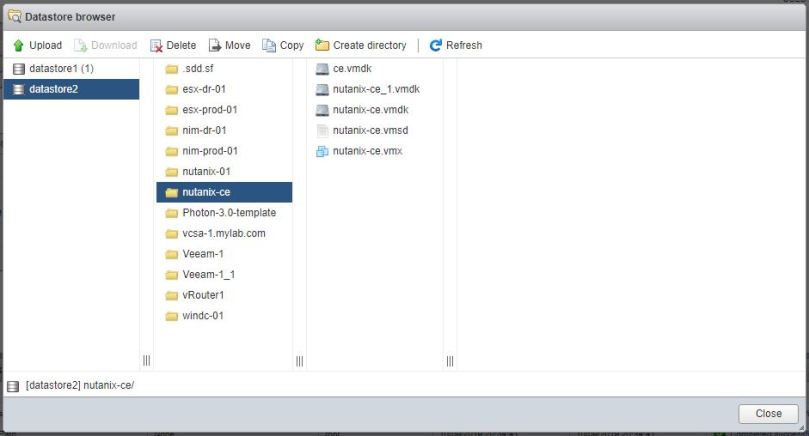
Notice that after uploading both files the datastore browser will only display the ce.vmdk file – the ce-flat.vmdk is hidden. But not to worry, it is there!
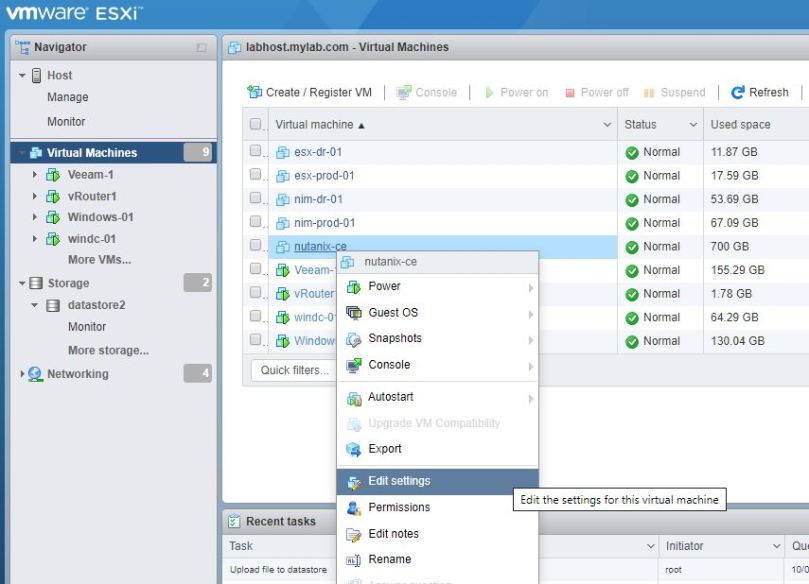
Now we’ll need to add the uploaded disk file to the VM. Right-click on the VM and select Edit settings:
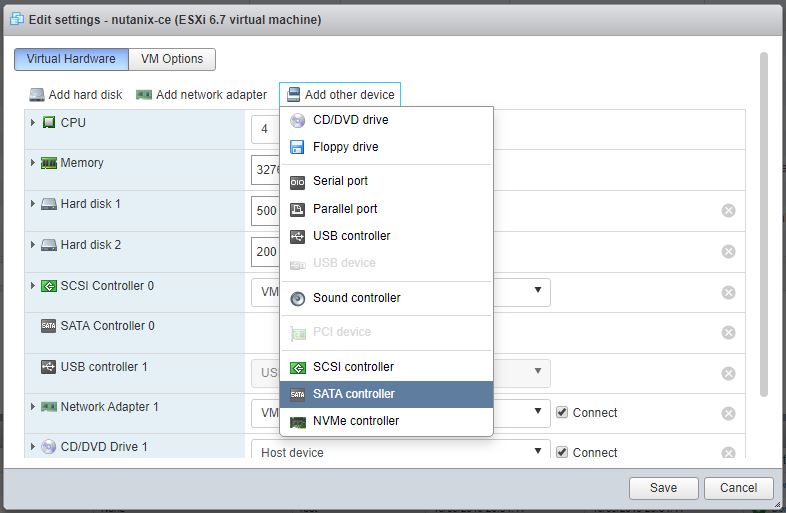
Click on the Add other device button and add a SATA controller (this will be the second SATA controller configured for this VM):
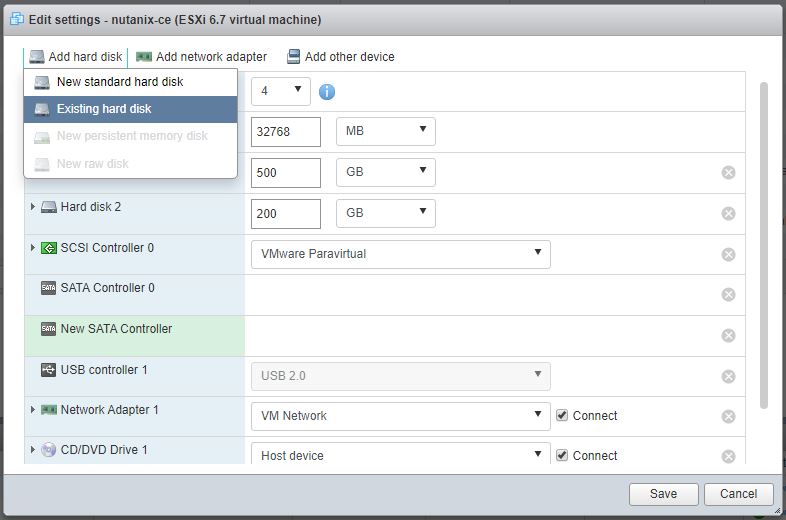
Now click on Add hard disk and choose the option to add an existing hard disk:
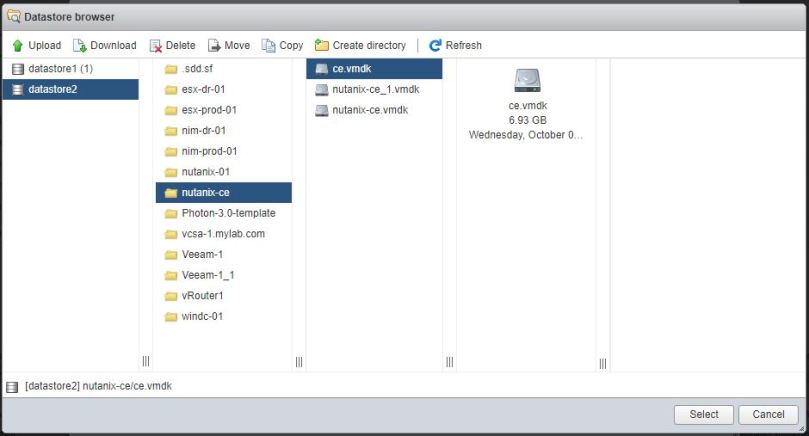
Use the datstore browser to navigate to the ce.vmdk file and click Select:
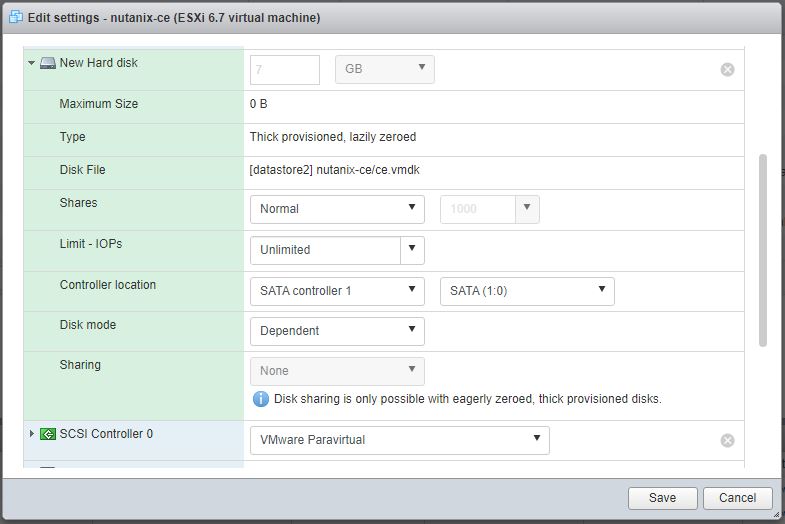
Edit the settings of the newly added disk so it is attached to SATA controller 1 as SATA(1:0) i.e the master device on the second SATA controller. Click Save:
Power on the VM and wait for the login prompt to appear. To start the install process, type install and hit enter:
Note: some blogs say that you should use the F2 key to break into the BIOS of the VM and make sure that the SATA(1:0) device is set as the default boot device. I haven’t found that I needed to do that but if you have any issues booting, have a look at this.
Now, assuming your VM has booted correctly, you’ll be prompted to log in. To start the setup, simply type install:

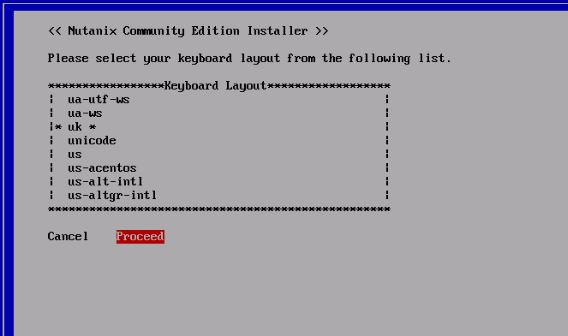
Select a keyboard layout and tab to the Proceed option. Hit Enter:
Now you’ll get a warning about destructive testing of the disks. Tab to Proceed and hit Enter:

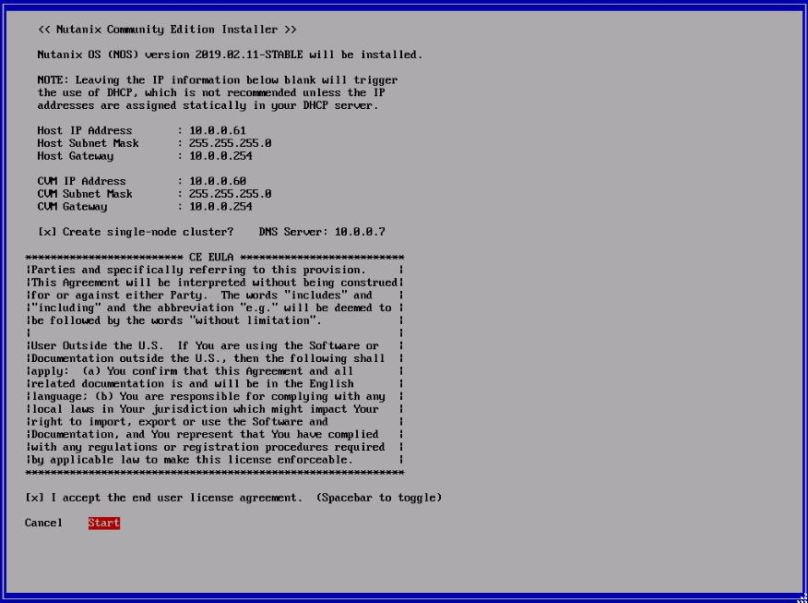
Enter IP addressing for the Nutanix system. You’ll need two IP addresses – one for the Nutanix node itself and one for the controller VM that provides management access. Check the box to create a single-node cluster.
In order to accept the EULA you’ll need to scroll down right to the end of the displayed text. Then you can check the box to accept agreement and tab to Start. Hit Enter:
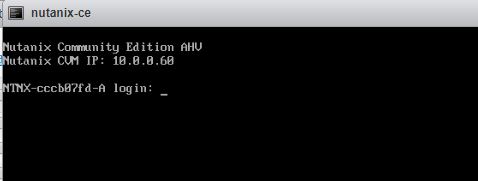
The system will take several minutes to install. When it’s ready for use you’ll see a prompt like the one shown. Notice that it displays the IP address of the controller VM. This is the address we’ll use with our browser to start configuring the system:
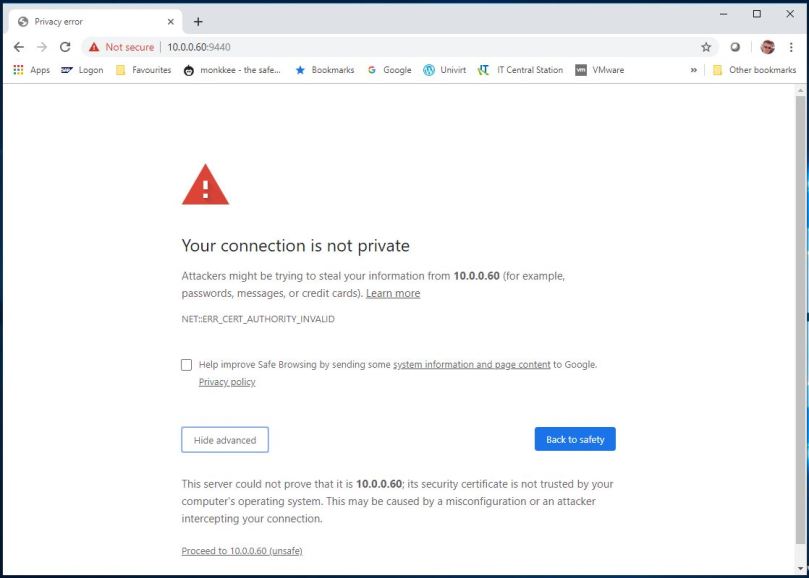
Open a browser tab and enter the IP address of the CVM, specifying port 9440, in my case this would be https://10.0.0.60:9440.
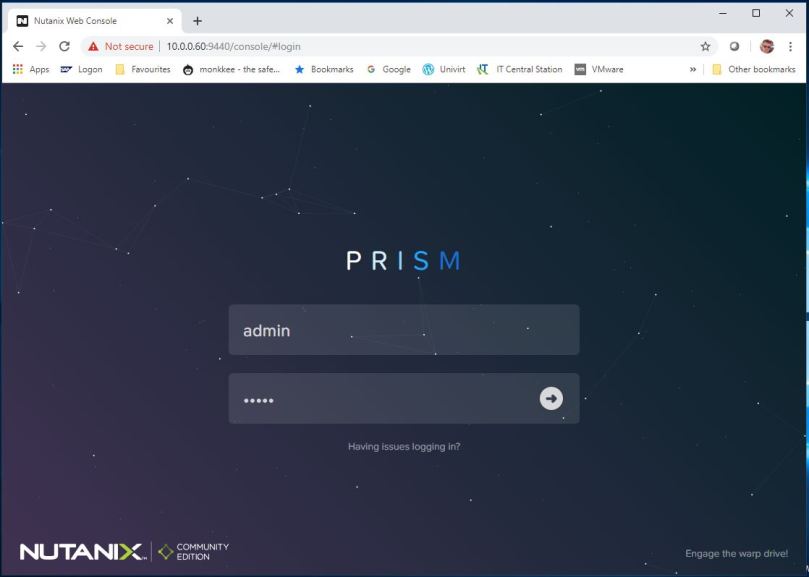
This will bring you to the login page for Prism which will be our management interface for Nutanix going forward. Enter the admin credentials. The default password for the admin user is Nutanix/4u:
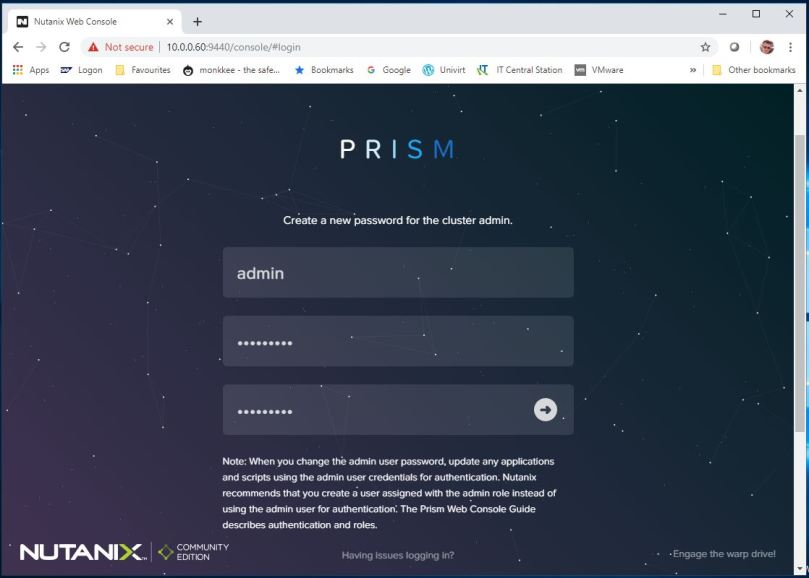
Now you’ll need to create a new password for the admin user:
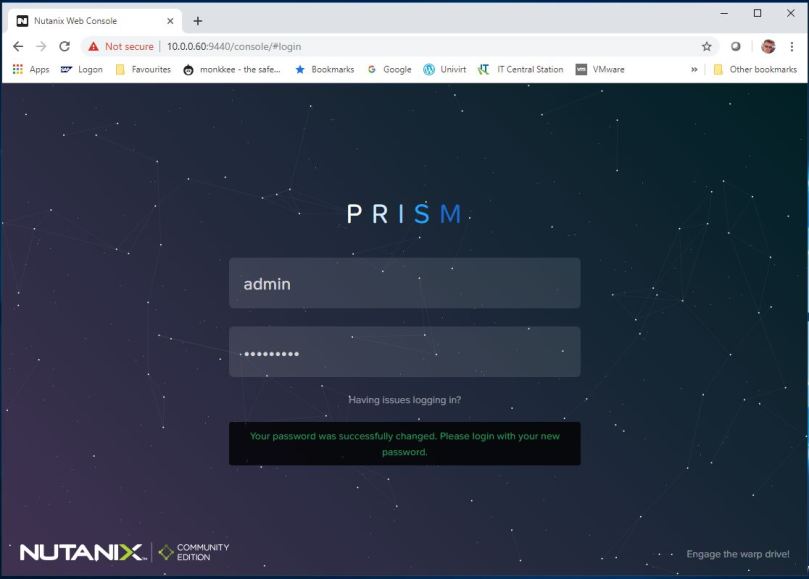
Now login using the new password:
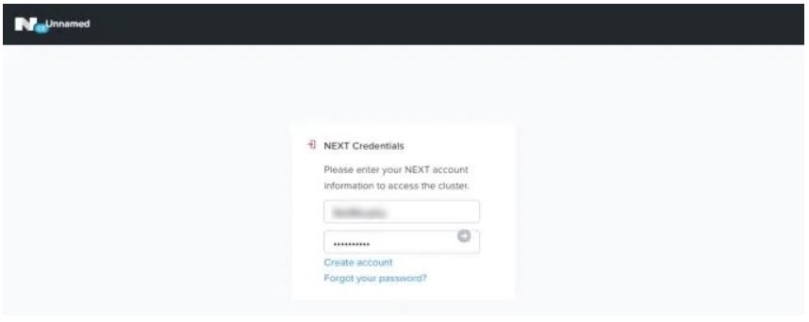
Now you’ll be prompted for the credentials of your Nutanix NEXT account. It’s important that the appliance has access to the internet at this stage or you won’t be able to proceed. Hit Enter:
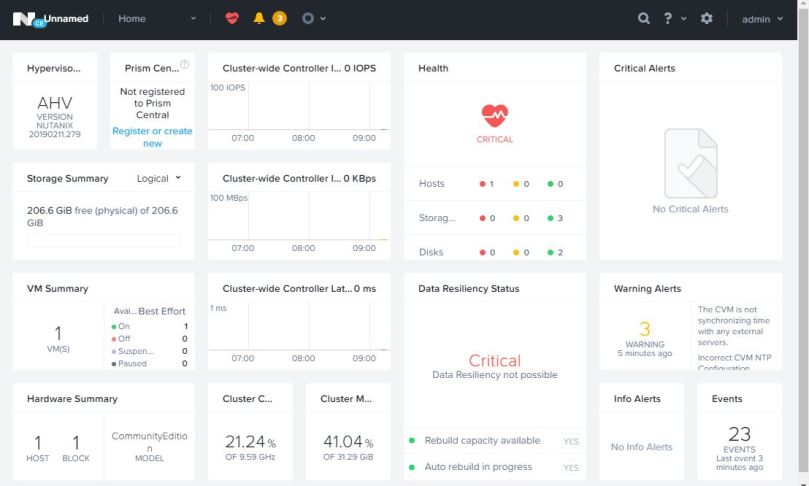
All going well you should now see the Nutanix Prism dashboard:
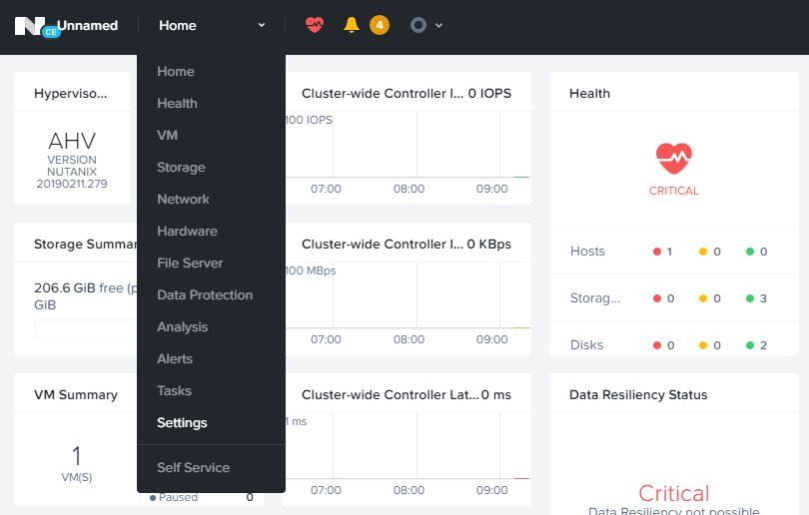
Now we’ll need to set up some networking for the VMs that we’re going to create. Use the drop-down menu to go to the Settings page:
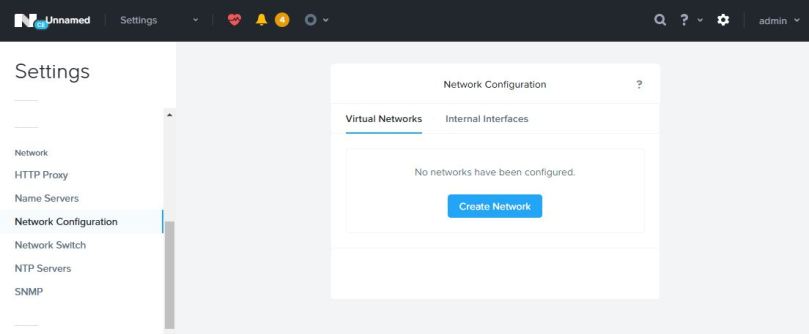
Click on Network Configuration on the left-hand side and then click on the Create Network button:.
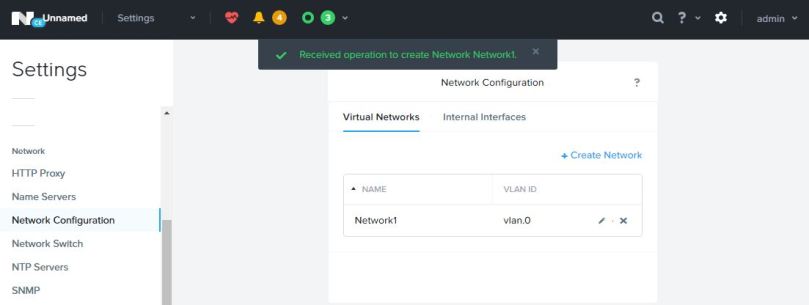
Give the new network a name and set the VLAN ID. Here I’ve chosen VLAN ID 0 i.e. the native VLAN. Click Save:

Now we should see the new virtual network listed:
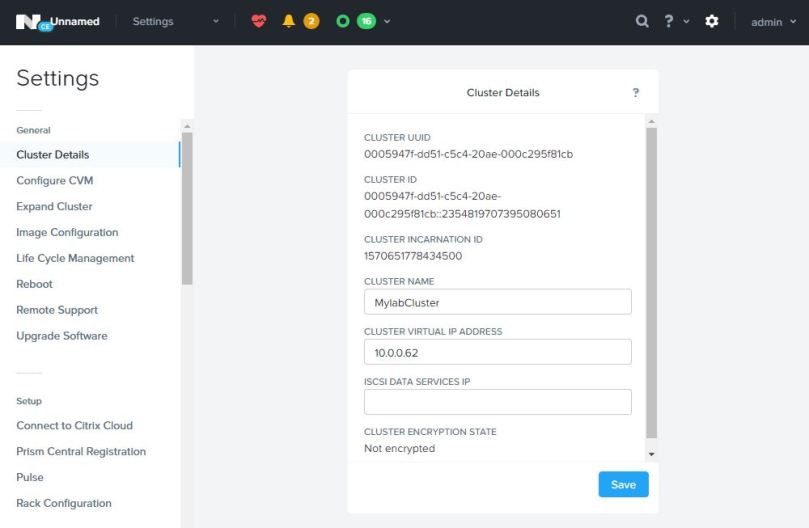
We also need to set a cluster virtual IP address at this stage (I’ve found this is necessary in order for the Nutanix Guest Tools to work later). Go to Settings -> Cluster Details and set the virtual IP address and, optionally, a friendly name for the cluster. Click Save:
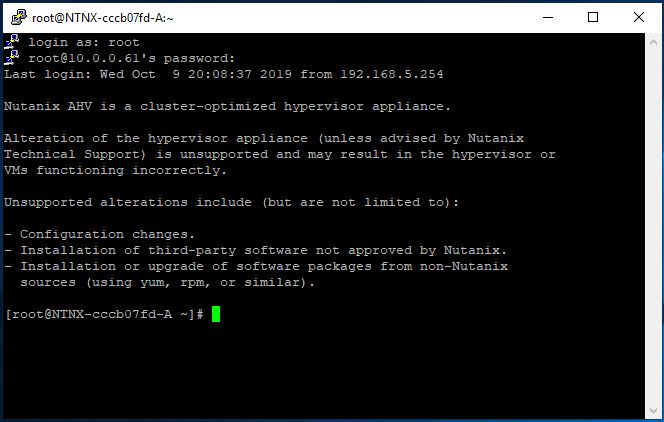
The next step is to edit some of the Nutanix files. This is an important step as failure to do this can mean that we wont be able to open a console to any of the VMs we create on the Nutanix system. Use putty to open an SSH session to the Nutanix host (not the CVM!). Login as root with a password of nutanix/4u (notice the lower case ‘n’ this time):
The first file to be edited is:
/home/install/phx_iso/phoenix/svm_template/kvm/default.xml.
Here you can see that I’ve cd’d to the directory. The first thing I’ve done is to make a backup copy of the default.xml file. Then I’ve opened it for editing using vi:

Add a line at the bottom of the <features> section reading “<pmu state=’off’/> as shown.

Save the file and exit.
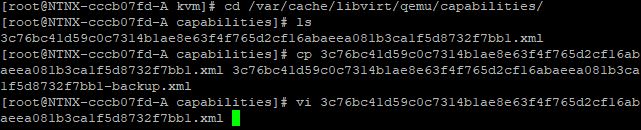
Now we’ll need to edit a file in the /var/cache/libvirt/qemu/capabilities directory. This is an xml file with a variable long form alphanumeric name so we need to identify it before editing it. Here you can see that I’ve cd’d to the directory and then used the ls command to identify the file. Again I’ve made a backup copy using the cp command before editing it with vi (tip – use the tab key to autofill the name of the file e.g “# vi 3c76<tab>”):
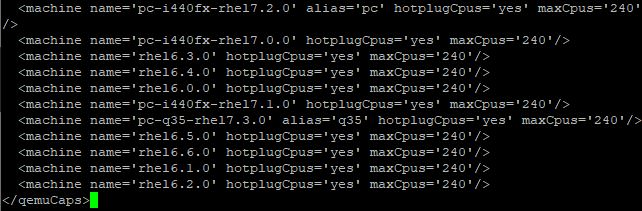
Now we need to delete one line and edit another line. The line to be deleted is:
<machine name=’pc-i440fx-rhel7.2.0′ hotplugCpus=’yes’ maxCpus=’240’/>
Now we need to edit the entry for
‘pc-i440-rhel7.3.0’…
so that it reads
‘pc-i440-rhel7.2.0’…
So, before:

After:
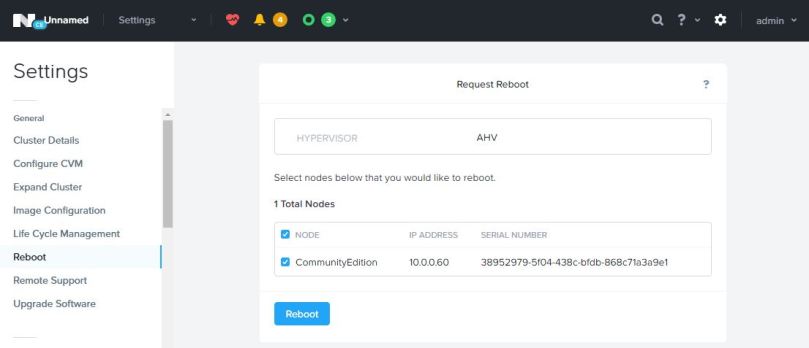
Save the edits and disconnect the SSH session. Now we’ll need reboot for the changes to take effect. Go to the Prism console and navigate to Setttings -> Reboot. Select the system using the check box and click on the Reboot button:
Now we’re at the stage where we can start building some test VMs on the Nutanix AHV platform. We’ll have a look at how to do that in my next post. Until then…
Part 1 – Overview
Part 2 – Deploying Nutanix CE
Part 3 – Creating Some Test VMs
Part 4 – Installing the Veeam Backup Server
Part 5 – Installing the Veeam Proxy
Part 6 – Configuring a Backup Job
Part 7 – Restore Scenarios
Tidak ada komentar:
Posting Komentar