Install Oracle Database 12c on Ubuntu 16.04
Being a software engineer in a startup company, I have to work with different technologies, languages, framework, and databases. Recently, I had to work on a project build with python/Django and Oracle database. As we are used to developing our software in Linux environments(to be specific, UBUNTU) and hence I started to search for tutorials that can help me setting up Oracle 12c on my Ubuntu 16.04 64-bit machine. It looked a bit confusing to me as I did not find any complete tutorial/instruction that can help me setting up Oracle 12c on my PC successfully. I went through multiple tutorials from Google(one was in Spanish also :D ) to set oracle on my pc.

Now I am going to share my experience of installing Oracle database 12c on Ubuntu 16.04 so that it can help others who are spending their valuable times for it.
First of all. download the software from the official site.
Now, unzip and copy them to
/tmp/databaseOpen a terminal and execute below commands to create groups and users for Oracle
sudo groupadd -g 502 oinstall
sudo groupadd -g 503 dba
sudo groupadd -g 504 oper
sudo groupadd -g 505 asmadmin
After that, create oracle user
sudo useradd -u 502 -g oinstall -G dba,asmadmin,oper -s /bin/bash -m oracleYou will prompt to set to password. set a memorable password and write it down. In case, if nothing prompts, try this command to set the password.
sudo passwd oracleTo install required packages, add the repository.
echo ‘deb http://cz.archive.ubuntu.com/ubuntu precise main universe’ >> /etc/apt/sources.list.d/extra.listIf there is an issue in setting the repo, you can try
sudo -i
echo ‘deb http://cz.archive.ubuntu.com/ubuntu precise main universe’ >> /etc/apt/sources.list.d/extra.list
exit
Now, get an update.
sudo apt-get updateGet libmotif4 and install on your system separately as it is not in ubuntu repository. Now execute this script to install all required packages.
sudo apt-get install alien autoconf automake autotools-dev binutils doxygen \
elfutils expat gawk gcc gcc-multilib g++-multilib libstdc++6:i386 ksh less libtiff5 \
libtiff5-dev lib32z1 libaio1 libaio-dev libc6-dev libc6-dev-i386 libc6-i386 \
libelf-dev libltdl-dev libodbcinstq4–1 libodbcinstq4–1:i386 \
libpthread-stubs0 libpth-dev libstdc++5 lsb-cxx make \
pdksh openssh-server rlwrap rpm sysstat unixodbc unixodbc-dev x11-utils \
zlibc libglapi-mesa:i386 libglu1-mesa:i386 libqt4-opengl:i386 \
libpthread-workqueue0 libpthread-workqueue-dev libzthread-2.3–2 libzthread-dev \
libpthread-stubs0-dev libaio-dev
(N.B. if any package is missing, google it to fix).
Then set the oinstall group to access Oracle installation.
sudo chown -R oracle:oinstall /tmp/databaseHost file should contain the fully qualified name for the local server.
Open hosts file
cat /etc/hostsIt should have a record similar to the following
127.0.0.1 localhostYou need this step to load installation UI as oracle user. Test the x server
xclockIf you see a clock running you are good to go. Now run
xhostResult should be
xhost SI:localuser:sajid
# sajid is my user name
Now let oracle user access xhost
xhost +SI:localuser:oracleLinking Binaries
ln -s /usr/bin/awk /bin/awk
ln -s /usr/bin/rpm /bin/rpm
ln -s /usr/bin/basename /bin/basename
Linking Libraries
ln -s /usr/lib/x86_64-linux-gnu /usr/lib64
cd /lib64
ln -s /lib/x86_64-linux-gnu/libgcc_s.so.1 .
Make Target Directories
mkdir -p /u01/app/oracle/product/12.2.0/dbhome_1
# dbhome_1 is database location
chown -R oracle:oinstall /u01
chmod -R 775 /u01
To add Oracle 12c Kernel Parameters, open
sudo nano /etc/sysctl.confAdd to the end of the file
#### Oracle 12c Kernel Parameters ####
fs.suid_dumpable = 1
fs.aio-max-nr = 1048576
fs.file-max = 6815744
kernel.shmall = 2097152
kernel.shmmax = 536870912
kernel.shmmni = 4096
# semaphores: semmsl, semmns, semopm, semmni
kernel.sem = 250 32000 100 128
net.ipv4.ip_local_port_range = 9000 65500
net.core.rmem_default=4194304
net.core.rmem_max=4194304
net.core.wmem_default=262144
net.core.wmem_max=1048586
Oracle User Settings for Oracle 12c
sudo nano /etc/security/limits.confAdd the following lines
#### oracle User Settings 4 Oracle 12c ####
oracle soft nproc 2047
oracle hard nproc 16384
oracle soft nofile 1024
oracle hard nofile 65536
oracle soft stack 10240
Add Paths to Oracle's .bashrc
Login as Oracle
su oracleEdit .bashrc file
sudo nano ~/.bashrcAppend in the end
# Oracle Settings
TMP=/tmp;
export TMP TMPDIR=$TMP;
export TMPDIR ORACLE_HOSTNAME=127.0.0.1;
export ORACLE_HOSTNAME
ORACLE_UNQNAME=DB12C;
export ORACLE_UNQNAME
ORACLE_BASE=/u01/app/oracle;
export ORACLE_BASE
ORACLE_HOME=$ORACLE_BASE/product/12.2.0/dbhome_1;
export ORACLE_HOME
ORACLE_SID=SID;
export ORACLE_SID
PATH=/usr/sbin:$PATH;
export PATH
PATH=$ORACLE_HOME/bin:$PATH;
export PATH
LD_LIBRARY_PATH=$ORACLE_HOME/lib:/lib:/usr/lib:/usr/lib64;
export LD_LIBRARY_PATH
CLASSPATH=$ORACLE_HOME/jlib:$ORACLE_HOME/rdbms/jlib;
export CLASSPATH
(N.B.: be careful about paths)
Load the New Kernel Parameters.
/sbin/sysctl -pLoad New .bashrc settings
source ~/.bashrcInstallation
sudo chmod -R +x /tmp/database
/tmp/database/runInstaller
It will open the GUI for installation. You can follow them as below
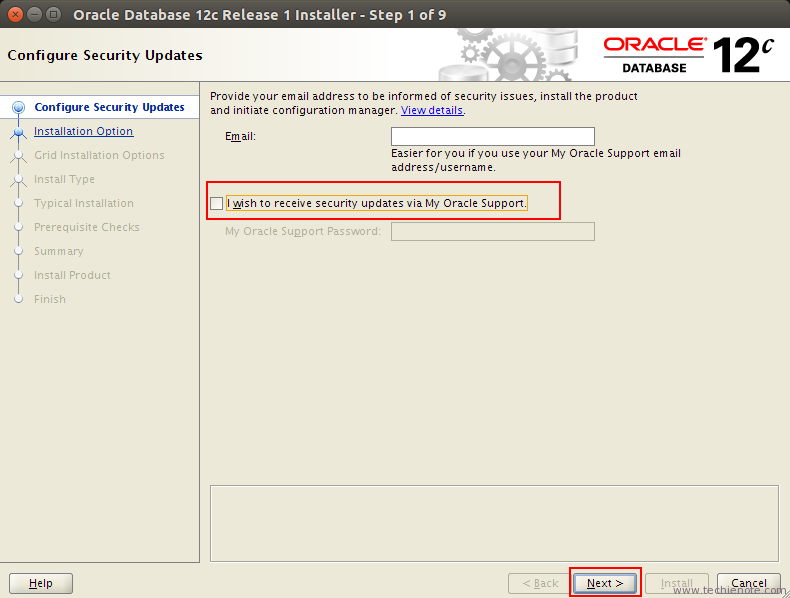
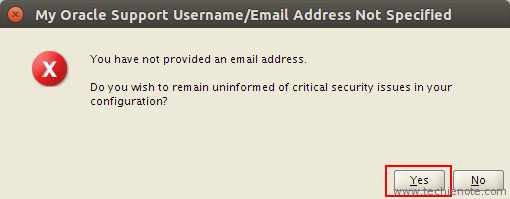

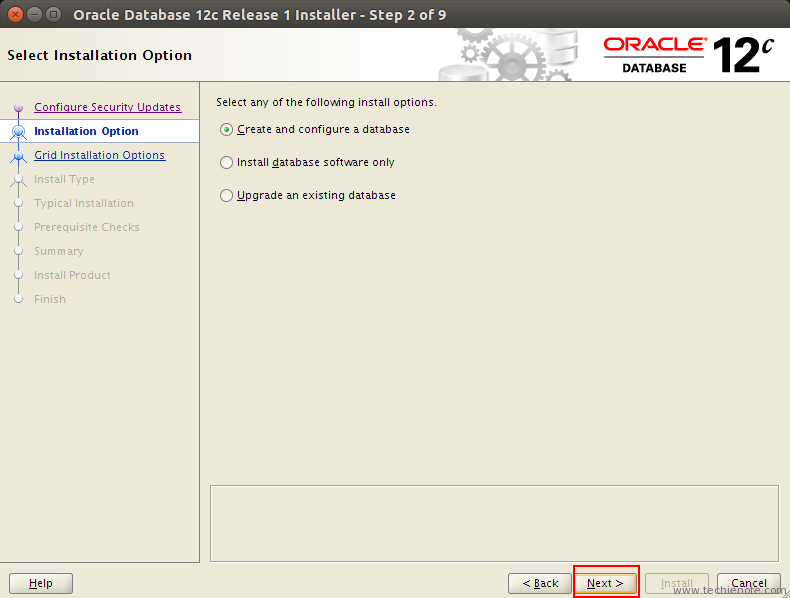
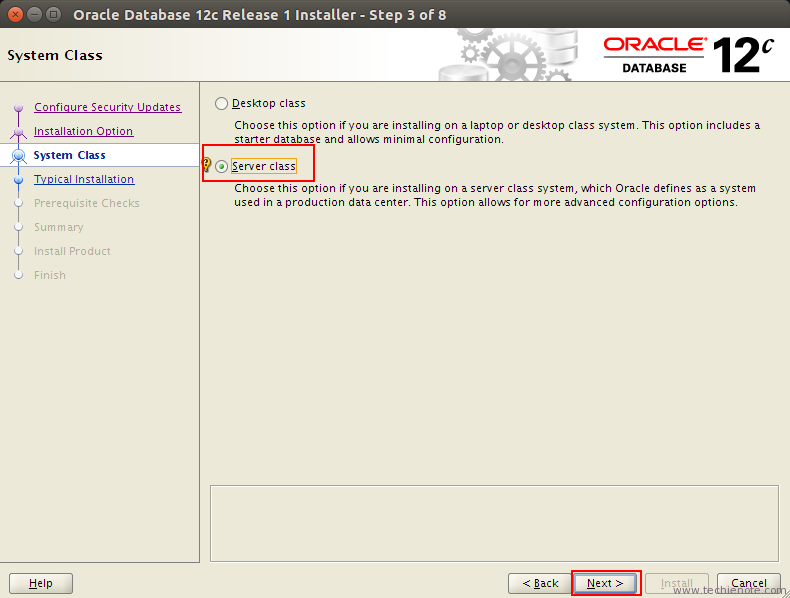
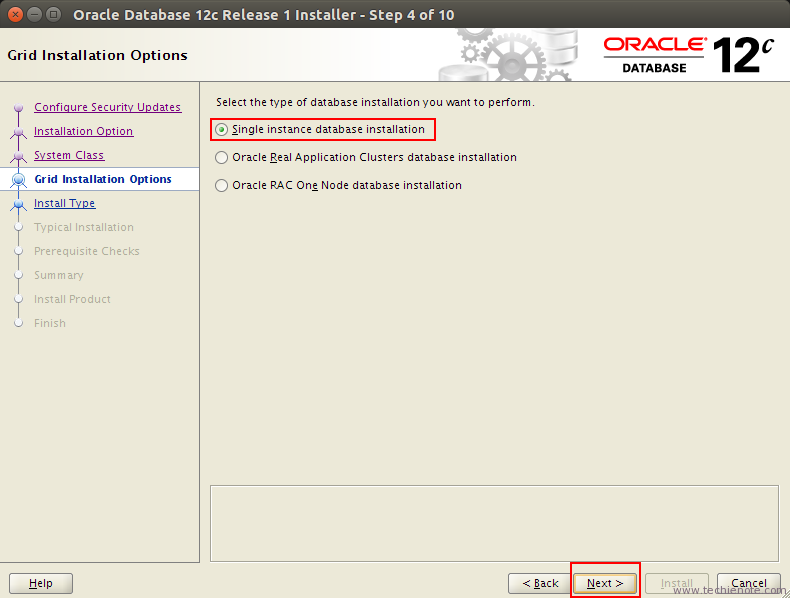
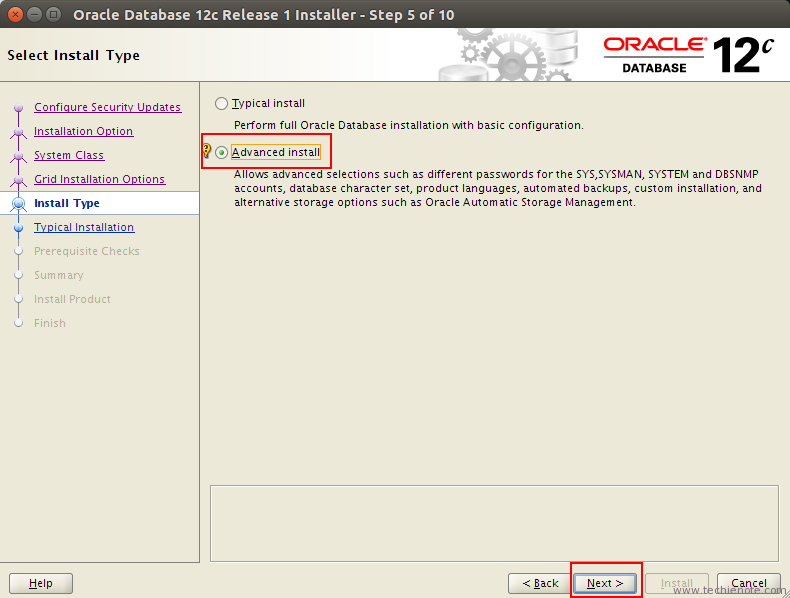
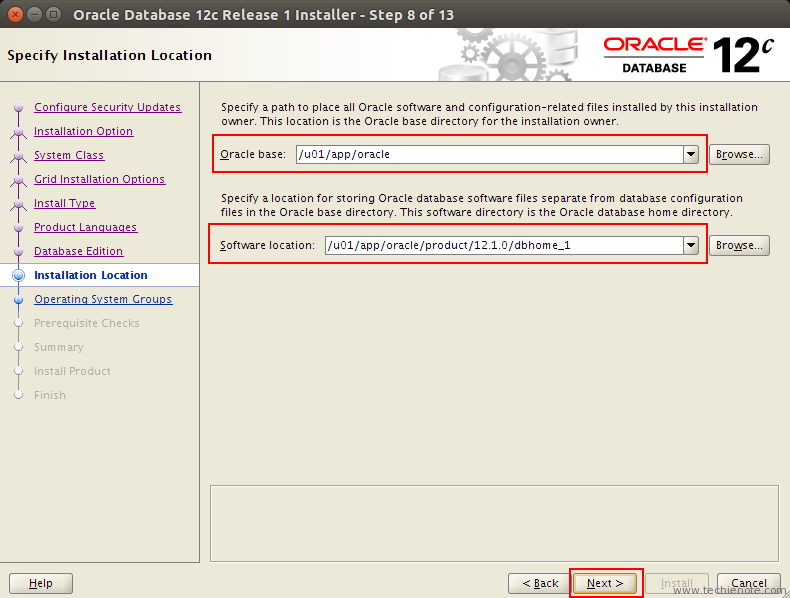
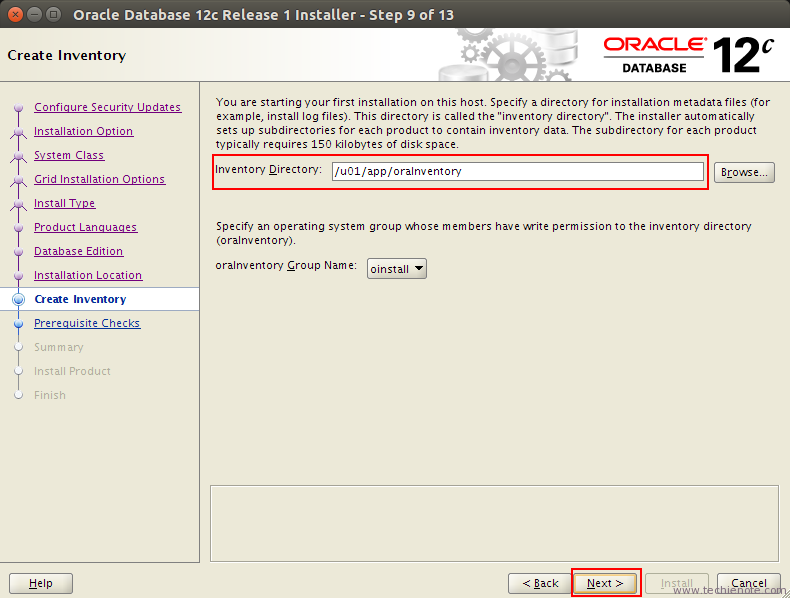
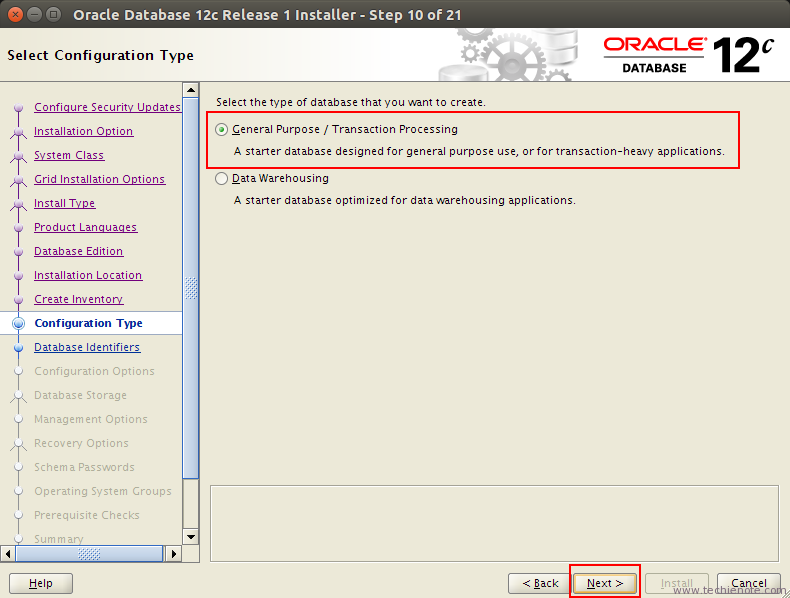
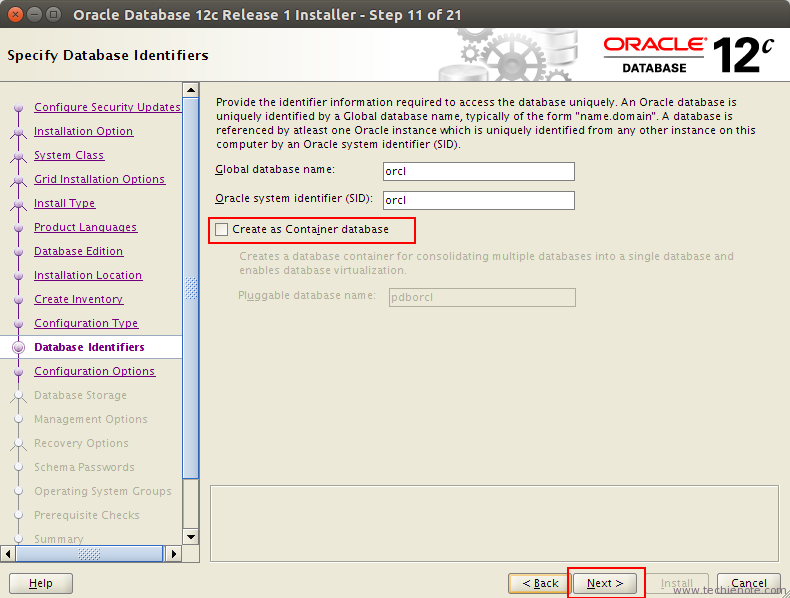
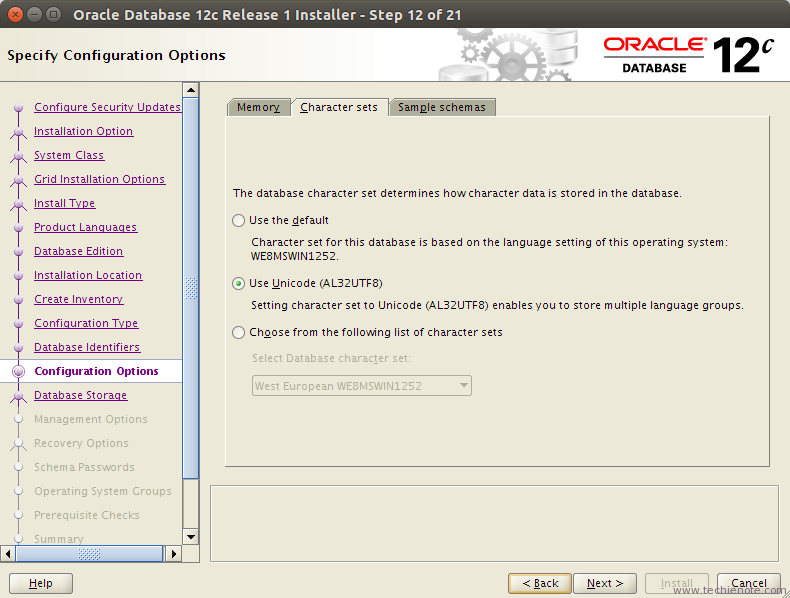
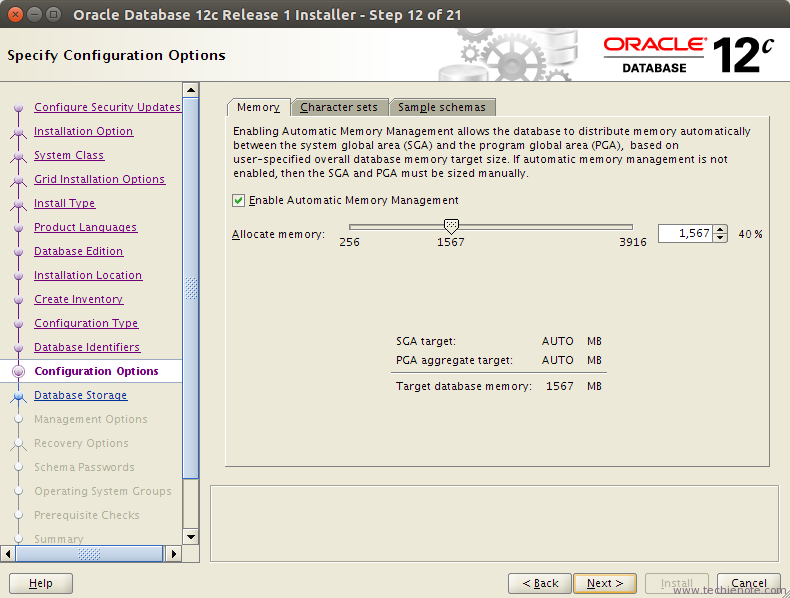

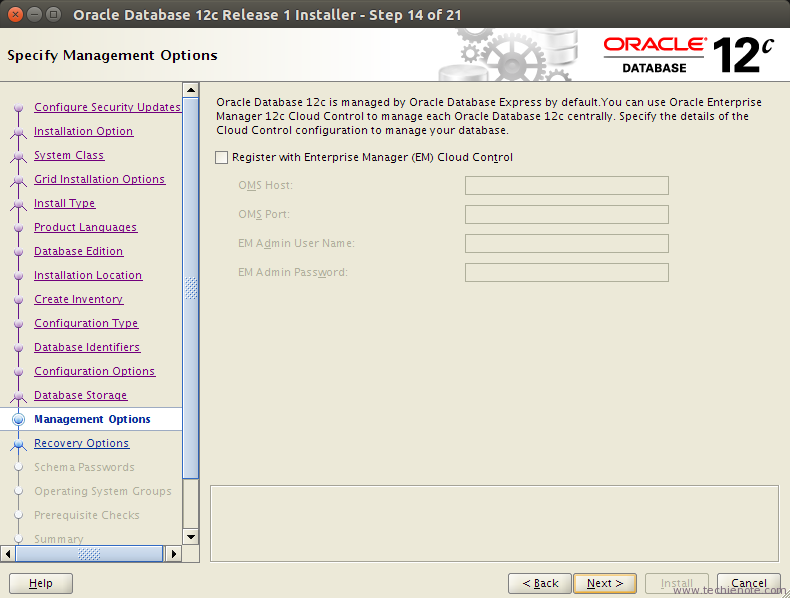
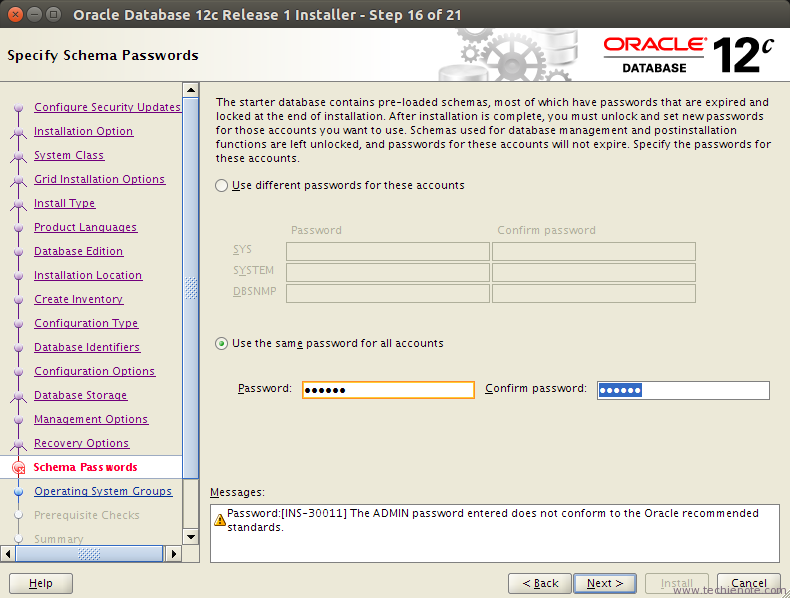

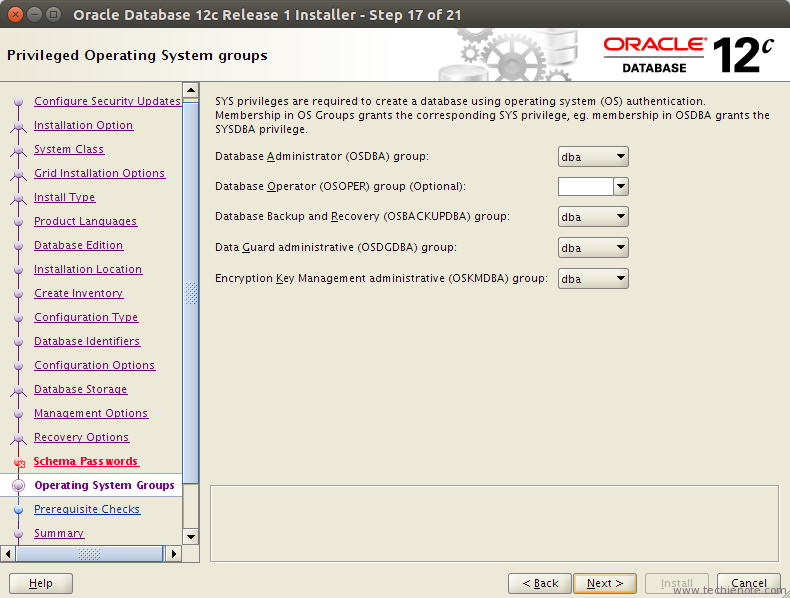
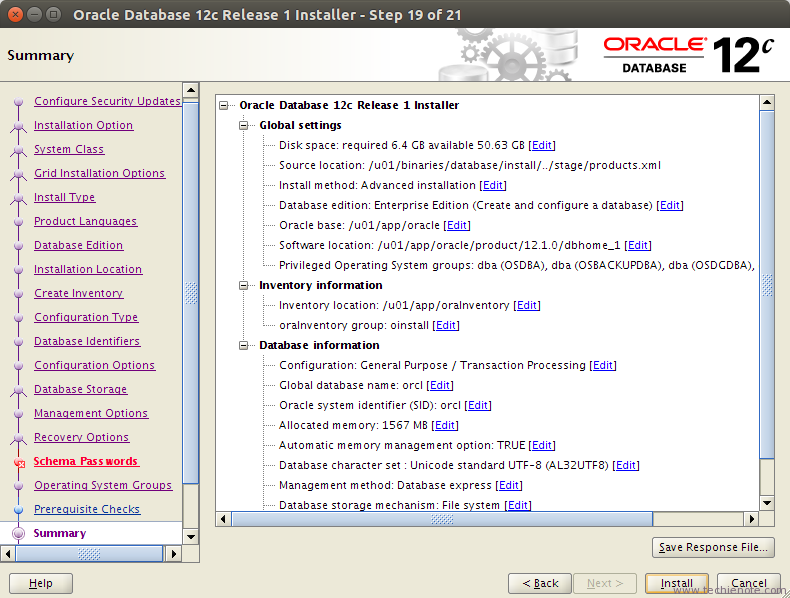
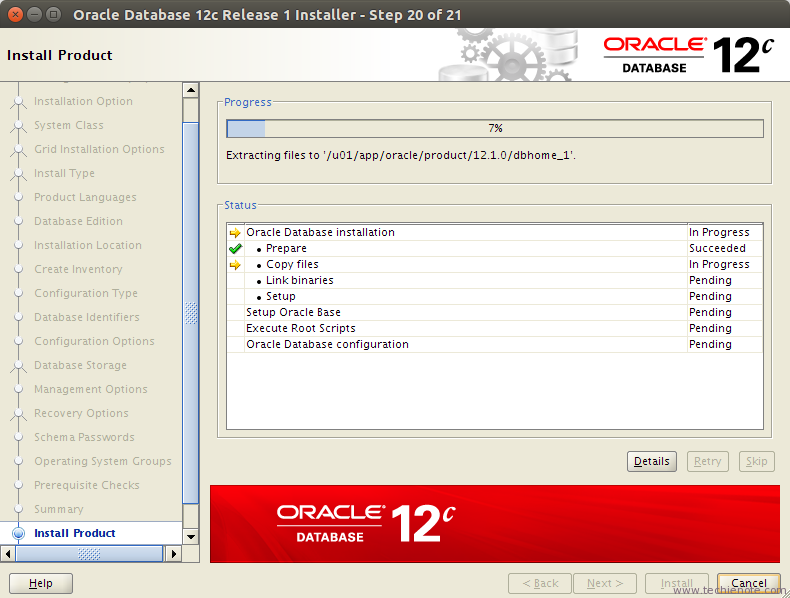
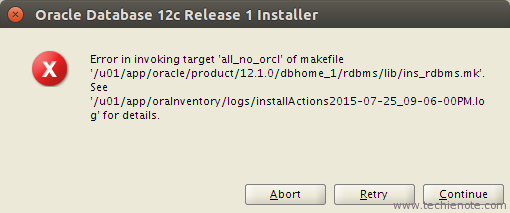
You will see some errors in this step. Don’t worry, just copy the appropriate mk files to the provided locations. You can find the files from here or here. For more details, you can see this video on YouTube. Then this window will appear.
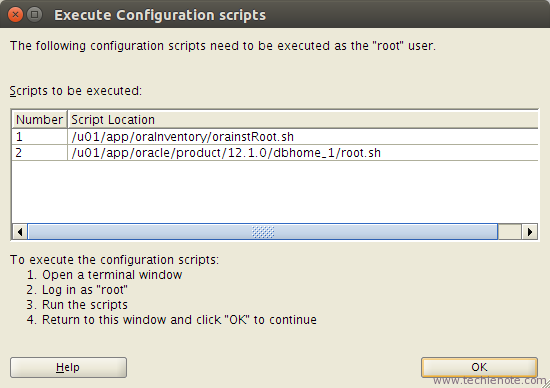
Now as per the instructions run the following commands with root/root equivalent user:
 — /u01/app/oraInventory/orainstRoot.sh
 — /u01/app/oracle/product/12.2.0/dbhome_1/root.sh
You will see something like
Copying dbhome to /usr/local/bin …
Copying oraenv to /usr/local/bin …
Copying coraenv to /usr/local/bin …
Then click Ok on the previous screen
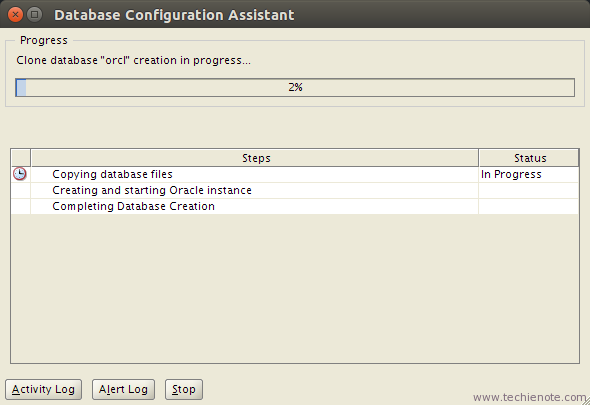
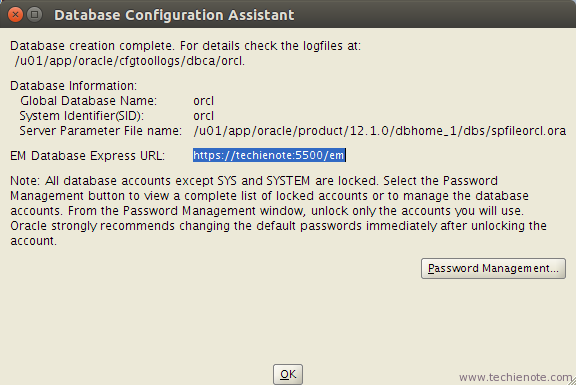
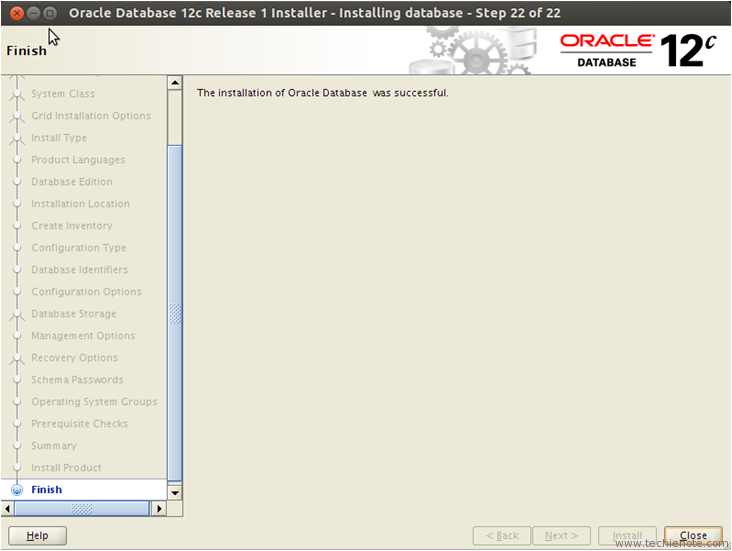
To start listener run following as oracle user
su oracle
$ORACLE_HOME/bin/lsnrctl start
To start the database run following
sqlplus /nolog
SQL> connect sys as sysdba
SQL> STARTUP;
SQL> EXIT;
Start em
https://127.0.0.1:5500/em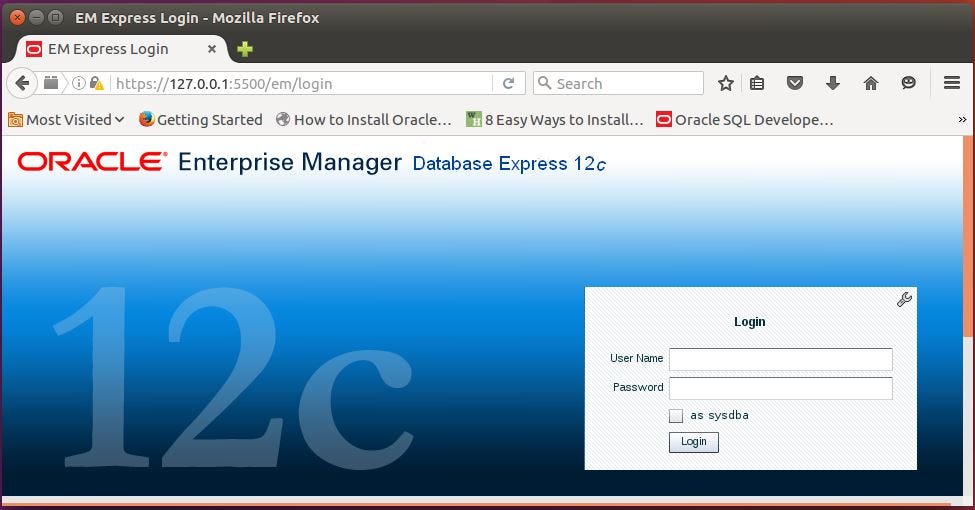
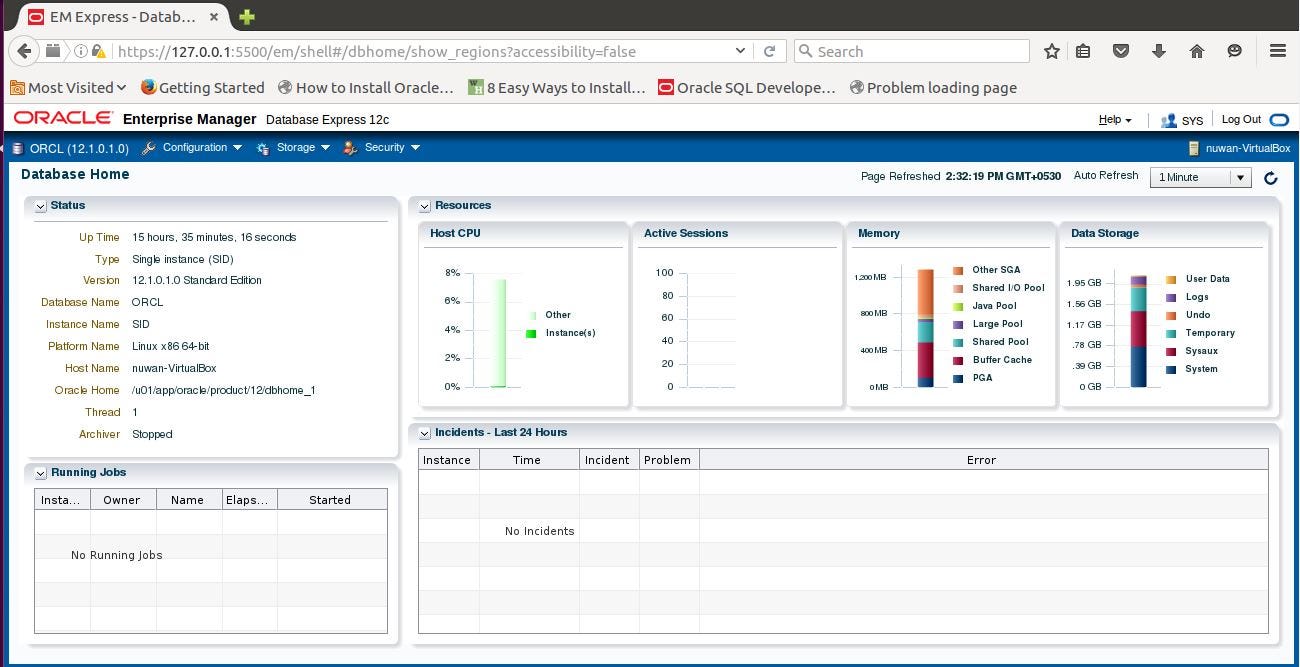
Congratulations, hope you have successfully installed Oracle database 12c on your Ubuntu 16.04 64-bit machine
Sources
- http://nu-one.blogspot.com/2016/07/oracle-database-12c-installation-on.html
- http://codigo61.blogspot.com/2018/01/como-instalar-oracle-12c-en-linux_12.html
- https://www.oracle.com/technetwork/database/enterprise-edition/downloads/index.html
- https://askubuntu.com/questions/185268/permission-denied-etc-apt-sources-list
- https://docs.oracle.com/database/121/ADMQS/GUID-F922EBB9-BA89-4A94-B89F-E3BB4BA14ACD.htm#ADMQS0231
- http://nu-one.blogspot.com/2016/07/dbca-no-protocol-specified.html


Tidak ada komentar:
Posting Komentar