How to Install Snipe-IT (IT Asset Management) on CentOS and Ubuntu
Snipe-IT is a free and open-source, cross-platform, feature-rich IT asset management system built using a PHP framework called Laravel. It is a web-based software, which enables IT, administrators, in medium to large enterprises to track physical assets, software licenses, accessories, and consumables in a single place.
Check out a live, up-to-date version of Snipe-IT Asset Management Tool: https://snipeitapp.com/demo
Snipe-IT Features:
- It is a cross-platform – works on Linux, Windows, and Mac OS X.
- It is mobile-friendly for easy asset updates.
- Easily Integrates with Active Directory and LDAP.
- Slack notification integration for check-in/checkout.
- Supports one-click (or cron) backups and automated backups.
- Supports optional two-factor authentication with Google authenticator.
- Supports the generation of custom reports.
- Supports custom status labels.
- Supports bulk user actions and user role management for different levels of access.
- Supports several languages for easy localization and so much more.
In this article, I will explain how to install an IT asset management system called Snipe-IT using a LAMP (Linux, Apache, MySQL & PHP) stack on CentOS and Debian based systems.
Step 1: Install LAMP Stack
1. First, update the system (meaning update the list of packages that needs to be upgraded and add new packages that have entered in repositories enabled on the system).
2. Once the system has been updated, now you can install LAMP (Linux, Apache, MySQL & PHP) stack with all needed PHP modules as shown.
Install LAMP on Debian/Ubuntu
Install LAMP on CentOS/RHEL
3. Snipe-IT requires PHP greater than 7.x and PHP 5.x has reached the end of life, so to have PHP 7.x, you need to enable the Epel and Remi repository as shown.
4. Next, install PHP 7.x on CentOS 7 with the required modules needed by Snipe-IT.
5. After the LAMP stack installation completes, start the web server for the meantime, and enable it to start on the next system boot with the following command.
6. Next, verify Apache and PHP installation and all its current configurations from a web browser, let’s create a info.php file in the Apache DocumentRoot (/var/www/html) using the following command.
Now open a web browser and navigate to following URLs to verify Apache and PHP configuration.
7. Next, you need to secure and harden your MySQL installation using the following command.
You will be asked you to set a strong root password for your MariaDB and answer Y to all of the other questions asked (self-explanatory).
8. Finally start MySQL server and enable it to start at the next system boot.
Step 2: Create Snipe-IT Database on MySQL
9. Now log in to the MariaDB shell and create a database for Snipe-IT, a database user, and set a suitable password for the user as follows.
Provide the password for the MariaDB root user.
Step 3: Install Composer – PHP Manager
10. Now you need to install Composer – a dependency manager for PHP, with the commands below.
Step 4: Install Snipe-IT Asset Management
11. First, install Git to fetch and clone the latest version of Snipe-IT under Apache web-root directory.
12. Now go into the snipe-it directory and rename the .env.example file to .env.
Step 5: Configure Snipe-IT Asset Management
13. Next, configure the snipe-it environment, here you’ll provide the database connection settings and many more.
First, open the .env file.
Then Find and change the following variables according to instructions given.
Save and close the file.
14. Now you need to set the appropriate permissions on certain directories as follows.
15. Next, install all the dependencies required by PHP using the Composer dependency manager as follows.
16. Now you can generate the “APP_KEY” value with the following command (this will be set automatically in the .env file).
17. Now, you need to create a virtual host file on the webserver for Snipe-IT.
Then add/modify the line below in your Apache config file (use your server IP address here).
Save and close the file.
18. On Debian/Ubuntu, you need to enable virtual host, mod_rewrite, and mcrypt using the following commands.
19. Lastly, restart the Apache webserver to take new changes into effect.
Step 6: Snipe-IT Web Installation
20. Now open your web browser and enter the URL: http://SERVER_IP to view the Snipe-IT web installation interface.
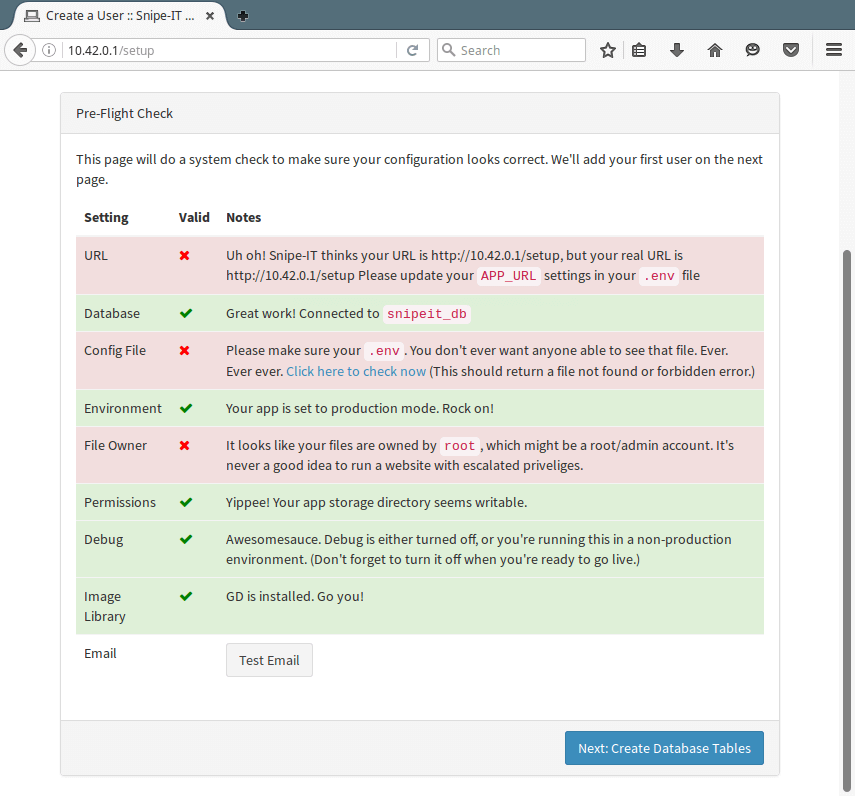
First, you will see the Pre-Flight Check page below, click Next: Create Database Tables.
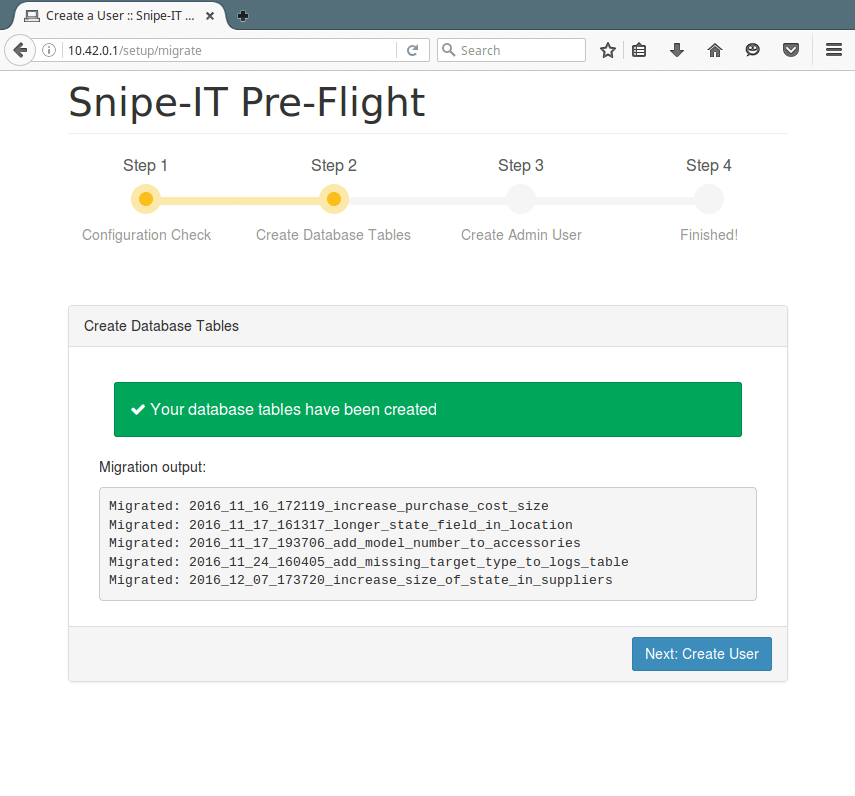
21. You will now see all the tables created, click Next: Create User.
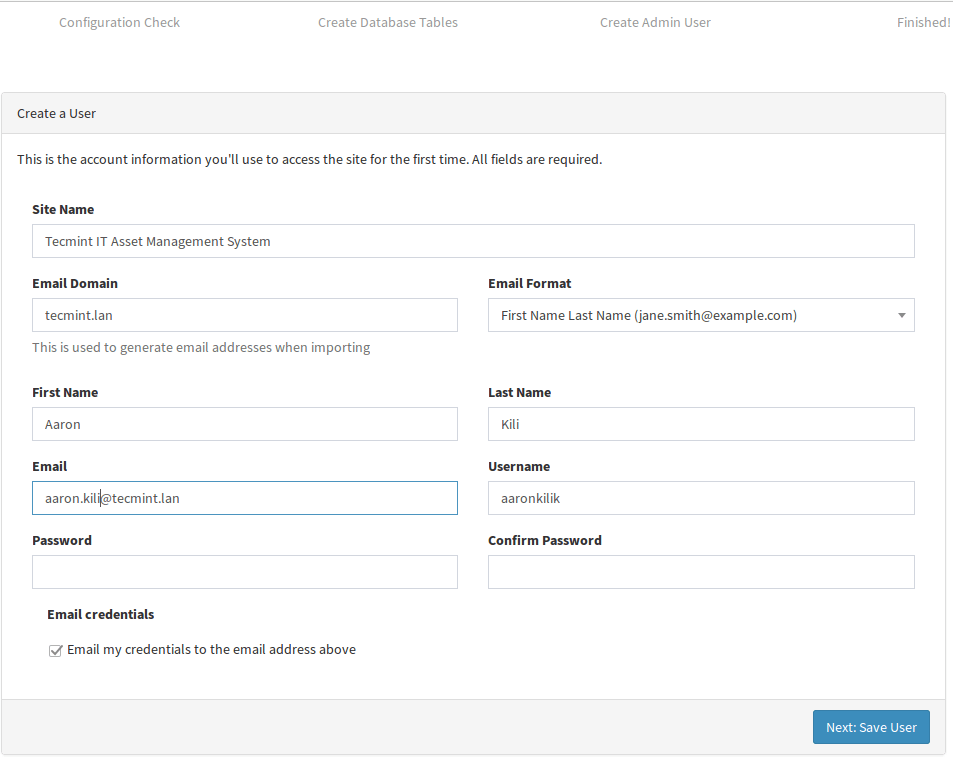
22. Here, provide all the admin user information and click Next: Save User.
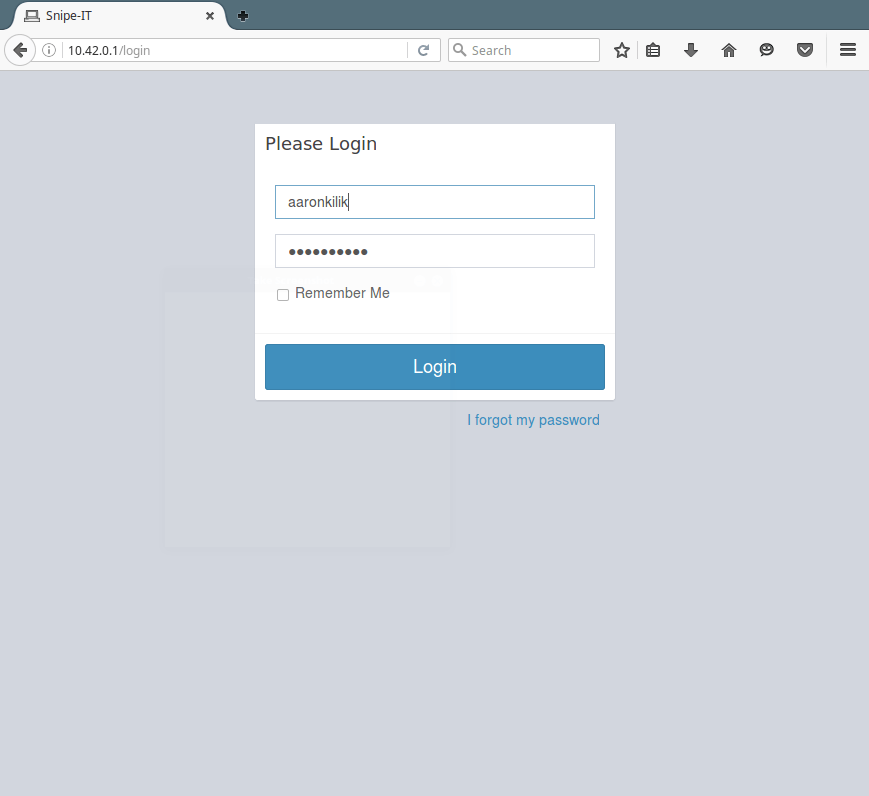
23. Finally, open the login page using the URL http://SERVER_IP/login as shown below and login to view the Snipe-IT dashboard.
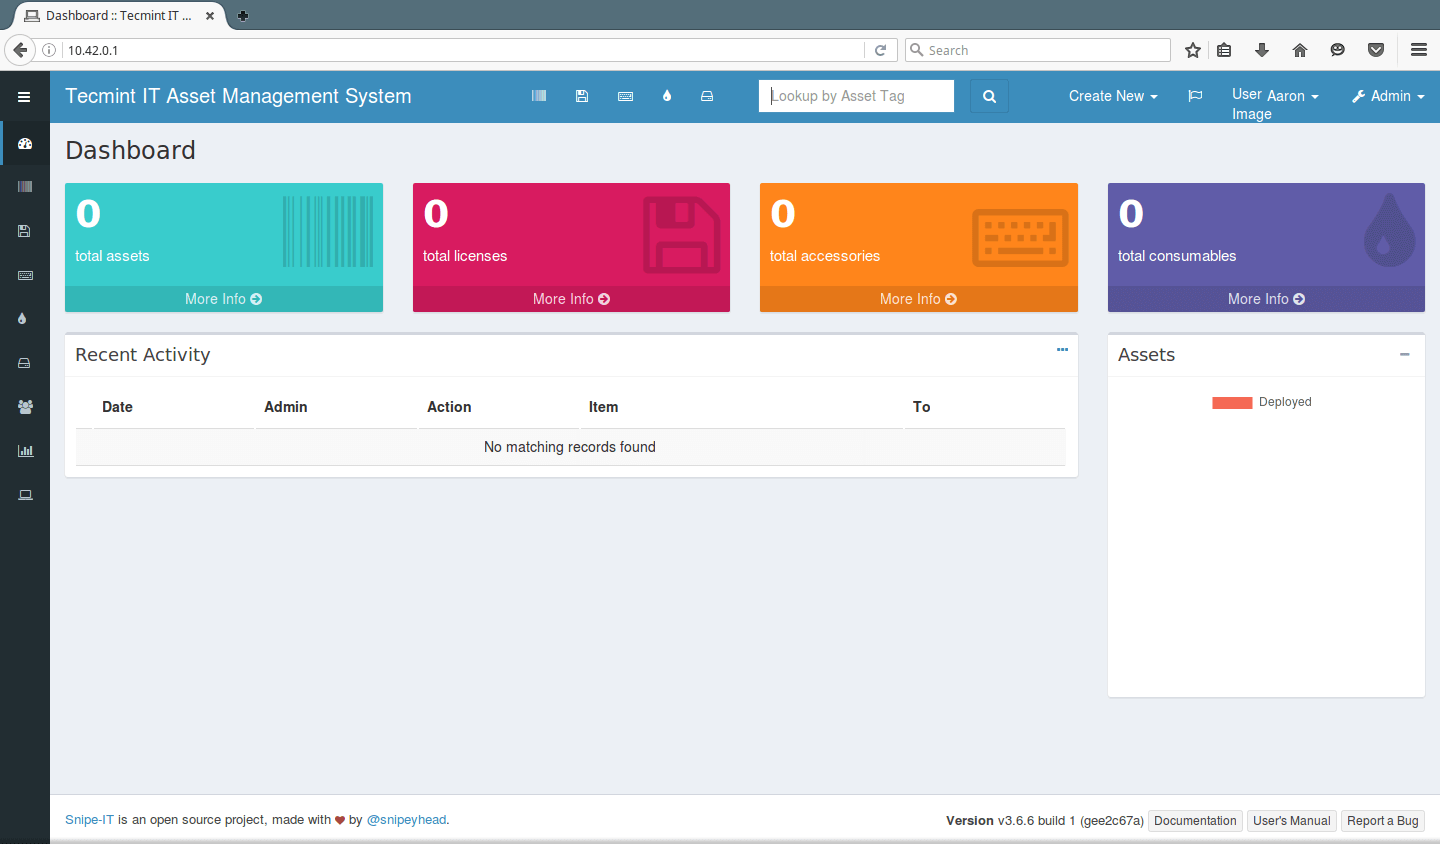
Snipe-IT Homepage: https://snipeitapp.com/
In this article, we discussed how to setup Snipe-IT with LAMP (Linux Apache MySQL PHP) stack on CentOS and Debian based systems. If any issues, do share with us using our comment form below.
Tidak ada komentar:
Posting Komentar