https://www.dbi-services.com/blog/getting-started-with-the-zalando-operator-for-postgresql/I
n the previous posts (Rancher, up and running, on EC2 – 1 – One node, Rancher, up and running, on EC2 – 2 – Three nodes, Rancher, up and running, on EC2 – 3 – Rancher setup, Rancher on SLES 15 as a demo environment, and Deploying a Kubernetes cluster on EC2 with Rancher) it was all about deploying a Kubernetes cluster and getting Rancher up and running. In this post we’ll use one of those systems to deploy a PostgreSQL cluster. I’ll be using my one node Rancher demo environment for this, but you can of course also use a cluster as described in the posts above. Zalando does not only provide Patroni but also provides a PostgreSQL operator for Kubernetes, and we’ll be using this one for this demo.
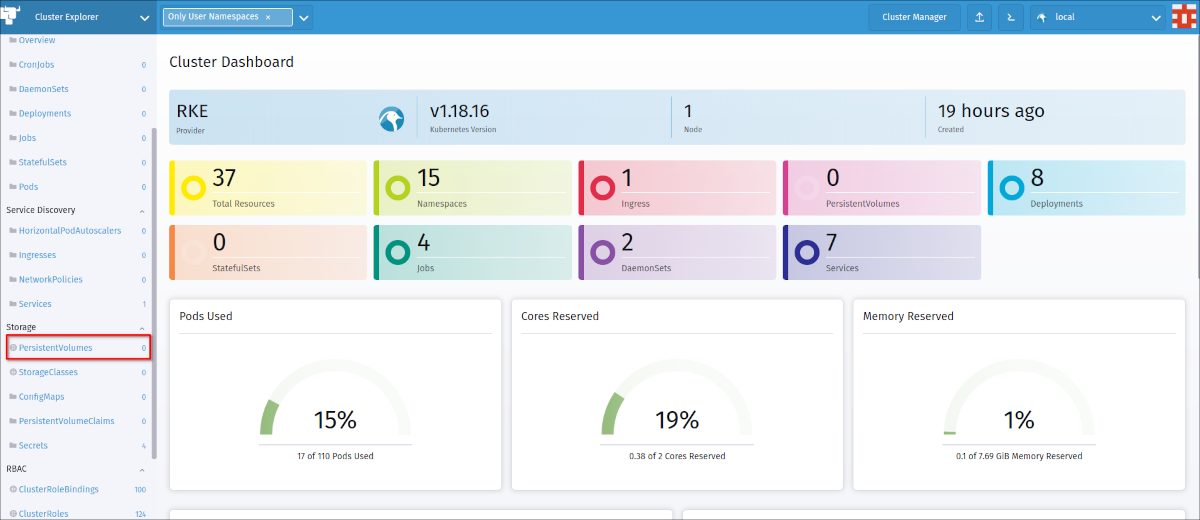
Before we start with the PostgreSQL operator we need to prepare the system. PostgreSQL needs to safely store it’s data somewhere, and for being able to do that we need persistent storage. We could do all the following steps using the command line, but we’ll use the Rancher UI for this. The easiest way to do this is by using the “Cluster Explorer”
On the left side you’ll find the Persistent Volumes:
As there is no storage system attached to the demo environment, we’ll be using the “Host Path” plugin for my persistent volumes, and I’ll be creating two of them: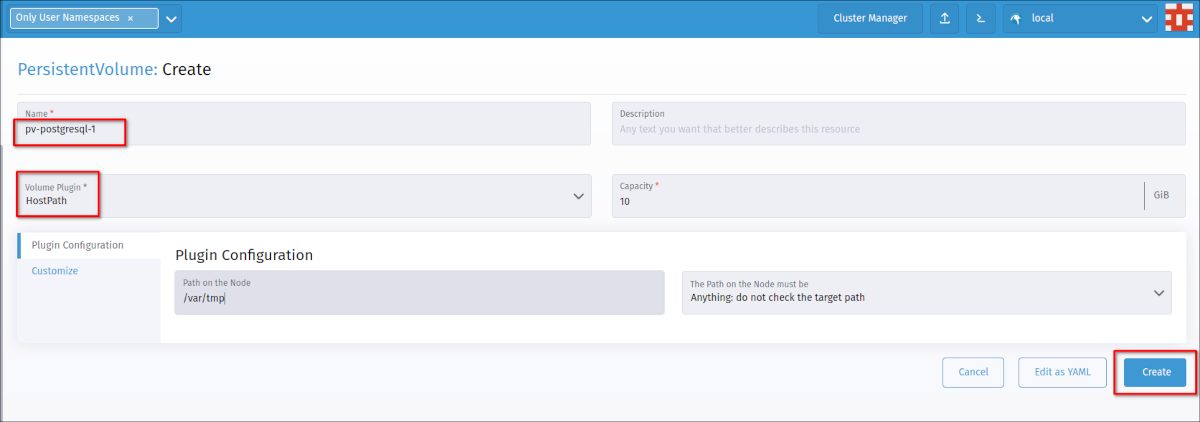


We can also use the command line for checking the persistent volumes we’ve just created:
1 2 3 4 | rancher@debian10ranger:~$ kubectl get pvNAME CAPACITY ACCESS MODES RECLAIM POLICY STATUS CLAIM STORAGECLASS REASON AGEpv-postgresql-1 10Gi RWO Retain Available 8m50spv-postgresql-2 10Gi RWO Retain Available 7m32s |
That’s it for the preparation and we are ready to clone the PostgreSQL operator repository:
1 2 3 4 5 6 7 8 9 | rancher@debian10ranger:~$ git clone https://github.com/zalando/postgres-operator.gitCloning into 'postgres-operator'...remote: Enumerating objects: 273, done.remote: Counting objects: 100% (273/273), done.remote: Compressing objects: 100% (178/178), done.remote: Total 20089 (delta 176), reused 173 (delta 93), pack-reused 19816Receiving objects: 100% (20089/20089), 7.75 MiB | 13.29 MiB/s, done.Resolving deltas: 100% (14256/14256), done.rancher@debian10ranger:~$ cd postgres-operator/ |
The first step is to create the config map (have a look at it to get an idea of all the parameters and values):
1 2 | rancher@debian10ranger:~/postgres-operator$ kubectl create -f manifests/configmap.yaml configmap/postgres-operator created |
This was the way to do it on the command line, the same is possible with the Rancher UI as well: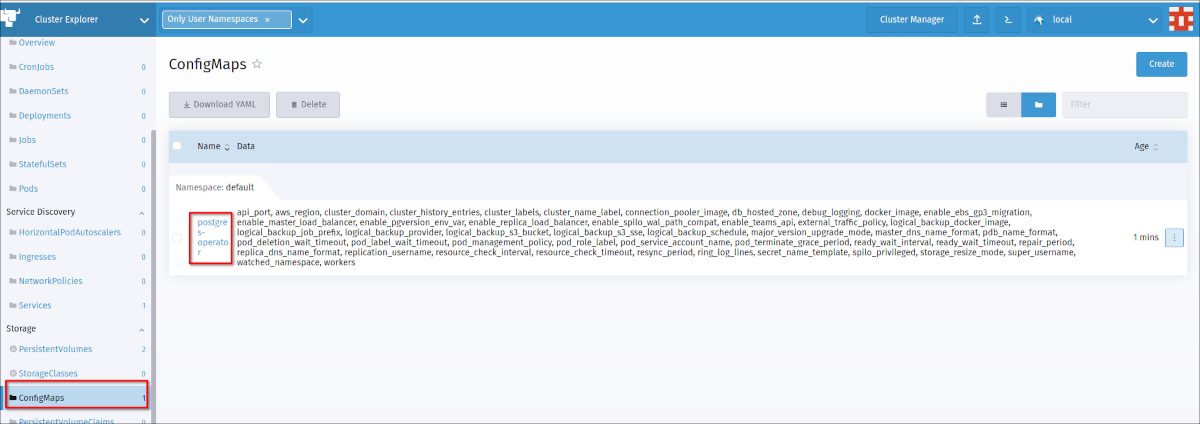
Next is the RBAC (role based access control) stuff (I’ve done that already before and did not do a proper cleanup, that’s why the postgres-operator service account already exists):
1 2 3 4 5 | rancher@debian10ranger:~/postgres-operator$ kubectl create -f manifests/operator-service-account-rbac.yamlclusterrole.rbac.authorization.k8s.io/postgres-operator createdclusterrolebinding.rbac.authorization.k8s.io/postgres-operator createdclusterrole.rbac.authorization.k8s.io/postgres-pod createdError from server (AlreadyExists): error when creating "manifests/operator-service-account-rbac.yaml": serviceaccounts "postgres-operator" already exists |
The PostgreSQL operator itself:
1 2 | rancher@debian10ranger:~/postgres-operator$ kubectl create -f manifests/postgres-operator.yamldeployment.apps/postgres-operator created |
… and finally the service:
1 2 | rancher@debian10ranger:~/postgres-operator$ kubectl create -f manifests/api-service.yamlservice/postgres-operator created |
A few seconds later the operator pod should be running:
1 2 3 4 | rancher@debian10ranger:~/postgres-operator$ cd ..rancher@debian10ranger:~$ kubectl get pod -l name=postgres-operatorNAME READY STATUS RESTARTS AGEpostgres-operator-6775b6dcf9-cpp86 1/1 Running 0 2m42s |
For getting the graphical user interface for the PostgreSQL operator install the UI components:
1 2 3 4 5 6 7 8 | rancher@debian10ranger:~$ kubectl apply -f postgres-operator/ui/manifests/deployment.apps/postgres-operator-ui createdingress.networking.k8s.io/postgres-operator-ui createdservice/postgres-operator-ui createdserviceaccount/postgres-operator-ui unchangedclusterrole.rbac.authorization.k8s.io/postgres-operator-ui createdclusterrolebinding.rbac.authorization.k8s.io/postgres-operator-ui createderror: unable to recognize "postgres-operator/ui/manifests/kustomization.yaml": no matches for kind "Kustomization" in version "kustomize.config.k8s.io/v1beta1" |
Same procedure as before, check if the pod is running:
1 2 3 | rancher@debian10ranger:~$ kubectl get pod -l name=postgres-operator-uiNAME READY STATUS RESTARTS AGEpostgres-operator-ui-5478dcfd7b-r2rzr 1/1 Running 0 74s |
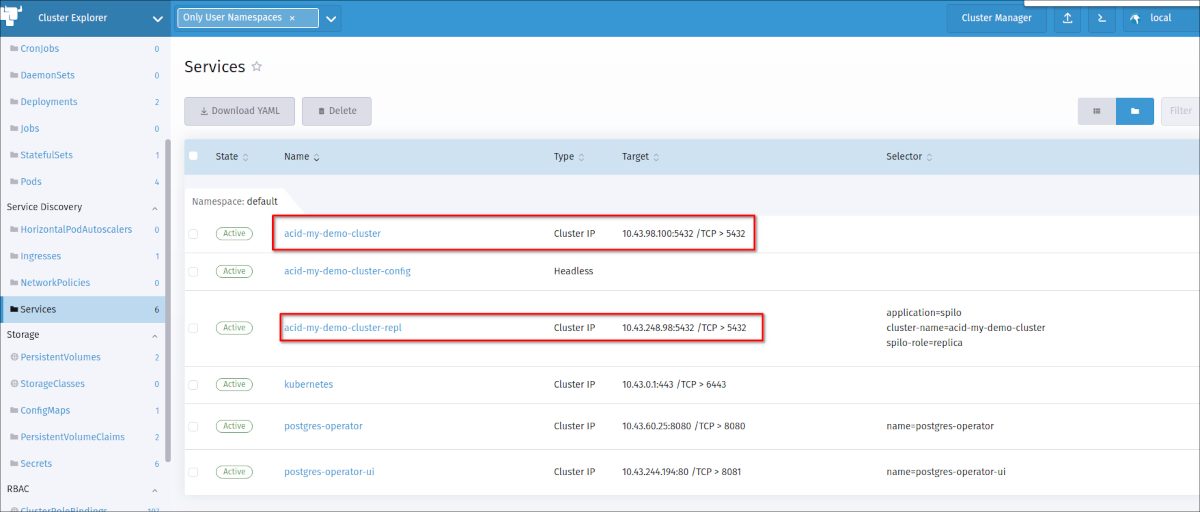
Check the Rancher UI for the service that got created (or use the command line to get that information):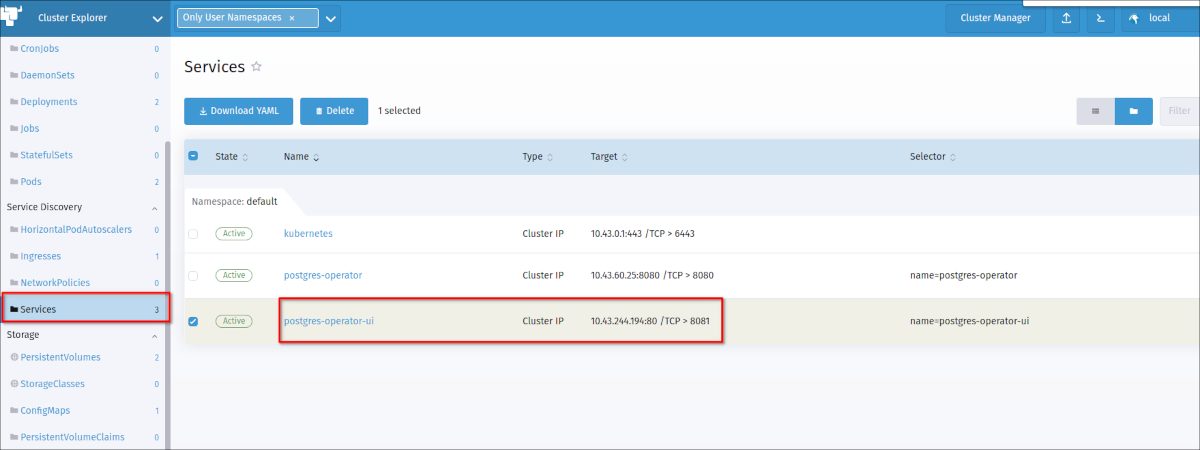
… and access the Operator user interface with your browser: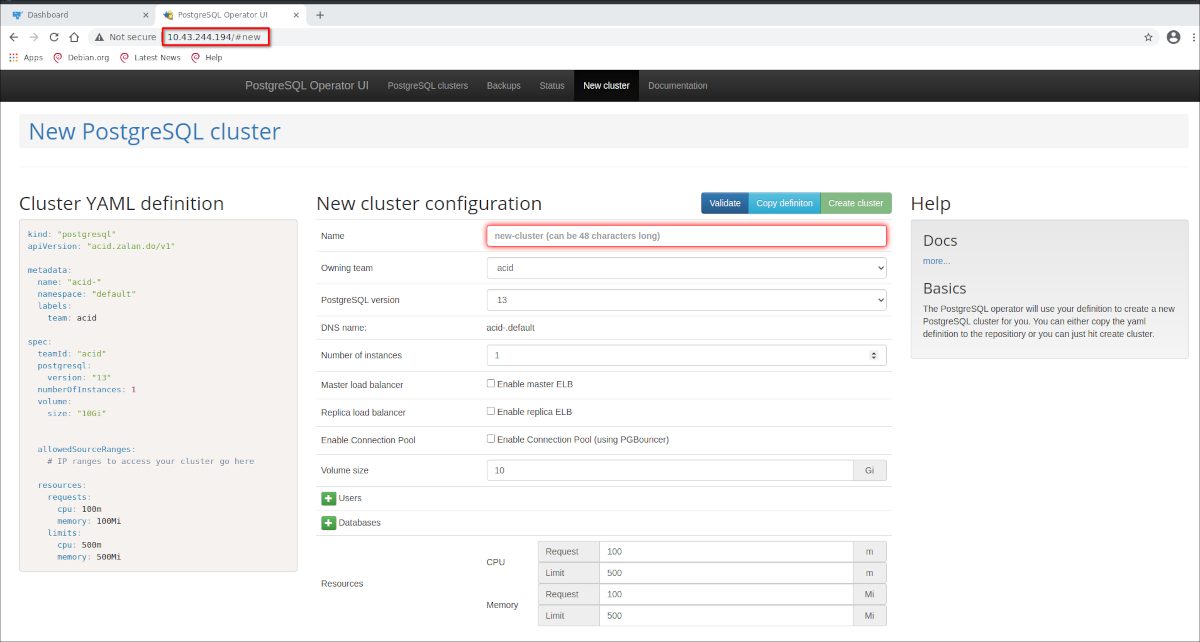
Using this interface, a two node PostgreSQL cluster can easily be created: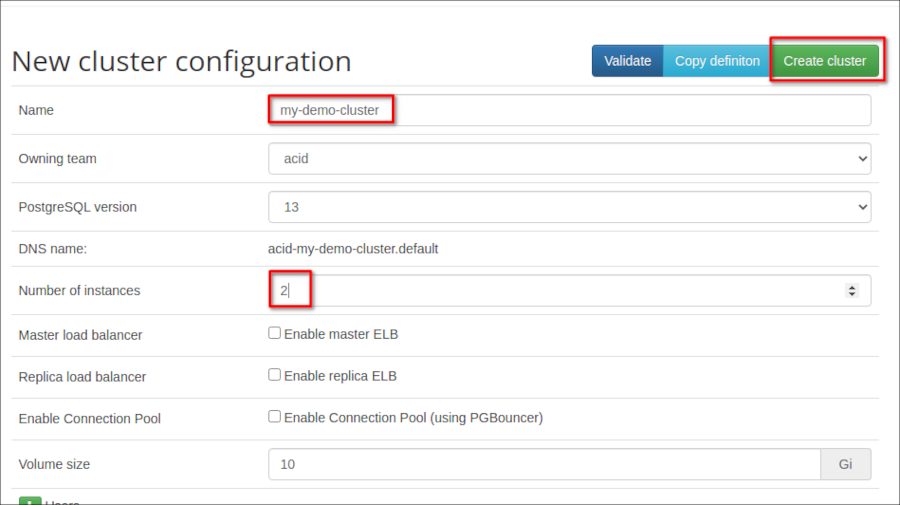
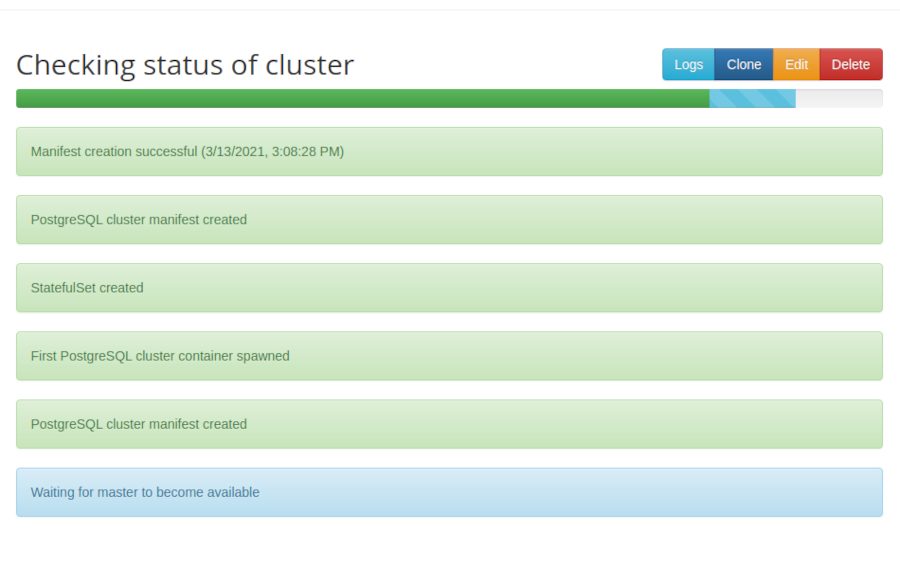
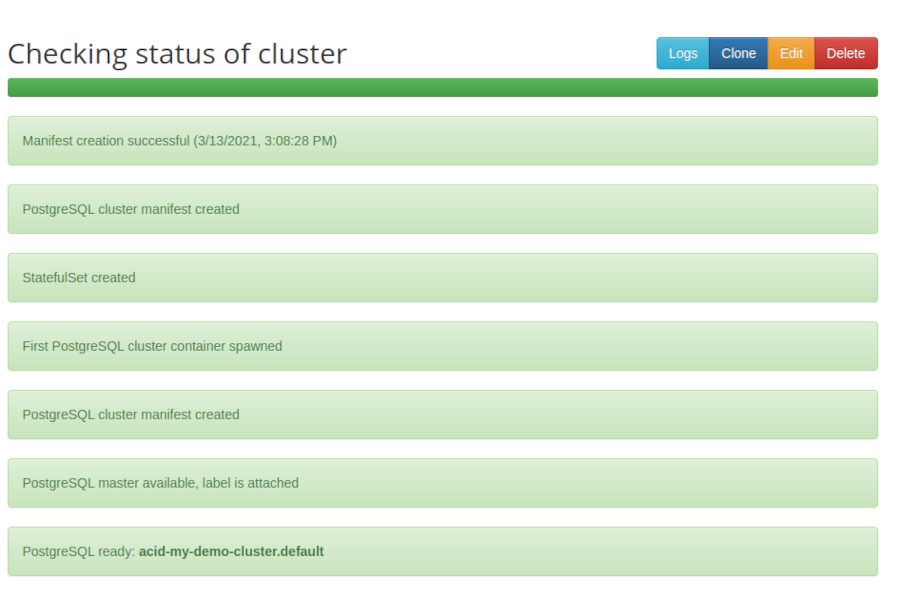
1 2 3 4 5 6 | rancher@debian10ranger:~$ kubectl get pods NAME READY STATUS RESTARTS AGEacid-my-demo-cluster-0 1/1 Running 0 4m58sacid-my-demo-cluster-1 1/1 Running 0 4m54spostgres-operator-6775b6dcf9-cpp86 1/1 Running 0 24mpostgres-operator-ui-5478dcfd7b-r2rzr 1/1 Running 0 19m |
Quite easy to get that up and running in a demo environment.

Tidak ada komentar:
Posting Komentar