K8S Backup Solution: Velero Implementation Guide(En)
After exploring different Kubernetes solutions, I forgot to share practical backup operations. While we discussed backing up and restoring directly from ETCD, it’s quite complex and more of a last resort :)

Velero is my go-to solution for individual project backups, and I often integrate it with Minio for service-level backups. This article will cover Velero’s features, deployment, and practical backup and restore operations, providing you with a basic understanding.
This article will cover the following topics:
- Velero features overview
- Backup process
- Deploying Velero
- Backup and restore
- Conclusion
1. Velero features overview
Velero offers backup and migration kubernetes resources and persistent volumes. It can run not only on-premises but also in public cloud environments.
Key Features:
- Backup and restore capabilities
- Transfer of cluster resources to other clusters
- Duplication of production environments to other environments
Components:
- Server (deployed on the cluster)
- CLI tools (used locally)
※ Operation Method
Velero operates by utilizing Custom Resource Definitions (CRDs) to manage backup and restore operations.It can selectively backup and restore objects within a Kubernetes cluster based on specified criteria such as object type, namespace, or tags. The backups are stored in object storage for easy retrieval and restoration when needed.
Unlike etcd backup, which grabs all cluster resources at once for major cluster-wide issues.
※ Type
- On-demand : Uploads compressed files of backed-up K8S objects to object storage.
- Scheduled : Executes regular backups using Cron scheduling.
2. Process
(1) Backup process:
Step 1: Velero client calls the api-server to create a CRD object named “Backup.”
Step 2: BackupController detects the creation of the new CRD object and performs validation.
Step 3: BackupController initiates the backup process by querying the API server to collect resource data.
Step 4: BackupController calls the object storage service, such as S3, and uploads the data.
By default, using `velero backup create` creates snapshots for PVs. Adjustments can be made through parameters, including the option to disable snapshot functionality.

(2) Expiration of Backups
After creating a backup, you can specify the retention period by adding `ttl`. If Velero detects that existing backups have expired, the following data will be deleted:
- Backup resources
- Backup data from cloud object storage
- PV snapshots
- All associated restorations
You can specify the granularity of the TTL in hours/minutes/seconds, with a default value of 30 days. If a backup fails, the CRD will be labeled with `velero.io/gc-failure=<reason>`. This label can then be used to filter and select failed backups for deletion.
Common reasons include:
- BSLNotFound: Storage location for the backup not found
- BSLCannotGet: Unable to retrieve response from API server for storage location
- BSLReadOnly: Storage location is read-only
(3) Object Storage Sync
According to the official doc:
Velero treats object storage as the source of truth. It continuously checks to see that the correct backup resources are always present.
If there is a properly formatted backup file in the storage bucket, but no corresponding backup resource in the Kubernetes API, Velero synchronizes the information from object storage to Kubernetes.
This allows restore functionality to work in a cluster migration scenario, where the original backup objects do not exist in the new cluster.
(4) Storage Setup for Backups and Volume Snapshots
Velero utilizes 2 CRD resources to configure where backups and associated PV snapshots are stored:
- BackupStorageLocation: Stores all Velero data along with specific characters for other purposes.
- VolumeSnapshotLocation: Provider-defined description for snapshots.
This setup allows for various scenarios like creating multiple PV snapshots in a single backup and storing snapshots in different locations based on regions or storage types.
3. Deploy Velero
Minio deployment details can be found in another article by the author. This one focuses on Velero deployment.
#---------------------------------------
# S3-1. Create bucket (Minio)
#---------------------------------------
Step1. Login Minio's UI
Step2. Create bucket for velero
#---------------------------------------
# S3-2. Download & install velero client
#---------------------------------------
[master]# mkdir -p /data/backup/velero; cd velero/
[master]# wget https://github.com/vmware-tanzu/velero/releases/download/v1.13.1/velero-v1.13.1-linux-amd64.tar.gz
[master]# tar zxvf velero-v1.13.1-linux-arm64.tar.gz
[master]# mv velero /usr/local/bin/
[master]# velero version
#---------------------------------------
# S3-3. Configure minio auth
#---------------------------------------
[master]# vim velero-auth.txt
[default]
aws_access_key_id = minioadmin
aws_secret_access_key = minioadmin123
#---------------------------------------
# S3-4. Deploy velero server
#---------------------------------------
[master]# kubectl create ns velero-system
[master]# velero --kubeconfig /etc/kubernetes/admin.conf \
install \
--provider aws \
--plugins velero/velero-plugin-for-aws:v1.9.1 \
--bucket velero \
--secret-file ./velero-auth.txt \
--use-volume-snapshots=false \
--namespace velero-system \
--backup-location-config region=minio,s3ForcePathStyle="true",s3Url=http://minio.test.example.poc:9000
#---------------------------------------
# S3-5. Verify
#---------------------------------------
[master]# kubectl get all -n velero-system
[master]# kubectl get pod -A

#---------------------------------------
# S3-6. uninstall (option)
#---------------------------------------
[master]# velero --kubeconfig /etc/kubernetes/admin.conf uninstall --namespace velero-system
4. Backup and restore
#---------------------------------------
# S4-1. Create test backup
#---------------------------------------
[master]# DATE=`date +%Y%m%d%H%M%S`
[master]# velero backup create test-backup-${DATE} \
--include-cluster-resources=true \
--include-namespaces kube-system \
--kubeconfig=/etc/kubernetes/admin.conf \
--namespace velero-system

[master]# velero backup get -n velero-system
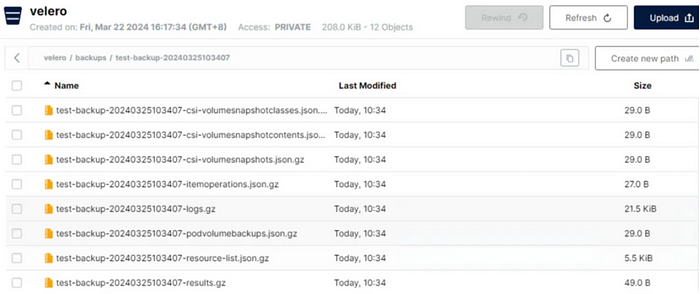
Next: Verify result in Minio dashboard


※Restore
#---------------------------------------
# S4-2. Delete Namespace
#---------------------------------------
[master]# kubectl delete ns mysql-std
[master]# kubectl get ns
#---------------------------------------
# S4-3. Restore
#---------------------------------------
[master]# velete backup get -n velero-system
[master]# velero restore create --from-backup mysql-std-backup-20240325152538 --namespace velero-system
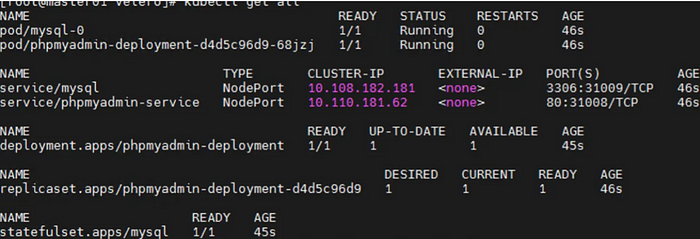
[master]# kubectl get all -n mysql-std
5. Conclusion
This article covered an alternative backup method focusing on application-level backup, alongside the traditional ETCD backup. It’s crucial for maintaining a healthy environment. While many enterprise-grade products offer similar functionalities, they often extend further to include additional data protection features. For instance, I’ve used the Proworx solution, which not only provides backup functionalities mentioned in this article but also features like Software-defined storage, DR and more robust capabilities.
That’s all for this article. Catch you in the next one!
※ References:
Tidak ada komentar:
Posting Komentar