https://callmedanbo.medium.com/installing-ibm-aix-on-x86-systems-using-qemu-3462b1da1544
Menginstal IBM AIX pada Sistem x86 Menggunakan QEMU
CATATAN PENTING
- Pengaturan ini TIDAK didukung oleh IBM.
- Ditujukan untuk pembelajaran, laboratorium, dan pengujian DevOps.
- Harapkan proses booting yang lambat dan beberapa layanan yang gagal.
- AIX 7.1 / 7.2 bekerja paling baik
- Bersabarlah
PERSYARATAN HOST
- Ubuntu 20.04 / 22.04 / 24.04 (x86_64)
- RAM minimal 8 GB (disarankan 16 GB)
- Ruang disk kosong 40 GB
- Akses root atau sudo
LANGKAH 1: UNDUH MEDIA INSTALASI AIX
Unduh dari Dukungan Perangkat Lunak Berjudul IBM atau Gunakan Ini: https://archive.org/details/aix_7200-04-02-2027_072020
- IBM AIX 7.2 TL04 SP02
- Nama file: aix_7200–04–02–2027_1of2_072020.iso (Hanya DVD 1)
Letakkan ISO di sini:/root/aix
LANGKAH 2: INSTAL QEMU (BANGUN DARI SUMBER)
sudo apt update -y
sudo apt install -y git build-essential libglib2.0 - dev libpixman -1 -dev zlib1g-dev libfdt-dev libaio-dev python3 python3-pip ninja-build pkg- config
 sudo apt install -y libslirp-dev libcap-ng-dev libattr1-dev libusb -1.0-0 - dev
LANGKAH 3: MEMBANGUN QEMU
cd ~
git clone https://gitlab.com/qemu-project/qemu.git
cd qemu
git checkout v10.2.0
mkdir build
cd build
../configure --target-list=ppc64-softmmu --enable-slirp --disable-werror
make -j$( nproc )
sudo make install
Verifikasi instalasi:
qemu - sistem - ppc64 --versiContoh output:
root@ubtuntu-server:~ /qemu/ build # qemu-system-ppc64 --version
 Emulator QEMU versi 10.2 . 50 (v1 0 . 2.0 - 361 -gb254e48624)
Hak Cipta (c) 2003 - 2025 Fabrice Bellard dan pengembang Proyek QEMU
LANGKAH 4: BUAT CITRA DISK AIX
mkdir -p /root/aix
cd /root/aix
Untuk hasil yang lebih baik: gunakan minimal 40G, idealnya 60G.
Dalam demo ini, kami menggunakan 20G:
qemu- img create -f qcow2 hdisk0 .qcow2 20 GLANGKAH 5: INSTAL AIX (BOOT DARI DVD)
cd /root/aix
mv aix_7200-04-02-2027_1of2_072020.iso 720402.iso
Penginstal boot:
qemu-system-ppc64 -cpu POWER8 -machine pseries -m 2048 -nographic -serial mon:stdio -drive file=hdisk0.qcow2, if =none, id =drive-virtio-disk0 -device virtio-scsi-pci, id =scsi -device scsi-hd,drive=drive-virtio-disk0 -cdrom 720402.iso -prom-env "boot-command=boot cdrom:"Parameter yang digunakan:
-cpu: tipe prosesor, di sini POWER8-machine: tipe mesin, di sini seri p-m: ukuran memori, di sini 2GB-serial: mengalihkan output serial-drive: berkas disk-device: virtio-scsi-pci (mungkin membuat adaptor eth virtual)-device scsi-hd: membuat perangkat hdisk-cdrom: DVD AIX-prom-env: mengatur variabel NVRAM untuk PPC/SPARC, boot dari cdrom
Jalur menu:
[ 1 ] Gunakan terminal sebagai konsol sistem
[ 1 ] Pilih Bahasa Inggris
[ 1 ] Opsi instalasi default
[ 1 ] Lanjutkan Instalasi Sistem Operasi Dasar- Disk target:
hdisk0 - Waktu pemasangan: 1,5–2 jam
Instalasi mungkin macet setelah selesai. Tekan
CTRL+Cuntuk menghentikan QEMU.
LANGKAH 6: MEMPERBAIKI MASALAH BOOT HANG PADA FSCK64
Mode pemeliharaan boot:
cd /root/aix
qemu-system-ppc64 -cpu POWER8 -machine pseries -m 2048 -nographic -serial mon:stdio -drive file=hdisk0.qcow2, if =none, id =drive-virtio-disk0 -device virtio-scsi-pci, id =scsi -device scsi-hd,drive=drive-virtio-disk0 -cdrom 720402.iso -prom-env "boot-command=boot cdrom:"
Jalur menu:
[ 1 ] Gunakan terminal sebagai konsol sistem
[ 1 ] Pilih Bahasa Inggris
[ 3 ] Mulai Mode Pemeliharaan
[ 1 ] Akses Grup Volume Root
[ 0 ] Lanjutkan
[ 1 ] Pilih hdisk0
[ 1 ] Akses VG dan mulai shell
Patch fsck64:
cd /sbin/helpers/jfs2
rm fsck64

cat > fsck64 << 'EOF'
#!/bin/ksh
exit 0
EOF

chmod 755 fsck64
cat fsck64
Menyelesaikan:
sinkronisasi
sinkronisasi
 berhenti
…Penghentian selesai…
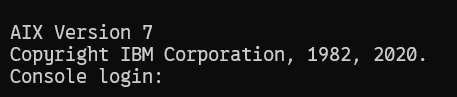
LANGKAH 7: BOOT PERTAMA DARI DISK
qemu-system-ppc64 -cpu POWER8 -machine pseries -m 2048 -nographic -serial mon:stdio -drive file=hdisk0.qcow2, if =none, id =hd0 -device virtio-scsi-pci, id =scsi -device scsi-hd,drive=hd0 -prom-env "boot-command=boot disk:"Proses booting ini akan memakan waktu lebih lama (sekitar 5-10 menit) karena beberapa daemon akan gagal dan akan macet di bagian NFS hingga waktu habis, tetapi kita akan mendapatkan prompt.
Contoh cuplikan log:
Menyimpan Data Kustomisasi Dasar ke disk boot
Memulai daemon sinkronisasi
Memulai daemon kesalahan
 Inisialisasi sistem selesai.
...
Layanan NFS selesai. Pembangunan
ulang file Scriptinfo selesai
Pilih “vt100” untuk terminal.

Setujui perjanjian lisensi: Tekan F4 → YA
Dapatkan cerita-cerita Danang Priabada di kotak masuk Anda.
Gabung Medium secara gratis untuk mendapatkan pembaruan dari penulis ini.
Sebelum keluar, atur kata sandi pengguna root.
Tekan Esc + 0 hingga keluar dari SMIT
LANGKAH 8: NONAKTIFKAN LAYANAN YANG BERMASALAH
Di dalam AIX:
Masuk sebagai root
rmitab rcnfs
rmitab qdaemon
rmitab piobe
rmitab writesrv
rmitab naudio
rmitab aso
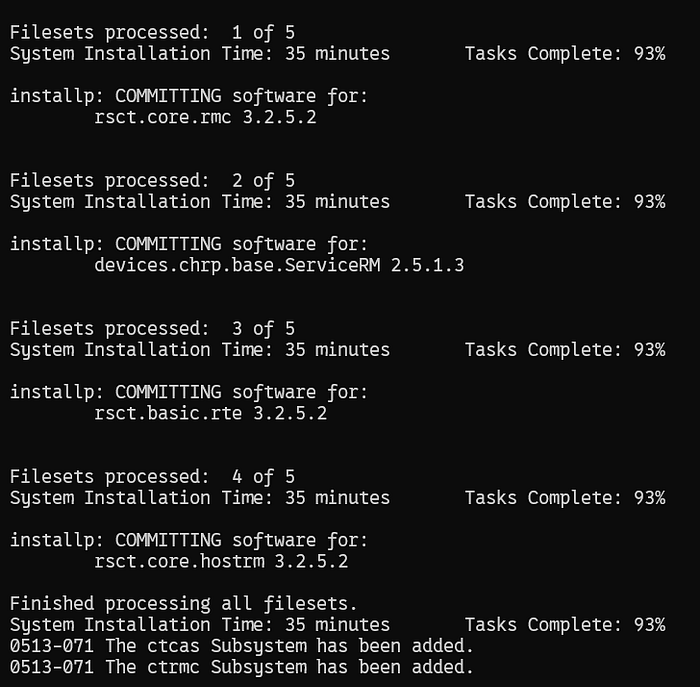
rmitab clcomdLANGKAH 9: INSTAL OPENSSH
Di dalam AIX:
Masuk sebagai root
chfs -a size=+200M /home
mount -v cdrfs -o ro /dev/cd0 /mnt
mkdir /home/ssh
cd /mnt/installp/ppc
cp openssh.* /home/ssh
umount /mnt
cd /home/ssh
installp -acXY -d . all
Hentikan dan mulai ulang:
berhentiqemu-system-ppc64 -cpu POWER8 -machine pseries -m 2048 -nographic -serial mon:stdio -drive file=hdisk0.qcow2, if =none, id =hd0 -device virtio-scsi-pci, id =scsi -device scsi-hd,drive=hd0 -prom-env "boot-command=boot disk:"LANGKAH 10: PENYIAPAN JARINGAN PADA HOST UBUNTU
Asumsi:
- Alamat IP Ubuntu: 192.168.220.5
- Alamat IP AIX: 192.168.220.6
- Antarmuka Ubuntu:
ens33 - Antarmuka AIX:
en0
Masuk sebagai root
# Tampilkan IP saat ini
 ip a show ens33

# Aktifkan penerusan IPv4 secara permanen
echo  "net.ipv4.ip_forward=1" | sudo tee /etc/sysctl.d/99-ipforward.conf
sudo sysctl -w net.ipv4.ip_forward=1

# Buat tap0 (abaikan jika sudah ada)
 sudo ip tuntap add tap0 mode tap 2>/dev/null || true
 sudo ip link  set tap0 up

# Aktifkan proxy ARP
 sudo sysctl -w net.ipv4.conf.tap0.proxy_arp=1
sudo sysctl -w net.ipv4.conf.ens33.proxy_arp=1

# Jadikan permanen
cat << EOF | sudo tee /etc/sysctl.d/99-aix-proxyarp.conf
net.ipv4.conf.tap0.proxy_arp=1
net.ipv4.conf.ens33.proxy_arp=1
EOF

 sudo sysctl --system

# Tambahkan rute statis ke AIX
 sudo ip route add 192.168.220.6 dev tap0 2>/dev/null || true
 ip route | grep 220.6
Jalankan QEMU dengan tap0:
qemu-system-ppc64 -cpu POWER8 -machine pseries -m 2048 -nographic -serial mon:stdio -drive file=hdisk0.qcow2, if =none, id =hd0 -device virtio-scsi-pci, id =scsi -device scsi-hd,drive=hd0 -device spapr-vlan,netdev=net0,mac=56:44:45:30:31:32 -netdev tap, id =net0,ifname=tap0,script=no,downscript=no -prom-env "boot-command=boot disk:"Tekan Esc + 0 hingga keluar dari SMIT dan layar login muncul.
LANGKAH 12: KONFIGURASI JARINGAN DI DALAM AIX
Masuk sebagai root
# Konfirmasi konektivitas
 ping 192.168.220.5 # Perbarui perangkat cfgmgr # Periksa antarmuka jaringan lsdev -Cc if lsdev -Cc adapter # Konfigurasi en0 chdev -l en0 -a state=up -a netaddr= 192.168.220.6 -a netmask= 255.255.255.0 mktcpip -h aixvm -i en0 -a 192.168.220.6 -m 255.255.255.0 -g 192.168.220.5 -s # Opsional : atur gateway default route add default 192.168.220.2 # Verifikasi ifconfig en0 netstat -rn
Contoh netstat -rnoutput:
# netstat -rn
 Tabel perutean
Tujuan Gateway Bendera Referensi Gunakan Jika Exp Grup

Pohon Rute untuk Keluarga Protokol 2 (Internet):
default             192.168 . 220.5      UG         0          0 en 0       - -
127 / 8               127.0 . 0 . 1          U          2         94 lo 0       - -
192.168 . 220.0       192.168 . 220.6      UHSb       0          0 en 0       - - =>
192.168 . 220 / 24      192.168 . 220.6      U          2        136 en 0       - -
192.168 . 220.6       127.0 . 0 . 1          UGHS       0          1 lo 0       - -
192.168 . 220.255     192.168 . 220.6      UHSb       0          0 en 0       - -

Pohon Rute untuk Keluarga Protokol 24 (Internet v6):
:: 1 %1 :: 1 %1 UH         0          0 lo 0       - -
#
LANGKAH 13: SSH DARI EKSTERNAL
DI AIX

# lssrc -s sshd
 Subsystem Group PID Status
sshd ssh               4784608       active
ssh root @192 .168.220.6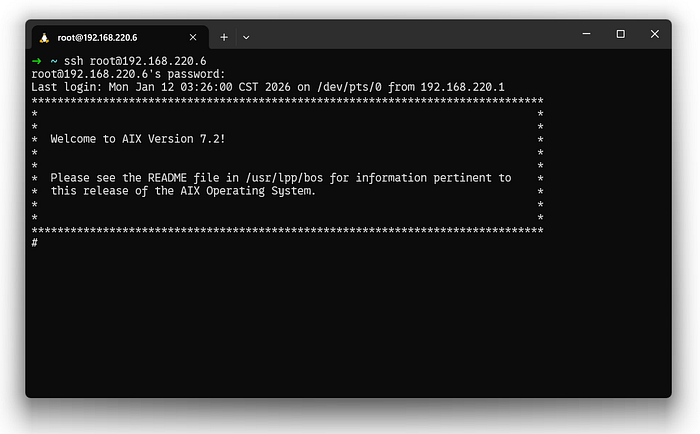
Terinspirasi dari: AIX untuk Administrator Sistem: DEVOPS — QEMU (Dengan beberapa modifikasi)