https://medium.com/@ithesadson/how-to-use-velero-installation-backup-and-restore-guide-with-minio-7e2c907d0a44
How to Use Velero: Installation, Backup, and Restore Guide

Read this blog for free.
Kubernetes is the leading platform for managing containerized applications. However, protecting your data and ensuring business continuity is crucial. Velero offers a powerful solution for Kubernetes backup and disaster recovery.
This guide will walk you through setting up Velero on Linux, using MinIO as your object storage. We’ll cover the entire process, from installation to creating and restoring backups. Let’s get started!
Prerequisites
- A running Kubernetes cluster on Linux
- Docker installed
- Basic understanding of Kubernetes concepts
- MinIO object storage setup (or any S3-compatible storage)
veleroandmc(MinIO client) command-line tools installed (follow the installation commands from the beginning of your provided code)
Step 1: Install Velero and MinIO Client (mc)
- Install Velero:
# Download and install Velero
wget https://github.com/vmware-tanzu/velero/releases/download/v1.14.0/velero-v1.14.0-linux-amd64.tar.gz
tar -xvf velero-v1.14.0-linux-amd64.tar.gz
sudo mv velero-v1.14.0-linux-amd64/velero /usr/local/bin/
velero version- Install MinIO Client (mc):
# Download and install MinIO Client (mc)
wget https://dl.min.io/client/mc/release/linux-amd64/mc
chmod +x mc
sudo mv mc /usr/local/bin/
Step 2: Configure MinIO and Test the Connection
i) Start the MinIO container (adjust the IP address and credentials):
# Run MinIO server in a Docker container with port mappings and volume mount
# Exposes ports 9000 for object storage and 9001 for console access
# Uses ~/minio/data on the host as the persistent data directory
# Sets MINIO_ROOT_USER to 'minio' and MINIO_ROOT_PASSWORD to 'minio123'
# Starts the MinIO server with /data as the storage directory and console on port 9001

docker run -p 9000:9000 -p 9001:9001 --name minio \
  -v ~/minio/data:/data \
  -e "MINIO_ROOT_USER=minio" \
  -e "MINIO_ROOT_PASSWORD=minio123" \
  quay.io/minio/minio server /data --console-address ":9001"
ii) Create a bucket for Velero backups:
# Retrieve MinIO server IP address
MINIO_IP=$(docker inspect -f '{{range .NetworkSettings.Networks}}{{.IPAddress}}{{end}}' minio)

# Configure MinIO client (mc) alias for Velero bucket
mc alias set minio http://${MINIO_IP}:9000 minio_accesskey minio_secretkey

# Create a bucket for Velero backups
mc mb minio/velero-bucket
Step 3: Install Velero on Kubernetes
i) Create a credentials file for Velero:
# Create credentials file for Velero with MinIO credentials

cat <<EOF > credentials-velero
[default]
aws_access_key_id=minio
aws_secret_access_key=minio123
EOF
ii) Install Velero using the provided command, replacing placeholders with your actual values:
# Install Velero on Kubernetes with AWS as the provider and MinIO as the backup location
# Uses Velero version v1.14.0 and Velero plugin for AWS version v1.10.0
# Configures Velero to use 'velero-bucket' as the backup bucket and 'credentials-velero' for MinIO credentials
# Enables node-agent for handling backup and restore operations
# Disables volume snapshots and uses kopia as the uploader type (u can pref restic)
# Sets default volumes to filesystem backups
# Installs Velero in the 'velero' namespace with MinIO configuration (replace <minio_ip> with your MinIO server's IP)

velero install \
  --provider aws \
  --image velero/velero:v1.14.0 \
  --plugins velero/velero-plugin-for-aws:v1.10.0 \
  --bucket velero-bucket \
  --secret-file ./credentials-velero \
  --use-node-agent \
  --use-volume-snapshots=false \
  --uploader-type kopia \
  --default-volumes-to-fs-backup \
  --namespace velero \
  --backup-location-config region=minio,s3ForcePathStyle="true",s3Url=http://<minio_ip>:9000
Step 4: Create and Restore Backups

i) Create a backup:
# Set the backup name based on current date and time
BACKUP_NAME="full-cluster-backup-$(date +%Y.%m.%d-%H.%M)"
# Create a Velero backup with the specified name and wait for completion
velero backup create $BACKUP_NAME --wait

# Describe the details of the created backup
velero backup describe $BACKUP_NAME
# View the logs of the backup creation process
velero backup logs $BACKUP_NAME

# List all Velero backups
velero get backup
ii) Restore from the backup:
# Restore from a Velero backup using the specified backup name
velero restore create $BACKUP_NAME --from-backup $BACKUP_NAME --wait

# Describe the details of the restore operation
velero restore describe $BACKUP_NAME
# View the logs of the restore process
velero restore logs $BACKUP_NAME
Uninstall Velero
You can uninstall Velero from your Kubernetes cluster using the following command:
velero uninstall
Velero UI
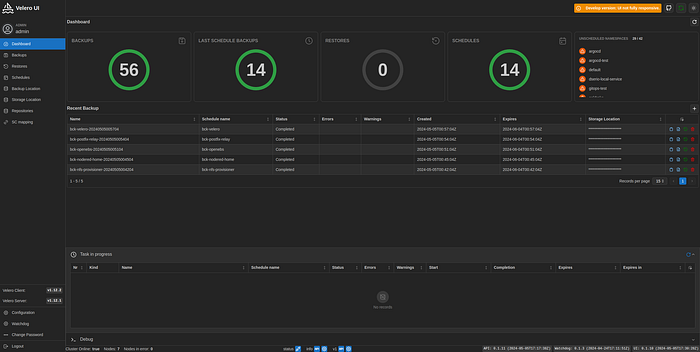
If you’re looking to access the Velero UI, I recommend checking out the plugin at seriohub/velero-ui. It’s still in development but shows promise in many aspects.

Conclusion
Congratulations! You’ve successfully set up Velero with MinIO for Kubernetes backup and restore operations. This setup ensures your Kubernetes applications and data are protected and recoverable. Experiment with different backup strategies and enjoy the reliability and peace of mind Velero brings to your Kubernetes environment.
For more information and advanced configurations, please refer to the Velero documentation.
You can refer to the CNCF document for more detailed information. It is informative and provides insights about Velero. Here is the link: CNCF Webinar: Backup and recovery best practices with Project Velero.
=====================================
🚀 For my My GitHub @ithesadson🚀
Knowledge should be Free and Disseminated.
=====================================
Tidak ada komentar:
Posting Komentar