Deploy Xen Orchestra Appliance on Xen or XCP-ng from CLI
In our recent article we captured installation steps for Xen Orchestra (XO) on an Ubuntu / Debian server by building the packages from source. XO is software built with a server and clients, such as the web client xo-web, but also a CLI capable client, called xo-cli. There is an alternative installation method which involves deployment with Xen Orchestra Virtual Appliance (XOA). This is the installation that will be performed in this guide.

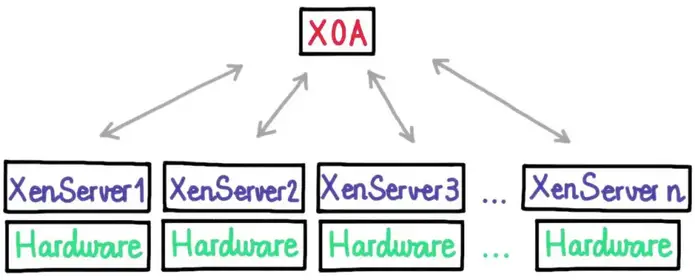
XOA is a virtual machine with Xen Orchestra already installed, thus intended to work out-of-the-box. The only dependency is a running Xen/XCP-ng hypervisor host with network and storage configurations. There is a bash script to be executed on the hypervisor shell which will download VM appliance and create a new Virtual Machine from it.
Import XOA on XenServer | XCP-ng Server
Start a new SSH session to your XenServer host and run the commands below.
### Using curl ###
[18:18 xcp-node-01 ~]# bash -c "$(curl -sS https://xoa.io/deploy)"

### Using wget ###
[18:18 xcp-node-01 ~]# bash -c "$(wget -qO- https://xoa.io/deploy)"
If you are using an old XenServer version, you may encounter SSL connection issues. This can bypassed by using the unsecure connection instead:

### Using curl ###
[18:18 xcp-node-01 ~]# bash -c "$(curl -sS http://xoa.io/deploy)"

### Using wget ###
[18:18 xcp-node-01 ~]# bash -c "$(wget -qO- http://xoa.io/deploy)"
If you’re using DHCP server on the default network, agree to proceed with the installation:
Welcome to the XOA auto-deploy script!

Network settings:
IP address? [dhcp]
For Static IP address provide all required IP related information such as netmask, gateway, and DNS server.

With the DHCP option, VM importation should start thereafter:
Your XOA will be started using DHCP

Importing XOA VM...

Booting XOA VM...
Waiting for your XOA to be ready…

Your XOA is ready on https://192.168.20.24/

Default UI credentials: admin@admin.net/admin
Default console credentials: xoa/xoa

VM UUID: 84f59294-a20c-3658-db12-6ed7152c6e08
If you access Xen cluster you should see VM importation in progress.

When done a VM named “XOA” should be visible. You can access the shell with the IP address assigned to the instance.


The default logins were printed out during XOA importation
Your XOA is ready on https://192.168.20.24/

Default UI credentials: admin@admin.net/admin
Default console credentials: xoa/xoa
Use the given username and password to login to XO web console.

Navigate to “Settings” > “Users“ section to update admin password for better security.

Select admin user and click “edit” under Password section to update user’s password.


Shell access to the appliance:
$ ssh xoa@192.168.20.24
Linux xoa 4.19.0-13-amd64 #1 SMP Debian 4.19.160-2 (2020-11-28) x86_64
 __   __             ____           _               _
 \ \ / /            / __ \         | |             | |
  \ V / ___ _ __   | |  | |_ __ ___| |__   ___  ___| |_ _ __ __ _
   > < / _ \ '_ \  | |  | | '__/ __| '_ \ / _ \/ __| __| '__/ _` |
  / . \  __/ | | | | |__| | | | (__| | | |  __/\__ \ |_| | | (_| |
 /_/ \_\___|_| |_|  \____/|_|  \___|_| |_|\___||___/\__|_|  \__,_|

Welcome to XOA Unified Edition, with Pro Support.

* Restart XO: sudo systemctl restart xo-server.service
* Display status: sudo systemctl status xo-server.service
* Display logs: sudo journalctl -u xo-server.service
* Register your XOA: sudo xoa-updater --register
* Update your XOA: sudo xoa-updater --upgrade

OFFICIAL XOA DOCUMENTATION HERE: https://xen-orchestra.com/docs/xoa.html

Support available at https://xen-orchestra.com/#!/member/support

In case of issues, use `xoa check` for a quick health check.

Build number: 21.01.02

Based on Debian GNU/Linux 10 (Stable) 64bits in PVHVM mode
Service xo-server should be in a running state:

$ systemctl status xo-server.service
● xo-server.service - XO Server
   Loaded: loaded (/etc/systemd/system/xo-server.service; enabled; vendor preset: enabled)
   Active: active (running) since Tue 2021-04-20 11:25:13 EDT; 19h ago
 Main PID: 504 (node)
    Tasks: 18 (limit: 2331)
   Memory: 144.9M
   CGroup: /system.slice/xo-server.service
           ├─ 504 node /usr/local/bin/xo-server
           └─2285 /usr/local/bin/node /usr/local/lib/node_modules/xo-server/node_modules/jest-worker/build/workers/processChild.js
Check and update if updates are available. But registration is required for updates.

sudo xoa-updater --register
sudo xoa-updater --upgrade
Add XenServer | XCP-ng Server
Add the Xen|XCP-ng server by going to “Home” > “Add server“

Input the server label, IP Address, Username and Password used to login.


Confirm connection is successful. The status should automatically turn to “Enabled“

From the console you can get your Xen Cluster details – Pools, Hosts, VMs and usage capacity.

Similar articles on Xen Virtualization platform.


Tidak ada komentar:
Posting Komentar