Overview
OpenShift Origin (OKD) is the Community Distribution of Kubernetes that powers Red Hat OpenShift. Built around a core of OCI container packaging and Kubernetes container cluster management, OKD is also augmented by application lifecycle management functionality and DevOps tooling. OKD provides a complete open-source container application platform
🔰1. Prerequisites
We can plan to install 3 physical machines or VM, and they should be connected on the Internet
Distribution: Centos 7 linux [Os Minimal Installation]
IP Address: 192.168.31.182 with 8 GB, 2 Core
IP Address: 192.168.31.144 with 4 GB RAM, 2 Core
IP Address: 192.168.31.94 with 4 GB RAM, 2 Core

Login username: root
Password: 123456
Note: Mentioned ip address and credential uses just for references. Please take a look at Official prerequisites
🔰2. To access remotely through username & password, needs to Installing and Enabling OpenSSH
📗 Install OpenSSH & net-tools packages, start and show status of SSH service, run automatic after reboot and finally show machine IP Address.
yum –y install openssh-server openssh-clients net-tools

systemctl start sshd
systemctl status sshd
systemctl enable sshd
ifconfig
Note: Now we can able to access those services through Terminal or Putty
🔰3. Common steps for on all the machines or nodes [Here, Master, Compute, Infra], Login into each single machine
📗 Step1: Install base packages
yum install -y wget git zile net-tools bind-utils iptables-services bridge-utils bash-completion kexec-tools sos psacct openssl-devel httpd-tools python-cryptography python2-pip python-devel python-passlib java-1.8.0-openjdk-headless "@Development Tools"
yum update -y

yum install docker-1.13.1
systemctl start docker && systemctl enable docker && systemctl status docker

yum -y install https://dl.fedoraproject.org/pub/epel/epel-release-latest-7.noarch.rpm
sed -i -e "s/^enabled=1/enabled=0/" /etc/yum.repos.d/epel.repo
📗 Step2: Set hosts for all nodes, so future ansible can communicate with all machines for automation
Open that file and vi /etc/hosts, include contents
192.168.31.182  master.192.168.31.182.nip.io
192.168.31.144  compute.192.168.31.144.nip.io
192.168.31.94  infra.192.168.31.94.nip.io
Now, restart network service
service network restart
📗 Step3: Login into each single machine and set hostname for all nodes
hostnamectl set-hostname hostname.<machine-ip>.nip.io
Examples for all machine:
hostnamectl set-hostname master.192.168.31.182.nip.io
hostnamectl set-hostname compute.192.168.31.144.nip.io
hostnamectl set-hostname infra.192.168.31.94.nip.io
Note: Remember each machine has only one hostname, so don't put all hostname in a single machine.
📗 Step4: Modify '/etc/NetworkManager/NetworkManager.conf' so after reboot wifi-router each time, DNS shouldn't change.
open this file vi /etc/NetworkManager/NetworkManager.conf, include contents
[main]
#plugins=ifcfg-rh,ibft
dns=none
📗 Step5: Modify ifconfig label information, and use google DNS
ifconfig
cd /etc/sysconfig/network-scripts
In Here, mine label was ifcfg-ens33, so vi ifcfg-ens33 and include contents
PEERDNS="no"
DNS1="8.8.8.8"
📗 Step6: Modify resolv.conf file, to update nameserver & search globally
open vi /etc/resolv.conf, include contents
search nip.io
nameserver 8.8.8.8
📗 Step7: Restart network manager & network service
systemctl restart NetworkManager
service network restart
📗 Step8: Change Selinux setting on Master,Compute,Infra
open vi /etc/selinux/config, include contents
SELINUX=enforcing
SELINUXTYPE=targeted
📗 Step9: Reboot machine
reboot
Note: For unknown behaviors, we can restart network manager & service
🔰4. Finally, log in into Master Machine and follow the below instructions,
📗 Step1: create ssh key and copy public key to other machines or nodes, fso we can communicate without username and password. It's needed for SSH.
ssh-keygen

for host in master.192.168.31.182.nip.io \
master.192.168.31.182.nip.io \
compute.192.168.31.144.nip.io \
infra.192.168.31.94.nip.io; \
do ssh-copy-id -i ~/.ssh/id_rsa.pub $host;
done
📗 Step2: After boot all the machines, we can ping from an external machine terminal or command
ping google.com
ping master.192.168.31.182.nip.io
ping compute.192.168.31.144.nip.io
ping infra.192.168.31.94.nip.io
Notes:
ping VM to VM = Ok
ping Host to VM = Ok
ping www.google.com = Ok
📗 Step3: install ansible 2.7 in master node
rpm -Uvh https://releases.ansible.com/ansible/rpm/release/epel-7-x86_64/ansible-2.7.10-1.el7.ans.noarch.rpm
ansible --version
📗 Step4: Now, clone openshift-ansible repository, and switch 3.11 release branch
git clone https://github.com/openshift/openshift-ansible.git
cd openshift-ansible && git fetch && git checkout release-3.11
📗 Step5: Create ansible hosts.ini configuration,
# Create an OSEv3 group that contains the masters, nodes, and etcd groups
[OSEv3:children]
masters
nodes
etcd

# Set variables common for all OSEv3 hosts
[OSEv3:vars]
# SSH user, this user should allow ssh based auth without requiring a password
ansible_ssh_user=root
# If ansible_ssh_user is not root, ansible_become must be set to true
ansible_become=true
openshift_master_default_subdomain=app.192.168.31.94.nip.io
deployment_type=origin

[nodes:vars]
openshift_disable_check=disk_availability,memory_availability,docker_storage
[masters:vars]
openshift_disable_check=disk_availability,memory_availability,docker_storage
# uncomment the following to enable htpasswd authentication; defaults to DenyAllPasswordIdentityProvider
openshift_master_identity_providers=[{'name': 'htpasswd_auth', 'login': 'true', 'challenge': 'true', 'kind': 'HTPasswdPasswordIdentityProvider'}]

# host group for masters
[masters]
192.168.31.182

# host group for etcd
[etcd]
192.168.31.182

# host group for nodes, includes region info
[nodes]
192.168.31.182  openshift_node_group_name='node-config-master'
192.168.31.144  openshift_node_group_name='node-config-compute'
192.168.31.94  openshift_node_group_name='node-config-infra'
📗 Step5: Execute ansible playbooks with hosts.ini configuration,
ansible-playbook -i hosts.ini playbooks/prerequisites.yml
ansible-playbook -i hosts.ini playbooks/deploy_cluster.yml
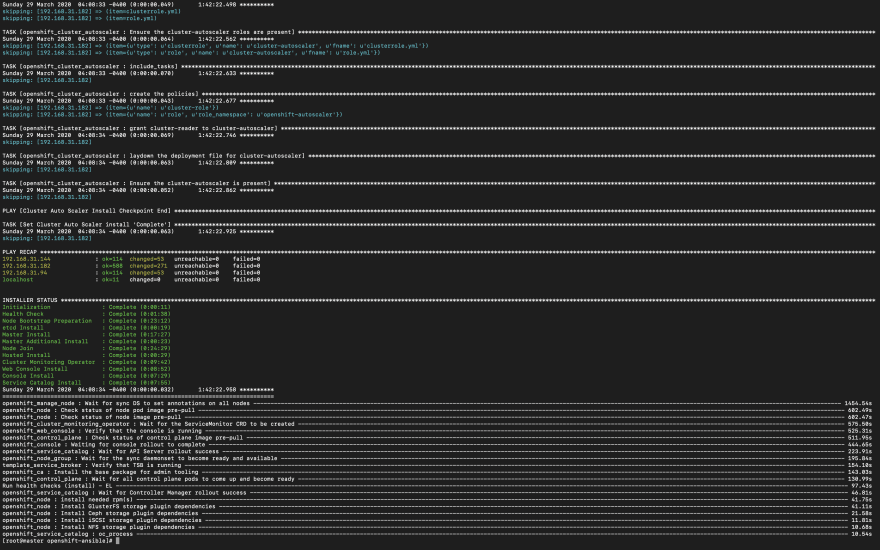
Note: If you're prerequisites.yml not throw any error, then you can ready for deploy_cluster.yml. After hours of later, you can able to see this screen. I hope your face will be glowing like mine! 🤩
📗 Step6: Create Admin User, so that we can log in to web console, we can also able to see web console URL
htpasswd -c /etc/origin/master/htpasswd admin
oc status

Note: We already created admin users, so use those credentials to move forward.
After 5 hours (depends on internet speed and nodes resources), successfully able to install a private cloud on an open-source container application platform using centos 7 with 3 nodes. It's lots of fun. It might occur errors if you're network connection is poor and machines or nodes resources (CPU, RAM) are not properly.
👌 Congratulations. & Thanks for your time & passion.
Feel free to comments, If you have any issues & queries.
Tidak ada komentar:
Posting Komentar