Run Virtual Machine on Kubernetes? | Kubevirt Basic

KubeVirt technology addresses the needs of development teams that have adopted or want to adopt Kubernetes but possess existing Virtual Machine-based workloads that cannot be easily containerized. More specifically, the technology provides a unified development platform where developers can build, modify, and deploy applications residing in both Application Containers as well as Virtual Machines in a common, shared environment.
Benefits are broad and significant. Teams with a reliance on existing virtual machine-based workloads are empowered to rapidly containerize applications. With virtualized workloads placed directly in development workflows, teams can decompose them over time while still leveraging remaining virtualized components as is comfortably desired.
This article will help you to implement kubevirt with basic configuration in your environment
Prerequisites
Before we start, make sure you have the following:
- A Kubernetes cluster (or Docker setup).
- kubectl installed (for Kubernetes environments).
Step 1: Deploy Kubevirt
export VERSION=$(curl -s https://storage.googleapis.com/kubevirt-prow/release/kubevirt/kubevirt/stable.txt)

echo $VERSION
kubectl create -f https://github.com/kubevirt/kubevirt/releases/download/${VERSION}/kubevirt-operator.yaml
Step 2: Install CRD
kubectl create -f https://github.com/kubevirt/kubevirt/releases/download/${VERSION}/kubevirt-cr.yamlStep 3: Verify Components
kubectl get kubevirt.kubevirt.io/kubevirt -n kubevirt -o=jsonpath="{.status.phase}"kubectl get all -n kubevirtStep 4: Virtctl
KubeVirt provides an additional binary called virtctl for quick access to the serial and graphical ports of a VM and also handle start/stop operations.
Install
VERSION=$(kubectl get kubevirt.kubevirt.io/kubevirt -n kubevirt -o=jsonpath="{.status.observedKubeVirtVersion}")
ARCH=$(uname -s | tr A-Z a-z)-$(uname -m | sed 's/x86_64/amd64/') || windows-amd64.exe
echo ${ARCH}
curl -L -o virtctl https://github.com/kubevirt/kubevirt/releases/download/${VERSION}/virtctl-${VERSION}-${ARCH}
chmod +x virtctl
sudo install virtctl /usr/local/bin
Install as krew plugin
kubectl krew install virtLets Try !!
Create Test VM
Create vm.yaml
apiVersion: kubevirt.io/v1
kind: VirtualMachine
metadata:
  name: testvm
spec:
  running: false
  template:
    metadata:
      labels:
        kubevirt.io/size: small
        kubevirt.io/domain: testvm
    spec:
      domain:
        devices:
          disks:
            - name: containerdisk
              disk:
                bus: virtio
            - name: cloudinitdisk
              disk:
                bus: virtio
          interfaces:
          - name: default
            masquerade: {}
        resources:
          requests:
            memory: 64M
      networks:
      - name: default
        pod: {}
      volumes:
        - name: containerdisk
          containerDisk:
            image: quay.io/kubevirt/cirros-container-disk-demo
        - name: cloudinitdisk
          cloudInitNoCloud:
            userDataBase64: SGkuXG4=
Apply vm
kubectl apply -f vm.yamlStart VM
virtctl start testvmCheck vm status

Console access to
virtctl console testvm
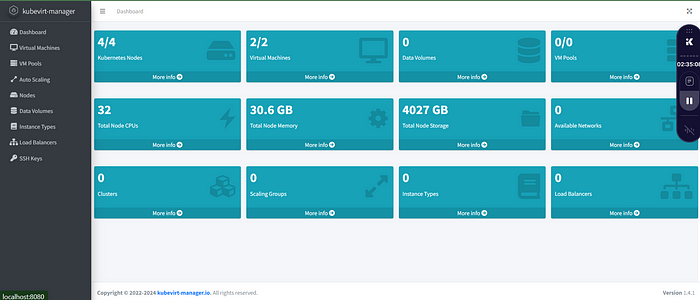
Additional you can install web virt manager to manage by web console
StorageClass
kubevirt-manager controls and manages disks, so a StorageClass is needed in order for the solution to work. allowVolumeExpansion feature needs to be enabled on the StorageClass that you plan to use:
allowVolumeExpansion: trueIf you are using hostpath-provisioner or some local storage you may also need:
volumeBindingMode: WaitForFirstConsumerCDI
Containerized Data Importer is used by kubevirt-manager to control DataVolume operations for Virtual Machines and Virtual Machine Pools:
config:
        featureGates:
        - HonorWaitForFirstConsumer
Install Kubevirt-Manager
kubectl apply -f https://raw.githubusercontent.com/kubevirt-manager/kubevirt-manager/main/kubernetes/bundled.yamlAccess the console
kubectl port-forward svc/kubevirt-manager 8080:8080 -n kubevirt-manager
Its Done !!!
Explore more on https://kubevirt-manager.io/get_started.html and https://kubevirt.io/user-guide/
Tidak ada komentar:
Posting Komentar