How to migrate ESXI VM’s to Proxmox Host!!

After VMware decided to discontinue the free version of ESXi virtualization software, many homelabers have turned to alternatives like xcp-ng or proxmox. Even though I have been using VMUG for the past two years, I have made the decision not to renew and switch to proxmox instead, as it fulfills all my homelab needs.
Furthermore, these free hypervisor companies have ensured a smooth migration process for virtual machines. With the recent release of the new proxmox import tool for ESXi virtual machines, there is significant interest among users to test it out. Personally, I also have some virtual machines on an ESXi host, so I am excited to give it a try.
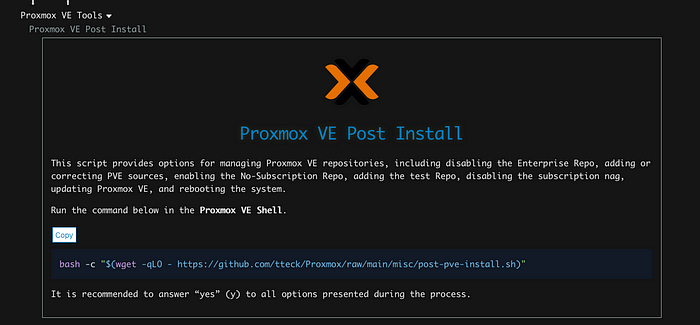
Enable Non-Subscription-Based Repositories:
Enable the pve-no-subscription (free) repository for your Proxmox host by visiting the GUI, selecting your host, navigating to updates, and selecting repositories. Disable the pve-enterprise repository and enable all pve-no-subscription repositories for both Proxmox and Ceph.
Please ensure that you update your Proxmox host after enabling the no-subscription repo.

You can accomplish all of this using the following Proxmox scripts:

Install proxmox-esxi-import-tools:
If your Proxmox has the latest release, Proxmox 8.1.10, most probably proxmox-esxi-import-tools is already installed. However, if it is not present, you need to add this package to your host by opening the shell.
apt search proxmox-esxi-import-tools
apt install -y proxmox-esxi-import-tools

Add ESXI Host Storage to Proxmox Host
- Go to the Datacenter section in Proxmox and select the Storage.
- Add a new storage, under the PBS section, you will see a new option called ESXi. Select that.
- Enter the connection details of your ESXi host and make sure to check the box for “Skip Certificate Verification” if you are not using the same CA for both Proxmox and ESXi.


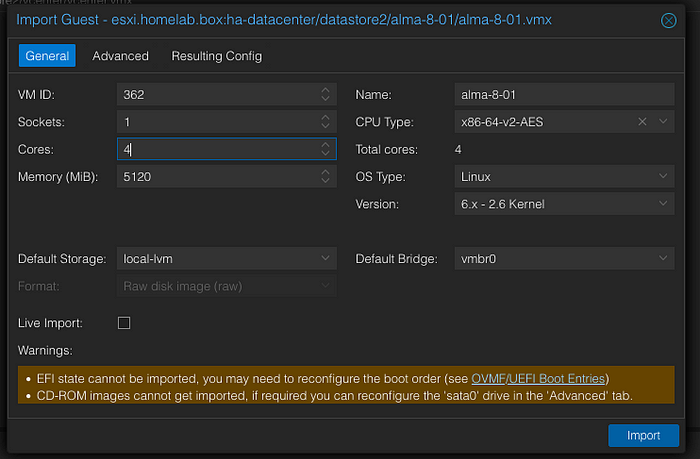
Start the migration process:
Make sure to shut down the VM on the ESXi host before migrating to the Proxmox host. Now, open the ESXi option that shows below a list of VMs in Proxmox. Click on the VM you want to import.


Remember, while the Proxmox Import Tool makes migration easier, it’s essential to back up your VM’s before migration to prevent data loss in case of any unexpected issues. Always verify the functionality of your migrated VM’s before decommissioning the original ones.
Tidak ada komentar:
Posting Komentar