Vinchin Backup & Recovery v6.5 overview
https://nolabnoparty.com/en/vinchin-backup-and-recovery-v6-5-overview/#google_vignette
Vinchin Backup & Recovery is a software backup solution that provides Backup and Disaster Recovery capabilities for virtual environments.
Vinchin software provides all the features required by the business to ensure data protection and availability with a cost-effective licensing.
Vinchin Backup & Recovery main features
Vinchin is an image-based backup solution (snapshot technology) with no need to install any agent on the VM and support full backup, (forever) incremental backup and differential backup types.
Incremental backups take advantage of CBT and SpeedKit technologies improving performance and reducing the time required to complete the backup job.
To save storage space, data are also deduplicated and compressed before writing to the backup repository and transferred from production to the backup repository using FC, iSCSI and NFS protocols.
Backup
Backup - full, incremental and reverse are the supported backup types.
Backup Copy - backups can be copied to a remote or DR site to recover the VM offsite if the primary production site fails.
Backup Archive - local backups can be archived and stored to cloud object storage for long term retention purposes. Multiple cloud platforms including AWS S3 and AlibabaCloud are supported to be the cloud archive destination.
Physical machines - Files in Windows and Linux servers can be backed up by installing a small agent on the target OS.
Recovery
Instant VM recovery - VMs can be recovered directly from the deduplicated and compressed backups reducing the RTO and minimizing the service disruption due to a disaster or system failure.
Full VM recovery - a single or a group of VMs can be restored from any restore point available in the backup chain to the original host or to a different host.
File level recovery - single files can be restored from backups with no need of restoring the entire VM first.
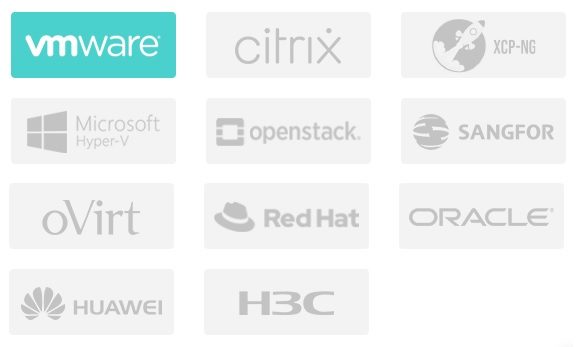
Cross-Platform recovery (V2V) - Data can be easily moved across 10 Vinchin supported virtual platforms by recovering backups of one virtual platform to another through a single web console.
Supported virtual platforms
- VMware - vSphere 4.x to 7.0
- Microsoft - Hyper-V 2012, 2012 R2, 2016, 2019, Server 2012, 2012 R2, 2016, 2019, Windows 10
- Citrix - Hypervisor 8.x, XenServer 6.x, 7.x
- Redhat - RHV/oVirt 4.x
- Oracle - Oracle Linux, Virtualization Manager 4.3
- OpenStack - Mitaka, Victoria
- Huawei - FusionCompute (KVM) 6.5.1 8.0.0 8.0.1
- H3C - CAS/UIS 5.x to 7.x
- Sangfor - HCI 5.x, 6.x
- XCP-ng - 8.x
Supported OSs
- Windows Server and Desktop
- RHEL 6,7,8
- Linux CentOS 6,7,8, Debian Linux 7 to 10, Ubuntu Linux 12 to 20
Supported databases
Physical or virtual MySQL, MS-SQL and Oracle platforms can be protected (hot backup) by saving backups on-premises, offsite and on cloud. DBs can be restored to any destination.
- MySQL 5.5, 5.6, 5.7, 8.0
- Microsoft SQL Server 2008, 2012, 2014, 2016, 2017, 2019
- Oracle Database 11G, 12C, 18C, 19C
Available editions
Vinchin Backup & Recovery comes with the following editions:
- Free - the free edition provides basic capabilities and can protect up to 3 VMs.
- Essential - applies to small businesses and support VMware and Hyper-V platforms.
- Standard - ideal for SMB businesses, supports VMware, Hyper-V, XenServer or KVM platforms.
- Enterprise - oriented for medium to large organizations, provides all available features.
To compare available editions, check out this page at Vinchin website.
Licensing
Two options are available to license the software:
- Perpetual license - based on the number of physical CPU sockets allows to backup an unlimited number of VMs.
- Subscription license - based on the number of VMs to protect, allows to save your budget with a 1-3 years subscription.
Install Vinchin Backup & Recovery
To install the Vinchin Backup Server, download the ISO from Vinchin website and create the VM in your virtual infrastructure (VMware in the example).
From the vSphere Client, right click the cluster and select New Virtual Machine.

Select Create a new virtual machine and click Next.
Enter the Virtual machine name and specify the location. Click Next.
Select the compute resource then click Next.
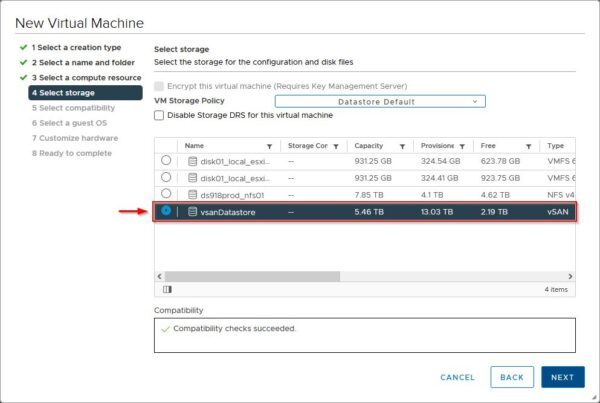
Select the storage to use and click Next.
Click Next.

Select Linux > CentOS 7 (64-bit) as Guest OS and click Next.

Specify CPU, Memory, Network and connect the CD/DVD drive to the ISO previously downloaded from Vinchin. Click Next.

Click Finish to start the installation.

Power on the created virtual machine to proceed with the installation.
From the vSphere Client, open the virtual machine console and select Install CentOS 7.
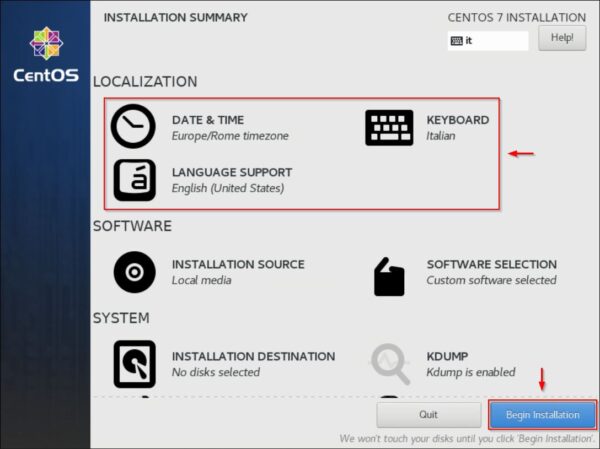
From the Installation Summary page, configure the requested settings:
- Date & Time
- Keyboard
- Language Support
- Installation Destination
- Network & Hostname
Click Begin Installation when done.
The installation of Vinchin is being performed. Bear in mind there is no need to setup root password.
When the installation completes successfully, remove the installation media and click Reboot.
Configure Vinchin Backup Server
After rebooting the system, the following default credentials are configured:
- Linux CLI - root / Backup@3R
- Web console - admin / 123456
Using your preferred browser, type the address https://<vinchin_IP_address> and enter the correct credentials. Click Login.
The Vinchin main dashboard.
Install the license
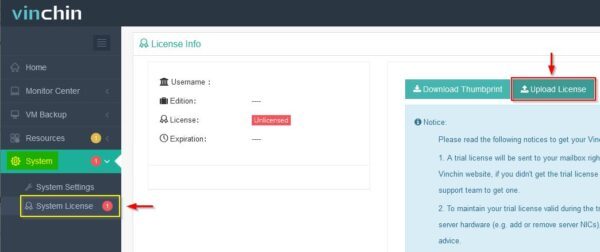
To start working with the software, you need to upload the license file received from Vinchin first. Go to System > System License section and click on Upload License button.
Once the license file has been uploaded, you are redirected to the login page.
Add the backup repository
Login once again and go to Resources > Storage section and click Add to add a new storage device used to store your backups.
Specify the Storage Settings for your repository. In the example, a NFS Share Storage Type is added and used to store Backup data. Click OK to save the configuration.
The new storage has been added successfully.
System Settings
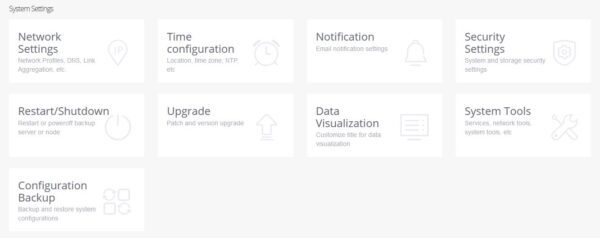
To secure and administer the product, go to System area and configure the appropriate parameters.
- Network Settings - configure IP Address, Local DNS Lookup and Link Aggregation.
- Time configuration - specify the time zone and enable the NTP sync.
- Email Notification - to receive alerts via email, configure email parameters in this section.
- Security Settings - used to specify Account Security, Storage Security (only Vinchin apps can write new or modify existing data to attached repositories) and System Security (enable firewall and SSH).
- Restart Shutdown - to restart or shutdown the Vinchin Backup Server.
- Upgrade - used to apply patch and version upgrade.
- Data Visualization - used to customize the data visualization title.
- System Tools - from this section you can stop/start System Services, perform Ping/Telnet tests with available Network Tools and run the WebSSH.
- Configuration Backup - used to backup and restore system configuration.
Configure the backup
The VM Backup area is used to manage backup jobs.
Configure the platform to protect
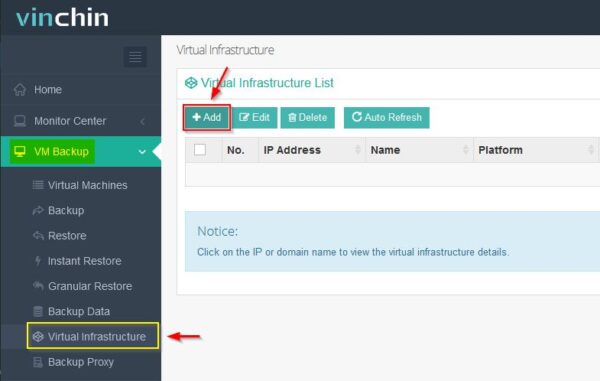
Go to VM Backup > Virtual Infrastructure to configure the virtual environment to protect and click Add.
Specify the Platform (VMware vSphere in the example) to use and enter the required parameters. Click OK.
When the vCenter has been added to the system, it must be authorized. Under Operation, click Auth to proceed.
Select all the available ESXi hosts in the list and click Authorize.
When all selected hosts have been authorized, you can close the window.
The Status is now reported as All Authorized.
Create a Backup Job
Go to VM Backup > Backup and select the VMs to backup. Click Next.
Specify the Target Storage and click Next.
In General Strategy tab specify the schedule for the job.
In Trasmission Strategy tab, specify the Transfer mode (LAN by default) for the backup job. You have four different ways to transfer backup data:
- LAN - this is the easiest way to transfer backup data. The backup data are be transferred via the production network.
- Encrypted Transmission - same as LAN transfer but the trasmission is encrypted.
- SAN - to take benefit of this method, the Vinchin Backup Server must be a physical server. For FC connections a HBA interface is required to connect the SAN via the FC switch. For iSCSI and NFS (IP SAN), an extra NIC is required instead to connect to the SAN via the storage network switch. LAN-Free path needs to be configured.
- HotAdd - to improve performance, the HotAdd technology can be used for VMware virtual platform and requires that the Backup Server is installed as VM. If the Backup Server is physical, you need to deploy the Vinchin Proxy, an additional component that acts as data mover.
Click Next.
Enter a Job Name and click Submit.
The backup job has been created.

Click Options and select Start Incr. option to manual start the just configured job. Despite the incremental backup has been selected, the first run will always perform a full backup.

The backup is being executed. Based on the amount of data to process, the backup will require some time to complete.

Perform a restore job
Go to VM Backup > Restore section to create a New VM Restore Job.

Select the virtual machine to recover from an existing backup and the Restore Point to use. Click Next.
Select the Target Host and specify the VM Configurations. Click Next.
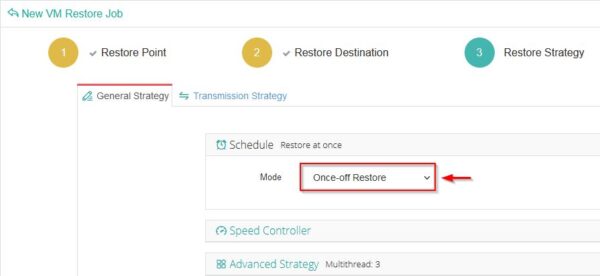
Specify the General Strategy and the Trasmission Strategy then click Next.
Enter the Job Name and click Submit to run the restore job.

The restore job is being executed and the Status is reported as Running.

The restored VM.

Vinchin Backup & Recovery is a well done product, simple to use where installation and configuration require only few minutes to complete. The navigation between windows is intuitive and the layout is minimal but clear. Since it is a Linux-based software, no additional license, such as Windows for example, is required to finalize the installation.
Vinchin Backup & Recovery is available to download as 60-day trial.










Tidak ada komentar:
Posting Komentar