OpenShift Installation On VMware

3 Node OpenShift Cluster on VMWare
Kubernetes Overview
Open-source container orchestration automating container deployment, scaling, and management.
Components Clusters with control plane and worker nodes.
Red Hat OpenShift Overview
OpenShift is an Enterprise-grade platform for cloud-native app development, powered by Kubernetes and CNCF ecosystem features, supported by Red Hat.
Key Features
Comprehensive platform, developer tools, enterprise operations support.
Benefits Over Kubernetes
Integrates essential components for security, support, and seamless operations.
Red Hat OpenShift subscription offerings
Self-managed OpenShift
OpenShift cloud services
Red Hat OpenShift 4 supports two primary deployment methods:
Platform-specific installer-provisioned infrastructure (IPI).
Platform-specific user-provisioned infrastructure (UPI).
For self-managed deployments, OpenShift can be installed on:
Bare-metal servers -
Virtualized environments, including: VMware vSphere. Red Hat Virtualization.
Other platforms are supported via the platform-agnostic UPI install method.
Private cloud environments: Red Hat OpenStack® Platform and Azure Stack Hub.
Public cloud environments -
Amazon Web Services, Azure, Google Cloud Platform, IBM Cloud, Alibaba Cloud, and VMware Cloud on AWS.
Other platforms are supported via the platform-agnostic UPI install method.
In this article we will install 3 Node OpenShift Cluster in VMware environment
Steps:
- Create Discovery ISO using https://console.redhat.com/openshift/
2. Using ISO create 3 VMs in VMWare environment.
3. Discover VMs from https://console.redhat.com/openshift/ and start the installation.
Installation steps:
Access https://console.redhat.com/openshift/
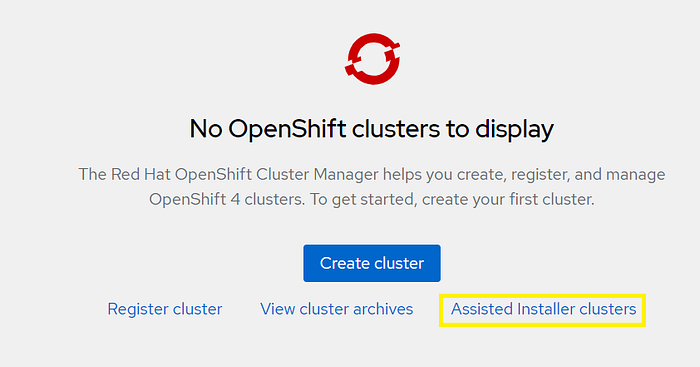
Click on Assisted Installer Clusters
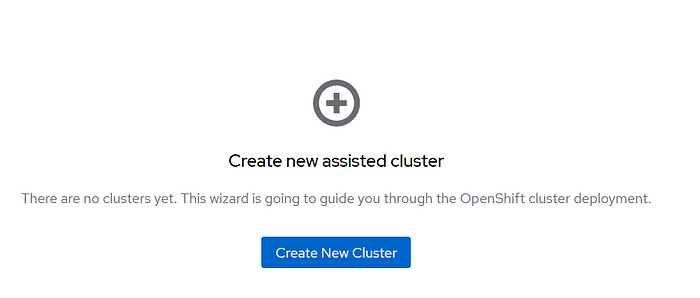
Click on Create New Cluster
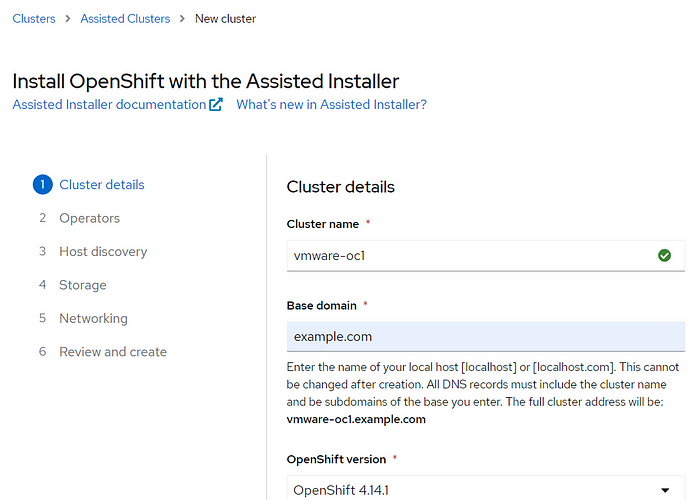
Next, Enter Cluster name and base domain, and click on Next. (Keep other options as default)
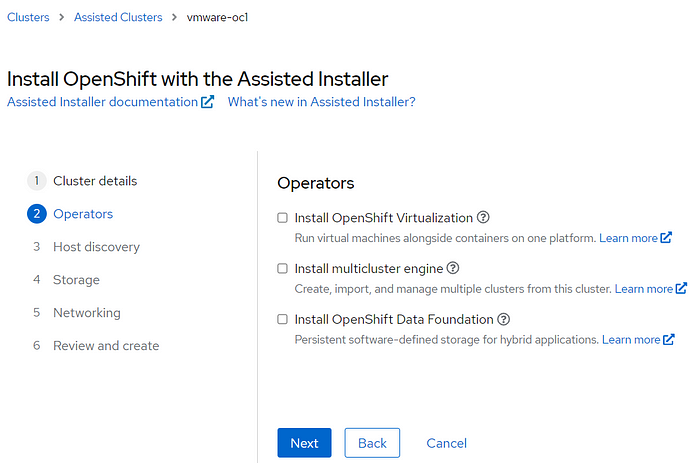
On next screen, Keep all options as default.
Click on Add Hosts
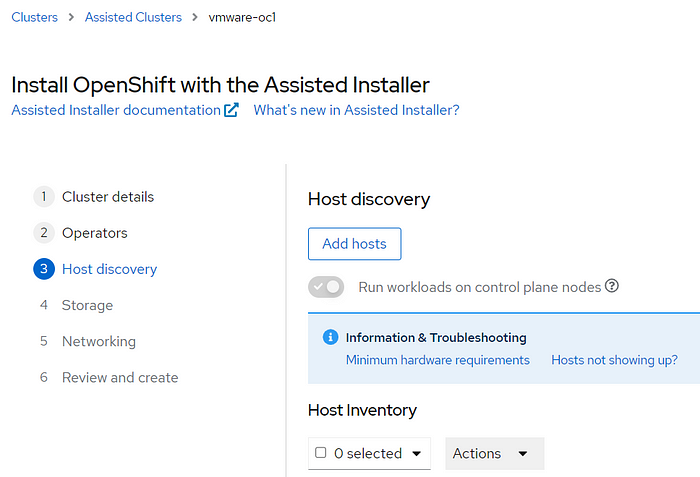
Enter your public key and click on Generate Discovery ISO
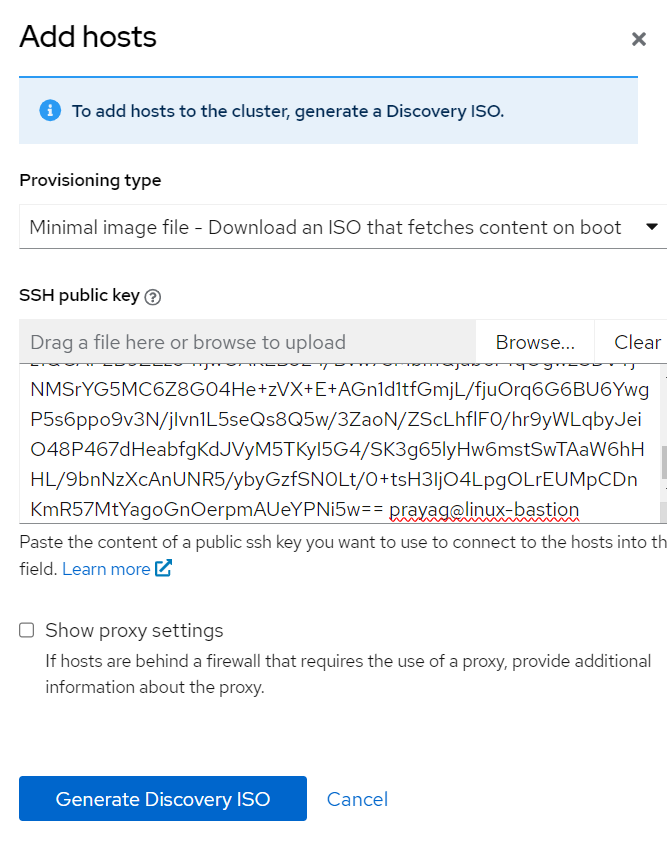
Links will be generated.
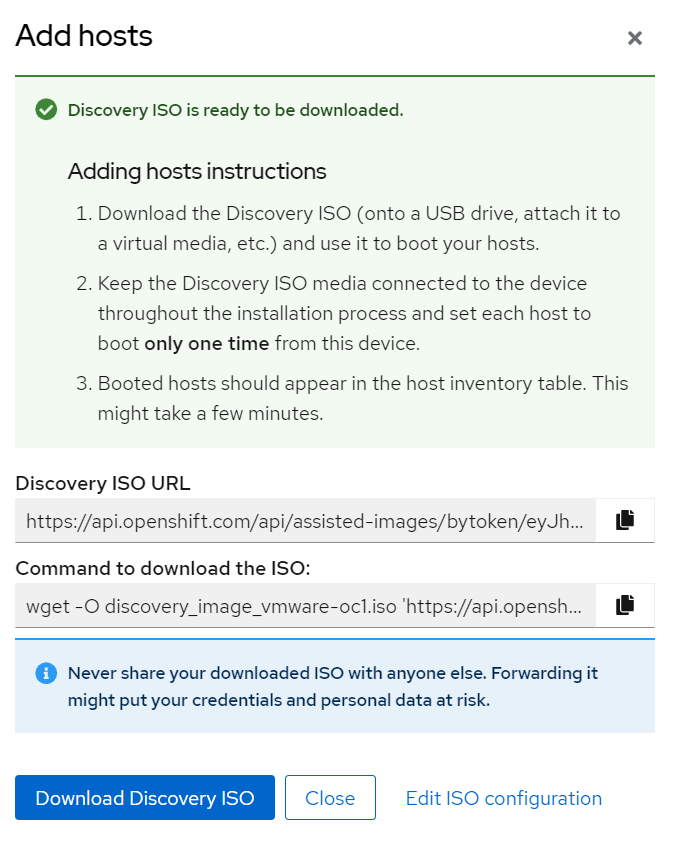
Download ISO using https URL. ISO is downloaded in Download folder
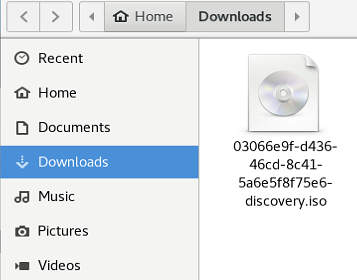
Upload ISO in VMware Datastore

Create 3 Linux VM and choose OS as Other Linux (64-bit).
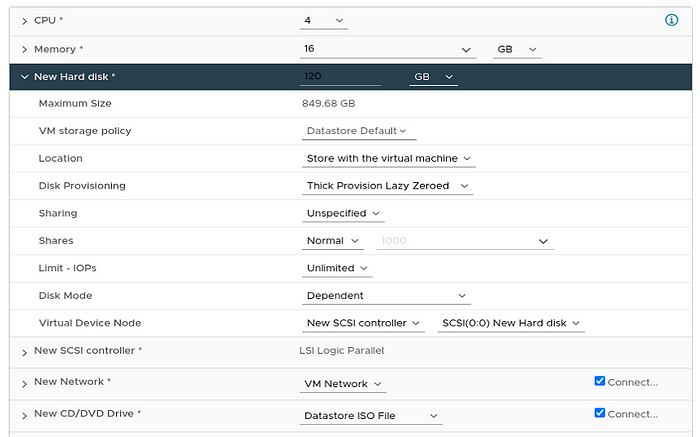
Select 4 CPU, 16GB RAM and 120GB Disk. Also attach above downloaded Discovery ISO
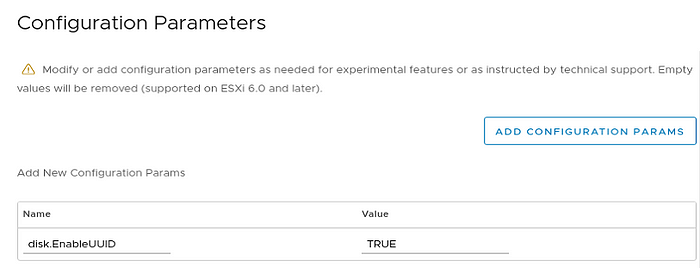
Enable — disk.EnableUUID
To enable disk.EnableUUID, you can use the vSphere Client or the vSphere API. The following steps will show you how to enable disk.EnableUUID using the vSphere Client:
- Open the vSphere Client and connect to the ESXi host that hosts the VM.Power off the VM.
- Right-click the VM and select Edit Settings.
- Click the VM Options tab.
- Click the Advanced button.
- Click Edit Configuration in the Configuration Parameters section.
- Click Add Row.
- In the Key column, type disk.EnableUUID.
- In the Value column, type TRUE.
- Click OK and then Save.
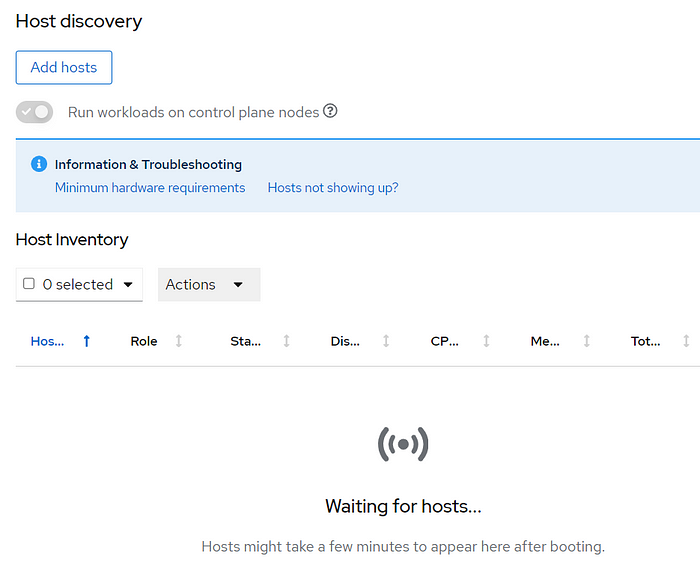
3 VMs created

We can see that Hosts are not yet discovered.
After few minutes we can see that Host Discovery is completed.
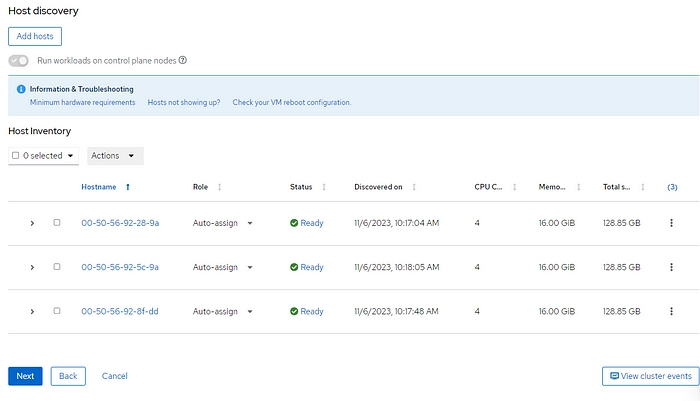
The following requirement must be met:
Clusters must have exactly 3 dedicated control plane nodes. So in this case all 3 nodes will act as control plane and worker nodes.
Click Next
On Next screen we see that node disks will be formatted

Click Next
Next we configure that API IP and Ingress IP
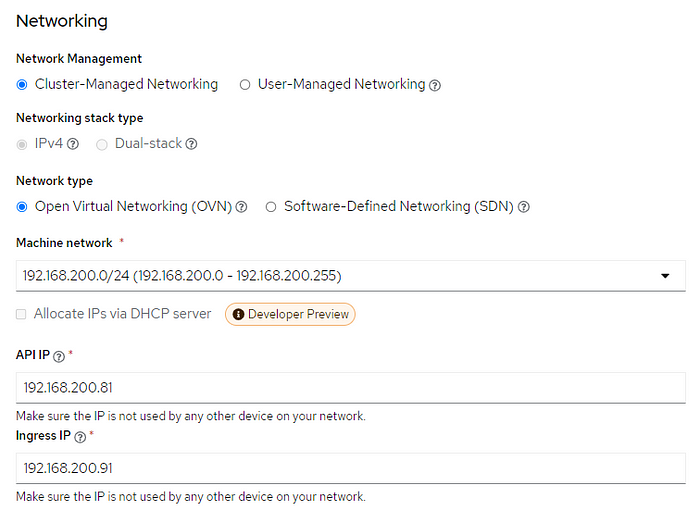
Click Next
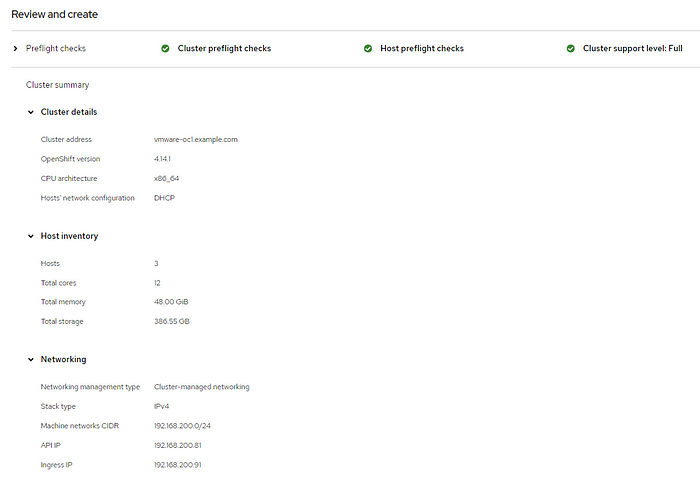
Next we review and create Cluster
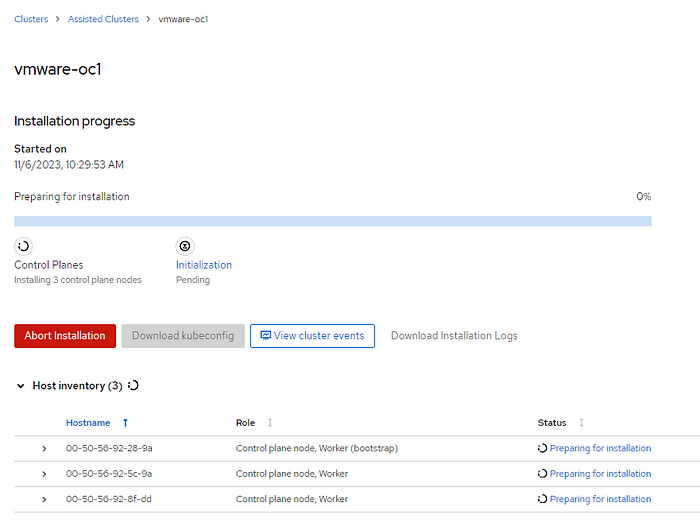
Click on Install Cluster. We can see that its Preparing for Installation
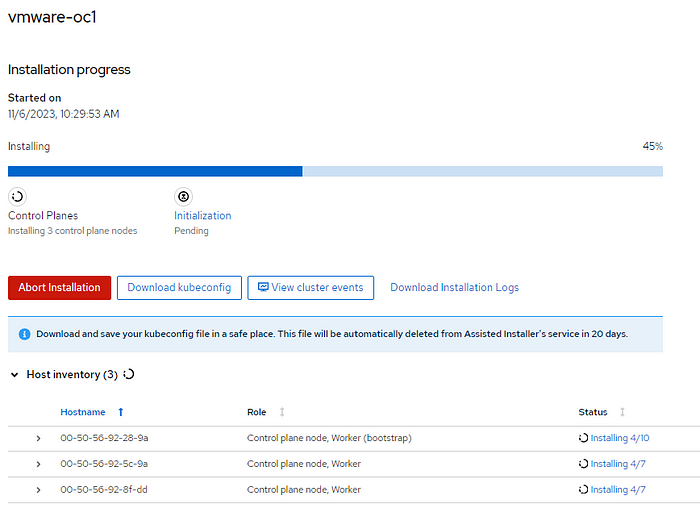
In few minutes installation starts.

We can see that installation is completed.
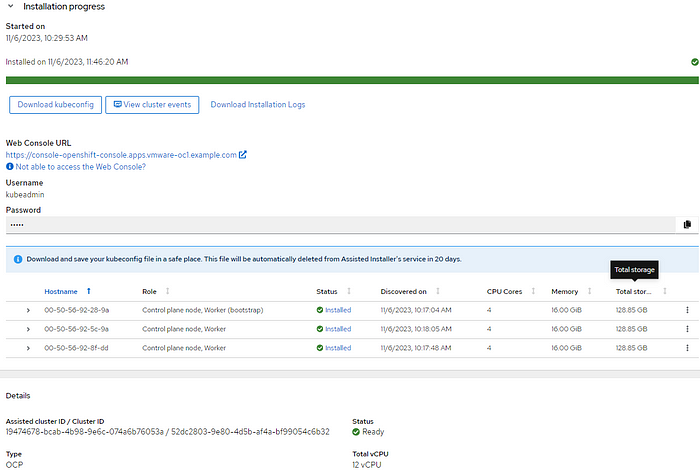
To access the cluster add below entries in /etc/hosts (on system, from where we will access the cluster)
[prayag@linux-bastion ~]$ cat /etc/hosts
127.0.0.1 localhost localhost.localdomain localhost4 localhost4.localdomain4
::1 localhost localhost.localdomain localhost6 localhost6.localdomain6
192.168.200.81 api.vmware-oc1.example.com
192.168.200.91 oauth-openshift.apps.vmware-oc1.example.com
192.168.200.91 console-openshift-console.apps.vmware-oc1.example.com
192.168.200.91 grafana-openshift-monitoring.apps.vmware-oc1.example.com
192.168.200.91 thanos-querier-openshift-monitoring.apps.vmware-oc1.example.com
192.168.200.91 prometheus-k8s-openshift-monitoring.apps.vmware-oc1.example.com
192.168.200.91 alertmanager-main-openshift-monitoring.apps.vmware-oc1.example.com
[prayag@linux-bastion ~]$
Download kubeconfig and note down kubeadmin password

Install oc on the system on which you want to access OpenShift cluster
[prayag@linux-bastion ~]$ wget https://mirror.openshift.com/pub/openshift-v4/x86_64/clients/ocp/stable/openshift-client-linux.tar.gz
 - 2023–11–05 23:54:26 - https://mirror.openshift.com/pub/openshift-v4/x86_64/clients/ocp/stable/openshift-client-linux.tar.gz
Resolving mirror.openshift.com (mirror.openshift.com)… 52.84.45.40, 52.84.45.64, 52.84.45.129, …
Connecting to mirror.openshift.com (mirror.openshift.com)|52.84.45.40|:443… connected.
HTTP request sent, awaiting response… 200 OK
Length: 63937892 (61M) [application/x-tar]
Saving to: 'openshift-client-linux.tar.gz'
100%[====================================================================================================================>] 6,39,37,892 8.61MB/s in 7.2s
2023–11–05 23:54:34 (8.41 MB/s) - 'openshift-client-linux.tar.gz' saved [63937892/63937892]
[prayag@linux-bastion ~]$ tar zxvf openshift-client-linux.tar.gz
README.md
oc
kubectl
[prayag@linux-bastion ~]$ sudo mv oc /usr/local/bin/
[prayag@linux-bastion ~]$ export KUBECONFIG=kubeconfig-vmware
Access nodes
[prayag@linux-bastion ~]$ oc get nodes
NAME STATUS ROLES AGE VERSION
00–50–56–92–28–9a Ready control-plane,master,worker 37m v1.27.6+f67aeb3
00–50–56–92–5c-9a Ready control-plane,master,worker 81m v1.27.6+f67aeb3
00–50–56–92–8f-dd Ready control-plane,master,worker 83m v1.27.6+f67aeb3
[prayag@linux-bastion ~]$ oc get all
Warning: apps.openshift.io/v1 DeploymentConfig is deprecated in v4.14+, unavailable in v4.10000+
NAME TYPE CLUSTER-IP EXTERNAL-IP PORT(S) AGE
service/kubernetes ClusterIP 172.30.0.1 <none> 443/TCP 93m
service/openshift ExternalName <none> kubernetes.default.svc.cluster.local <none> 62m
[prayag@linux-bastion ~]$
Deploy nginx container
[prayag@linux-bastion ~]$ oc create deployment nginx-deployment - image=quay.io/ocsci/nginx
deployment.apps/nginx-deployment created

[prayag@linux-bastion ~]$ oc expose deployment nginx-deployment - port=80 - name=nginx-service
service/nginx-service exposed

[prayag@linux-bastion ~]$ oc create route edge - service=nginx-service - hostname=nginx.example.com - insecure-policy=Allow
route.route.openshift.io/nginx-service created

[prayag@linux-bastion ~]$ oc get all
Warning: apps.openshift.io/v1 DeploymentConfig is deprecated in v4.14+, unavailable in v4.10000+
NAME READY STATUS RESTARTS AGE
pod/nginx-deployment-b9ffcb976-p8vc6 1/1 Running 0 24m
NAME TYPE CLUSTER-IP EXTERNAL-IP PORT(S) AGE
service/kubernetes ClusterIP 172.30.0.1 <none> 443/TCP 127m
service/nginx-service ClusterIP 172.30.26.228 <none> 80/TCP 24m
service/openshift ExternalName <none> kubernetes.default.svc.cluster.local <none> 96m
NAME READY UP-TO-DATE AVAILABLE AGE
deployment.apps/nginx-deployment 1/1 1 1 24m
NAME DESIRED CURRENT READY AGE
replicaset.apps/nginx-deployment-b9ffcb976 1 1 1 24m
NAME HOST/PORT PATH SERVICES PORT TERMINATION WILDCARD
route.route.openshift.io/nginx-service nginx.example.com nginx-service <all> edge/Allow None

[prayag@linux-bastion ~]$ curl nginx.example.com
<!DOCTYPE html>
<html>
<head>
<title>Welcome to nginx!</title>
<style>
body {
width: 35em;
margin: 0 auto;
font-family: Tahoma, Verdana, Arial, sans-serif;
}
</style>
</head>
<body>
<h1>Welcome to nginx!</h1>
<p>If you see this page, the nginx web server is successfully installed and
working. Further configuration is required.</p>
<p>For online documentation and support please refer to
<a href="http://nginx.org/">nginx.org</a>.<br/>
Commercial support is available at
<a href="http://nginx.com/">nginx.com</a>.</p>
<p><em>Thank you for using nginx.</em></p>
</body>
</html>
[prayag@linux-bastion ~]$
We have below entry in /etc/hosts in order to access nginx.example.com
[prayag@linux-bastion ~]$ cat /etc/hosts | grep nginx
192.168.200.81 nginx.example.com
[prayag@linux-bastion ~]$
Access OpenShift webconse from browser
https://console-openshift-console.apps.vmware-oc1.example.com/
login as kubeadmin credentials
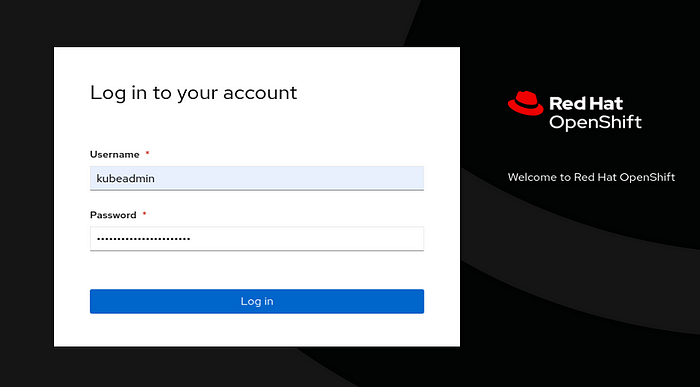
Once we login we can access the Dashboard
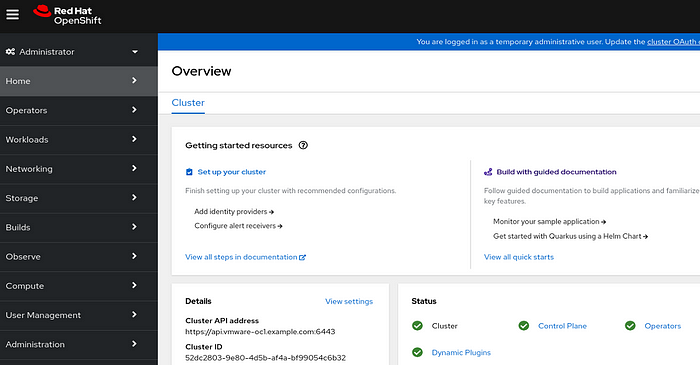
Get the token- On top right hand corner click on Copy login command

On Next screen it will give link to Display token

We can see the token details
Login with the token
[prayag@linux-bastion ~]$ oc login - token=sha256~sRUirhk88LBmsC3ykrdQn3jfnKS815PSgLTgnubP0sk - server=https://api.vmware-oc1.example.com:6443
The server uses a certificate signed by an unknown authority.
You can bypass the certificate check, but any data you send to the server could be intercepted by others.
Use insecure connections? (y/n): y
WARNING: Using insecure TLS client config. Setting this option is not supported!
Logged into "https://api.vmware-oc1.example.com:6443" as "kube:admin" using the token provided.
You have access to 69 projects, the list has been suppressed. You can list all projects with 'oc projects'
Using project "default".
Welcome! See 'oc help' to get started.
[prayag@linux-bastion ~]$ oc get nodes
NAME STATUS ROLES AGE VERSION
00–50–56–92–28–9a Ready control-plane,master,worker 114m v1.27.6+f67aeb3
00–50–56–92–5c-9a Ready control-plane,master,worker 158m v1.27.6+f67aeb3
00–50–56–92–8f-dd Ready control-plane,master,worker 160m v1.27.6+f67aeb3
[prayag@linux-bastion ~]$ oc get all
Warning: apps.openshift.io/v1 DeploymentConfig is deprecated in v4.14+, unavailable in v4.10000+
NAME READY STATUS RESTARTS AGE
pod/nginx-deployment-b9ffcb976-p8vc6 1/1 Running 0 67m
NAME TYPE CLUSTER-IP EXTERNAL-IP PORT(S) AGE
service/kubernetes ClusterIP 172.30.0.1 <none> 443/TCP 170m
service/nginx-service ClusterIP 172.30.26.228 <none> 80/TCP 67m
service/openshift ExternalName <none> kubernetes.default.svc.cluster.local <none> 139m
NAME READY UP-TO-DATE AVAILABLE AGE
deployment.apps/nginx-deployment 1/1 1 1 67m
NAME DESIRED CURRENT READY AGE
replicaset.apps/nginx-deployment-b9ffcb976 1 1 1 67m
NAME HOST/PORT PATH SERVICES PORT TERMINATION WILDCARD
route.route.openshift.io/nginx-service nginx.example.com nginx-service <all> edge/Allow None
[prayag@linux-bastion ~]$Thats it, hope you found this article to be useful in some way. I will be back with some more interesting articles on cloud, devop, kubernetes and openshift soon.
Tidak ada komentar:
Posting Komentar