Installation
https://www.youtube.com/watch?v=Y24ch4ywqyU
https://github.com/jekkos/opensourcepos
https://github.com/jekkos/opensourcepos
This installation guide covers installing OSPOS on Windows using WampServer. You should also be able to use this guide to help you install the system on any web server.
This guide has been tested with OSPOS 2.4.0. Ignore any images that mention another version. We just didn't bother updating them.
Feel free to contact us if there's a newer version released and we don't mention it on this page. We want to try to make sure this installation guide is always up to date.
When you download OSPOS, you should find a file called README.md. This includes information about how to install the application.
Unfortunately, these steps can be confusing for people not used to installing web applications. So we've written this guide to help out the OSPOS community. Note that we've changed the order of some of the steps to make the installation process easier.
We've also assumed that you know basic Windows administration, such as unzipping files and copying files into directories.
How to Install
1. Create/locate a new MySQL database to install Open Source Point of Sale into
To do this, you actually have two options: you can install OSPOS on your local computer or you can install it on the Web.
For this guide, we're going to assume you're installing it on your local Windows machine.
Start by downloading and installing WampServer. You'll need this software to run OSPOS.
(Note: we couldn't get WampServer 3 to work with OSPOS, so we use WampServer 2.5 32 bit, even with our Windows 10 64 bit test machine. We are looking into this.)
When WampServer's installed, look in your taskbar for a Green W. Click that icon, and look for phpMyAdmin. Click that, and the program should launch.
You should find yourself inside phpMyAdmin. Click on the Databases tab to get to the "Create New Database" form.
Fill out a name and click the Create button. It should look like the screenshot below:

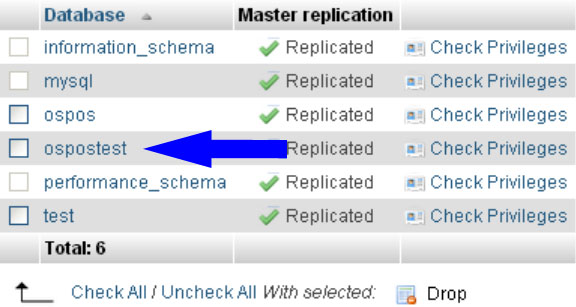
You should now see your new database in the Databases list. Click on your new database. It should look something like this:

Now that you've loaded up your new database, it's time to add a user.
Click on the Privileges tab and then on the "Add User" link.
(Note: If you don't see the Privileges tab, look for it under the More tab.)
Fill out the "Add User" form.
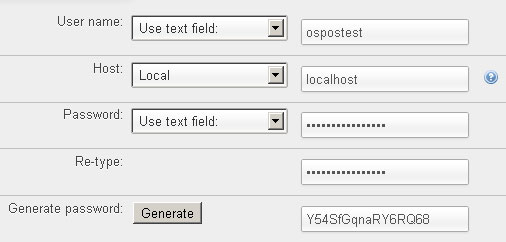
The "Login Information" should look like the screenshot below:

Obviously, you can use any user name and password that you want. We always automatically generate a password with phpMyAdmin, because it's more secure.
Now, before you do anything else, open up Notepad or your favorite text editor and copy the User name, password, and database name into it. You'll need this information in a few minutes.
When you've done that, scroll down to the bottom of the page in phpMyAdmin and click the "Add user" button in the bottom right hand corner. You can leave the rest of the settings as they are. You've now created a user for your database.
2. Unzip and upload the Open Source Point of Sale files to web server
Download the latest version of OSPOS if you haven't already. You can download it from Github. Scroll to the bottom of the page, and look under the Downloads section.
When you download that file, you'll want to unzip the OSPOS files into your WampServer web directory.
Usually, this directory is something like "C:\wamp\www". So, unless you've changed this, unzip the OSPOS files there. The files are stored in a directory called "opensourcepos-2.4". Rename this to opensourcepos.
3. Execute the file database/database.sql to create the tables needed
Now that you've created a database and a user, and unzipped the OSPOS files, you'll need to add some data to your database so that Open Source Point of Sale will work.
Make sure you're inside the database you made. Then click on the "Import" tab in phpMyAdmin. It will look like the screenshot below:

You'll get to a screen called "Importing into the database...". Look under the "File to import" heading for the "Choose File" button. Click that, and browse to "C:\wamp\www\opensourcepos\database" and double-click on the "database.sql" file. Look for the "Go" button at the bottom of the page, and click it. You can leave the rest of the settings as they are.
When it's done importing the file, you should see a green success message that looks like the screenshot below:

This means that the tables and data you need to use OSPOS have been created.
4-6. Modify OSPOS configuration files
Browse to "C:\wamp\www\opensourcepos\application\config" and look for a file called "database.php.tmpl". Rename this file "database.php" and then open it so you can edit it.
(Note: if you need a good text editor, try Notepad++.)
You'll want to change lines 79-81.
79: $db['default']['username'] = '';
80: $db['default']['password'] = '';
81: $db['default']['database'] = '';
Copy your username, password, and database from the text file you created earlier into the configuration file. Make sure you paste them between the single quotes.
Modifying these lines will tell OSPOS to use the database and user you created earlier.
Save this file, and then open "config.php" and look on line 330. Change this line to a unique encryption key.
Feel free to use the random key generated by this encryption key generator.
You're now done editing the configuration files. It's time to run the application for the first time.
7. Go to your Point of Sale install via the browser
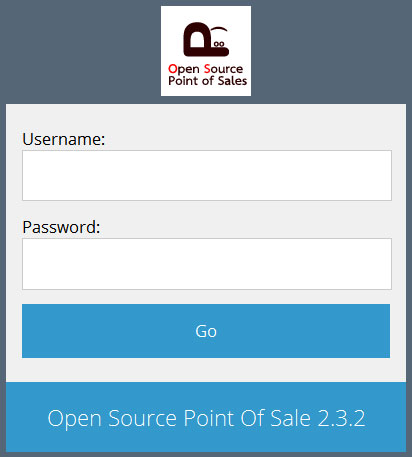
You can reach your OSPOS install via a web browser. Browse to "http://localhost/opensourcepos/" and you should see the OSPOS login form. It should look like the screenshot below:

(Note: If you see an error message that says "Internal Server Error", make sure the Apache Rewrite Module is active. Click the Green W and go to Apache->Apache modules. Make sure rewrite_module is checked.)
8. LOGIN using default username and password
The default login information is:
Username: admin
Password: pointofsale
Password: pointofsale
Type these into the Login Form, and click the Go button.
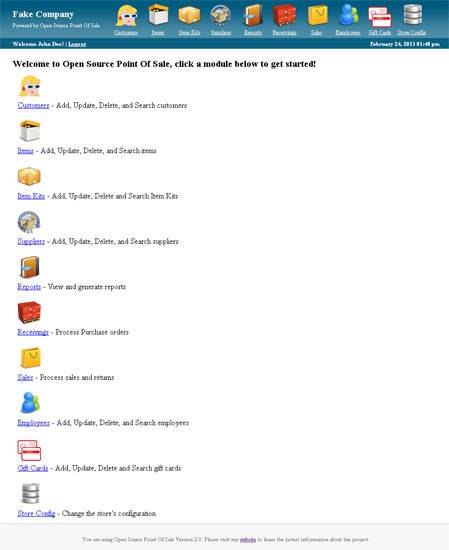
If you've installed OSPOS correctly, you should see the welcome screen:

Note: if you want Open Source Point of Sale to look more like an application, instead of a website, please read our tip about Google Chrome application shortcuts.
Tidak ada komentar:
Posting Komentar