Creating an IOT or MQTT Dashboard Using Thingsboard
It is available for download and installation on your own hardware or as an online service for demonstration purposes.
In this tutorial we will configure a simple Dashboard to display data from sensors using MQTT and Python.
There are two sensors, a main door sensor and a main light sensor. Our final demo dashboard will appear like this
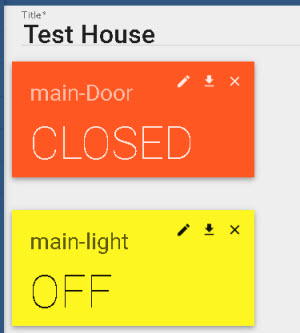
The first step is to create your own demo account by signing up here.
Once you have an account and have verified it you can login to thingsboard here.
Process Overview
- Create device or devices
- Assign device to Widget
- Assign Widget to Dashboard
- Add new widgets and edit as necessary
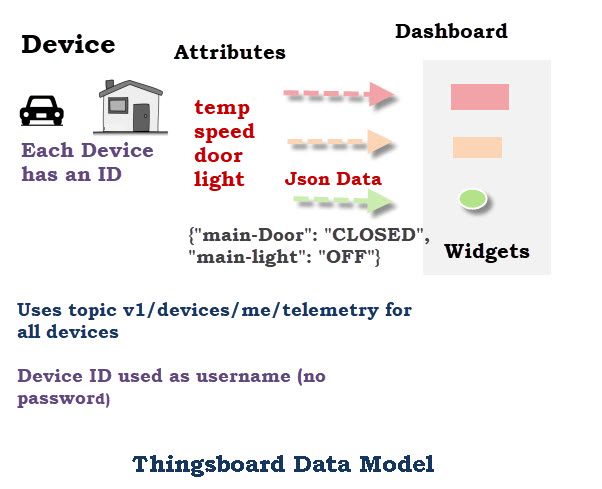
The diagram below illustrates the process:
 Devices
The first thing you need to create is a device.
Go to devices and click on the add device circle in the lower right hand corner
You will need to give the device a name and add a description. Leave the is gateway box un-checked.
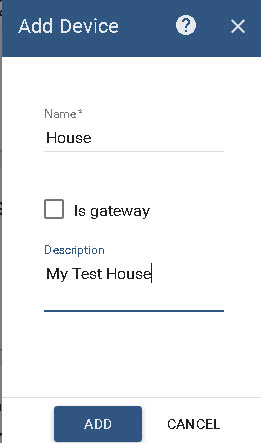
Click ADD when done.
Now click on the device card to edit the device, and then click the tick icon to display and edit the device properties.
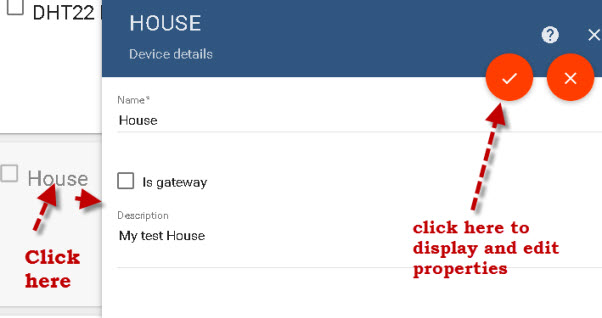
Each device is assigned an access token which is used by the device to identify itself to the thingsboard platform.
You will need to copy this access token for use in your MQTT client. You can do this using the copy access token tab.
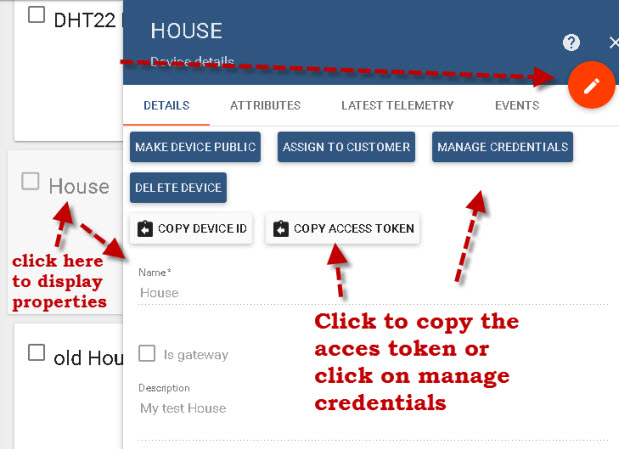
Or by clicking on the manage credentials tab
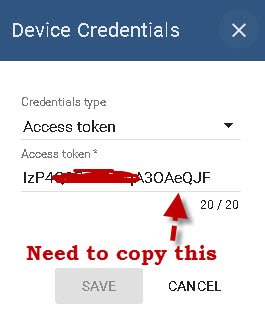
The access token you will use as the username in MQTT. There is no password.
The actual physical device is responsible for sending data to thingsboard.
All data is sent to the following topic id:
v1/devices/me/telemetry
Note: A device need not be a single device like a sensor as devices publish data as a JSON object.
The device client attributes can be used to manage the device, but these must first be populated by the client. We will not be using device attributes in this tutorial.
The device is now usable and can receive data.
If you follow the introduction on the thingsboard website they use a Javascript client and Node.js to send data.
In this tutorial we will send data using MQTT and a Python client.
Configuring The Python Client
We need to configure the following:
username= access token
password=”” #not used
broker=demo.thngsboard.io
topic=v1/devices/me/telemetry
password=”” #not used
broker=demo.thngsboard.io
topic=v1/devices/me/telemetry
We also need to package the data in a dictionary object and then convert it to a JSON encoded string to output
Here is my demo script (partial) that simply simulates a light sensor and a door sensor.
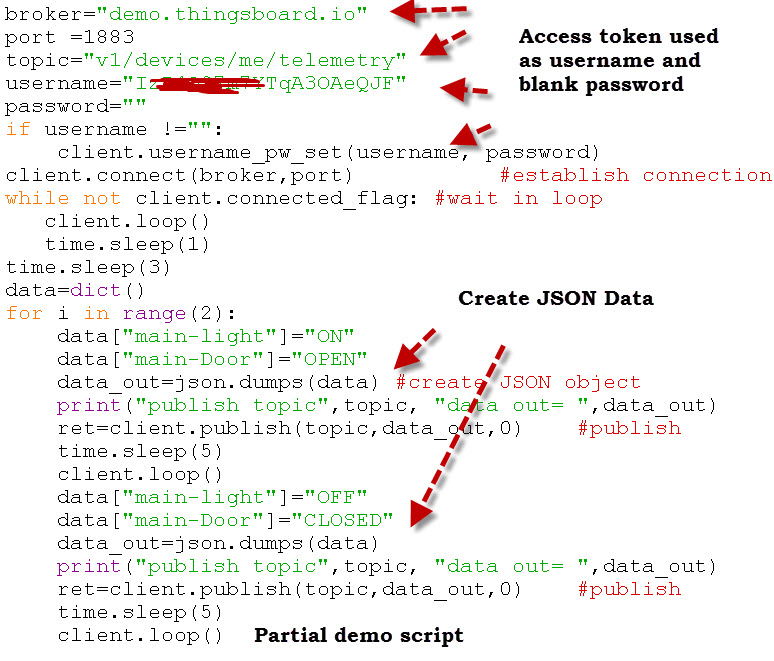
The light is either on or off, and the door is either open or closed.
When I run the script this is what I see on the console.
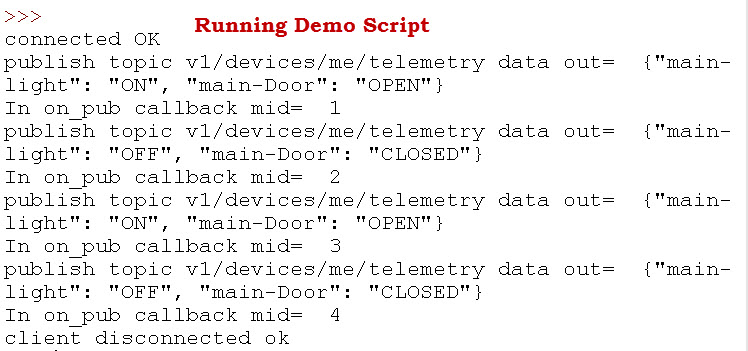
To view the results on the device in thingsboard go the device telemetry tab.
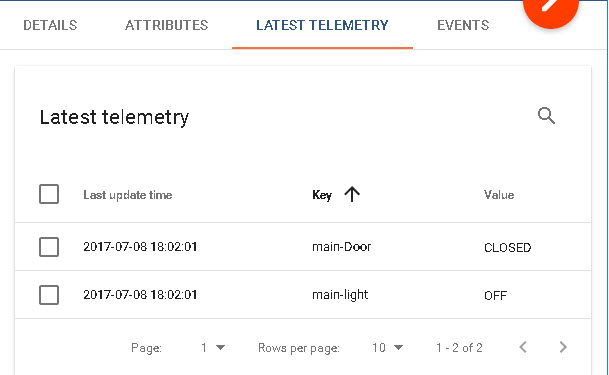
To visualize data from this device we need to configure a dashboard and a display widget.
We start by adding the device to a widget.
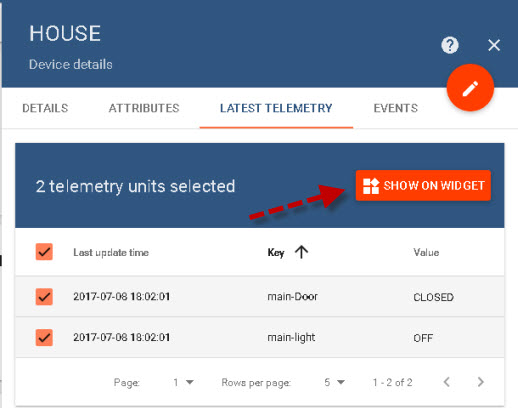
To add this device to a widget click on the check box next to last update time
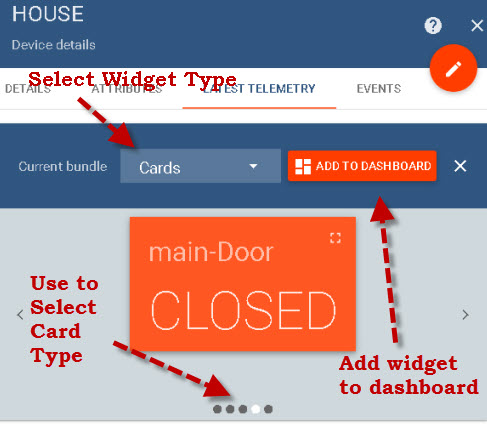
Now select the widget type (cards) and then use the small circles to select the card type, and then click add to dashboard.
You can now add the widget to an existing dashboard or create a new dashboard.
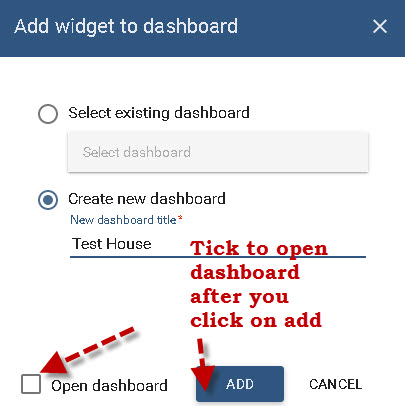
If you tick the checkbox to open the dashboard, when you click ADD the dashboard will open and display the widget.
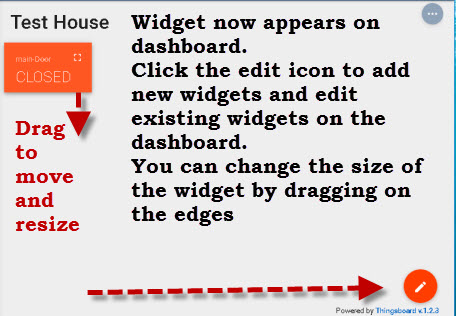
Adding A new Widget to the Dashboard
To add a new widget or edit the dashboard click on the edit (pencil) icon in the lower right corner of the dashboard.
When adding a new widget you first need to select the type of widget.
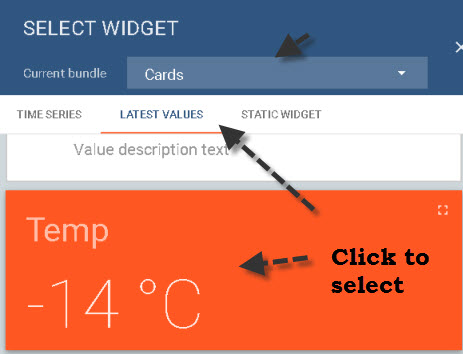
Now you need to select a data source for the Widget.
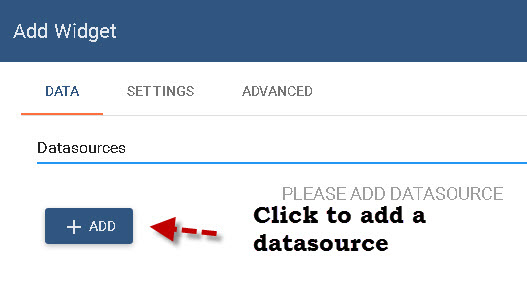 Now configure the datasource. In the example below our datasource is called house which is the name of the device we configured earlier and we select the main-light property. The Main-door property we added to our first widget.
Now you can edit the card settings and change colour and fonts etc.
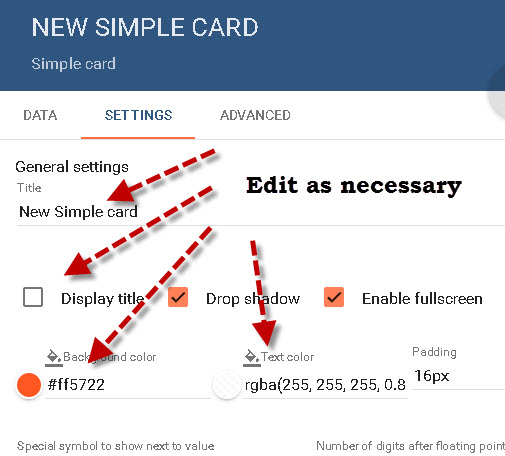
When finished the new widget appears on the screen.

As long as the edit icons are showing you can rearrange and edit widgets on the dashboard.
When finished click on the tick icon.
Making the Dashboard Public
You can also make the dashboard public which makes it visible to everyone.
Sending Test Data Using Mosquitto_pub Tool
You can send test data using MQTT and the mosquitto_ pub tool.
You need:
You need:
- Your access token for the username -Ahwpx1r8fNNQbr9JILm3
- Broker name demo.thingsboard.io
- topic -v1/devices/me/telemetry
- JSON Data -“{\”main-light\”:\”OFF \”,\”main-Door\”:\”CLOSED\”}”
Command shown below:
mosquitto_pub -h demo.thingsboard.io -u Ahwpx1r8fNNQbr9JILm3 -t v1/devices/me/telemetry -m "{\"main-light\":\"OFFs \",\"main-Door\":\"CLOSED\"}"
Sending Test Data Using cURL
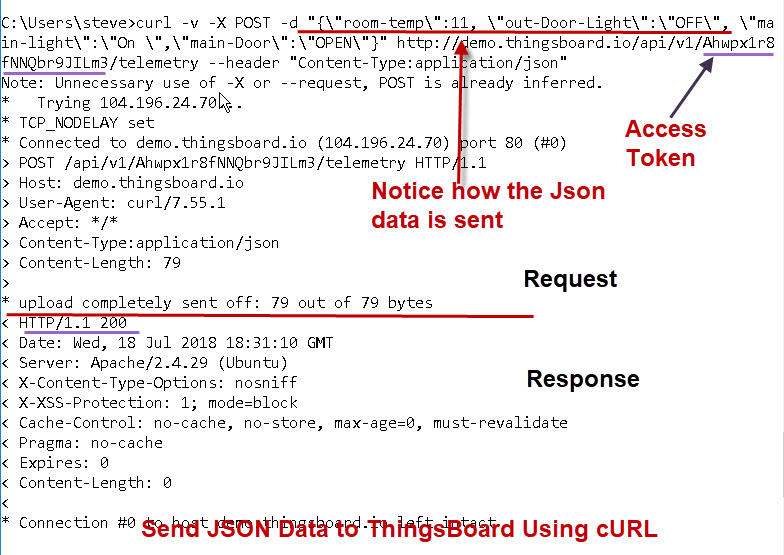
You can publish data to Thingsboard using http and curl.
The thingsboard website give the various formats supported and example curl commands.
Unfortunately these didn’t work on windows until I escaped the quotes on the data keys and values.
The format I used was the simple format
{"key1":"value1", "key2":"value2"}
The data needs to be JSON encoded .
The ThingsBoard dashboard has two devices a light and door. The JSON data looks like this
“{, \”main-light\”:\”OFF \”,\”main-Door\”:\”OPEN\”}”
Notice I had to escape the quotes around the keys and values.
Here is a command example
Video -Creating an MQTT (IOT) Dashboard Using Thingsboard
Here is my demo test house dashboard that I created in the video tutorial. You can download the python scripts used in the video here.
References:
Related Tutorials:
- Internet of Things for beginners
- IOT and MQTT Dashboards and Platforms-Working Notes
- Node Red Overview for Beginners
- Create an MQTT broker Using CloudMQTT
[Total: 4 Average: 5/5]
 Devices
Can you tell me which python script did you use? Because the one I use, thingsboard-1, I get errors:
File “primjer1.py”, line 34, in
client.connect(broker,port)
File “C:\Users\Korisnik\AppData\Local\Programs\Python\Python36-32\lib\site-packages\paho\mqtt\client.py”, line 839, in connect
return self.reconnect()
File “C:\Users\Korisnik\AppData\Local\Programs\Python\Python36-32\lib\site-packages\paho\mqtt\client.py”, line 962, in reconnect
sock = socket.create_connection((self._host, self._port), source_address=(self._bind_address, 0))
File “C:\Users\Korisnik\AppData\Local\Programs\Python\Python36-32\lib\socket.py”, line 704, in create_connection
for res in getaddrinfo(host, port, 0, SOCK_STREAM):
File “C:\Users\Korisnik\AppData\Local\Programs\Python\Python36-32\lib\socket.py”, line 745, in getaddrinfo
for res in _socket.getaddrinfo(host, port, family, type, proto, flags):
socket.gaierror: [Errno 11001] getaddrinfo failed
http://www.steves-internet-guide.com/downloads/