Minggu, 31 Januari 2016

Web ERP


How to Install WebERP with Ubuntu 15.10

Introduction

WebERP is an open source, very popular and business process management system which comes in more then 33 languages, it is open source and totally free application which is based on PHP, is is one of the best available business administration software with very low footprint and minimum network traffic.

Features

Some of the highlighted features are:

General Features

totally web based, platform independent and can be easily integrated with a wiki, it comes with customizable themes.

Security

Role base authentication for users, all inputs are sanitised to prevent mysql injections and cross site scripting, pages can be encrypted using SSL. Users can permitted to see defined portions/modules only.

Inventory

Stock management, stock movement history, selling price in various currencies, reorder level can be maintained, Bill of Material can be maintained.

Accounts and finance management

Supplier management, invoice management, bank accounts can be added and bank accounts reconciliation statements can be generated.

Manufacturing

Work order costing, automated issue of components required as per Bill of Material, issue of labour time or other services to work order.

Installation and prerequisites

This ERP be is easy to install in a straightforward manner, you will need a a fresh Ubuntu 15.10 based machine with minimum dual core processor, minimum 4 GB RAM, A web server  apache2/nginx, mysql database, php packages are required in form of software.

Steps

Update system
# apt-get update
Install Database server
# apt-get install mysql-server
Install your favourite web server
# apt-get install apache2
Install php
# apt-get install php5
Create a database and a database user which will have all access to this newly created database
#mysql -u root -p mysql

mysql>create database weberp;

mysql> grant all on weberp.* to 'unixmen'@'localhost' identified by 'password';

mysql>flush privileges;

mysql>/q
Download package from this link
Extract package to /var/www/html/
# unzip webERP_4.12.3.zip -d /var/www/html
Change permissions
# chmod -R 755 /var/ww/html/webERP
Change ownership
# chown -R www-data: /var/www/html/webERP
Restart services
# /etc/init.d/apache2 restart
Open browser of your choice and type
<ip_address>/webERP
Selection_004
When I click next, got encountered with following screen
Selection_002
So, I install phph5-mysql then restart apache service to resolve the issue
# apt-get install php5-mysql
# /etc/init.d/apache2 restart
Click next fill required credentials
Selection_004


You can browse your organization logo, provide admin password, click next
Selection_005
Login with newly created admin password
Selection_006
Configure primary setting in setup section
Selection_008
Company preference section will look something like
Selection_007
Installation steps are finished at that stage we can explore some of the features in examples.

Examples

Add customers

Go to customer tab-> click to add new customer
Selection_009

Inventory

Go to item menu  and you can add your inventory items with a detail
Selection_011

Asset management

Software provide a detailed feature of asset management, go to main menu and click on asset management
Selection_012
There are lots and lost of feature which you can explore by yourself.

Conclusion

This ERP is ready to use type of application, very effective for even Larger Enterprises, no hidden license charges, usable for retailers, stockists, production companies or other enterprises, a must have for any business who are seeking a  low budget or free open source ERP application.
Have fun!

Youtube LAN


Install ClipBucket with Ubuntu 15.10

Introduction

ClipBucket is open source script used for video sharing.It comes with very effective features like  HQ video customization, Multiple language support, several video moderation tools.It uses FFMpeg, flash and HTML5 for streaming.It comes with media management and user management features. Recently ClipBucket article was published on unixmen.com based on CenOS Linux, refer below link to have a look

Installation and prerequisites

We will need a fresh installed Ubuntu 15.10, Apache. MySQL,FFMpeg, ImageMagic, and FLVTool.
Update  system
apt-get update
Install Apache, MySQL
apt-get install apache2 mariadb-server
Install php and ruby packages
apt-get install php5 php5-mysql php5-curl php5-gd php5-cli ruby
Install other dependencies
Install FFMPEG
apt-add-repository ppa:mc3man/trusty-media
Sample output
Press [ENTER] to continue or ctrl-c to cancel adding it

gpg: keyring `/tmp/tmp624ee04k/secring.gpg' created
gpg: keyring `/tmp/tmp624ee04k/pubring.gpg' created
gpg: requesting key ED8E640A from hkp server keyserver.ubuntu.com
gpg: /tmp/tmp624ee04k/trustdb.gpg: trustdb created
gpg: key ED8E640A: public key "Launchpad PPA for Doug McMahon" imported
gpg: Total number processed: 1
gpg:               imported: 1  (RSA: 1)
OK
Update System and install ffmpeg package
apt-get update && apt-get install ffmpeg
Install imagemagic
apt-get install imagemagick php5-imagick
Install flvtool2
gem install flvtool2
Sample output
Fetching: flvtool2-1.0.6.gem (100%)
Successfully installed flvtool2-1.0.6
Parsing documentation for flvtool2-1.0.6
Installing ri documentation for flvtool2-1.0.6
Done installing documentation for flvtool2 after 1 seconds
1 gem installed

Install GPAC
apt-get install gpac mediainfo
Download package
wget http://netix.dl.sourceforge.net/project/clipbucket/ClipBucket%20v2/clipbucket-2.8.v3354-stable.zip
Create a database and a database user
mysql -u root -p
Welcome to the MariaDB monitor.  Commands end with ; or \g.
Your MariaDB connection id is 43
Server version: 10.0.22-MariaDB-0ubuntu0.15.10.1 (Ubuntu)

Copyright (c) 2000, 2015, Oracle, MariaDB Corporation Ab and others.

Type 'help;' or '\h' for help. Type '\c' to clear the current input statement.

MariaDB [(none)]> create database unixmen;
Query OK, 1 row affected (0.00 sec)

MariaDB [(none)]> grant all on unixmen.* to 'unixmen'@'localhost' identified by 'P@ssw0rd';
Query OK, 0 rows affected (0.01 sec)

MariaDB [(none)]> \q;
Unzip downloaded folder and copy to web directory
unzip clipbucket-2.8.v3354-stable.zip -d /var/www/html/
Rename Package
cd /var/www/html 
mv clipbucket-2.8.v3354-stable/ clipbucket
Change permissions and ownership of Package
 chown -R www-data:www-data clipbucket/
 chmod -R 777 /var/www/data/clipbucket
Restart Apache service
/etc/init.d/apache2 restart
Open Browser
and type
ip_addr/clipbucket and proceed
Selection_042
Accept License Agreement and click to next, if all things looks good click to next
Selection_043
All file permission looks good, click next
Selection_044
Provide database credentials which you have created in database
Selection_045
Change admin password, save settings and continue
Selection_047
Skip and finish
Selection_048
Login to admin panel first then upload videos
Selection_049

Selection_050
Click to upload video and try to upload some videos
Selection_051

Thats It!

Conclusion

ClipBucket is very easy to use and deploy video sharing tool, first it was developed as a clone of YouTube but now is a very popular open source video sharing platform.
Have fun!!

Monitoring infrastruktur

NetXMS adalah open source berkembang pesat sistem monitoring yang dapat digunakan untuk memantau infrastruktur TI secara keseluruhan, dimulai dengan hardware SNMP-mampu (seperti switch dan router) dan diakhiri dengan aplikasi pada servers.Features di perangkat lunak glanceThe dirancang untuk skalabilitas maksimum dan kinerja, mendukung didistribusikan pemantauan jaringan, dan penemuan jaringan otomatis. Ini fitur pemrosesan event mudah digunakan dan fleksibel, serta integrasi sederhana dan mudah dengan produk-produk terkait.
Hal tersebut terintegrasi dengan baik dengan kedua API Java (Application Programming Interfaces) dan kode C asli, sehingga Anda dapat dengan cepat mengembangkan aplikasi client kustom, itu sepenuhnya kompatibel dengan plugin diciptakan untuk terkenal sistem pemantauan nagios, menawarkan agen modular dan struktur Server , serta built-in interface yang mencakup sistem helpdesk.
Fitur lain yang menarik adalah penemuan jaringan otomatis untuk OSI lapisan 2 dan 3. Hal ini juga dilengkapi dengan acara pengolahan berbasis kebijakan yang fleksibel dan ambang batas sistem untuk data yang dikumpulkan, Dukungan untuk SNMP (Simple Network Management Protocol) versi 1, 2c dan 3, dan nuilt-in mesin scripting.
Saat ini, aplikasi ini mendukung berbagai database SQL, termasuk MySQL, PostgreSQL, Microsoft SQL Server dan Oracle, dan termasuk analisis dampak bisnis utilitas. Hal ini dapat dengan cepat dikerahkan dengan konfigurasi efforts.Supported minimal systemsNetXMS operasi adalah aplikasi platform-independen yang berjalan di awan dan saat ini didukung pada semua distro GNU / Linux serta pada BSD, Solaris, Mac OS X dan Microsoft Windows sistem operasi. 32-bit dan 64-bit arsitektur hardware yang didukung saat ini.
Saat ini, NetXMS tersedia untuk di-download sebagai sumber yang universal arsip, yang berarti bahwa Anda akan dapat mengoptimalkan aplikasi untuk sistem operasi GNU / Linux dan platform perangkat keras. Rincian lebih lanjut tentang proyek ini dapat ditemukan di website resmi
Apa yang baru dalam rilis ini:.
  • sumber New DCI : Script NXSL dijalankan di server
  • kebijakan yang cocok simpul Dikonfigurasi untuk built-in server syslog (dikontrol oleh parameter konfigurasi SyslogNodeMatchingPolicy)
  • Oracle pemantauan subagen ditingkatkan (bug, metrik baru)
  • alat nxalarm mendukung perintah add-komentar dan mendapatkan komentar-
  • Nomor Sumber pelabuhan ditambahkan ke peristiwa yang dihasilkan dari SNMP trap (tersedia melalui & quot; sourcePort & quot; bernama parameter)
  • Link Jira: kemungkinan ditambahkan untuk mengatur komponen proyek untuk masalah yang dibuat
  • ICMP proxy dapat diatur untuk node
  • Metode baru dalam kelas NXSL Node, Interface, dan NetObj: setStatusCalculation dan setStatusPropagation
  • atribut baru & quot; Slot & quot; dan & quot; pelabuhan & quot; di kelas NXSL Antarmuka
  • Dapat menjalankan script NXSL sewenang-wenang dalam konteks node, cluster, subnet, atau objek kontainer dari manajemen konsol
  • Peningkatan topologi jaringan berubah deteksi
  • sopir Ditambahkan untuk switch H3C
  • konsol Manajemen:
  • Dapat menunjukkan alarm untuk beberapa objek yang dipilih
  • Tetap memesan non-kerja dalam daftar acara di rincian alarm melihat
  • Fixed bug dengan hak sistem LDAP pengguna
  • Ditambahkan standar string pencarian untuk LDAP untuk memilih semua objek: & quot; (objectClass = *) & quot;
  • pelacakan Ditambahkan perangkat geolocation dan ditampilkan pada peta
  • Filter editor kebijakan pemrosesan event
  • Fixed bug dengan penghapusan subnet dengan IP dikoreksi
  • Ditambahkan baris perintah pilihan untuk membuka dashboard tertentu setelah login
  • Android konsol:
  • Tetap masalah # 661
  • Ditambahkan waktu simpul boot untuk ikhtisar tab
  • bug Fix dalam memberitahukan titik koneksi tidak ditemukan
  • bug Fix dalam menghitung antarmuka diperluas ukuran daftar (dihapus nilai hardcoded)
  • Ditambahkan mengelola, unmanage, set diharapkan negara (atas, bawah, abaikan) dan menemukan port switch untuk antarmuka daftar
  • Memperbaiki masalah estetika dalam daftar diperluas (grafik dan interface daftar)
  • Integrasi perpustakaan dukungan baru
  • Target ke versi API baru (20)
  • Tetap masalah: # 51, # 91, # 324, # 359, # 409, # 532, # 542, # 571, # 563, # 590, # 593, # 613, # 617, # 624, # 626 , # 629, # 632, # 635, # 638, # 639, # 641, # 642, # 649, # 658, # 663

Install NetXMS with Ubuntu 15.10

NetXMS is an enterprise grade network management and performance monitoring system. It provides a detailed reports in the form of graphs, logs etc. It grab almost all of the required information which will be necessary for any kind of monitoring system like  mac or ip based information discovery, easy to handle event processing or web based or console based management, it is an Open Source tool available for Microsoft and Linux based operating systems.

Some of the highlighter features

General

  1. Data is collected either from SNMP or from native NetXMS agents.
  2. SMS and email alerts like features are provided.
  3. Event forwarding to another netXMS server.
  4. Automatic network discovery for OSI layer 2 and 3.
  5. Uses very low system resources.

Security

  1. Authenticated with username and and password.
  2. Group level user level rights can be managed.
  3. Smart cards, RADIUS server are supported.

Integration

  1. Native C and JAVA (Tomcat) API for rapid customization.
  2. Based on modular server and agent architecture.
  3. Built in interface with help desk system.
  4. Firewall friendly communication.
Please refer following link for more details

Prerequisites and Installation steps

We will need a Fresh Ubuntu 15.10 System with at least 4 GB RAM, 8 GB free disk space. In form of software we will required tomcat6 or tomcat7, mysql-server and some other supporting tools.

Step 1. Prepare system by installing all of the prerequisites

Update system
# apt-get update
Install  mysql
# apt-get install mysql-server
Install latest version of apache tomcat
# apt-get install tomcat7
Install  libmysqlclient-dev and libssl packages
   # apt-get install libmysqlclient-dev
   # apt-get install libssl-dev

Create a database and a user to have access this newly created database.
# mysql -u root -p mysql
mysql> CREATE DATABASE netxms;
mysql> GRANT ALL ON netxms.* TO netxms@localhost IDENTIFIED BY 'password';
mysql> \q

Step 2. Now download NetXMS server package

Download latest copy of NetXMS server package from this link
# wget http://www.netxms.org/download/archive/netxms-1.2.17.tar.gz
Extract package
# tar -xvf netxms-1.2.17.tar.gz

Step 3. Configure package

# sh ./configure --with-server --with-mysql --with-agent
# make 
# make install
If package is successfully installed you will got a message something like below
Configure results
---------------------------------------------------------------------

Prefix                  : /usr/local
Platform                : Linux
Shared library suffix   : .so
Build Server            : YES
Server libs             :  -lssl -lrt
LDAP support            : NO
XMPP support            : YES
Encryption enabled      : YES
Build DB-Drivers        : mysql
Build Clients           : NO
Build Agent             : YES
Subagents list          : linux
Build Static Agent      : NO
UNICODE build           : NO
Use internal libexpat   : YES
Use internal libtre     : YES
Use internal libjansson : YES
Use internal zlib       : NO
Force 32bit build       : NO
C compiler              : gcc
C++ compiler            : g++
CPPFLAGS                :  -D_THREAD_SAFE -DTRE_WCHAR=1 -D_GNU_SOURCE -O2 -Wformat -I/usr/local/include -DPREFIX=\"${prefix}\" -DDATADIR=\"${pkgdatadir}\" -DBINDIR=\"${bindir}\" -DLIBDIR=\"${libdir}\" -DPKGLIBDIR=\"${pkglibdir}\" -DNDEBUG
CXXFLAGS                : -g -O2 -fno-rtti -fno-exceptions
CFLAGS                  : -g -O2
LDFLAGS                 :   -L/usr/local/lib
LIBS                    : -lresolv -lz -ldl  -lpthread -lcrypto
MySQL CPPFLAGS          : -I/usr/include/mysql
MySQL LDFLAGS           : -L/usr/lib/mysql
MySQL LIBS              : -lmysqlclient
Everything looks good up to this stage let use make next move and download following two sample files to /etc from package directory.
# cp contrib/netxmsd.conf-dist /etc/netxmsd.conf 
# cp contrib/nxagentd.conf-dist /etc/nxagentd.conf
Open  /etc/netxmsd.conf  file and contents fo the file must be something like below, make sure you to match Database password.
# nano /etc/netxmsd.conf
Sample output
DBDriver = mysql.ddr
DBServer = localhost
DBName = netxms
DBLogin = netxms
DBPassword = password
LogFile = /var/log/netxmsd
LogFailedSQLQueries = yes

Open /etc/nxagentd file and put following line at the end of the file
# nano  /etc/nxagentd
MasterServers = 127.0.0.1, 192.168.1.4
When you are done initialize the database
 # /usr/local/bin/nxdbmgr init /usr/local/share/netxms/sql/dbinit_mysql.sql
Initialize agent and server services
 # /usr/local/bin/nxagentd -d
 # /usr/local/bin/netxmsd -d

Step 4. Download and run we b based management  utility

Download latest version of nxmc package required for web based management from this link
# wget https://www.netxms.org/download/archive/webui/nxmc-1.2.17.war

Copy that downloaded package to   tomcat webapp directory which is  /var/lib/tomcat7/webapps/
#  cp nxmc.x.x.war  /var/lib/tomcat7/webapps/
Rename that pacakge to nxmc
# rename nxmc-1.2.17 nxmc
Open your browser and type
http://ip_address:8080/nxmc
Login with default user: admin default password: netxms
Selection_020
Change admin password
Selection_021
You can manage all of your network resource with this  console
Selection_022

Explore features available with NetXMX by yourself.
Selection_023

Have fun!

Script hapus file linux

http://tutorialubuntuindonesia.blogspot.co.id/2013/07/menghapus-file-lebih-dari-x-hari-di.html

Hiyaa, ketemu lagi di blog Tutorial Linux Ubuntu Berbahasa Indonesia. Metode ini biasanya digunakan untuk daily backup pada sebuah storage yang dikhususkan untuk backup. Retensi backup yang diberikan bisa diatur sesuai keinginan kita. Mengapa harus seperti ini? Jawabannya adalah untuk menghemat space di storage kita. Bayangkan saja kalau setiap hari membackup pasti lama-lama storage kita akan penuh, maka dari itu file-file backup yang lama bisa di burning ke DVD/CD, atau kita menghapusnya seperti topik yang akan saya bahas.

Metode ini menggunakan Shell Script yang akan di eksekusi dengan crontab setiap jangka waktu tertentu, sudah pasti ini akan menjadi patokan retensi backup kita kan. :) sebenarnya tidak terlalu sulit untuk melakukannya, jadi jangan khawatir. Ikuti saja langkah-langkah cara menghapus file lebih dari x hari ini, anda juga bisa dengan bebas menjiplak shell script yang akan saya buat :)

Skenario :
Kita melakukan daily backup pada folder /home/apocalypsix/backup/. Didalam folder tersebut pasti akan tersimpan file backup dengan timestamp yang berbeda-beda. Setiap 7 hari jam 12:01 malam crontab akan mengeksekusi shell script dibawah ini.

Sample script :
SHELL=/bin/sh
PATH=/sbin:/bin:/usr/sbin:/usr/bin

SEVENDAY=`date "+%d.%m.%Y" --date="-7 days"`

rm /home/apocalypsix/backup/backup_$SEVENDAY.tar.gz

  • Pada baris pertama dan kedua kita menentukan eksekutor shell script.
  • Pada baris ketiga kita sedang membuat aturan retensi hari, untuk bagian "--date="-7 days" anda bisa mengubah angkanya menjadi hari yang anda inginkan.
  • Pada baris keempat kita akan menghapus semua file yang bernama backup_ dengan memasukkan variabel retensi serta ekstensi file.
Untuk mengatur shell script ini berjalan setiap 7 hari, kita menggunakan crontab. Asumsi bahwa shell script tersimpan di /home/apocalypsix/shell/delete7day.sh. Jangan lupa untuk menambahkan permission x pada shell script anda, chmod 700 /home/apocalypsix/shell/delete7day.sh.
1 0 * * 0 /home/apocalypsix/shell/delete7day.sh
Dari crontab diatas, shell script kita akan di eksekusi pada hari ke 0 (hari minggu), pada jam 12:01 malam.

[ TAMBAHAN ]


Parameter tambahan untuk settingan retensi ada banyak. Parameter yang saya tau adalah bahwa pada bagian --date="x days", pada bagian "x" mempunyai parameter tersendiri, seperti jika kita membuat file untuk 5 hari kedepan maka value dari "x" maka tidak boleh memakai tanda minus (-). Tanda minus hanya digunakan jika anda ingin melakukan sesuatu pada beberapa hari kebelakang. Lain hal nya jika anda ingin melakukan penghapusan tadi pada setiap file sehari sebelum tanggal sekarang. Value dari "x" tadi harus menjadi "yesterday".

Sample script : 
SHELL=/bin/sh
PATH=/sbin:/bin:/usr/sbin:/usr/bin
 

YESTERDAY=`date "+%d.%m.%Y" --date="yesterday"`

rm /home/apocalypsix/backup/backup_$YESTERDAY.tar.gz
Dalam shell script diatas retensi penghapusan menjadi 1 hari. Tentunya ini harus disesuaikan pula dengan settingan crontab anda karena settingan crontab tersebut saling terkait dengan shell script anda. Crontab anda harusnya menjadi seperti ini :
1 0 * * * /home/apocalypsix/shell/delete1day.sh

Sekian dulu postingan kali ini, jika ada pertanyaan anda bisa tanyakan melalui komentar.
Semoga bermanfaat dan,
Salam Penguin :)

OPENNODE WEB GUI (OMS)

INSTAL OPENNODE WEB GUI (OMS)

open-simpulLayanan Manajemen OpenNode, atau OMS, digunakan untuk mengelola OpenNode melalui GUI berbasis web. OMS tidak diinstal secara default dan harus ditambahkan setelah instalasi. OMS tidak dipasang sebagai paket menggunakan yum, tetapi merupakan wadah OpenVZ host. Wadah ini kemudian terdaftar dengan sistem OpenNode dan kemudian dapat digunakan untuk mengelola itu.
Anda harus memiliki OpenNode diinstal Sebelum memasang OMS.
OpenNode juga memiliki TUI, ini adalah utilitas manajemen berbasis teks yang dapat digunakan untuk membuat dan mengelola mesin virtual baru dan membantu Anda menginstal OMS.
Login ke sesi ssh OpenNode Anda dan jalankan perintah opennodeuntuk memulai TUI.
Select OMS (beta) on the right to be given a set of options for getting the OMS up and running.Layar utama OpenNode TUI
Select Download OMS image and press ENTER .Layar utama OpenNode TUI OMS
Select Yes to start downloading the OMS virtual machine archive.OpenNode TUI OMS Download
The download may take a while. If you quit the download and restart it, it will resume where it left off and not download the same part of the file twice.OpenNode TUI OMS download
Press OK when the download completes. OpenNode TUI OMS download selesai
Back in the main menu, select Install OMS image to open the settings for the new virtual machine. You will need to enter the following settings
  •  VSwap size (GB):  set to 1GB
  • Number of CPUs:  set to two. The OMS can be quite CPU hungry when performing certain tasks.
  • CPU usage limit (%):  set to 100% to allow all of the assigned CPU to be used.
  • Disk size (GB):  as very little is stored on the OMS root device you will not need to assign it much space. 5GB should be sufficient.
  • IO Priority: although very little IO will occur on the OMS container, it is best to give it the priority over other containers.
  • Hostname  set this to the hostname you would like to use for the OMS container.
  • IP-address: set this to the IP address for the container to use.
  • Nameserver:  set this to the IP address of your networks DNS server.
  • Root password:  enter a password which the OMS container will use for it’s root account. This is not the password which will be used to access the web GUI.
  • Root password x2:  Repeat your password to confirm it.
  • Start VM select this and press SPACE to start the container after it has been created.
  • Start on boot select this and press SPACE to enable the container to start up after your OpenNode server starts up after a reboot.
Click Create VM once you have entered all the required settings.OpenNode TUI OMS membuat VM
You will be taken back to the OpenNode Management Service (OMS) operations  menu when your container has been created and started. The final step is to register the OMS with the OpenNode server. Select Register with OMS and enter the OMS server address – this is the IP you just created in the above step. Make sure the OMS server port  remains on the default of 4506 .OpenNode TUI OMS daftar
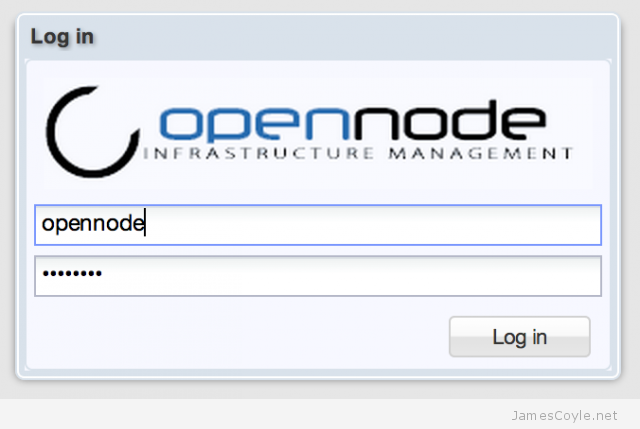
You can now log into your OMS web administration with the below username and password. The URL to use is the IP address you created when creating the container for the OMS. You must also access the page over HTTPS, for example https://10.10.10.8
  • Username :  opennode
  • Password : changeme
opennode-login-screen
See my blog post on changing the password to help secure your OMS install.