https://domalab.com/deploy-nutanix-community-edition-vmware/
--------------
Running Nutanix Community Edition on VMware Workstation 15

Update 1: 28/05/2020 for Step 26
Optional: Modify the Pre-Requisite Checks for the installer, depending on your hardware.
In this post series, we will install and configure Nutanix CE on VMware Workstation 15. I’m deploying it on my machine using the VMware Workstation 15. I really got benefit from an article written by Joep Piscaer to build it up.
My Environment:
250GB SSD
20GB RAM
Intel i5-7200 @ 2.5 GHz
VMware Workstation 15
Download the NutanixCE:
Step 1– Extract the ce-2019.02.11-stable.img.gz

Step 2– Rename the ce-2019.02.11-stable.img to ce-flat.vmdk
Step 3– Download the disk descriptor file from here , rename it to ce.vmdk

Build A Nutanix Node
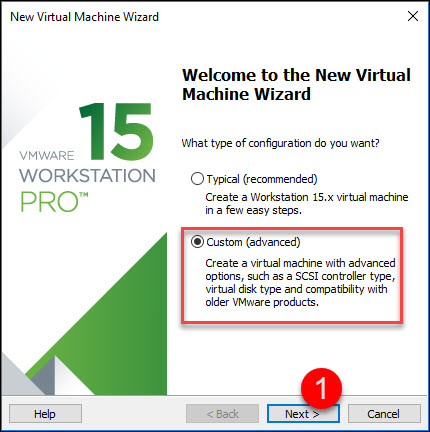
Step 4– Open VMware Workstation, File –> New Virtual Machine –> Select Custom and click Next.

Step 5:

Step 6:

Step 7:

Step 8:

Step 9:

Step 10:

Step 11:

Step 12:

Step 13:

Step 14: Attach an existing the disk. Select the image/disk descriptor file created in the above section.

Step 15:

Step 16: Click finish;

Step 18 – Modify the VM Settings again to add the Hard Disks [200GB HDD, 500GB] and the Virtualization Engine [VTx/EPT].

Step 19:

Step 20:

Step 21:

Step 22:

Step 23:

Step 24:

Step 25:

Step 26 – Start VM.

Update 1:
Step 26.1: Login as ‘root’ (password ‘nutanix/4u’)
Step 26.2: Edit /home/install/phx_iso/phoenix/sysUtil.py
#Modify the SVM Requirments
SVM_GB_RAM = 16
#Modify the CVM requirements
custom_ram = 8
Step 26.3: Save and start the installation
Step 27: When booted, follow the instructions and type install at the login.

Step 28:

Step 29: 
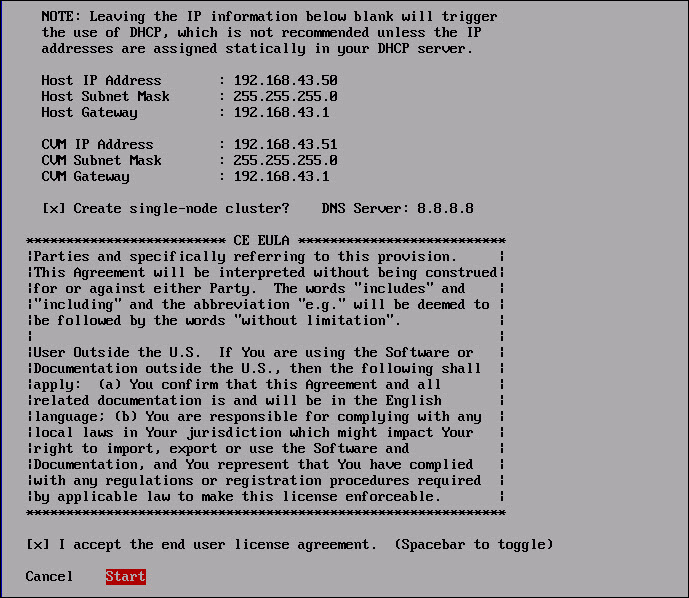
Step 30: Assign Static IPs for the KVM Host & CVM and mark the checkbox “Create single-node cluster”

Step 31:

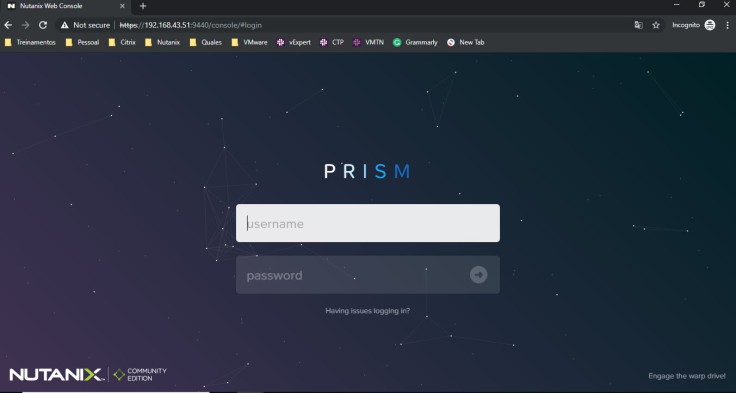
Step 32- Navigate to your CVM via IP address provided in step 30.

Step 33: Change password.

Step 34: Login with your NEXT Account credentials

Step 36: Now, you are then into PRISM, controlling your single KVM host.


Tidak ada komentar:
Posting Komentar