This tutorial will show you how to use Synology Drive Client and Server on a Synology NAS.
https://www.wundertech.net/synology-drive-server-tutorial-sync-local-files-to-your-nas/

I’m writing this tutorial because Synology Drive Server is my favorite way of ensuring my documents get synced up to my NAS. They are processed in real-time, allow me to reclaim space on my local PC by storing them on my NAS, and give me an easy way to follow the 3-2-1 backup rule. If you set up a VPN on your NAS, you can even access your files anywhere in the world securely!
1. How to Install Synology Drive Server (Tutorial)
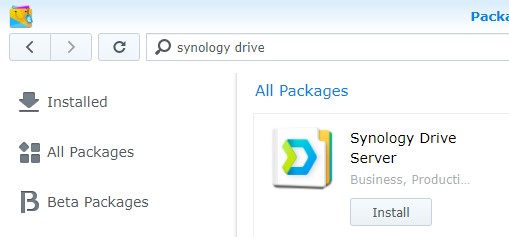
1. Open the Package Center and install the Synology Driver Server application.
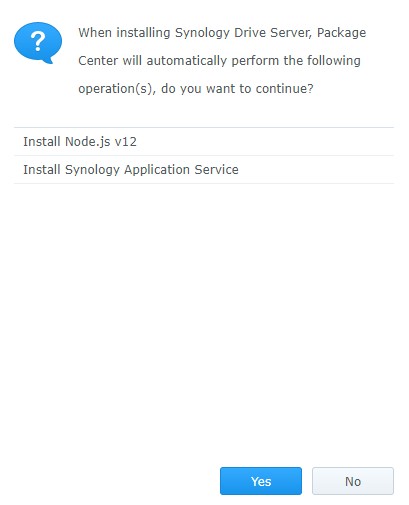
2. You will be informed that there are dependencies that must be installed. Select Yes.
3. After the package has been installed, select Open. You will be prompted to refresh the page. Select Yes.
4. Synology Drive Server is now installed!
2. Team Folder & My Drive
In Synology Drive Server, you can manage one folder shared amongst a team by using the Team Folder option. This will give users the ability to collaborate using a specific folder stored on the Synology NAS. Think of this option as the ability to give multiple users access to a central folder where they can all add/edit/delete files/folders with changes automatically syncing to all users.
My Drive, on the other hand, will sync a user’s local folders to a Synology NAS linked to their user account. This requires the User Home to be enabled but allows users to select folders from their local PC and automatically sync them to their PC.
2.1 How to Set Up My Drive
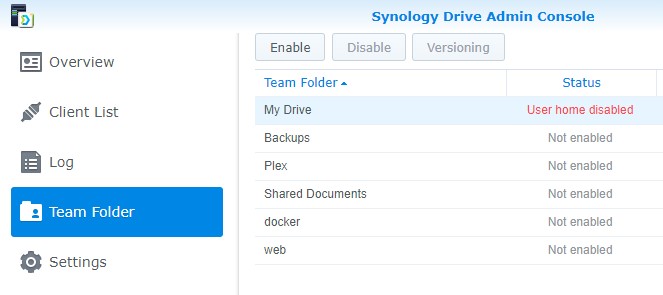
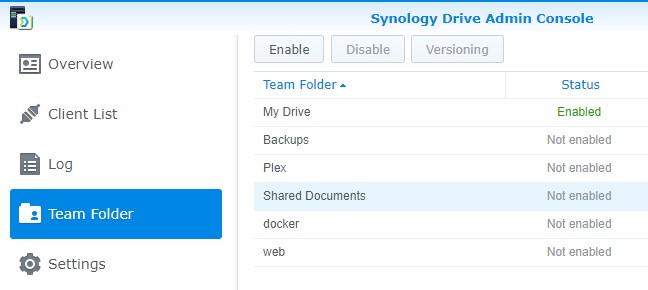
1. Open Synology Drive Admin Console on your Synology NAS. Select Team Folder.
2. Highlight My Drive and select Enable.
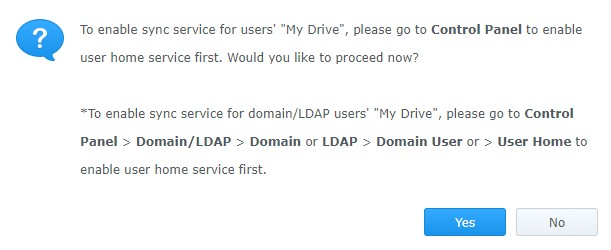
3. You will be informed that User Home must be enabled. Select Yes to be brought to the control panel.
4. Scroll to the bottom and Enable user home service. Since this will be used for documents, I suggest that you Enable Recycle Bin as well. This will create two new shared folders on your Synology NAS named home and homes. Inside the homes folder, you will see that a folder is created for every user on your NAS.
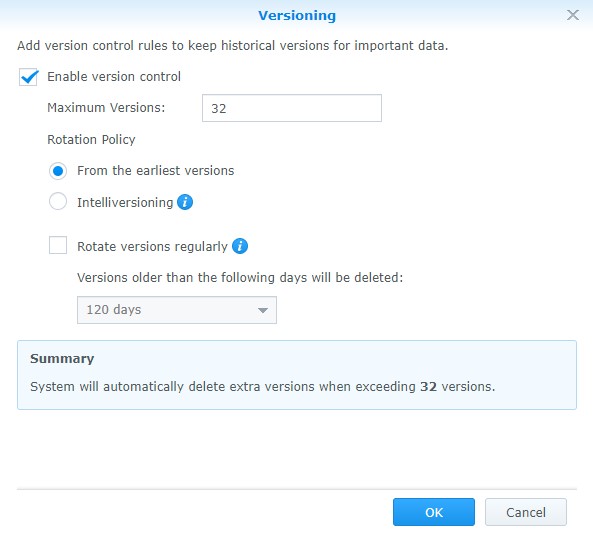
5. Go back to the Synology Drive Admin Console and set up versioning. These settings are personal preference, but it’s probably a good idea to keep versioning on. This will allow you to retrieve each version of the file up to the maximum number of versions you specified.
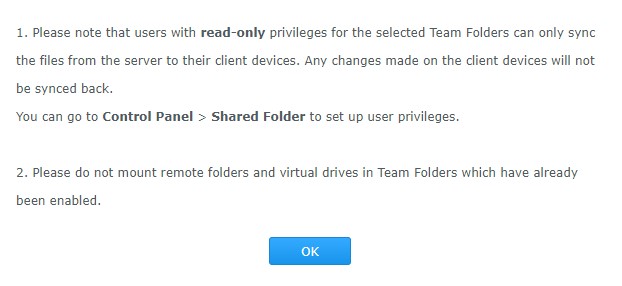
6. After you save, you will be informed that users with read-only permission to Team Folders will only sync files from the NAS, and not to the NAS. We will get into this a little later, but keep this in mind.
7. My Drive is now set up!
2.2 How to Set Up Team Folder
Enabling a Team Folder is a little easier than setting up My Drive since the folder already exists with the necessary permissions. As mentioned above, Team Folders are shared across users and allow multiple users to collaborate on individual documents. When an item is created, modified, or deleted, the change is automatically synced to the NAS and all devices connected to the Team Folder will automatically sync the change as well. This ensures that all files, for all users, stay up to date with the version on the Synology NAS.
1. Open Synology Drive Admin Console on your Synology NAS. Select Team Folder.
2. Select a folder, then select Enable. This will enable the document and allow it to be used on clients that install Synology’s Drive Server application.
3. Set up the versioning as you’d like. Since Team Folders are synced to multiple people, I highly recommend that you keep versioning on.
3. Synology Drive Client Application
3.1 How to Download the Install File for Synology Drive Client - Synology Drive Server Tutorial
The best part about Synology Drive Server is there are applications for all of your devices that allow you to access your files. You can find the version you need by downloading the correct version for your NAS here.
An easier way that I have found is by using the process below. This will download the application for the operating system you’re currently using. The Synology Drive Client is also available for mobile devices by using the App Store or Google Play store.
1. Open the Synology Drive application from your NAS.
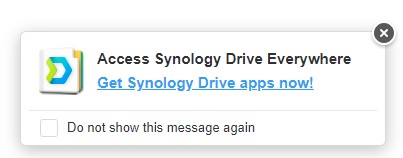
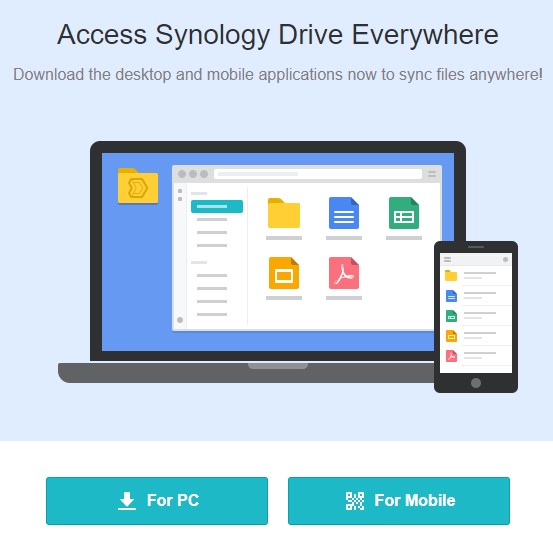
2. Click the link in the bottom right that says Get Synology Drive apps now.
3. Select the For PC button. This will automatically download the correct version for your operating system. If you’d like to download the application for your mobile device, you can select For Mobile.
3.2 Synology Drive Client Configuration – Sync Task
For this section, I will be using a Windows 10 PC. The options should be the same, but there might be slight differences when you configure the tool.
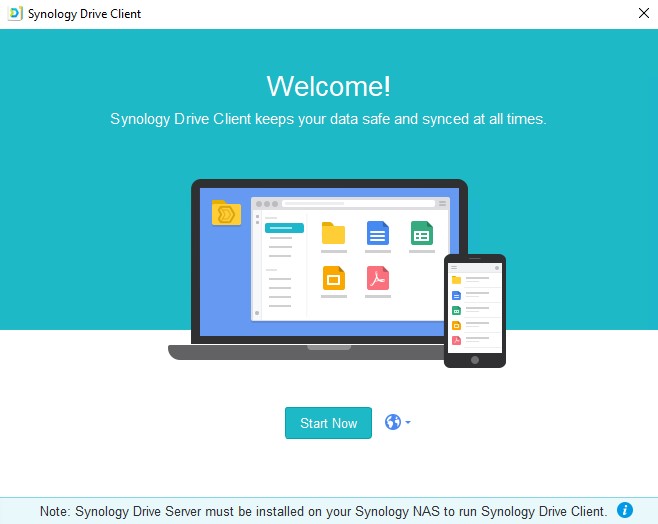
1. Launch the Synology Drive Client on the local device.
2. Select Start Now.
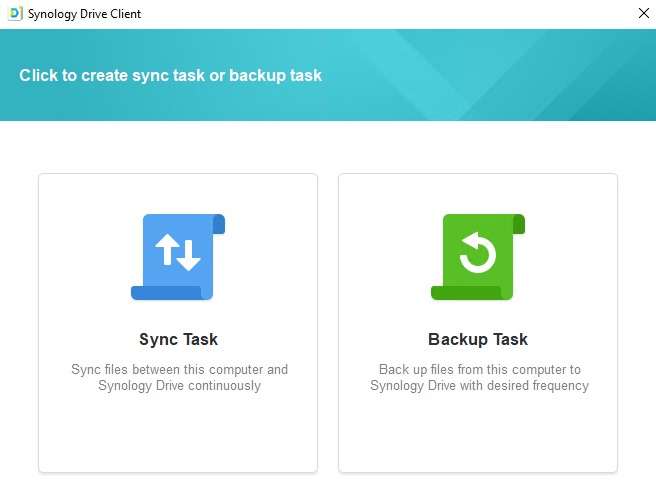
3. For now, we are going to create a Sync Task. You can also create a Backup Task at a later time if you’d like. Select Sync Task.
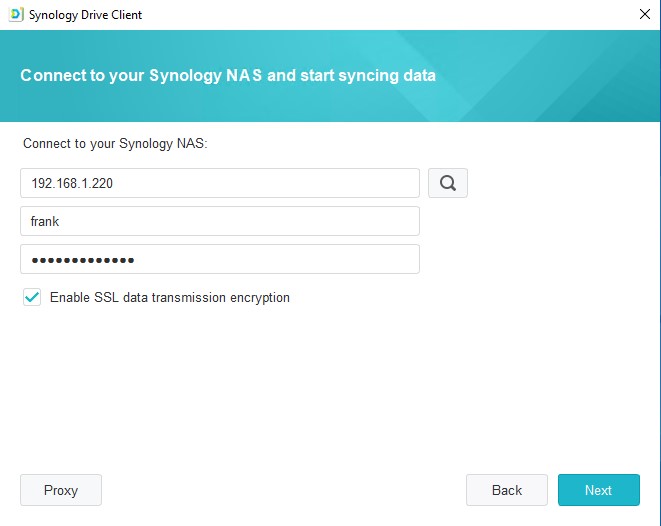
4. Enter the IP Address of your Synology NAS and your username and password. If you keep Enable SSL data transmission encryption selected, Synology Drive will use your HTTPS port as opposed to the HTTP port. Select Next.
5. Since we don’t have a certificate configured, you will receive a message stating that the SSL certificate is not trusted. Select Proceed Anyway.
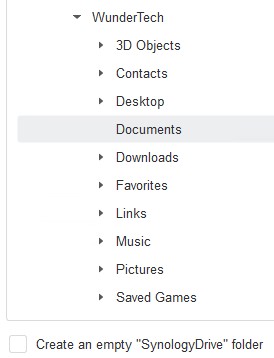
6. The Synology Drive Server section is the folder that you want to sync from your Synology NAS. This will either be a Team Folder or your individual drive. At the bottom, Local Folder is the folder which the data will sync to. I normally sync my data to the Documents folder on my PC, but the decision is up to you. This is the folder that you’ll be working out of, so make sure you select the correct location. If you’d like to change it, select the edit icon next to Local Folder. NOTE: If you keep Create an empty “SynologyDrive” folder enabled, a folder named SynologyDrive will be created inside of the local folder you selected. If you want it to sync to the root of that local folder, uncheck this option. You are only able to set up one folder sync initially. If you’d like to sync other Team Folders, follow these instructions after you finish setting this up.
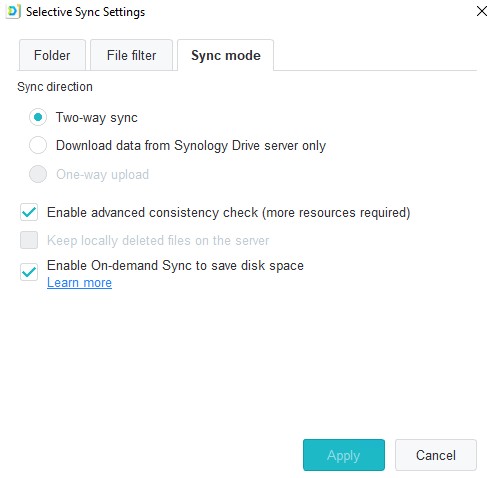
7. If you’d like to change any options, select Advanced. The main setting to check here is the Sync mode. Two-way sync will sync files to and from this device. If you only want to download remote changes, select Download data from Synology Drive server only. When you’re done, select Next to proceed.
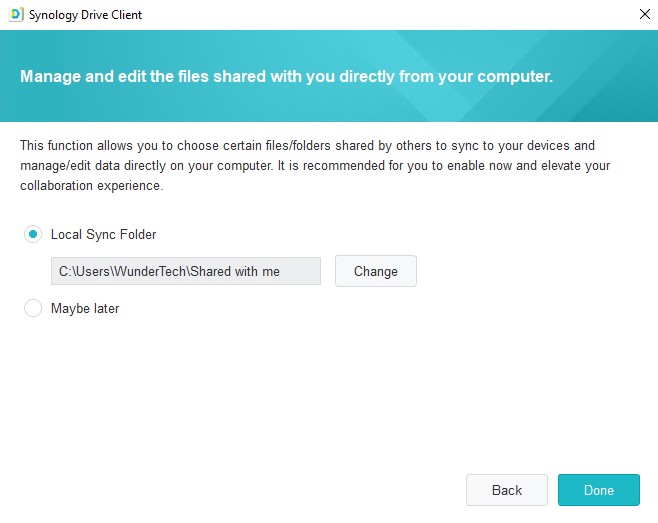
8. The next screen will ask you if you’d like to have access to folders/files shared by other people on your NAS. If you’d like to use this option, configure the location you’d like and proceed. If not, select Maybe Later.
9. Select Done and Synology Drive Client is fully configured! You will be brought through a tutorial that shows you how to use the tool.
10. Refer to the video above to learn how the tool automatically syncs data to your NAS and allows you to reclaim some of the space locally!
3.3 Setting up Multiple Sync Folders - Synology Drive Client & Server Tutorial
The initial setup of the Synology Drive Client only allows you to sync an individual folder. For this reason, you have the option of syncing the “My Drive” folder, or a “Team Folder”. This is NOT to say that you can only sync one folder, it’s just that the initial setup only allows you to sync one. If you’d like to sync multiple, follow the instructions below.
1. Open the Synology Drive Client’s settings. Select Create under Sync Tasks.
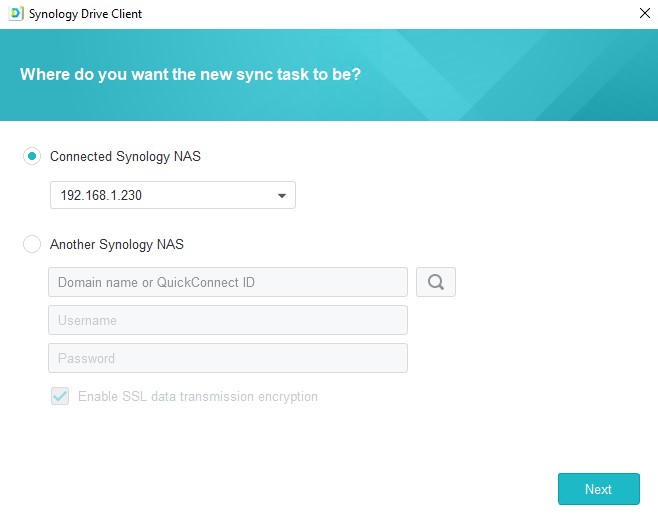
2. Use your Connected Synology NAS or specify a different Synology NAS. Select Next.
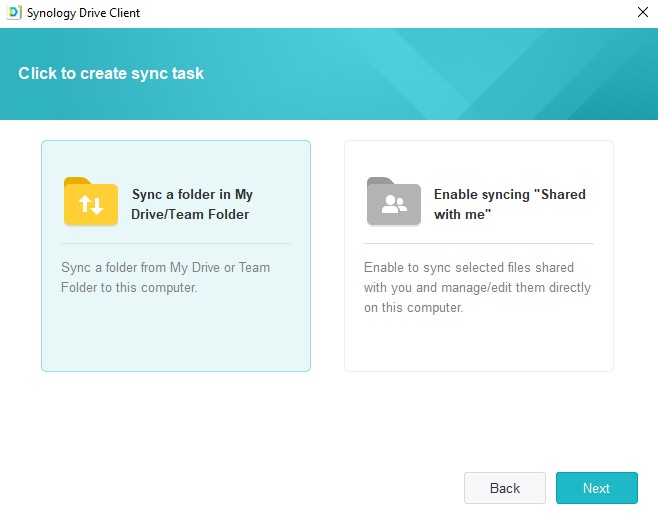
3. Select Sync a folder in My Drive/Team Folder and press Next.
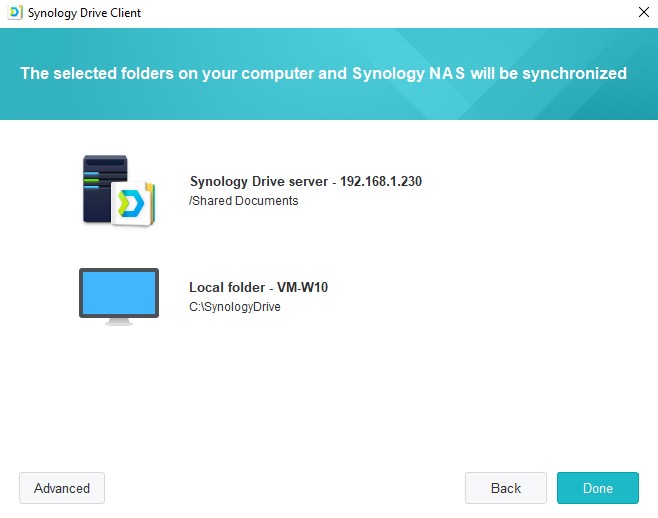
4. The Synology Drive Server section is the folder that you’d like to sync FROM your Synology NAS. Select the My Drive folder or a Team Folder. The Local Folder is the folder where you’d like to sync your data TO (this will be on the local device). Modify any Advanced settings you’d like, then select Done. The folder will now sync! Do this for as many folders as you’d like!
3.4 How to Configure a Backup Task
Synology Drive Client offers a way to back up your local files. This is not a bare-metal backup. The files will automatically back up to your NAS, but you won’t be able to do a bare-metal restore. For this reason, it’s a good idea to only back up your files and exclude the operating system files. You’re free to back up anything you’d like, but the idea is to back up your important files only.
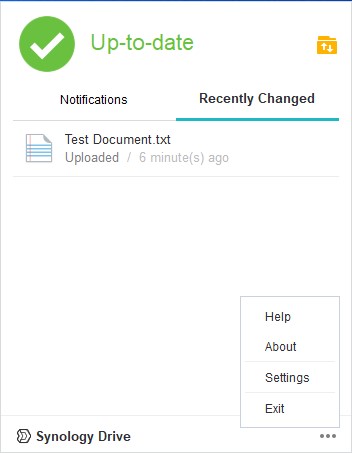
1. From the Synology Drive application, select Settings.
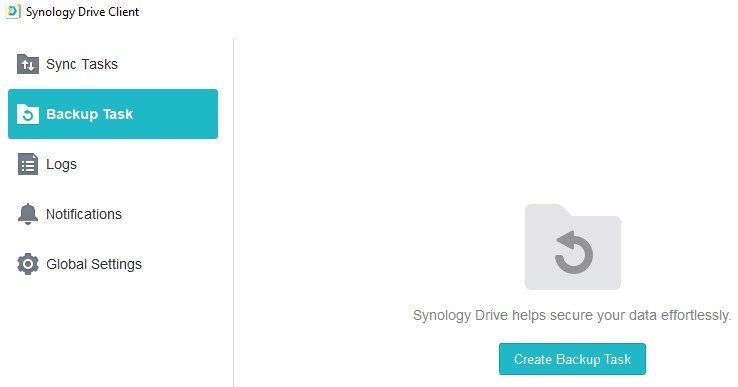
2. Select Backup Task, then Create Backup Task.
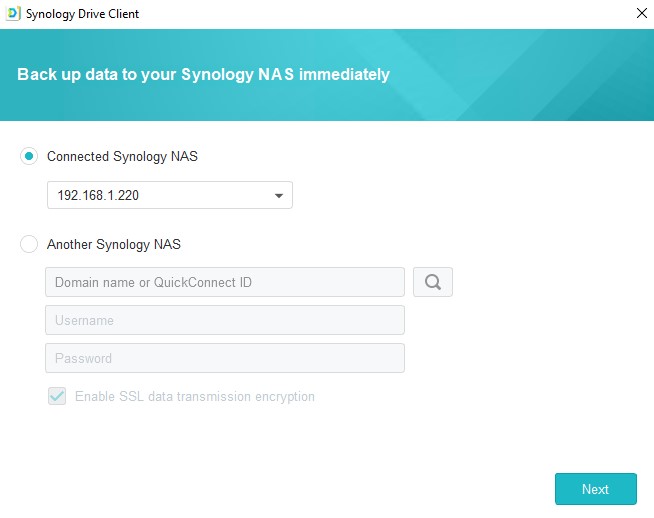
3. Select your connected NAS (or a different one if you’d like).
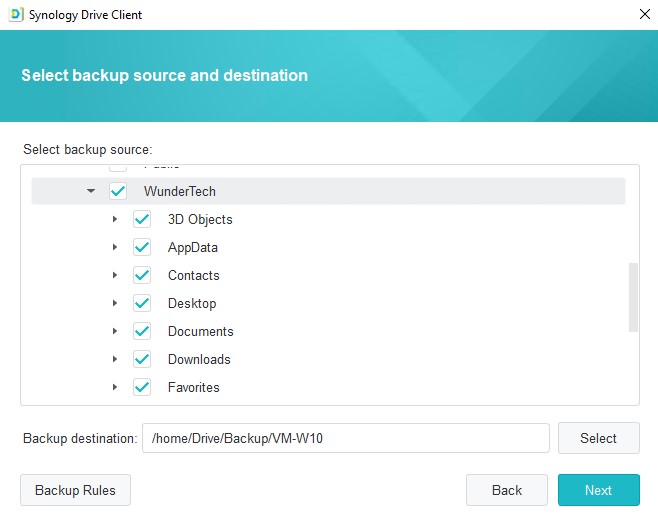
4. Select the files that you’d like to back up, along with the destination where you’d like it written. If you’d like to modify the Backup Rules, you can do that as well.
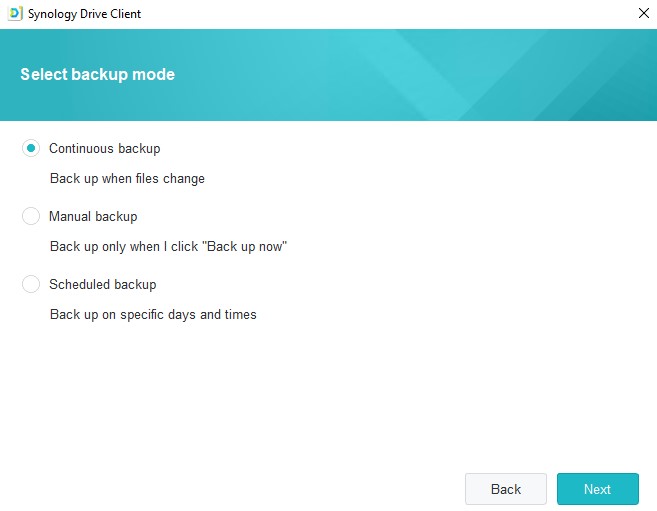
5. You will now select from three different backup modes. It’s hard to suggest one as being better than the other, so select your preferred option and select Next. NOTE: If you select Schedule Backup, you will be required to enter the backup schedule.
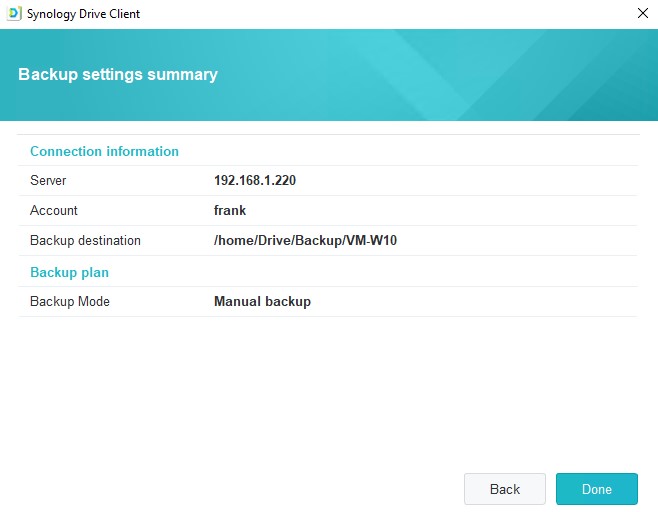
6. Select Done. Your backup is now configured!
4. Conclusion - Synology Drive Client & Server Tutorial
This tutorial went over Synology Drive Server and hopefully shows why it is one of my favorite applications. When I create a file on my PC, it automatically syncs to my NAS, which automatically backs up to the cloud. This ensures that my data is backed up following the 3-2-1 backup rule and I don’t have to think about it.
As always, thank you for reading the tutorial. If you have any questions, please leave them in the comments!




Tidak ada komentar:
Posting Komentar