- Download and install VMWare Player.
It is completely free and supports Windows and Linux.
Note: the VMWare Player installation procedure falls beyond this manual; please refer to VMWare documentation for detailed information. - Download the VA virtual machine package here.
- Extract files from the downloaded archive to any folder, for example:
С:\VMBitrix\BitrixVM\. - Start the virtual machine:
- Starts the download of the operational system installed on the virtual machine. After the download, this window opens:
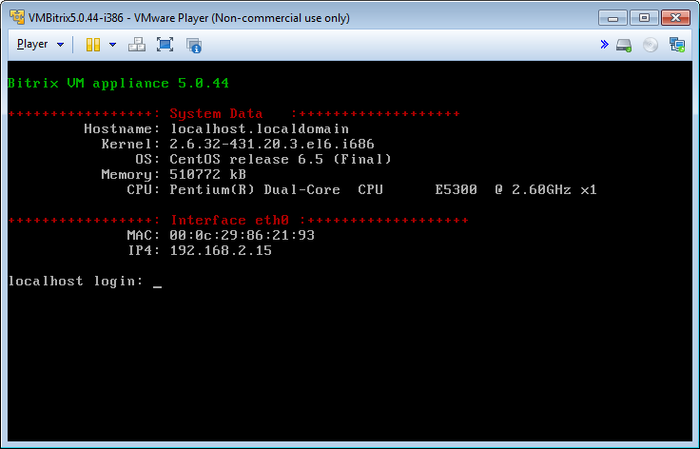
- Note. Superuser root uses the password bitrix by default.Upon the first startup of the virtual machine you are prompted to change the passwords of the superuser root and user bitrix:
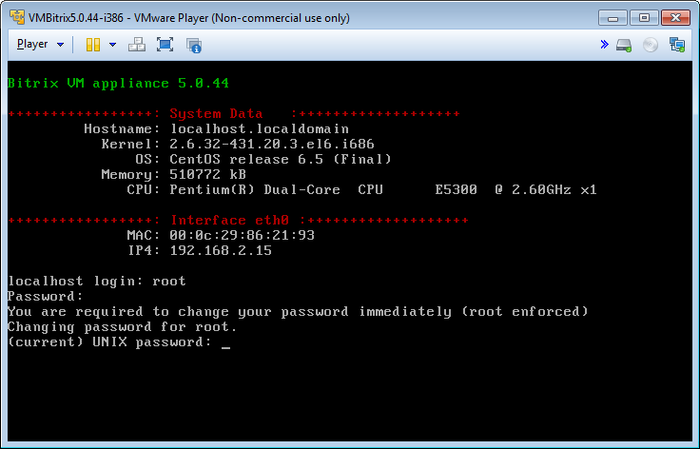
- In localhost login and Password prompts, type the current login and password (root and bitrix, respectively). Hit Enter.
- When prompter for (current) UNIX password, type the current password (bitrix) and press Enter.
- Type the new password in Enter new UNIX password; press Enter.
- Retype the new password in Retype new UNIX password; press Enter again.
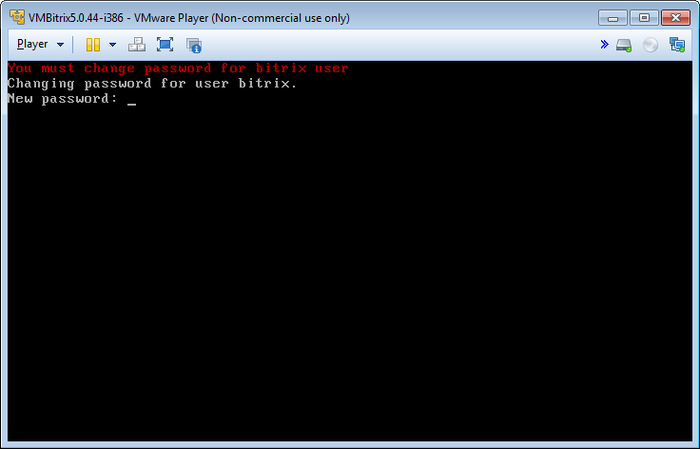
Note. You can change the bitrix user password later in the virtual server control panel using menu 1. Creat Management pool of server - Change bitrix password.
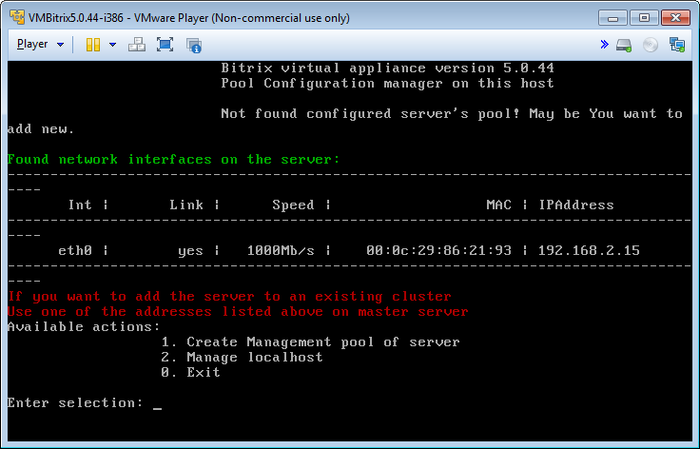
- 1. Create Management pool of server – creates server control pool;
- 2. Manage localhost – controls local virtual server;
- 0. Exit - exit to operational system console.
Type the number (0–2) and press Enter to execute any action. For example, to configure the local virtual server type 2 (Manage localhost) in the line and press Enter.
To direct control back to operating system, press Ctrl+Alt.
To return from shell to the virtual machine menu, execute:
cd ./menu.sh
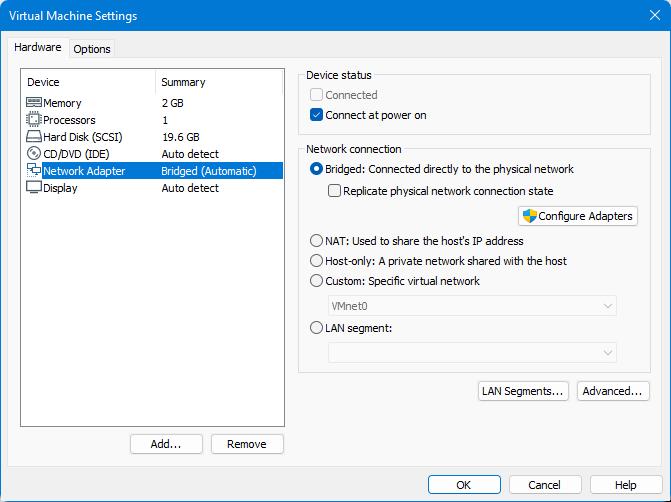
Note: if you encounter problems with the network adapter, try changing the adapter mode (Bridged, NAT, Host-only):
Then, restart the server by selecting the command 2. Manage localhost > 4. Reboot server and pressing Enter.
Then, restart the server by selecting the command 2. Manage localhost > 4. Reboot server and pressing Enter.
Now that the server is running, type the address suggested by the appliance (it varies from system to system; the screenshot above shows the address http://192.168.2.15) in the web browser. You will see the following welcome screen:
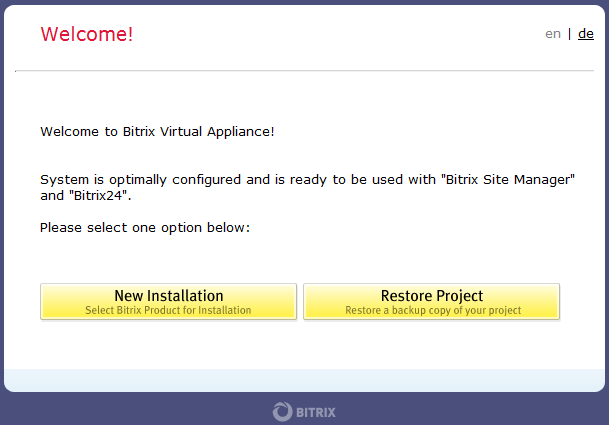
Choose one of the options to continue:
- New Installation - runs the installation wizard which will download, unpack and install a new website;
- Restore Project - runs a restoration wizard to create a backup copy of your website or restore it from an existing backup.
https://training.bitrix24.com/support/training/course/?COURSE_ID=58&LESSON_ID=6571&LESSON_PATH=5455.6569.6571
Tidak ada komentar:
Posting Komentar