How To Install Mumble Server On Ubuntu
Please share


What is Mumble Server?
Mumble is an open source, low-latency, high quality voice chat software. Mumble
is a voice over IP (VoIP) application primarily designed for use by
gamers, similar to programs such as TeamSpeak and Ventrilo. Mumble uses a client–server architecture which allows users to talk to each other via the same server.
Step 1
Now open the Terminal or Press (Ctrl+Alt+T). After that follow this command one by one.
sudo apt-get update
sudo apt-get upgrade
If will be asked to confirm installing any packages. Type Y and press Enter.
Step 2
Now Install Mumble Server.
sudo apt-get install mumble-server
Then install Mumble Client.
sudo apt-get install mumble
Step 3
After
the installation is complete, you will run the package reconfiguration
command to create some basic server and user settings.
sudo dpkg-reconfigure mumble-server
You can use your arrow keys to select your answer, then press Enter to continue.
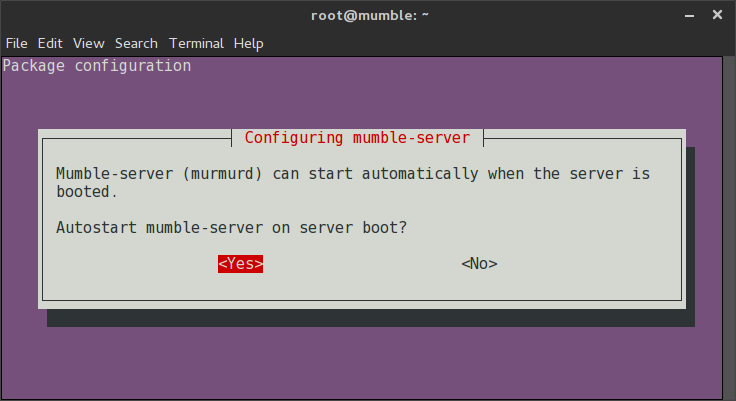
you will accept the default value of Yes because we want Mumble-Server to run when the server boots.
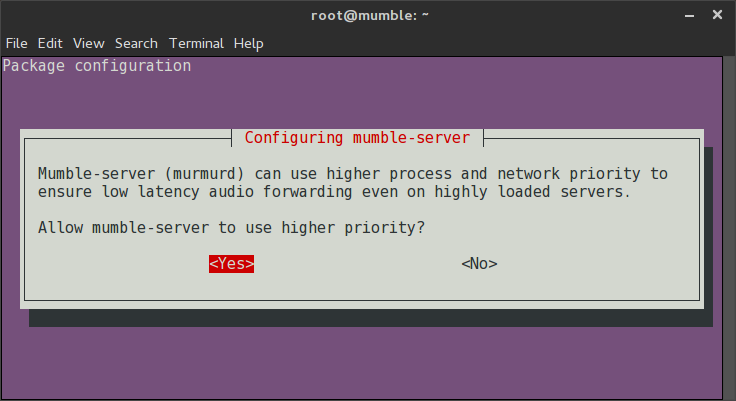
Even if this will be a dedicated Mumble-Server, Now select Yes since this will ensure the lowest possible latency.
Mumble SuperUser Password
SuperUser
is the highest-level administrative account for the server. You’ll need
to log in to Mumble with this user when you want to manage the server.
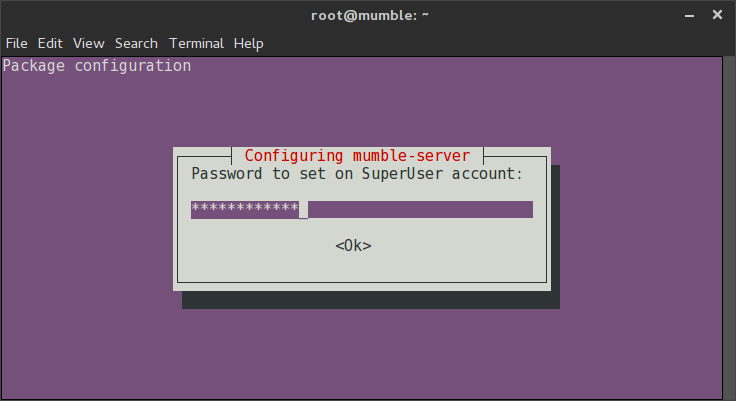
Type a password, press Tab to select Ok, and press Enter.
Step 4
Advanced Configuration
Now you will need to edit some configuration file. Open terminal then type the command.
sudo mcedit /etc/mumble-server.ini
There Just enable some command. To enable some of these settings, you will have to remove the preceding (#) character. This is referred to as un-commenting the line. Lines that start with # are not processed by the server.
1. autobanAttempts, autobanTimeframe, autobanTime,welcometext,
host,bandwidth,users,textmessagelenth,imagemessagelenght,allowhtml,
registername,registerURL (#) removed the character before this line.
When done everything. Then Click Esc button two time and select save.
Now restart Mumble-Server.
sudo service mumble-server restart
Step 5
Now connect to your Mumble Server. Open the Mumble client on your computer.
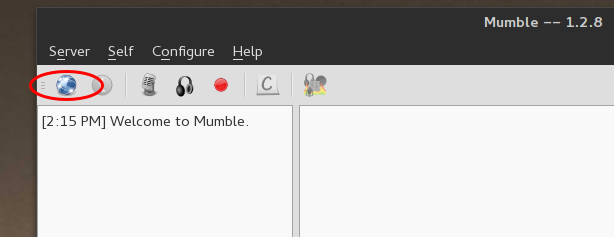
When Click Connect then show the audio tunning wizard. After that setting your audio tunning. Click Next Button.

Now Add new User in the Server.
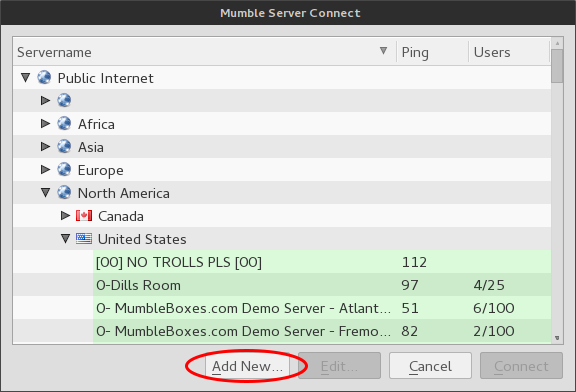
Click Add new Button.
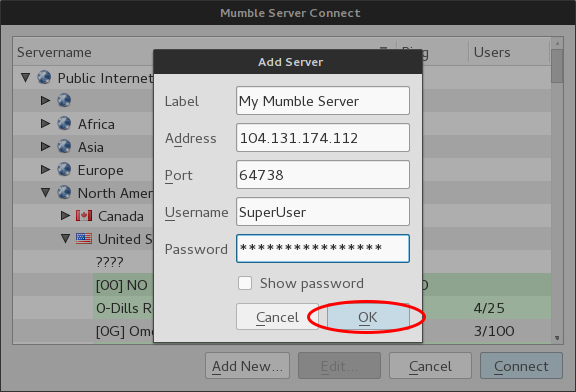
Enter the information for your Mumble server. The address can be a host name or the IP address of your server. If you did not use a custom port, it will be the default port of 64738. Click OK to save settings.
Example: Your IP address like this: 192.168.10.100.
Now select your own server name and Click Connect.
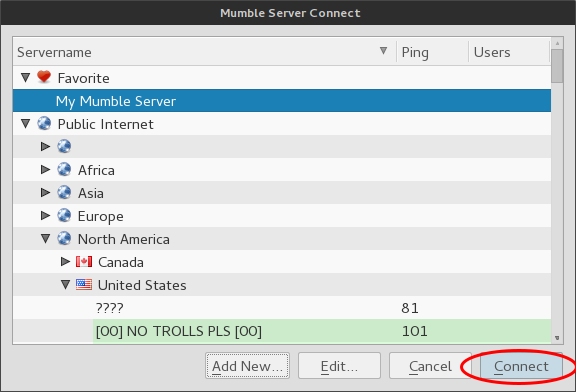
You will get the message Connected once you are successfully connected.

Now Enjoy!!
Tidak ada komentar:
Posting Komentar