How To Install ownCloud 10.5 on Ubuntu 20.04
https://atetux.com/how-to-install-owncloud-10-5-on-ubuntu-20-04ownCloud first coming as an alternative to Dropbox, Google Drive, etc. ownCloud is self hosted ‘cloud’ application that you can manage, the storage and speed depend on the hardware it installed on.
It’s similiar to file manager on cloud, which had client for Windows, MacOS, Linux, Android and iOS. For power user it had API which can used to integrated with other application or make your own.
In this tutorial we’ll start from fresh install Ubuntu 20.04, it’s beginner friendly tutorial which for most case you can just copy and paste except the domain name part. Please let us know if you had any question, we’ll talk later about scaling the ownCloud in production environment.
Install PHP
Install PHP directly from Ubuntu 20.04 repository.
sudo apt-get install php php-gd php-xmlrpc php-fpm php-curl php-intl php-imagick php-mysql php-zip php-xml php-mbstring php-bcmath -y
Install NGINX
Install latest available nginx versin from Ubuntu 20.04 repository.
sudo apt install nginx -y
Setup SSL Lets Encrypt
Let’s setup the SSL from Lets Encrypt, using acme.sh as the client
acme.sh --issue -d owncloud.EXAMPLE.com --standalone

Install MariaDB Database
Install MariaDB from repository
sudo apt install mariadb-server -y
Create a database and user for ownCloud
1. Create Database
CREATE DATABASE owncloud;
2. Create User
GRANT ALL PRIVILEGES ON owncloud.* TO "owncloud"@"localhost" IDENTIFIED BY "SECURE-PASSWORD";

Download ownCloud
Move to /var/www/html directory
cd /var/www/html/
Download the latest version of ownCloud, currently 10.5
wget https://download.owncloud.org/community/owncloud-complete-20200731.tar.bz2 https://download.owncloud.org/community/owncloud-complete-20200731.tar.bz2.sha256
to verify the file not corrupted or tampered by
sha256sum -c owncloud-complete-20200731.tar.bz2.sha256 2>&1 | grep OK
if that show OK nothing wrong with the files, it otherwise re-download the owncloud.
Extract the owncloud-complete-20200731.tar.bz2 file and rename the folder to owncloud.EXAMPLE.com
tar jxvf owncloud-complete-20200731.tar.bz2
mv owncloud owncloud.EXAMPLE.com
Set read and write permission for www-data user, an default nginx user in Ubuntu 20.04
chown www-data:www-data -R /var/www/html/owncloud.EXAMPLE.com
Install ownCloud from CLI
I love this feature a lot, because we can setup everything without visiting the URL, it can be automated in easy way using shell script.
sudo -u www-data php occ maintenance:install --database "mysql" --database-name "owncloud" --database-user "owncloud" --database-pass "sXTHTPVJuo9zkVEAxrri" --admin-user "atetux" --admin-pass "XmN9RfvAhxA4cFhHmVHE"
Set trusted domain
sudo -u www-data php occ config:system:set trusted_domains 2 --value=owncloud.EXAMPLE.com

If you forgot to set trusted domain, ownCloud will gave warning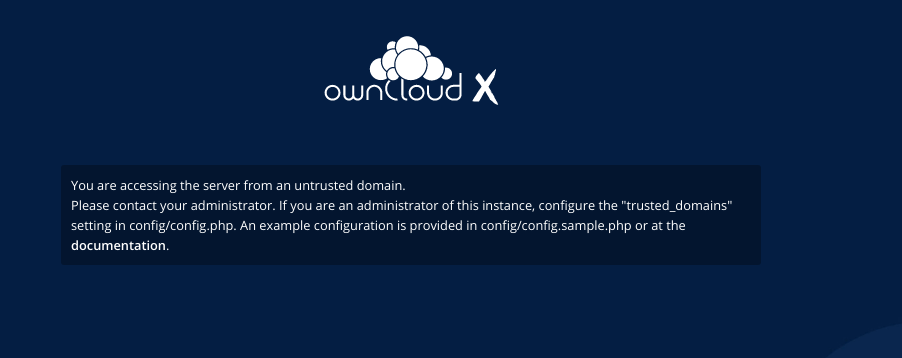
ownCloud Login Page
Open https://owncloud.EXAMPLE.com on browser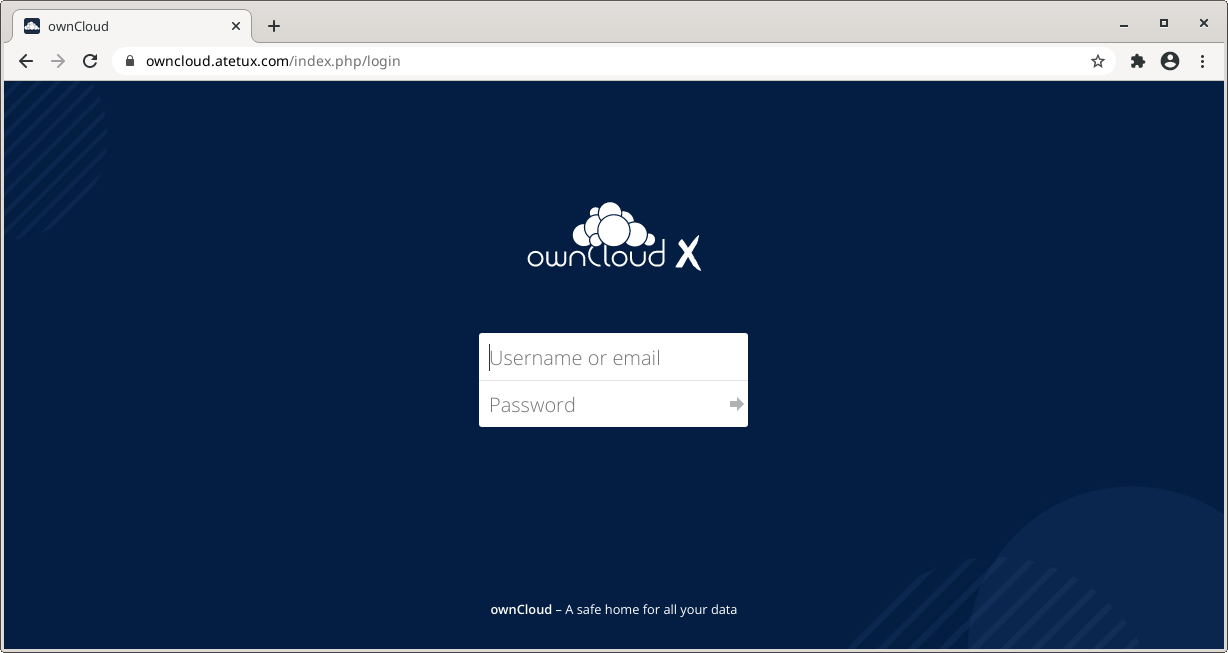
Login using credential we created earlier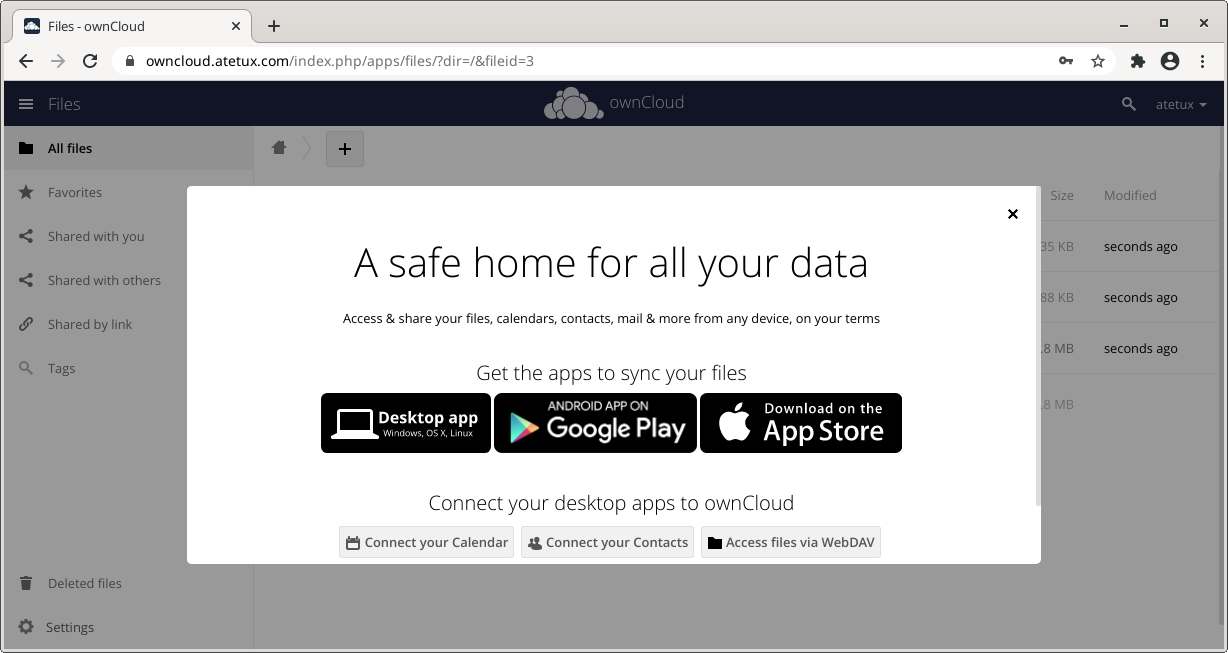
This post shows students and new users steps to install and configure ownCloud on Ubuntu Linux with Nginx and Let’s Encrypt free SSL certificate.
ownCloud is an open-source, self-hosted file sync and share platform similar to Dropbox, OneDrive, and other proprietary online storage services. ownCloud enables private cloud services on users’ servers. It is extensible via its app and can be installed on mobile and desktops to access & sync your files, contacts, and data across all devices and platforms.
If you’re looking for a self-hosted file share and sync platform, ownCloud should be a good place to start. We’ll show you how to install and configure ownCloud on your own Ubuntu server with a link to the Let’s Encrypt SSL post.
Also, for students and new users learning Linux, Ubuntu Linux is the easiest place to start learning. Ubuntu is the modern, open-source Linux operating system for desktops, servers, and other devices.
Follow the steps below to start installing and configuring ownCloud on Ubuntu Linux.
How to install Nginx on Ubuntu Linux
As mentioned above, we will use the Nginx web server to run ownCloud. ownCloud requires a web server to function, and Nginx is the most popular open-source web server available today.
To install Nginx on Ubuntu, run the commands below:
sudo apt update
sudo apt install nginx
After installing Nginx, the commands below can stop, start and enable Nginx services to start up every time your server starts up.
sudo systemctl stop nginx.service
sudo systemctl start nginx.service
sudo systemctl enable nginx.service
To test whether Nginx is installed and functioning, open your web browser and browse to the server’s IP address or hostname.
http://localhost
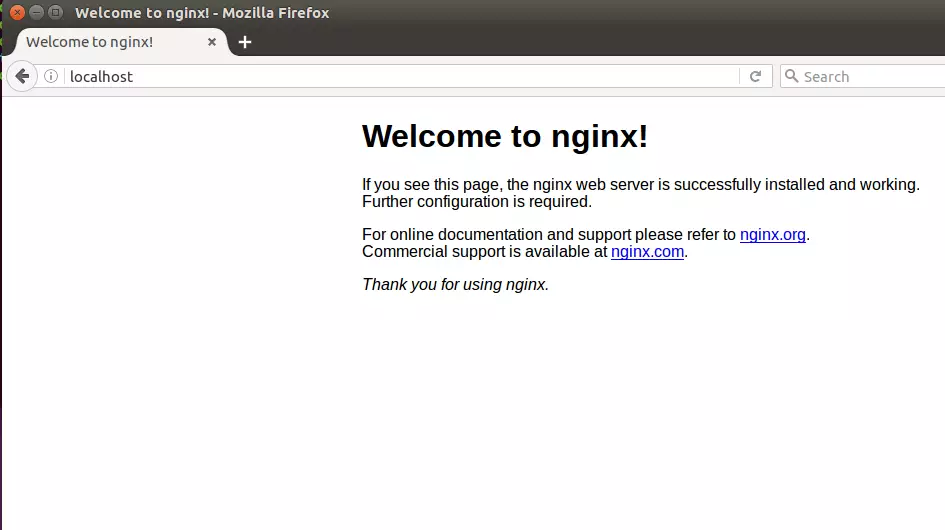
If you see the above page in your browser, Nginx works as expected.
How to install MariaDB on Ubuntu Linux
A database server is required for ownCloud to function. ownCloud stores its content in a database, and MariaDB is probably the best database server available to run ownCloud.
MariaDB is fast, secure, and the default server for almost all Linux servers. To install MariaDB, run the commands below:
sudo apt install mariadb-server
sudo apt install mariadb-client
After installing MariaDB, the commands below can stop, start and enable MariaDB services to start up when the server boots.
sudo systemctl stop mariadb.service
sudo systemctl start mariadb.service
sudo systemctl enable mariadb.service
Next, run the commands below to secure the database server with a root password if you were not prompted to do so during the installation.
sudo mysql_secure_installation
When prompted, use the guide below to answer:
If you've just installed MariaDB, and haven't set the root password yet, you should just press enter here.

Enter current password for root (enter for none): PRESS ENTER

Switch to unix_socket authentication [Y/n] n

Change the root password? [Y/n] n

Remove anonymous users? [Y/n] y

Disallow root login remotely? [Y/n] y

Remove test database and access to it? [Y/n] y

Reload privilege tables now? [Y/n] y

All done!
To verify and validate that MariaDB is installed and working, log in to the database console using the commands below:
sudo mysql -u root -p
You should automatically be logged in to the database server since we initiated the login request as root. Only the root can log in without a password and from the server console.
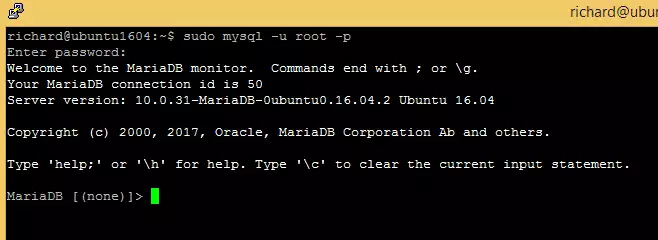
The server was successfully installed if you see a similar screen.
How to install PHP on Ubuntu Linux
Also, PHP is required to run ownCloud. PHP packages are added to Ubuntu repositories. The versions of the repositories might not be the latest. If you need to install the latest versions, you’ll need to add a third-party PPA repository.
Run the commands below to a third-party repository with the latest versions of PHP.
sudo apt-get install software-properties-common
sudo add-apt-repository ppa:ondrej/php
At the time of this writing, the latest PHP version is 8.0.
sudo apt update
Next, run the commands below to install PHP 8.0 and related modules.
sudo apt install php7.4-fpm php7.4-imagick php7.4-common php7.4-mysql php7.4-gmp php7.4-imap php7.4-json php7.4-pgsql php7.4-ssh2 php7.4-sqlite3 php7.4-ldap php7.4-curl php7.4-intl php7.4-mbstring php7.4-xmlrpc php7.4-gd php7.4-xml php7.4-cli php7.4-zip
Next, you’ll want to change some PHP configuration settings that work great with ownCloud. Run the commands below to open the PHP default configuration file.
sudo nano /etc/php/7.4/fpm/php.ini
Then change the line settings to be something like the lines below. Save your changes and exit.
file_uploads = On
allow_url_fopen = On
short_open_tag = On
memory_limit = 256M
upload_max_filesize = 100M
max_execution_time = 360
date.timezone = America/Chicago
How to create ownCloud database on Ubuntu
At this point, we’re ready to create our ownCloud database. As mentioned above, ownCloud uses databases to store its content.
To create a database for ownCloud, run the commands below:
sudo mysql -u root -p
Then create a database called owncloud
CREATE DATABASE owncloud;Next, create a database user called ownclouduser and set a password
CREATE USER 'ownclouduser'@'localhost' IDENTIFIED BY 'new_password_here';
Then grant the user full access to the database.
GRANT ALL ON owncloud.* TO 'ownclouduser'@'localhost' WITH GRANT OPTION;
Finally, save your changes and exit.
FLUSH PRIVILEGES;
EXIT;
How to download ownCloud on Ubuntu
We’re ready to download ownCloud and begin configuring it. First, run the commands below to download the latest version of ownCloud from its repository.
Next, extract the downloaded content into the Nginx root directory. This will create a folder called owncloud.
wget https://download.owncloud.org/community/owncloud-complete-20210721.zip -P /tmp
sudo unzip /tmp/owncloud-complete-20210721.zip -d /var/www
Then run the command below to allow the www-data user to own the new owncloud directory.
sudo chown -R www-data:www-data /var/www/owncloud/
sudo chmod -R 755 /var/www/owncloud/
How to configure Nginx for ownCloud
We have downloaded ownCloud content into a new folder we called ownCloud. Let’s configure Nginx to create a new server block with our ownCloud website. You can create as many server blocks with Nginx.
To do that, run the commands below to create a new configuration file called owncloud. Conf in the /etc/nginx/sites-available/ directory to host our ownCloud server block.
sudo nano /etc/nginx/sites-available/owncloud.conf
In the file, copy and paste the content below into the file and save.
upstream php-handler {
    server unix:/var/run/php/php7.4-fpm.sock;
}
server {
    listen 80;
    listen [::]:80;
    root /var/www;
    index  index.php index.html index.htm;
    server_name  example.com;


  location ^~ /owncloud {

        client_max_body_size 512M;
        fastcgi_buffers 8 4K;
        fastcgi_ignore_headers X-Accel-Buffering;

        gzip off;

        error_page 403 /owncloud/core/templates/403.php;
        error_page 404 /owncloud/core/templates/404.php;

        location /owncloud {
            rewrite ^ /owncloud/index.php$uri;
        }

        location ~ ^/owncloud/(?:build|tests|config|lib|3rdparty|templates|changelog|data)/ {
            return 404;
        }
        location ~ ^/owncloud/(?:\.|autotest|occ|issue|indie|db_|console|core/skeleton/) {
            return 404;
        }
        location ~ ^/owncloud/core/signature\.json {
            return 404;
        }

        location ~ ^/owncloud/(?:index|remote|public|cron|core/ajax/update|status|ocs/v[12]|updater/.+|oc[sm]-provider/.+|core/templates/40[34])\.php(?:$|/) {
            fastcgi_split_path_info ^(.+\.php)(/.*)$;
            include fastcgi_params;
            fastcgi_param SCRIPT_FILENAME $document_root$fastcgi_script_name;
            fastcgi_param SCRIPT_NAME $fastcgi_script_name;
            fastcgi_param PATH_INFO $fastcgi_path_info;
            fastcgi_param modHeadersAvailable true;
            fastcgi_read_timeout 180;
            fastcgi_pass php-handler;
            fastcgi_intercept_errors on;
            fastcgi_request_buffering off;
        }

        location ~ ^/owncloud/(?:updater|oc[sm]-provider)(?:$|/) {
            try_files $uri $uri/ =404;
            index index.php;
        }

        # Adding the cache control header for js and css files
        # Make sure it is BELOW the PHP block
        location ~ /owncloud/.*\.(?:css|js) {
            try_files $uri /owncloud/index.php$uri$is_args$args;
            add_header Cache-Control "max-age=15778463" always;
            add_header X-Content-Type-Options "nosniff" always;
            add_header X-Frame-Options "SAMEORIGIN" always;
            add_header X-XSS-Protection "1; mode=block" always;
            add_header X-Robots-Tag "none" always;
            add_header X-Download-Options "noopen" always;
            add_header X-Permitted-Cross-Domain-Policies "none" always;
            access_log off;
        }

        location ~ /owncloud/.*\.(?:svg|gif|png|html|ttf|woff|ico|jpg|jpeg|map|json) {
            try_files $uri /owncloud/index.php$uri$is_args$args;
            add_header Cache-Control "public, max-age=7200" always;
            access_log off;
        }
    }
}
Save the file and exit.
After saving the file above, run the commands below to enable the new file that contains our ownCloud server block and other important Nginx modules.
Restart Nginx after that.
sudo ln -s /etc/nginx/sites-available/owncloud.conf /etc/nginx/sites-enabled/
Reload Nginx when the configuration is above.
sudo systemctl restart nginx.service
Now that ownCloud is downloaded, and the necessary services are configured, open your browser and start the ownCloud installation by visiting your server’s domain name or IP address followed by /owncloud :
http://example.com/owncloud
However, we want to protect our server with Let’s Encrypt free SSL certificates. So, continue below to learn how to generate a Let’s Encrypt SSL certificate for websites.
How to setup Let’s Encrypt for ownCloud
We have written a great post on generating and managing Let’s Encrypt SSL certificates for the Nginx web server. You can use that post to apply it here for your ownCloud website.
To read the post on how to generate Let’s Encrypt SSL certificates for a website, click on the link below:
How to Setup Let’s Encrypt on Ubuntu Linux with Nginx
If you successfully generate a Let’s Encrypt SSL certificate, you should reopen the server block for our ownCloud website by running the commands below.
sudo nano /etc/nginx/sites-available/owncloud.conf
The new ownCloud server block configurations should look similar to the line below. Take notes of the highlighted lines.
- The first server block listens on port 80. It contains a 301 redirect to redirect HTTP to HTTPS.
- The second server block listens on port 443. It contains a 301 redirect to redirect www to the non-www domain.
upstream php-handler {
    server unix:/var/run/php/php7.4-fpm.sock;
}

server {
    listen 80;
    listen [::]:80;
    root /var/www;
    index  index.php index.html index.htm;
    server_name  example.com www.example.com;

    include snippets/well-known.conf;

    return 301 https://$host$request_uri;
}

server {
    listen 443 ssl http2;
    listen [::]:443 ssl http2;
    root /var/www;
    index  index.php index.html index.htm;
    server_name www.example.com;

    ssl_certificate /etc/letsencrypt/live/example.com/fullchain.pem;
    ssl_certificate_key /etc/letsencrypt/live/example.com/privkey.pem;
    ssl_trusted_certificate /etc/letsencrypt/live/example.com/chain.pem;

    ssl_protocols TLSv1 TLSv1.1 TLSv1.2 TLSv1.3;
    ssl_ciphers ECDHE-ECDSA-AES128-GCM-SHA256:ECDHE-RSA-AES128-GCM-SHA256:ECDHE-ECDSA-AES256-GCM-SHA384:ECDHE-RSA-AES256-GCM-SHA384:ECDHE-ECDSA-CHACHA20-POLY1305:ECDHE-RSA-CHACHA20-POLY1305:DHE-RSA-AES128-GCM-SHA256:DHE-RSA-AES256-GCM-SHA384;

    add_header Strict-Transport-Security "max-age=31536000;  includeSubDomains";

    include snippets/well-known.conf;

    return 301 https://example.com$request_uri;
}

server {
    listen 443 ssl http2;
    listen [::]:443 ssl http2;
    root /var/www;
    index  index.php index.html index.htm;
    server_name example.com;

    ssl_certificate /etc/letsencrypt/live/example.com/fullchain.pem;
    ssl_certificate_key /etc/letsencrypt/live/example.com/privkey.pem;
    ssl_trusted_certificate /etc/letsencrypt/live/example.com/chain.pem;

    ssl_protocols TLSv1 TLSv1.1 TLSv1.2 TLSv1.3;
    ssl_ciphers ECDHE-ECDSA-AES128-GCM-SHA256:ECDHE-RSA-AES128-GCM-SHA256:ECDHE-ECDSA-AES256-GCM-SHA384:ECDHE-RSA-AES256-GCM-SHA384:ECDHE-ECDSA-CHACHA20-POLY1305:ECDHE-RSA-CHACHA20-POLY1305:DHE-RSA-AES128-GCM-SHA256:DHE-RSA-AES256-GCM-SHA384;

    ssl_prefer_server_ciphers on;
    ssl_session_cache shared:SSL:50m;
    ssl_session_timeout 1d;
    ssl_session_tickets off;

    ssl_stapling on;
    ssl_stapling_verify on;
    resolver 8.8.8.8 8.8.4.4 valid=300s;
    resolver_timeout 30s;

    ssl_dhparam /etc/ssl/certs/dhparam.pem;

    add_header Strict-Transport-Security "max-age=31536000;  includeSubDomains";


 location / {
        return 301 https://$server_name:443$request_uri;
    }

  location ^~ /owncloud {

        client_max_body_size 512M;
        fastcgi_buffers 8 4K;
        fastcgi_ignore_headers X-Accel-Buffering;

        gzip off;

        error_page 403 /owncloud/core/templates/403.php;
        error_page 404 /owncloud/core/templates/404.php;

        location /owncloud {
            rewrite ^ /owncloud/index.php$uri;
        }

        location ~ ^/owncloud/(?:build|tests|config|lib|3rdparty|templates|changelog|data)/ {
            return 404;
        }
        location ~ ^/owncloud/(?:\.|autotest|occ|issue|indie|db_|console|core/skeleton/) {
            return 404;
        }
        location ~ ^/owncloud/core/signature\.json {
            return 404;
        }

        location ~ ^/owncloud/(?:index|remote|public|cron|core/ajax/update|status|ocs/v[12]|updater/.+|oc[sm]-provider/.+|core/templates/40[34])\.php(?:$|/) {
            fastcgi_split_path_info ^(.+\.php)(/.*)$;
            include fastcgi_params;
            fastcgi_param SCRIPT_FILENAME $document_root$fastcgi_script_name;
            fastcgi_param SCRIPT_NAME $fastcgi_script_name;
            fastcgi_param PATH_INFO $fastcgi_path_info;
            fastcgi_param HTTPS on;
            fastcgi_param modHeadersAvailable true;
            fastcgi_read_timeout 180;
            fastcgi_pass php-handler;
            fastcgi_intercept_errors on;
            fastcgi_request_buffering off;
        }

        location ~ ^/owncloud/(?:updater|oc[sm]-provider)(?:$|/) {
            try_files $uri $uri/ =404;
            index index.php;
        }

        # Adding the cache control header for js and css files
        # Make sure it is BELOW the PHP block
        location ~ /owncloud/.*\.(?:css|js) {
            try_files $uri /owncloud/index.php$uri$is_args$args;
            add_header Cache-Control "max-age=15778463" always;
            add_header X-Content-Type-Options "nosniff" always;
            add_header X-Frame-Options "SAMEORIGIN" always;
            add_header X-XSS-Protection "1; mode=block" always;
            add_header X-Robots-Tag "none" always;
            add_header X-Download-Options "noopen" always;
            add_header X-Permitted-Cross-Domain-Policies "none" always;
            access_log off;
        }

        location ~ /owncloud/.*\.(?:svg|gif|png|html|ttf|woff|ico|jpg|jpeg|map|json) {
            try_files $uri /owncloud/index.php$uri$is_args$args;
            add_header Cache-Control "public, max-age=7200" always;
            access_log off;
        }
    }
}
Save the file above, then restart Nginx and PHP using the commands below.
sudo systemctl reload nginx
Finally, if everything went as planned, you should be able to start the ownCloud setup wizard by browsing to the server hostname or IP address over HTTPS.
https://example.com/owncloud
An ownCloud setup wizard should appear. Follow the wizard to complete the setup.
- Create an admin account and password
- leave Data folder default
- Select MySQL/MariaDB
- Enter the database username
- Enter the database user password
- Enter the database name
- Leave database host as local host if ownCloud and database server are on the same host.
Click Finish setup
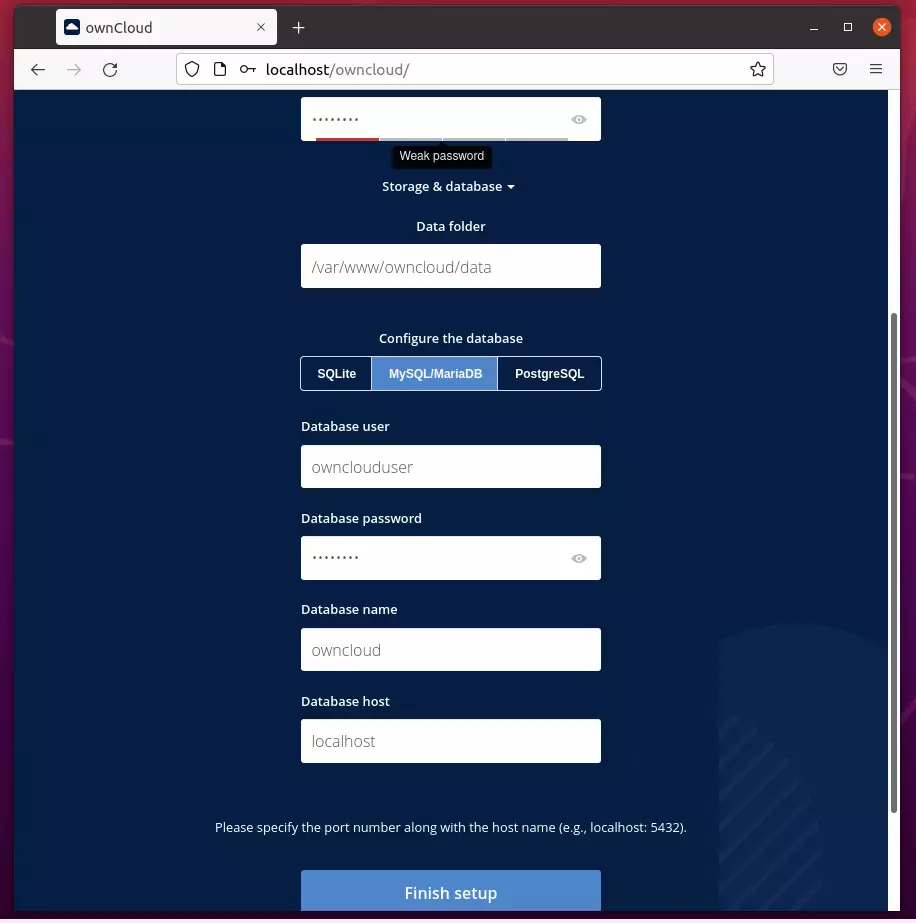
Wait for the setup to complete. Then log in and begin configuring your environment.
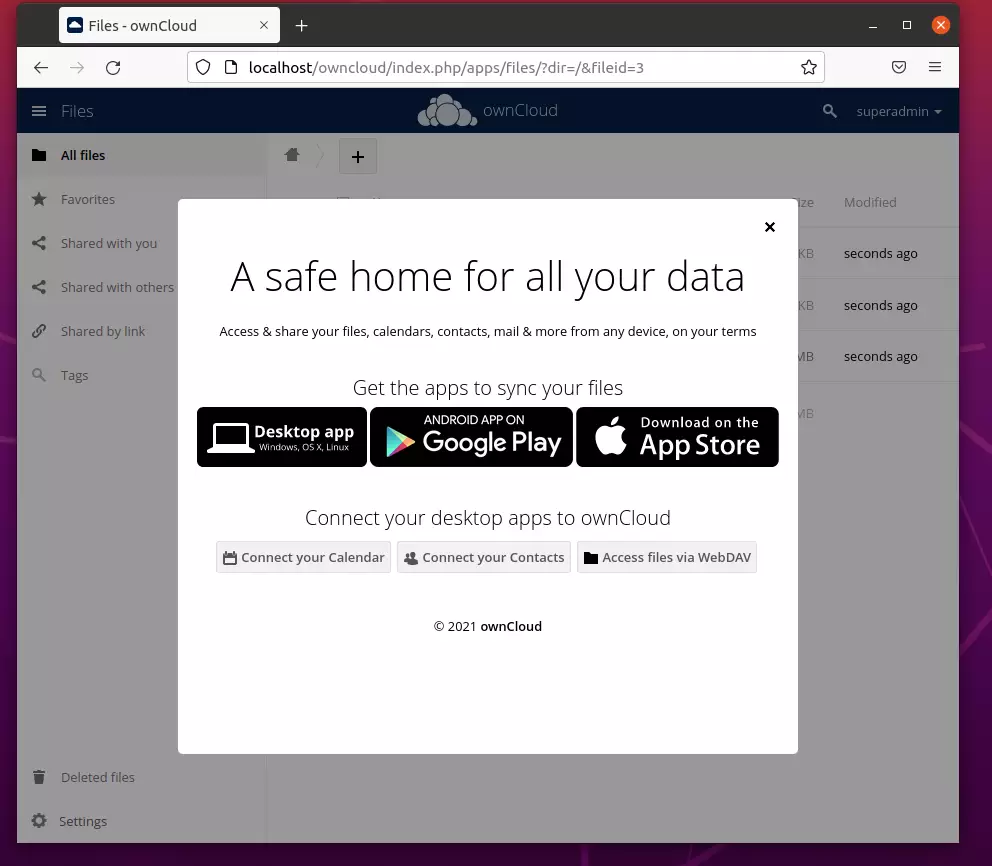
That should do it!
Conclusion:
This post showed you how to set up ownCloud on Ubuntu Linux with Nginx and Let’s Encrypt. Please use the comment form below if you find any errors above or have something to add.
Tidak ada komentar:
Posting Komentar