How to Install FreeFileSync on Ubuntu 22.04
FreeFileSync is an open-source file synchronization & backup tool that helps in synchronizing files across folders and various devices and keeping your data updated. It’s a multi-platform tool that is available for Windows, Linux, and Mac.
In this tutorial, we will cover how to install FreeFileSync on Ubuntu 22.04 step-by-step.
Prerequisites
- Pre-Installed Ubuntu 22.04 LTS system
- Sudo User with admin rights
- Stable Internet connectivity
1. Update Package Lists
To get started, log into your Ubuntu 22.04 workstation and update the package lists:
$ sudo apt update
Once the update is complete, proceed to the next step to install FreeFileSync.
2. Download the FreeFileSync Setup file
FreeFileSync is not included in the official Ubuntu repositories at the time of writing this guide. The only way of installing it is by downloading the binary file from the official site and then running the installation file.
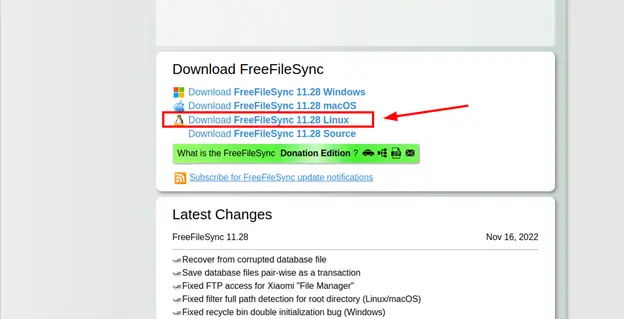
Therefore, visit the official FreeFileSync download page and download the tarball file for Linux by clicking on it as shown below.
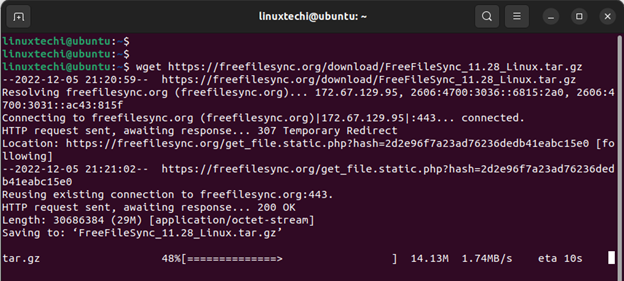
Alternatively, you can copy the link and download it using the wget command as follows. Take note that the version number is likely to be different at the time you are referring to this guide and, therefore, replace the version number to correspond to the latest version.
$ wget https://freefilesync.org/download/FreeFileSync_11.28_Linux.tar.gz
3. Extract the downloaded Setup File
Once the download is complete, navigate to the file location and extract it using below tar command.
$ tar -xvf FreeFileSync_11.28_Linux.tar.gz
The installer file comes already with execute permissions, and therefore, you do not need to assign execute permissions.
4. Install FreeFileSync on Ubuntu 22.04
To install FreeFile Sync, simply run the installer file as shown.
$ sudo ./FreeFileSync_11.28_Install.run
Type ‘y’ and press ENTER to accept the License Terms.
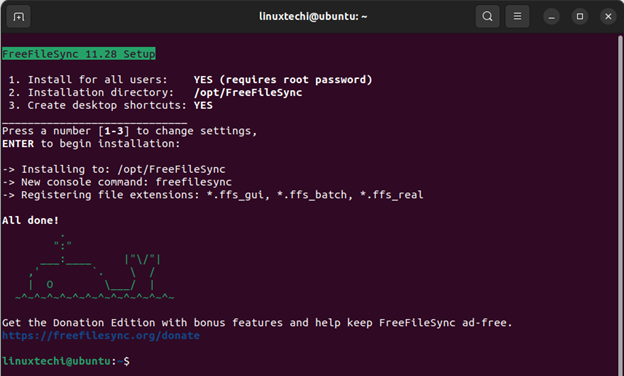
Next, the following output will be displayed on the terminal. Just leave the default settings the way they appear and hit ENTER to proceed with the installation.
In just a matter of seconds, the installation will be complete, and you will get the following output as confirmation.
Upon completion of the installation, you will get two icons at the bottom right of your Ubuntu desktop as shown.
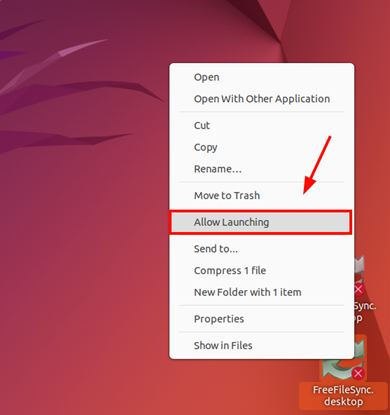
To activate the FreeFileSync desktop icon, right-click on it and select ‘Allow Launching’.
The icon now turns green as shown. To launch FreeFileSync, simply double-click the icon.
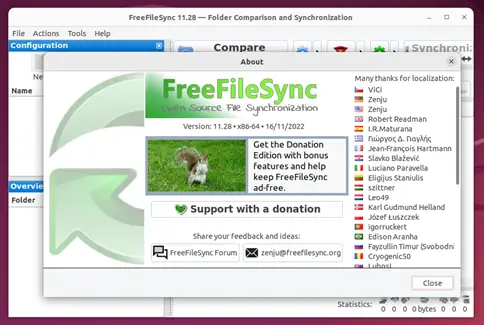
The FreeFileSync desktop application will pop open. The ‘About’ pop-up displays the version of FreeFileSync installed and contributors to the project.
To access the dashboard, click the ‘Close’ button
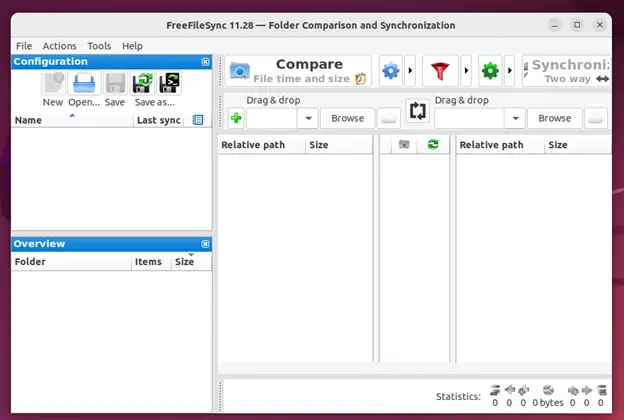
This is what the dashboard looks like.
5. Synchronize files using FreeFileSync
In this section, we are going to demonstrate how to synchronize files from one folder to another. This is our directory setup
- Source folder : /home/linuxtechi/data
- Destination folder : /home/linuxtechi/Documents
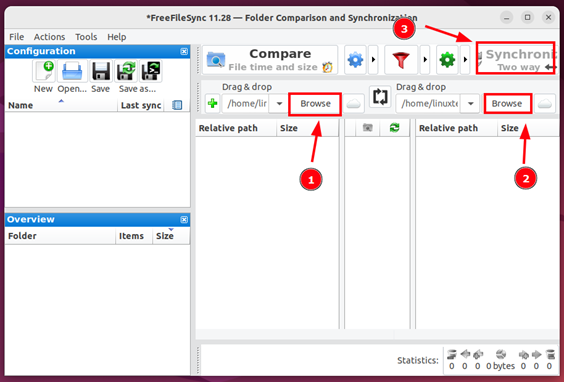
First, click the ‘Browse’ button in the first section and select the source folder. Similarly, click the ‘Browse’ button in the second section to select the destination directory in which the synchronization is going to occur.
Finally. Click the ‘Synchronize’ button.
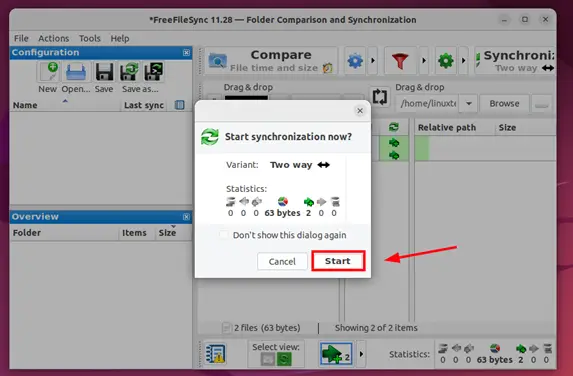
Next, click ‘Start’ to start the file synchronization process
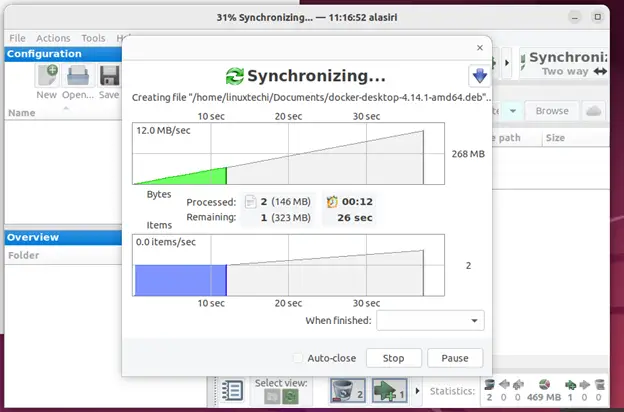
This can take a while depending on the size of the files being synchronized. You should see a progress chart indicating how the synchronization is going on.
Once done, confirm that the source and destination folders have the same files
Conclusion
This brings down the curtains on this guide. In this tutorial, we have installed FreeFileSync on Ubuntu 22.04 and demonstrated how you can use it to synchronize files between folders.


Tidak ada komentar:
Posting Komentar