Getting started with VMware Admiral Container Service on Photon OS
In this guide I will walk you through a simple setup of Admiral using Photon OS as the container host. Admiral™ is a highly scalable and very lightweight Container Management platform for deploying and managing container based applications. It is designed to have a small footprint and boot extremely quickly. Admiral™ is intended to provide automated deployment and lifecycle management of containers.
Key Features:
- Rule-based resource management – Setup your deployment preferences to let Admiral™ manage container placement.
- Live state updates – Provides a live view of your system.
- Efficient multi-container template management – Enables logical multi-container application deployments.
Pre-Reqs
- One Photon OS VM to install Admiral Container Service
- Two Photon OS VM’s with Docker Remote API enabled to use as Container Hosts : See my Guide here
- Internet Access from all the above Photon OS VM’s
- A quiet place where you will not be interrupted. See my guide here.
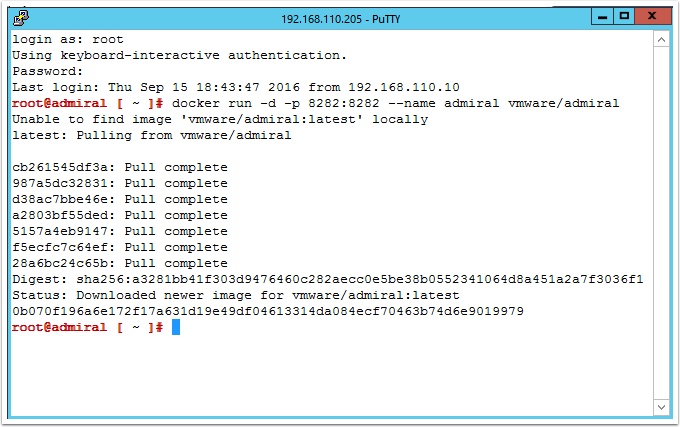
docker run -d -p 8282:8282 --name admiral vmware/admiral
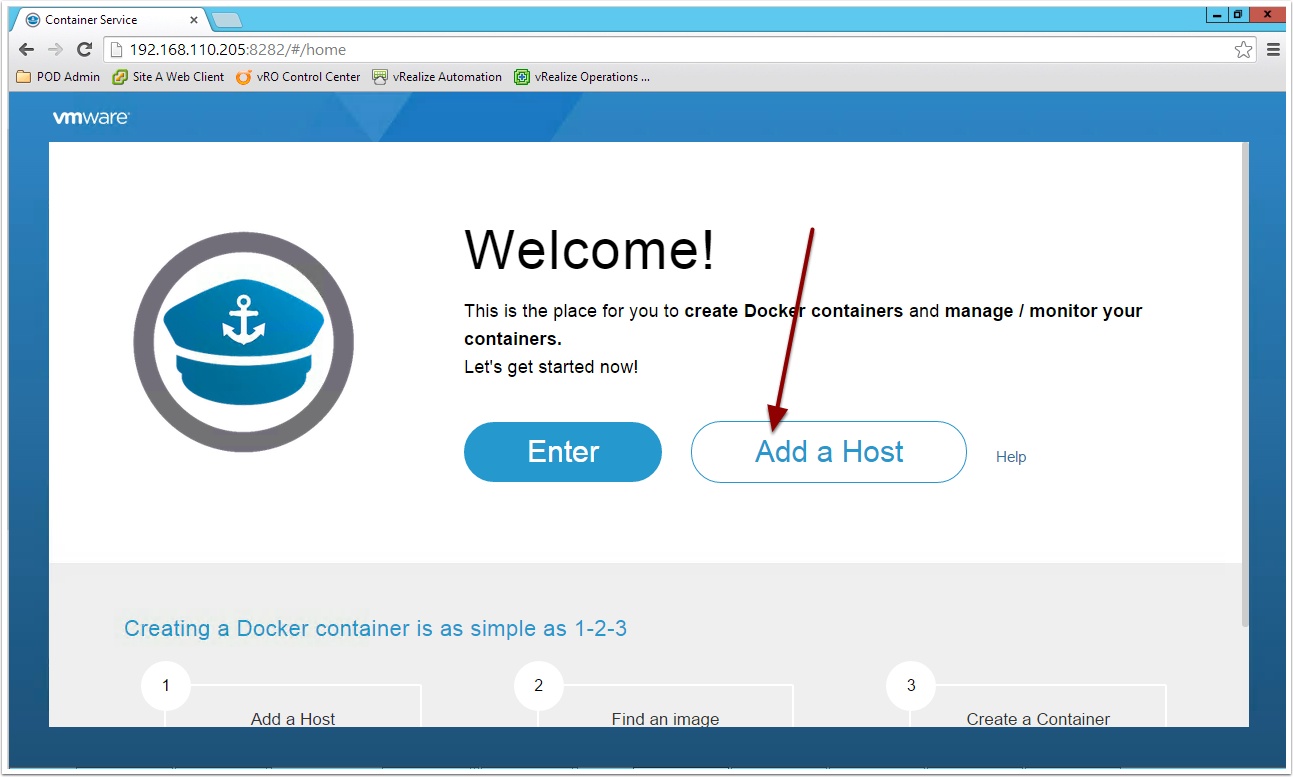
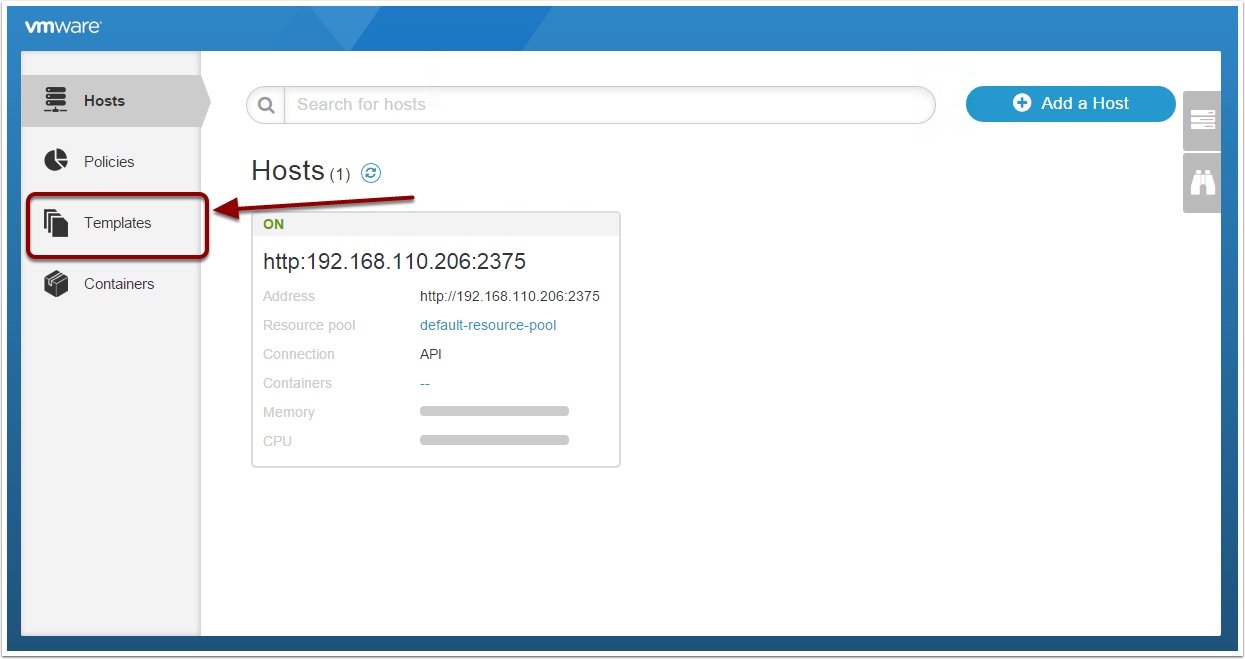
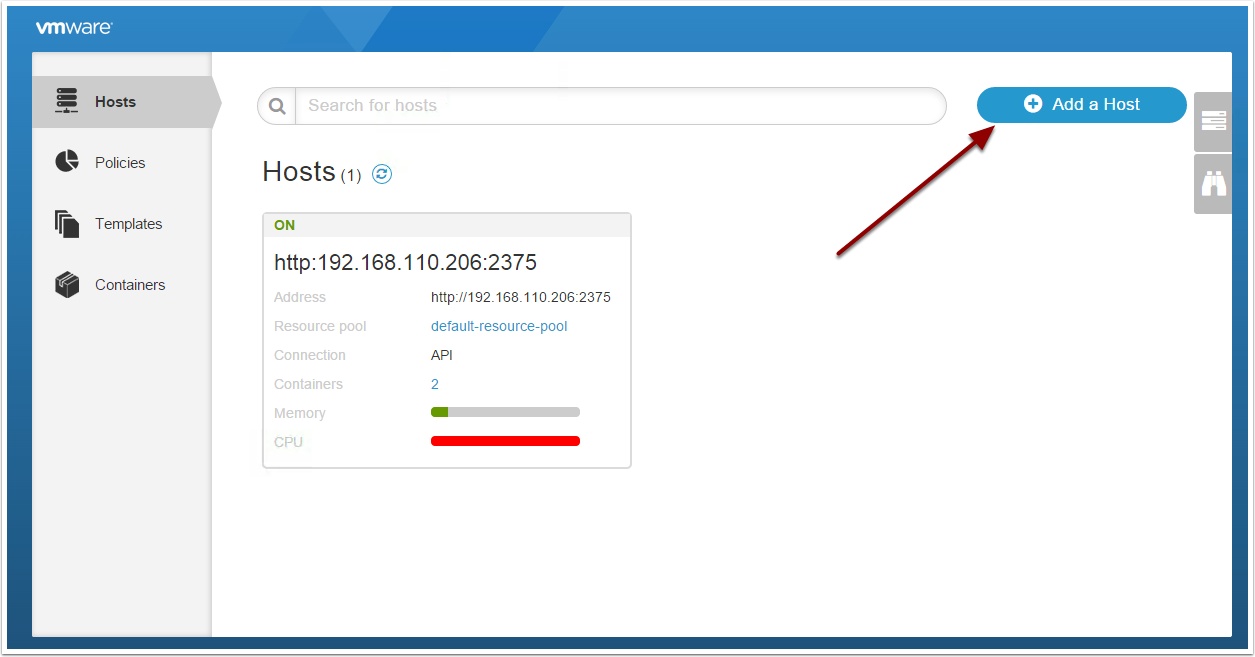
Open a browser to the ip address of your Photon OS and port 8282 http://ipaddress:8282 then click on add host
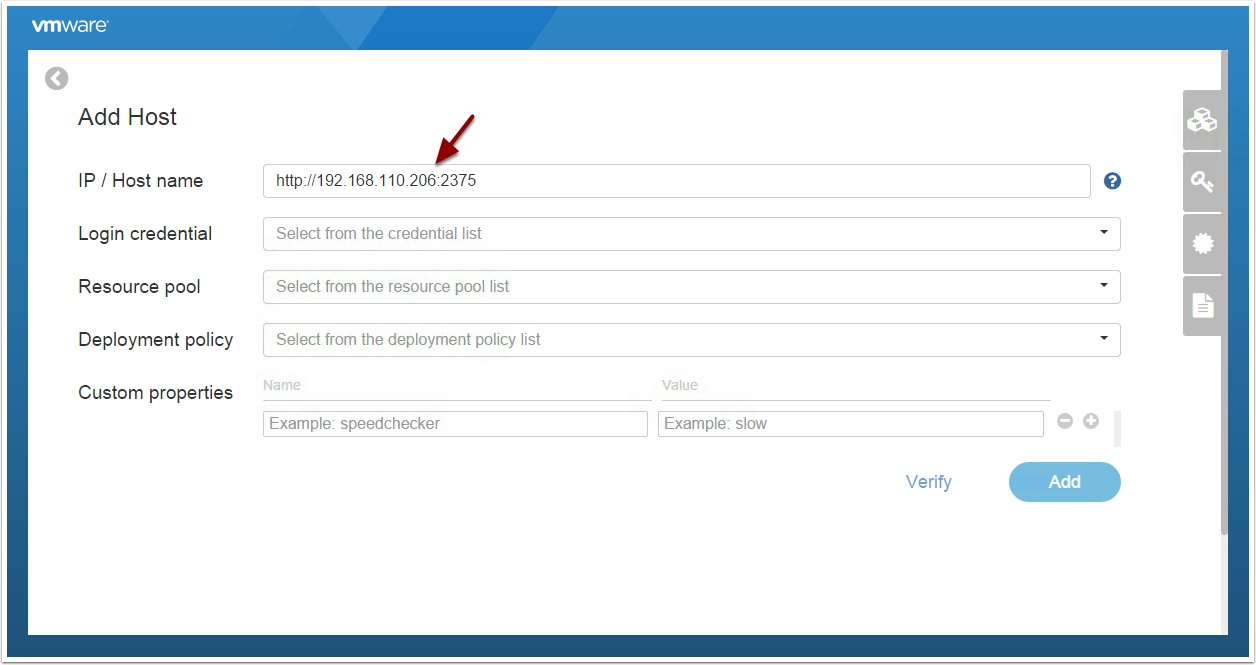
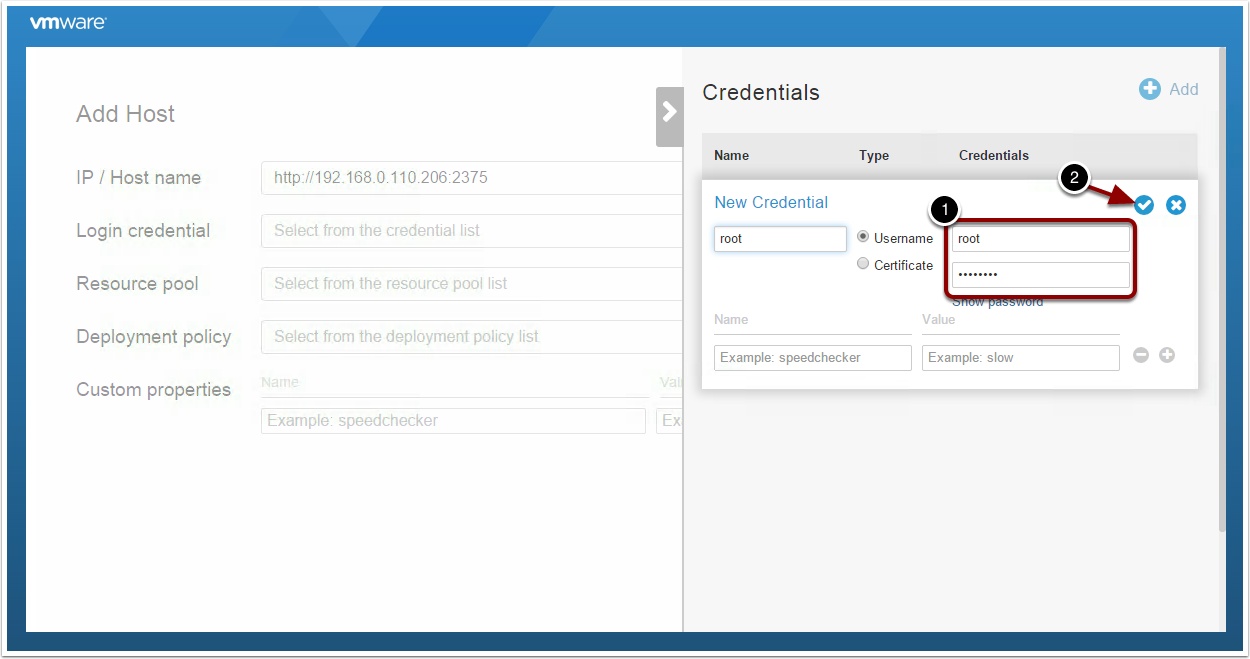
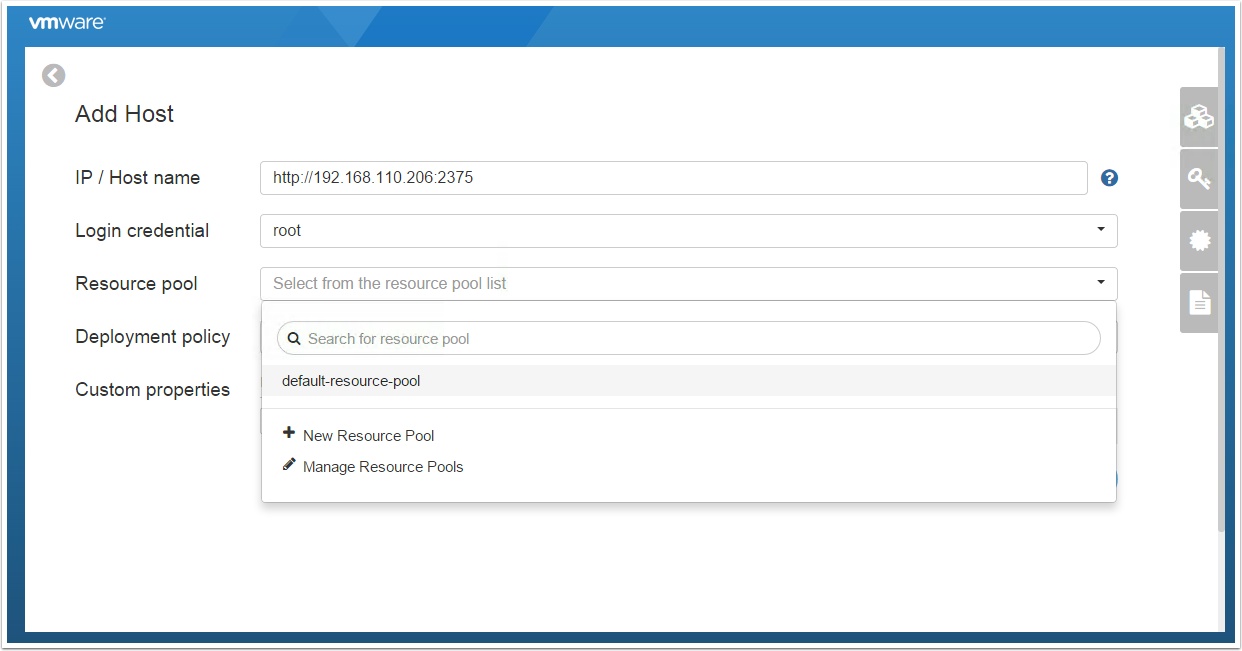
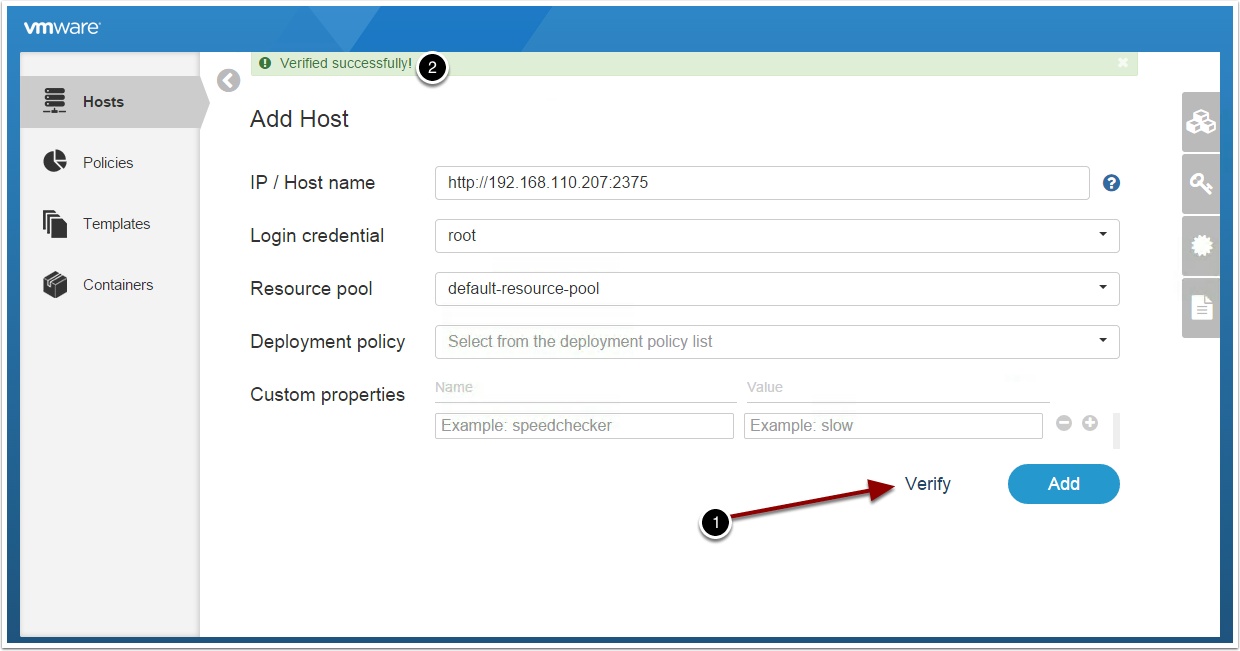
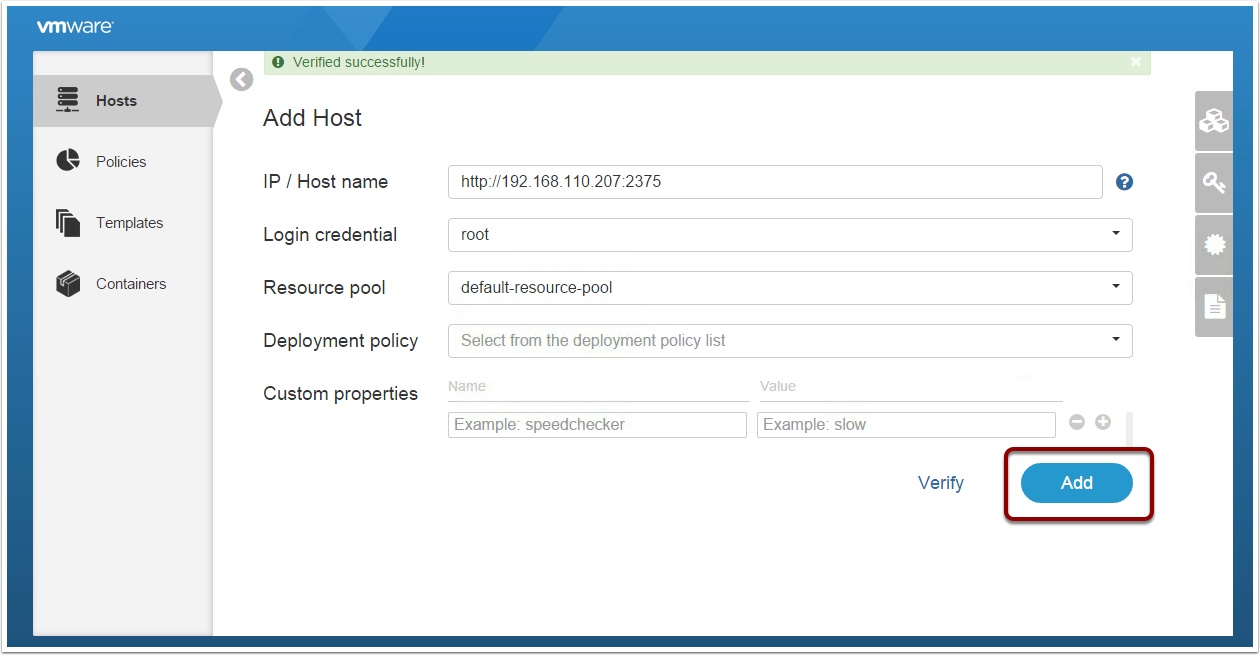
Enter the IP and host name of one of your other Photon OS VM’s
Note: The Photon OS host you’re adding needs the Docker Remote API enabled, see my guide here.
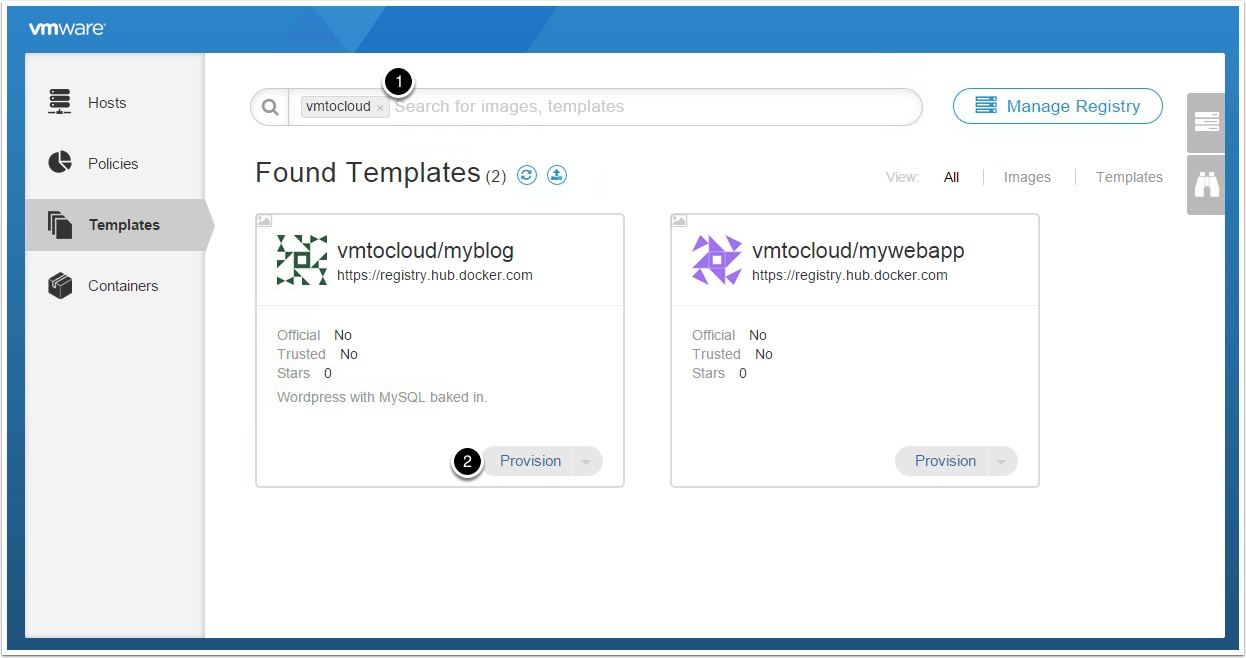
In the search box enter vmtocloud and press enter, then click to provision the vmtocloud/myblog template
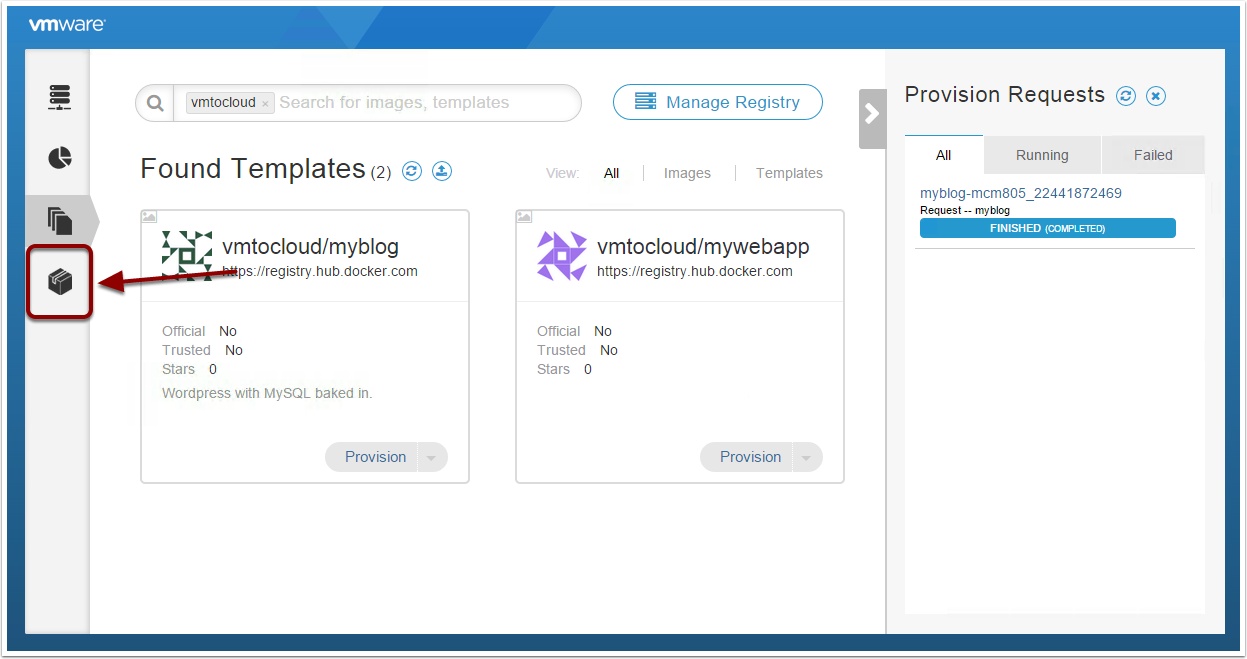
Watch the progress screen on the right, after several minutes it should show finished. Now clock the Containers tab.
Notice that all the templates are being pulled from Docker Hub. In a later post I will show you how to use VMware Harbor Registry locally.
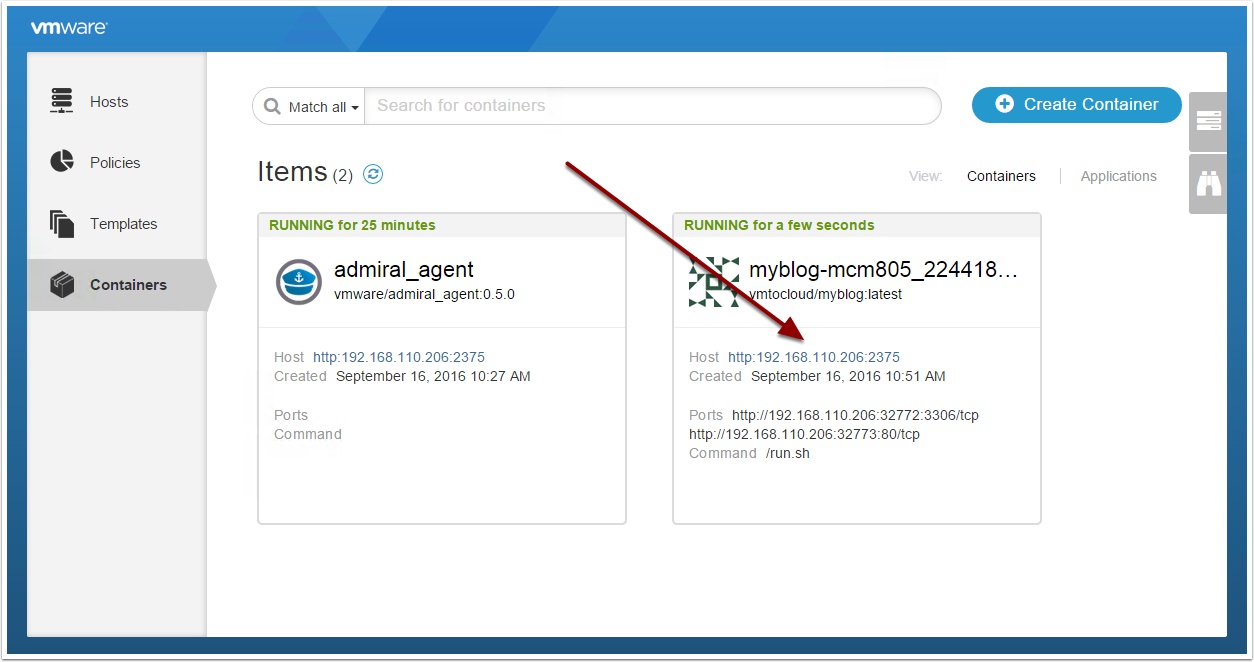
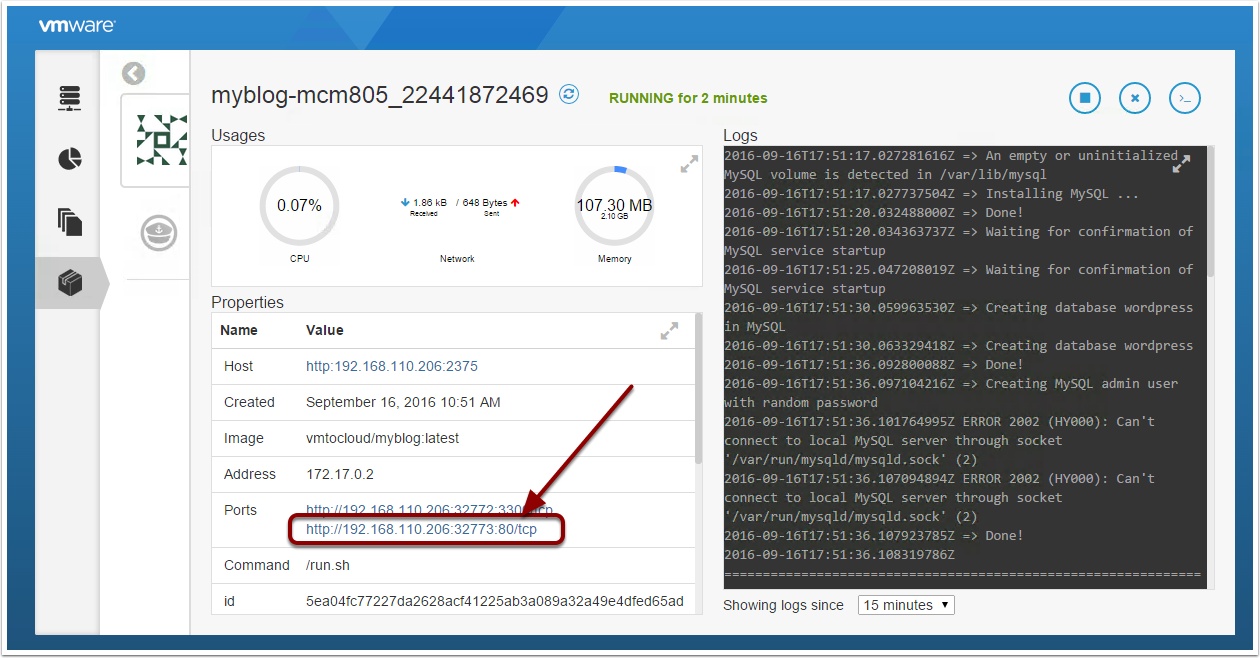
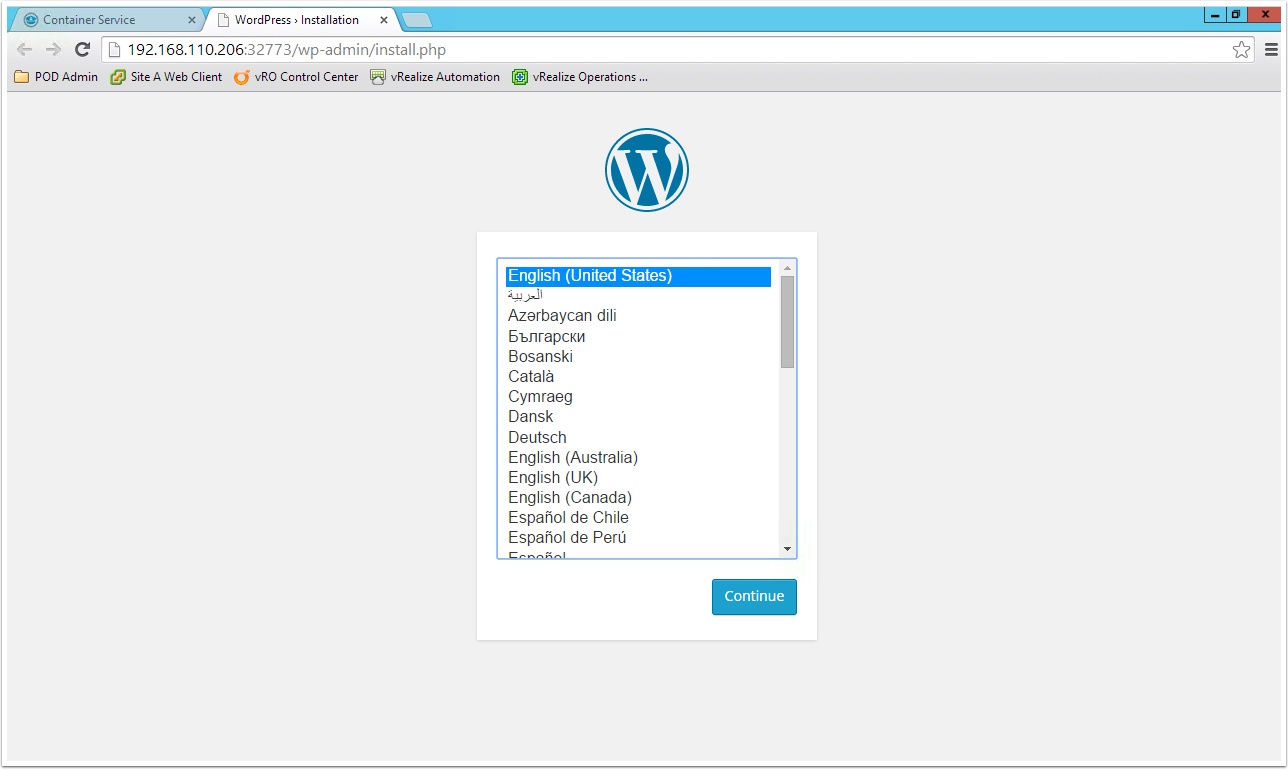
Notice all the information you get about the running container. Now click the second port link to go to the WordPress Site
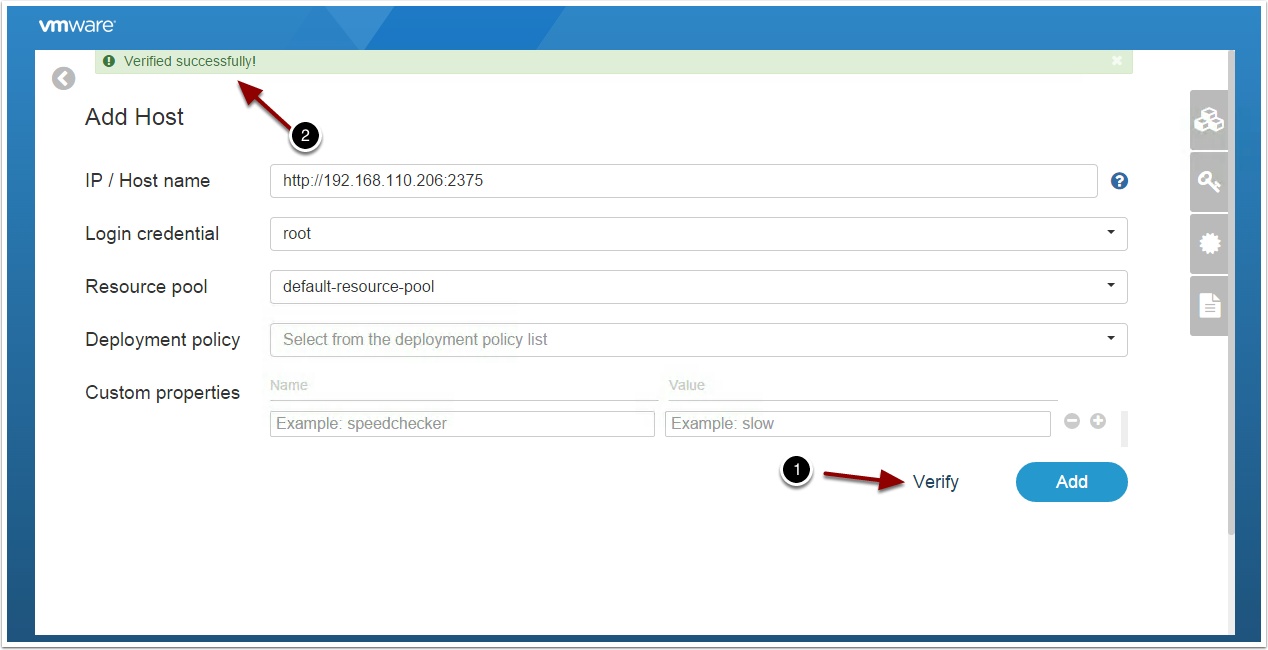
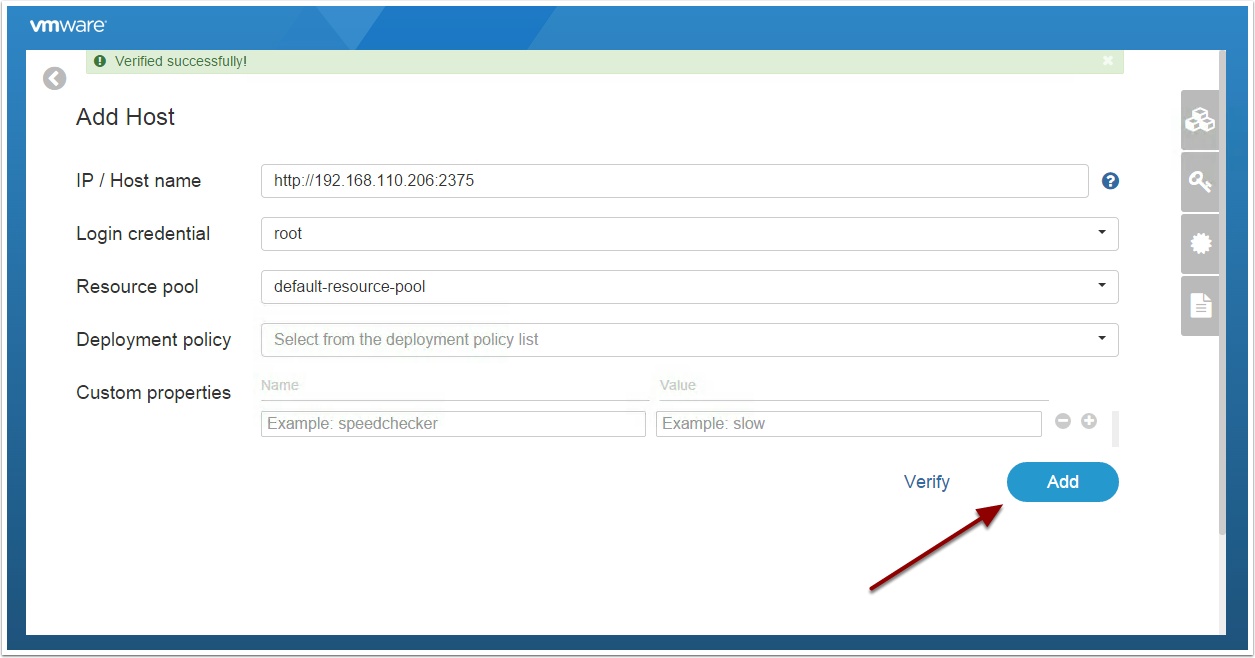
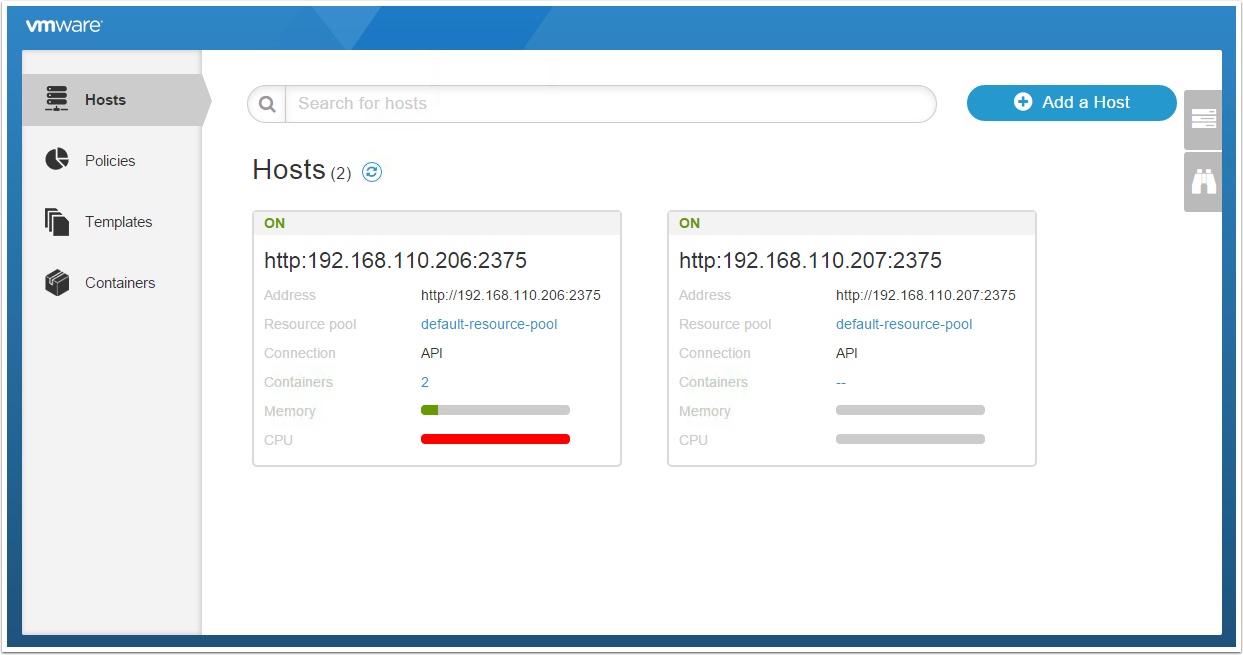
Enter the same information as before and click verify
Remember the Photon Host needs to have Docker Remote API enabled of the verify will fail with a connection error. See my guide here.
You should now be well on your way to using Admiral, see the user guide here to explore more features.
Also, If you want to use a local registry see my guide here How to use VMware Admiral with Harbor Registry


Tidak ada komentar:
Posting Komentar