How to apply Authentication to any Web Service in 15 Minutes using Keycloak and Keycloak Proxy
October 24th, 2018
I am a part-time cyber security lecturer at the software engineering department of the University of Applied Science in Rapperswil Switzerland. My students must learn several programming skills and in almost any web software project some sort of authentication and authorization must be applied. I want my students to spend their time working on the real purpose of the software problem (problem domain), instead of spending hours with authentication and authorization. Needless to say this is a crucial task in a real software project. Read this tutorial and I will show you how to add authentication to any web service that does not have a builtin authentication layer using keycloak IdP and keycloak proxy in approx. 15 minutes.
Update May 11th, 2019. Please find a step-by-step tutorial, including setting up Keycloak and Traefik here
https://github.com/ibuetler/docker-keycloak-traefik-workshop
https://github.com/ibuetler/docker-keycloak-traefik-workshop
Sample Application for this Tutorial: ip2loc
For the sake of this tutorial I have chosen ip2loc, a service that will return the GeoIP information for a given ip address. You can grab the software from GitHub if you like: https://github.com/taras-by/ip2geo
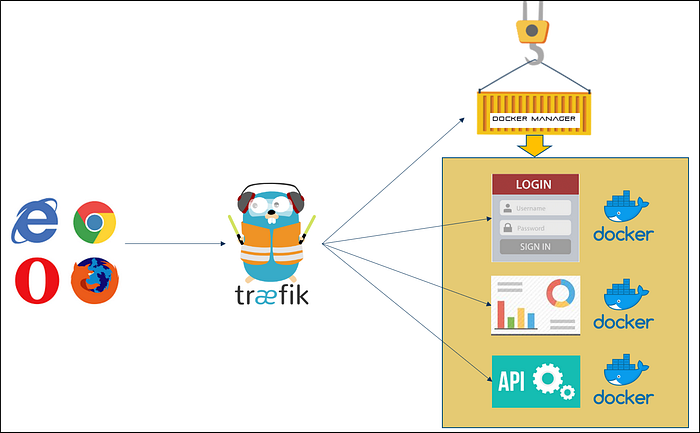
I run my docker services “behind” traefik, behind a single IP address in combination with a wildcard SSL/TLS certificate. If you are interested in this setup, please read my previous article.

Keycloak IdP
For the sake of this tutorial I use keycloak, an open-source identity provider that runs smoothly with docker. If you don’t know keycloak, I encourage you to get into this project. It is the open source version of the RedHat RH-SSO solution. I will not cover the setup of keycloak in this tutorial. Ok you got me; 15 minutes is maybe too short for this tutorial if you do not have keycloak up and running. But I promise, it is as simple as any other docker service.
Step 1: Run the Sample ip2loc Application that comes without Authentication
First I would like to show you the application and the docker-compose file of the origin ip2loc service. If you clone the git repo from ip2loc, the docker-compose.yml looks like this

But as I run my docker container “behind” the Traefik load balancer, I have added the traefik labels to my docker-compose-traefik.yml file and removed the port settings. My own docker-compose-traefik.yml looks like this:

If the label confuses you, please read my previous Docker with Traefikarticle.
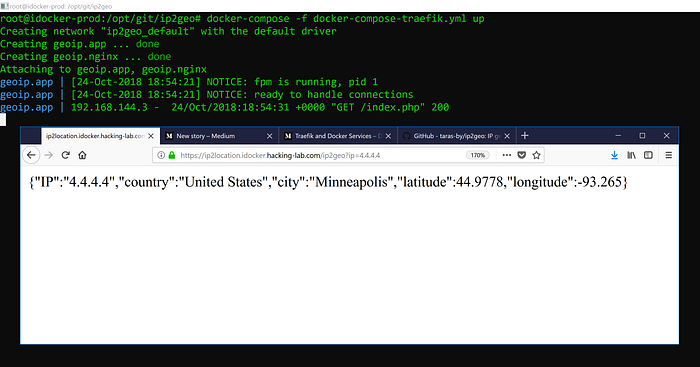
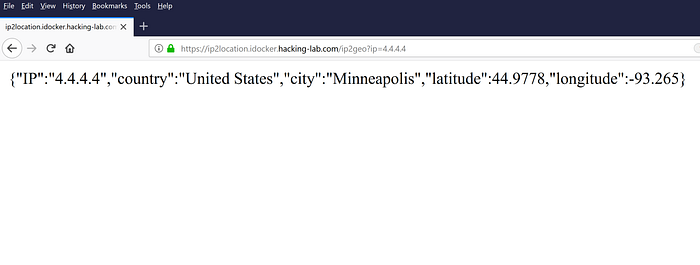
In the next step, I am going to start the ip2loc docker with docker-compose-traefik.yml from the screenshot above. The service becomes available under: https://ip2location.idocker.hacking-lab.com/ip2geo?ip=4.4.4.4(this URL won’t be available as soon as I stop the service)

As you can see in the picture above, I have used the docker-compose-traefik.yml and asked the web app to resolve the IP 4.4.4.4. The service is not having any authentication scheme.
Next we must create a keycloak configuration for our ip2loc service.
Step 2: Configure Keycloak
In keycloak, please create a new client and give it a name. In my case “ip2location”. From the perspective of an IdP, any new IdP-aware application must be registered as new client.

Please review the yellow configurations carefully. These are very important settings for this tutorial.

Please click on the “Credentials” tab in your keycloak configuration and copy the Secret value. This will later be used.

Step 3: Keycloak Proxy
Now we come to the trick. The magic is simple. There is a keycloak aware reverse proxy in front of the ip2loc service. Thus, the keycloak aware proxy will do the authentication and only web requests from authenticated users will be sent to the ip2loc service. Please review the following keycloak proxy docker-compose.yml file. This file introduces the auth-proxy service.

The keycloak proxy has a config file. Let’s see what’s in the file. The screenshot below discloses the configuration of the proxy and as you can see, I have used the keycloak Secret.

The upstream-url is important too; This is the docker service name the proxy shall send all requests that are authenticated. For this tutorial, this is the ip2location service running on port 3000.
Step 4: Start the Application
Now we have all pieces together. We have the demo application running as docker service on port 3000. We have an IdP based on Keycloak running on https://auth.idocker.hacking-lab.com/ and finally we have the keycloak proxy running on https://ip2location.idocker.hacking-lab.com/ . Needless to say, keycloak and the keycloak proxy are running behind “Traefik” in this setup
This is what you get once the docker-compose-with-proxy.yml is started. As you can see in the image below, the keycloak proxy is retrieving the configuration from keycloak. If this succeeds, you are good.

Step 5: Access the Application with your Browser
Now let’s see how the application behaves if we connect with our browser. I use the following URL
in a new private Firefox window.

As expected, my browser gets redirected to the IdP.

I forgot to mention in Step 2; you must add a user in keycloak and use the login credentials of your newly created user to authenticate against keycloak.

Why is Google Auth available?
With keycloak you can link other Identity Providers to your application. I added Google and that’s why one can login with Google credentials too into my ip2loc service.


Lesson Learned
I hope you find this tutorial useful. I have showed how to add authentication to any web services that comes without authentication by plugin IdP and IdP proxies together. This takes no longer than 15 minutes if you have your IdP available and your docker infrastructure.
Update May 11th, 2019
Please find a step-by-step tutorial, including setting up Keycloak and Traefik here https://github.com/ibuetler/docker-keycloak-traefik-workshop
Thank you for Reading
Ivan Bütler
CEO Compass Security
Lecturer at University of Applied Sciences in Rapperswil, Switzerland
CEO Compass Security
Lecturer at University of Applied Sciences in Rapperswil, Switzerland


Tidak ada komentar:
Posting Komentar