Selasa, 30 Januari 2018

Owncloud migrasi

ownCloud migration in linux

Now a day’s most of the IT companies implemented ownCloud because they are getting more benefits from it and many things were automated. So, today i’m going to explain how to migrate owncloud from one server to another.

New Server

First install the ownCloud to new server then move/copy required files/folders from old server.

1) Download & Install the ownCloud package

Use the below link to download the latest version of ownCloud package then install it.
# Download the ownCloud package #
root@2daygeek [~]# wget https://download.owncloud.org/community/owncloud-7.0.4.tar.bz2

# Extract the ownCloud archive file #
root@2daygeek [~]# tar -xjvf owncloud-7.0.4.tar.bz2

# Change folder permission #
root@2daygeek [~]# chown -R groupname:username owncloud

# Create Database #
mysql> create database cloud;
Query OK, 1 row affected (0.00 sec)

# Create Database user #
mysql> CREATE USER 'cloud'@'localhost' IDENTIFIED BY 'cloud';
Query OK, 0 rows affected (0.00 sec)

# Assign the PRIVILEGES #
mysql> GRANT ALL PRIVILEGES ON cloud.* TO 'cloud'@'localhost';
Query OK, 0 rows affected (0.00 sec)

# FLUSH PRIVILEGES #
mysql> FLUSH PRIVILEGES;
Query OK, 0 rows affected (0.00 sec)

2) Configuration

Navigate your browser to http://Your-domain.com/owncloud, it will ask you to create the username & password to mange your owncloud.

3) Remove data & config folders

Remove data & config from new server.
# Remove data folder #
root@2daygeek [~]# rm -Rf data

# Remove config folder #
root@2daygeek [~]# rm -Rf config

Old Server

take backup of database,data & config folders then move/copy to new server.

1) Backup database,data & config folders

Follow the below steps to take backup of required data from old server.
# Database Backup #
root@2daygeek [~]# mysqldump -u root -p owncloud > owncloud.sql

# Sync Database Backup to new server #
root@2daygeek [~]# rsync -avz -e "ssh -p 22" /root/owncloud.sql 192.168.1.137:/root

# Sync data folder #
root@2daygeek [~]# rsync -avz -e "ssh -p 22" /home/cloudana/public_html/owncloud/data/* 192.168.1.137:/home/cloudtest/public_html/owncloud/data/

# Sync config folder #
root@2daygeek [~]# rsync -avz -e "ssh -p 22" /home/cloudana/public_html/owncloud/config/* 192.168.1.137:/home/cloudtest/public_html/owncloud/config/

New Server

Modify the configuration according to the new server details to make it work on owncloud properly.
# Restore Database Backup #
root@2daygeek [~]# mysql -u root -p owncloud < owncloud.sql

# Change data folder permission #
root@2daygeek [~]# chown -R groupname:username data

# Change config folder permission #
root@2daygeek [~]# chown -R groupname:username config
Modify config.php file
root@2daygeek [~]# nano config.php
0 => 'New-domain-name',
datadirectory' => '../current-data-directory-location',
'dbname' => 'New-DB-name',
'dbuser' => 'New-DB-User-name',
'dbpassword' => 'New-DB-password',
Goahead and access the owncloud from new server without any issues.

Install PHPMyadmin

Cara Install phpMyAdmin di Ubuntu 16.04 LAMP

Cara Install phpMyAdmin di Ubuntu 16.04 LAMP

Pendahuluan

Pada dasarnya, mengelola database dengan MySQL harus dilakukan dengan cara mengetikkan perintah yang sesuai untuk setiap tujuan tertentu. Kita harus hafal bagaimana jika ingin menghapus, membuat atau pun mengubah record , namun dengan phpmyadmin, kita bisa mengelola database dengan mudah Karena berbasis web, sekali klik, semua perintah dapat dijalan kan tanpa mengetik command line.

Persyaratan

  1. Client SSH seperti Bitvise atau Putty
  2. Pengetahuan dasar tentang peritah Linux/Unix
  3. Server atau VPS dengan RAM minimal 256MB (openVZ), disarankan 512 MB jika Anda menggunakan KVM atau Xen
  4. Ubuntu 16.04, 32 bit atau 64 bit

Instal PHPMYADMIN

  1. Pertama dan yang paling penting, anda harus sudah menginstal php7MariaDB dan web server(apache/nginx)
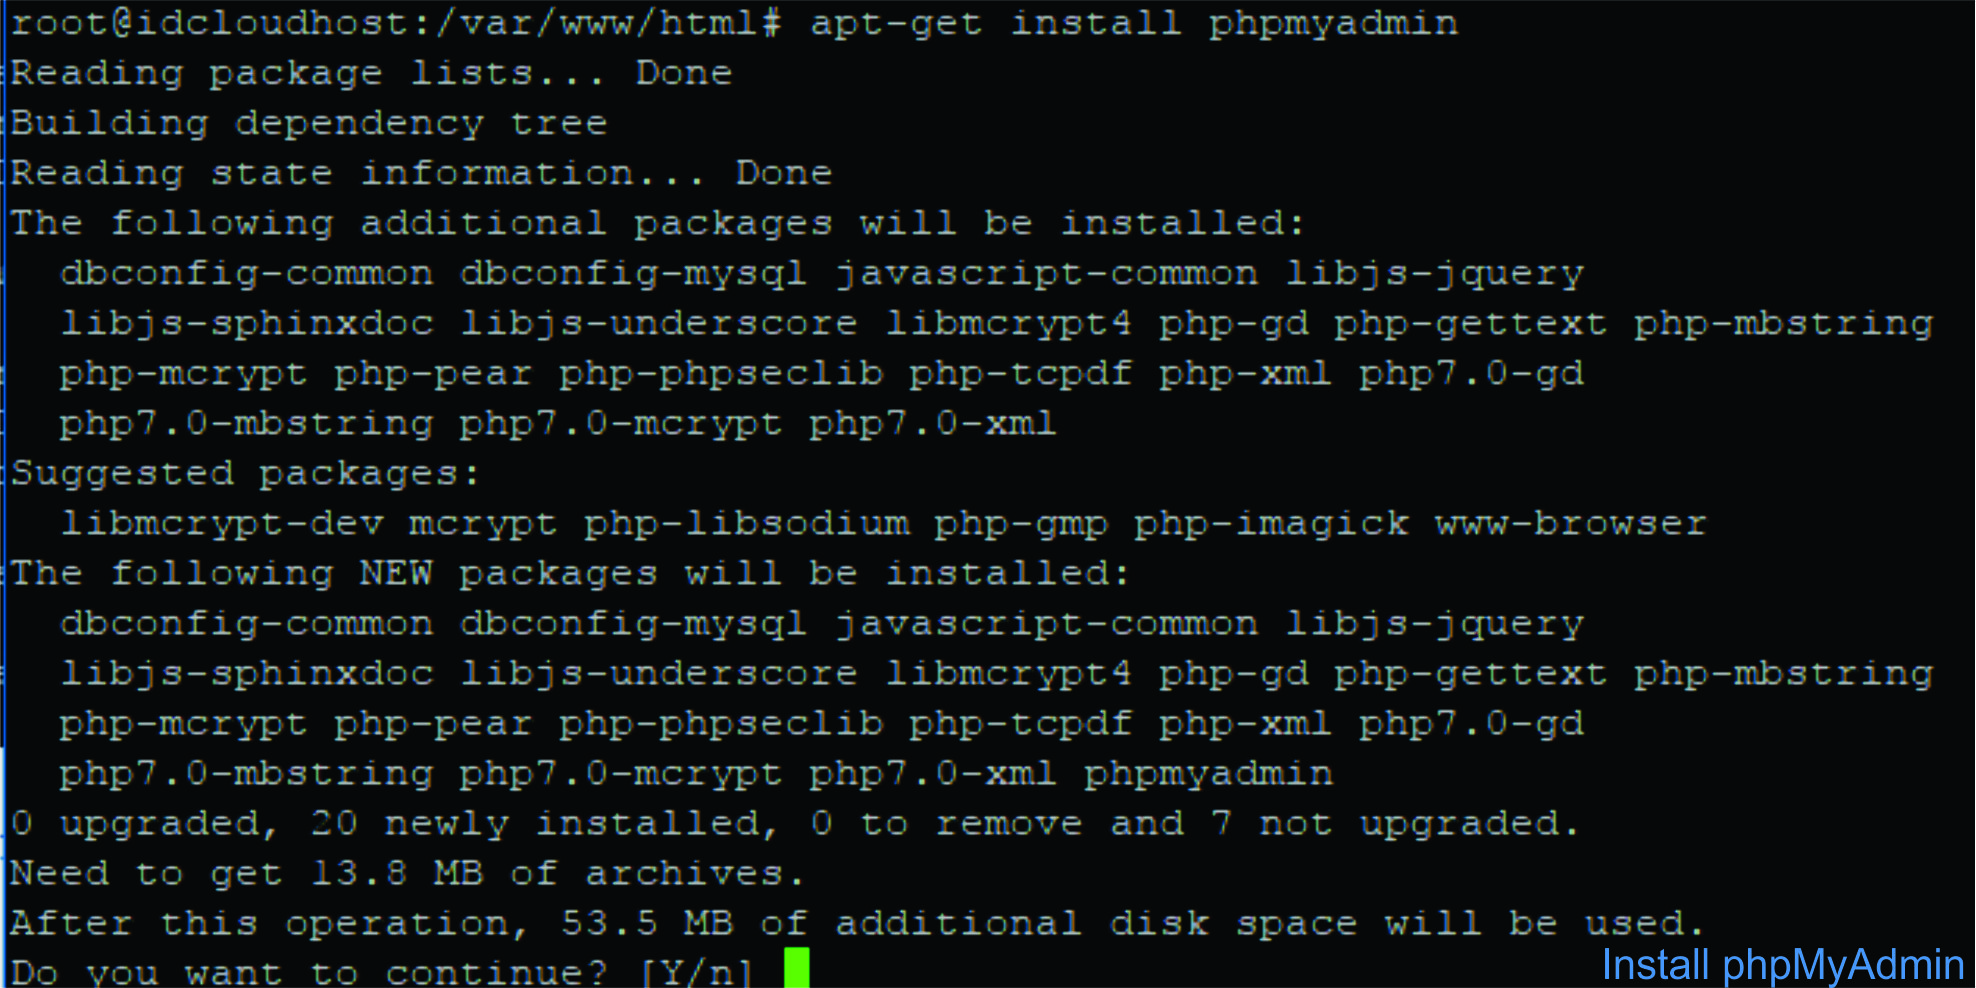
  2. Sekarang install phpMyAdmin dengan mengetikkan perintah berikut
    apt-get install phpmyadmin
    Cara Install phpMyAdmin di Ubuntu 16.04 LAMP
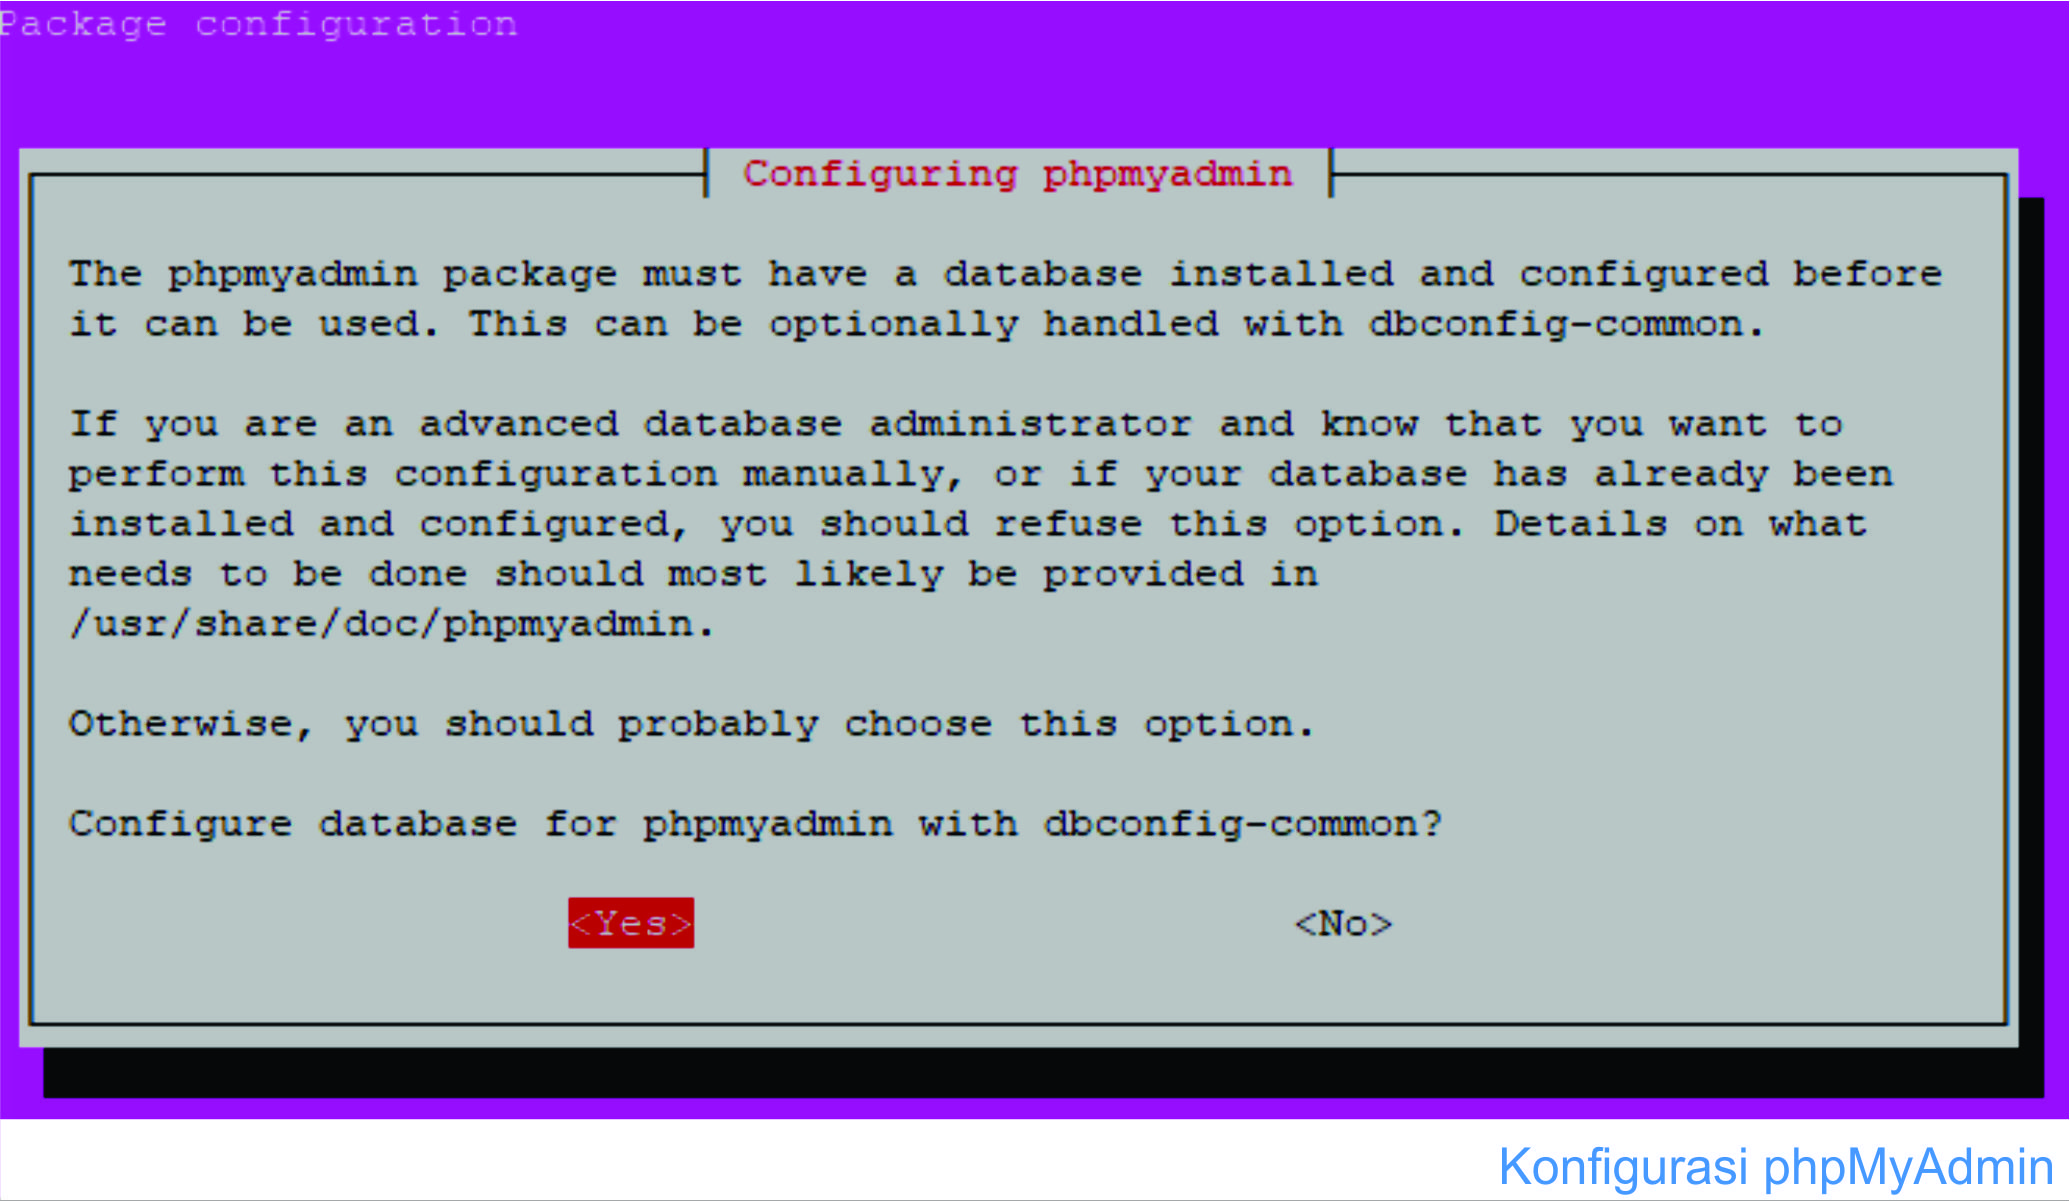
  3. Installer akan menanyakan opsi untuk menggunakan dbconfig-common untuk mengkonfigurasi phpMyAdmin. Pilih Yes.
    Cara Install phpMyAdmin di Ubuntu 16.04 LAMP
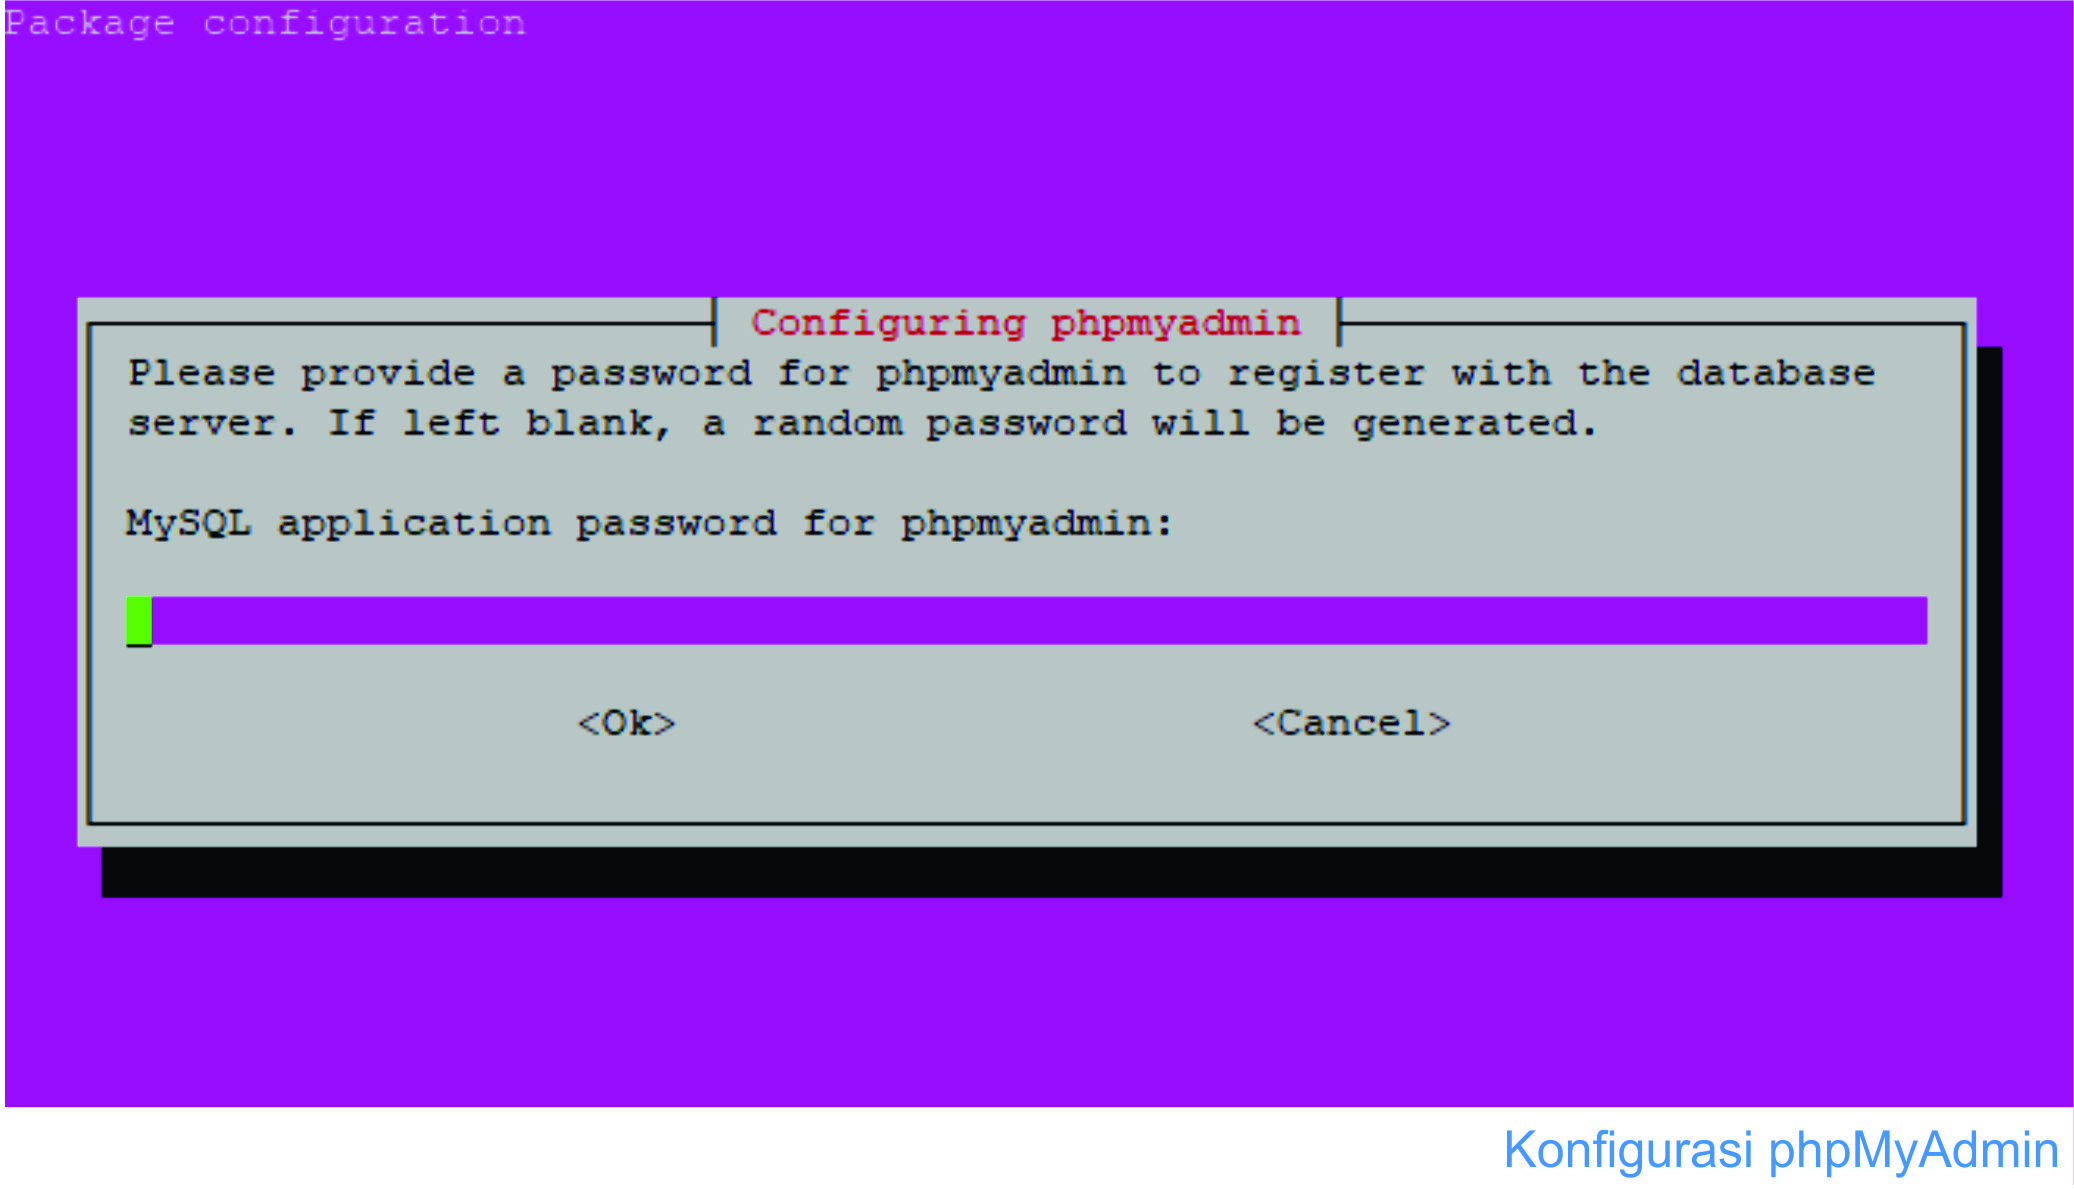
  4. Sekarang anda harus memasukkan password untuk database anda
    Cara Install phpMyAdmin di Ubuntu 16.04 LAMP
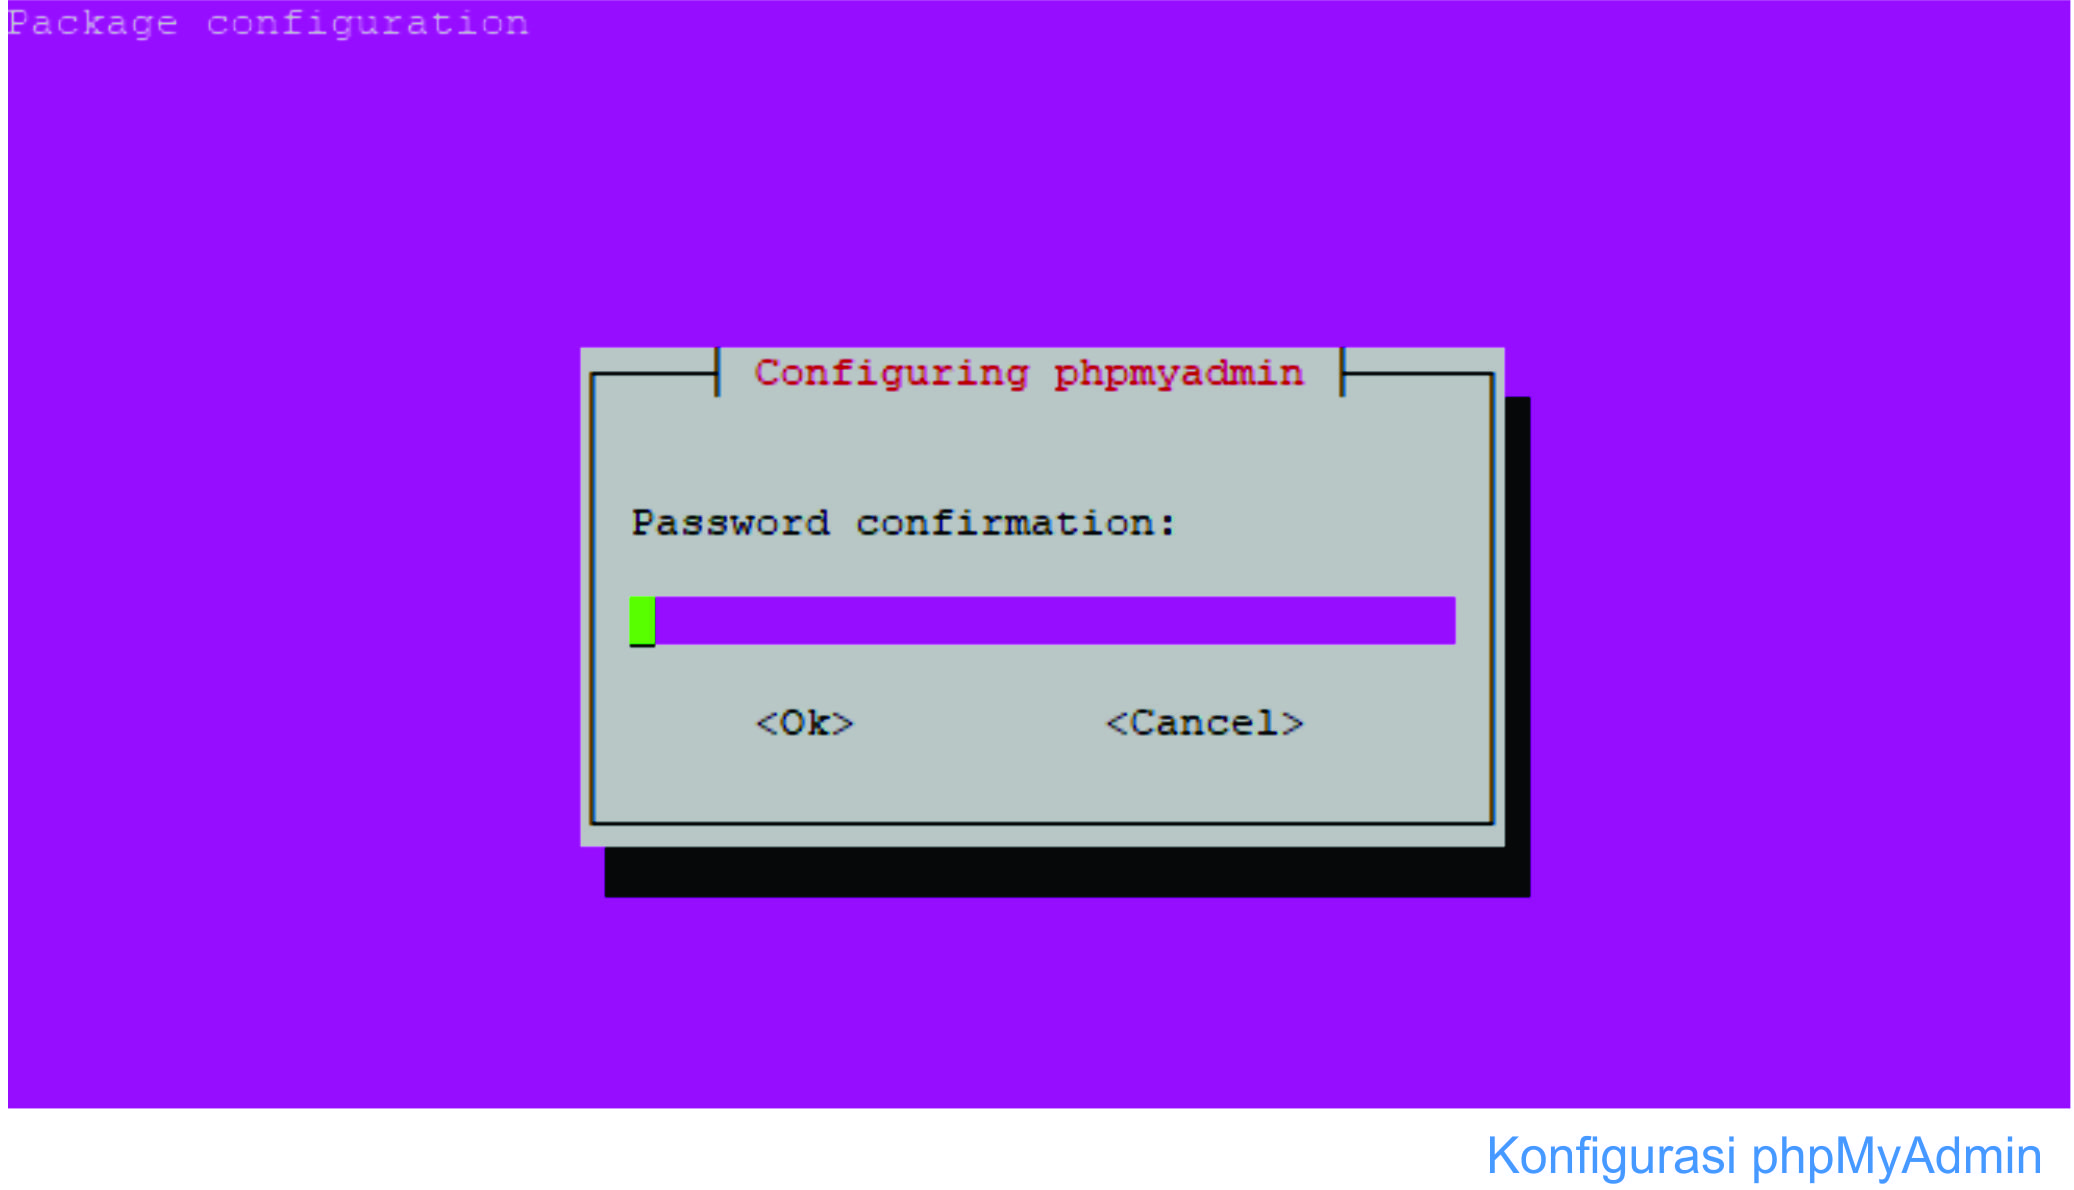
    Anda akan diminta mengkonfirmasi sekali lagi.
    Cara Install phpMyAdmin di Ubuntu 16.04 LAMP
  5. Setelah selesai, phpMyAdmin semestinya sudah terinstal, namun di beberapa kasus anda mungkin akan menemui pesan error yang berbunyi
    ERROR 1045 (28000) : Access denied for user ‘root’@’localhost’ (using password : NO). Your options are … (etc)
    Jika itu terjadi, ikuti langkah tambahan ini
    Pertama, pilih ‘abort’
    Kemudian login sebagai root menggunakan password anda ketika menginstal MariaDB
    mysql -u root -p
    Kemudian jalankan perintah ini
    CREATE DATABASE phpmyadmin;
    GRANT ALL ON phpmyadmin.* TO phpmyadmin@localhost IDENTIFIED BY ‘changethispassword’;
    \q
    Jangan lupa untuk mengganti changethispassword dengan password anda
    Selanjutnya, ubah konfigurasi database
    nano /etc/phpmyadmin/config-db.php
    Kemudian ubah parameter dbpass dengan password anda
    ##
    ## database access settings in php format
    ## automatically generated from /etc/dbconfig-common/phpmyadmin.conf
    ## by /usr/sbin/dbconfig-generate-include
    ##
    ## by default this file is managed via ucf, so you shouldn’t have to
    ## worry about manual changes being silently discarded. *however*,
    ## you’ll probably also want to edit the configuration file mentioned
    ## above too.
    ##
    $dbuser=’phpmyadmin’;
    $dbpass=’changethispassword’;
    $basepath=”;
    $dbname=’phpmyadmin’;
    $dbserver=’localhost’;
    $dbport=”;
    $dbtype=’mysql’;
    Ganti changethispassword dengan milik anda
    Kemudian simpan dengan menekan tombol Ctrl+O lalu Ctrl+X untuk keluar dari nano editor
  6. Instal modul php yang dibutuhkan Karena tanpa itu phpmyadmin tidak akan bekerja
    Maka dari itu, masukkan perintah berikut
    apt-get install php-mbstring php7.0-mbstring php-gettext
    Cara Install phpMyAdmin di Ubuntu 16.04 LAMP
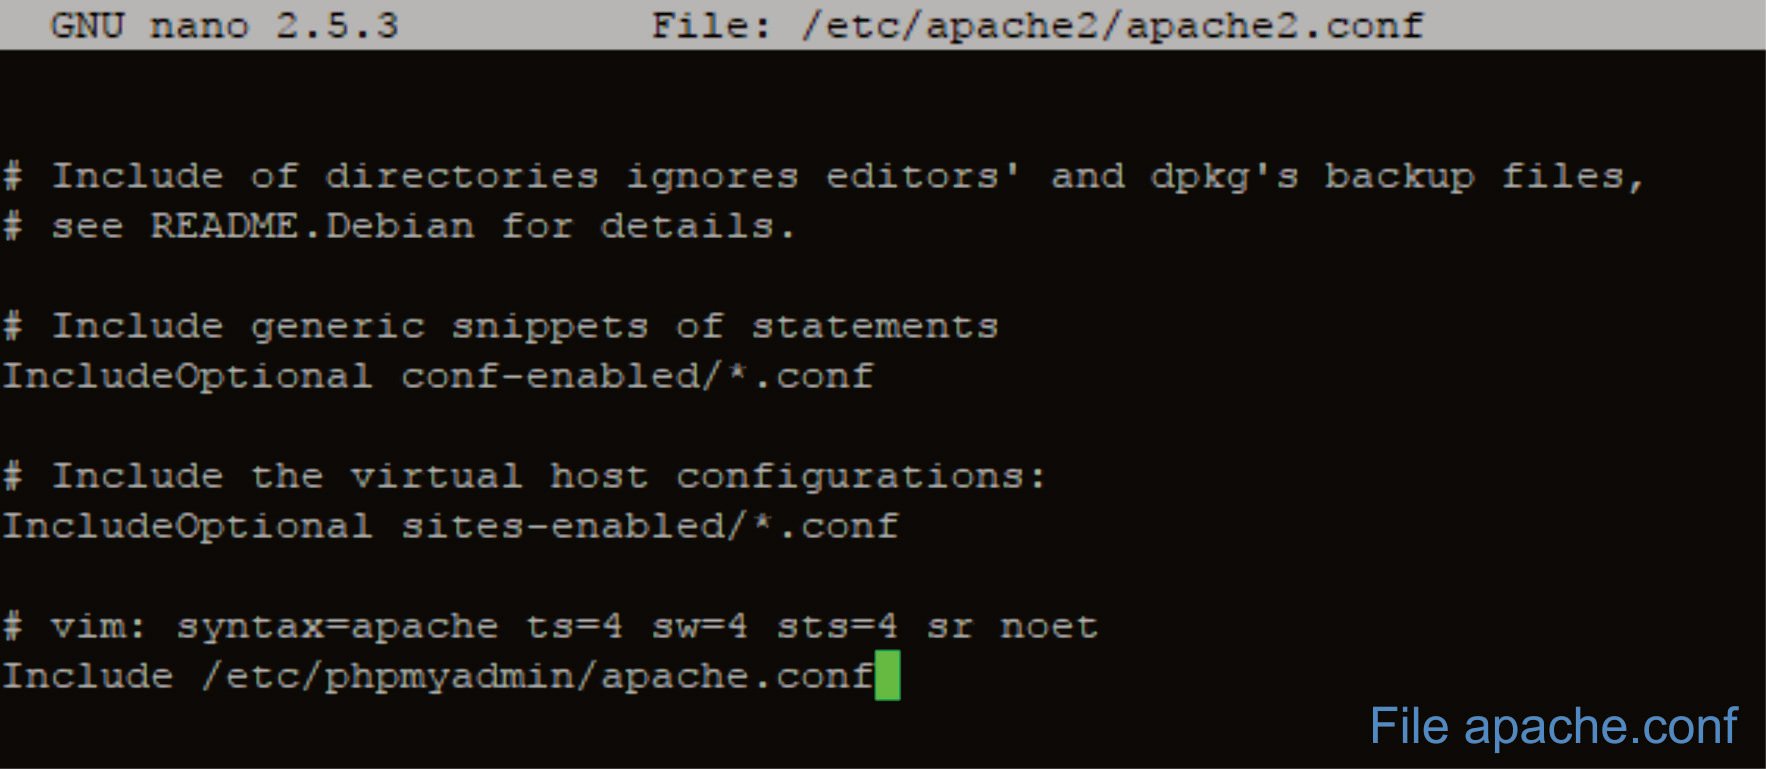
  7. Sesuaikan file config apache2 agar phpmyadmin dapat di akses
    nano /etc/apache2/apache2.conf
  8. Scroll file konfigurasi hingga ke dasar dan tambahkan kode berikut
    Include /etc/phpmyadmin/apache.conf
    Simpan perubahan dan keluar dari nano editor
    Cara Install phpMyAdmin di Ubuntu 16.04 LAMP
  9. Restart service apache2
    service apache2 restart
  10. Untuk mengeceknya, buka web browser dan coba akses phpmyadmin lewat URL
    http://x.x.x.x/phpmyadmin
    ganti x.x.x.x dengan IP address server anda
    Cara Install phpMyAdmin di Ubuntu 16.04 LAMP
    Gunakan credential berikut untuk login pertama
    • Username : root
    • Password : password yang dimasukkan ketika instalasi sebelumnya

NextCloud Ubuntu 16/17 OK

How to install NextCloud 12 on Ubuntu 16.04/16.10/17.04/17.10

https://www.marksei.com/how-to-install-nextcloud-12-on-ubuntu/NextCloud Ubuntu Logo
NextCloud is a Dropbox-like solution for self-hosted file sharing and syncing. Installing NextCloud 12 on Ubuntu is trivial. Whether you want to backup, have file-syncing or just have a Google Calendar alternative, this guide is for you.

What is NextCloud? Is it like a “cloud”?

If you stumbled here by chance and don’t know what NextCloud is, here is an article explaining its principal features and advantages/disadvantages. In this other article you can find NextCloud 12 new features. To tell you the truth, NextCloud is a SaaS cloud, if you want to know more about cloud types you can read this article.
In this article we will cover the installation of the server (not the client).

Step1: Install software

Important
I take absolutely NO responsibility of what you do with your machine; use this tutorial as a guide and remember you can possibly cause data loss if you touch things carelessly.
The first step in order to install NextCloud 12 is to install a web server and PHP. Although you can adapt this guide for many Ubuntu versions I suggest you to stick with Ubuntu 16.04 or higher since PHP7 is included. PHP7 brings many improvements over the past versions and will boost NextCloud too, as a matter of fact PHP7 is required since NextCloud 11. You will need root access during this procedure. The following procedure will install apache as webserver. Input the commands one by one to avoid errors!
Ubuntu 16.04Ubuntu 16.10Ubuntu 17.04Ubuntu 17.10
Open a terminal and input the following commands:

Step2: Database selection

Now that you have set up the environment, all that is left is to choose a database that will support the installation. You have three choices:
  • SQLite: is a single-file database. It is suggested only for small installations since it will slow NextCloud down sensibly.
  • MariaDB/MySQL: are popular open source databases especially amongst web developers. It is the suggested choice.
  • PostgreSQL: a popular enterprise-class database. More complicated than MySQL/MariaDB.
Now, this choice won’t really alter the functionality of NextCloud (except if you use SQLite), so pick whatever you know best. If you’re unsure pick MariaDB/MySQL.
SQLiteMySQL/MariaDBPostgreSQL
Install the software:

Step 3: Install NextCloud

The last step is to actually get the software, configure it and run it.
Ubuntu
With these step we download the software and extract it:
Now we need to create a new file in /etc/apache2/sites-available/nextcloud.conf . Feel free to use whatever editor you feel comfortable with and add the following lines:
Once done it’s time to enable the new site and enable apache modsthat are needed by NextCloud:

Step 4: Configuring firewall

This step is essential when your firewall is enabled. If your firewall is enabled you won’t be able to access your NextCloud 12 instance; on the other hand if it isn’t enabled you shouldn’t have any problems and you can simply skip this step. 
Tip!
Keep in mind having a firewall enabled is a good security practiceand you should already have one enabled.
In order for the firewall to work, it must be enabled. This guide will not include this part. When you enable a firewall many things can go wrong, e.g. you’re using SSH, you enable the firewall and your connection is cut and can’t connect otherwise, hence you should carefully review the documentation from your distribution.
To open the ports needed by NextCloud 12 follow these steps:
UFWIPtables
UFW is the default firewall in Ubuntu, if you’re using one, you’re probably using UFW.

Step 5: Install

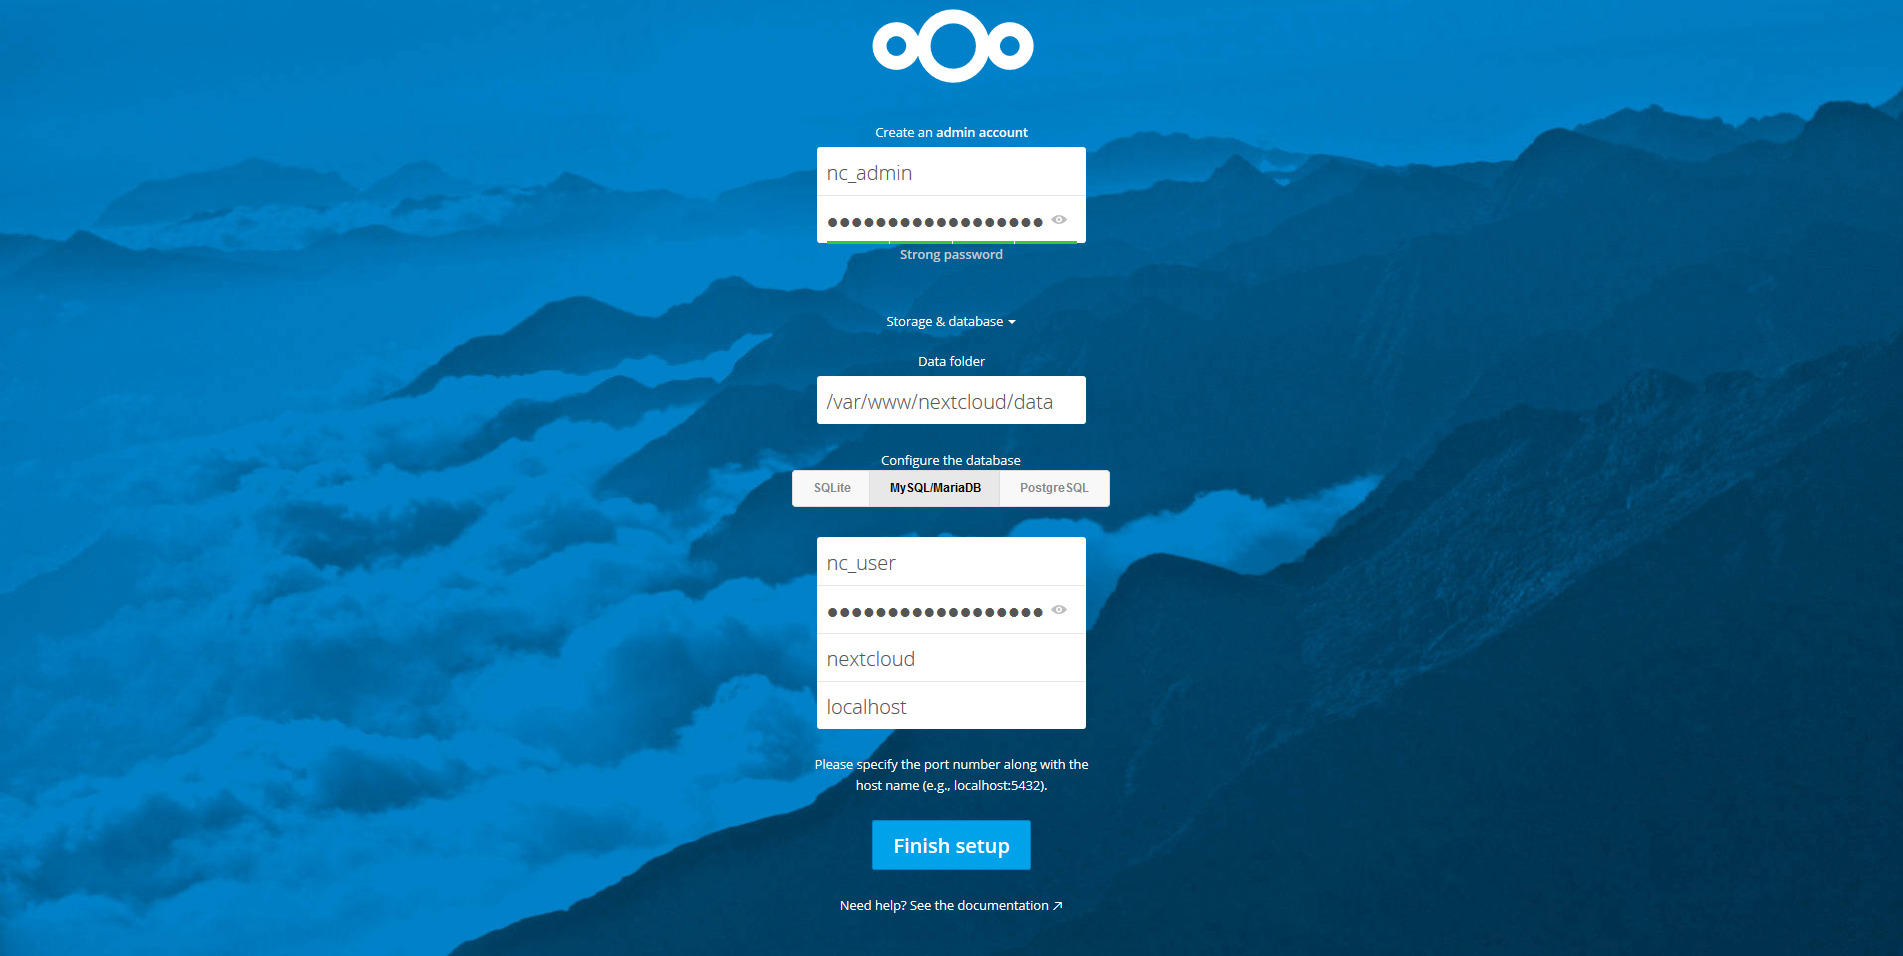
Once you’re done with selecting the database, it’s time to install everything. Head to http://YOUR_IP_ADDRESS/nextcloud/ and you will be facing the following screen:
Nextcloud 12 installation
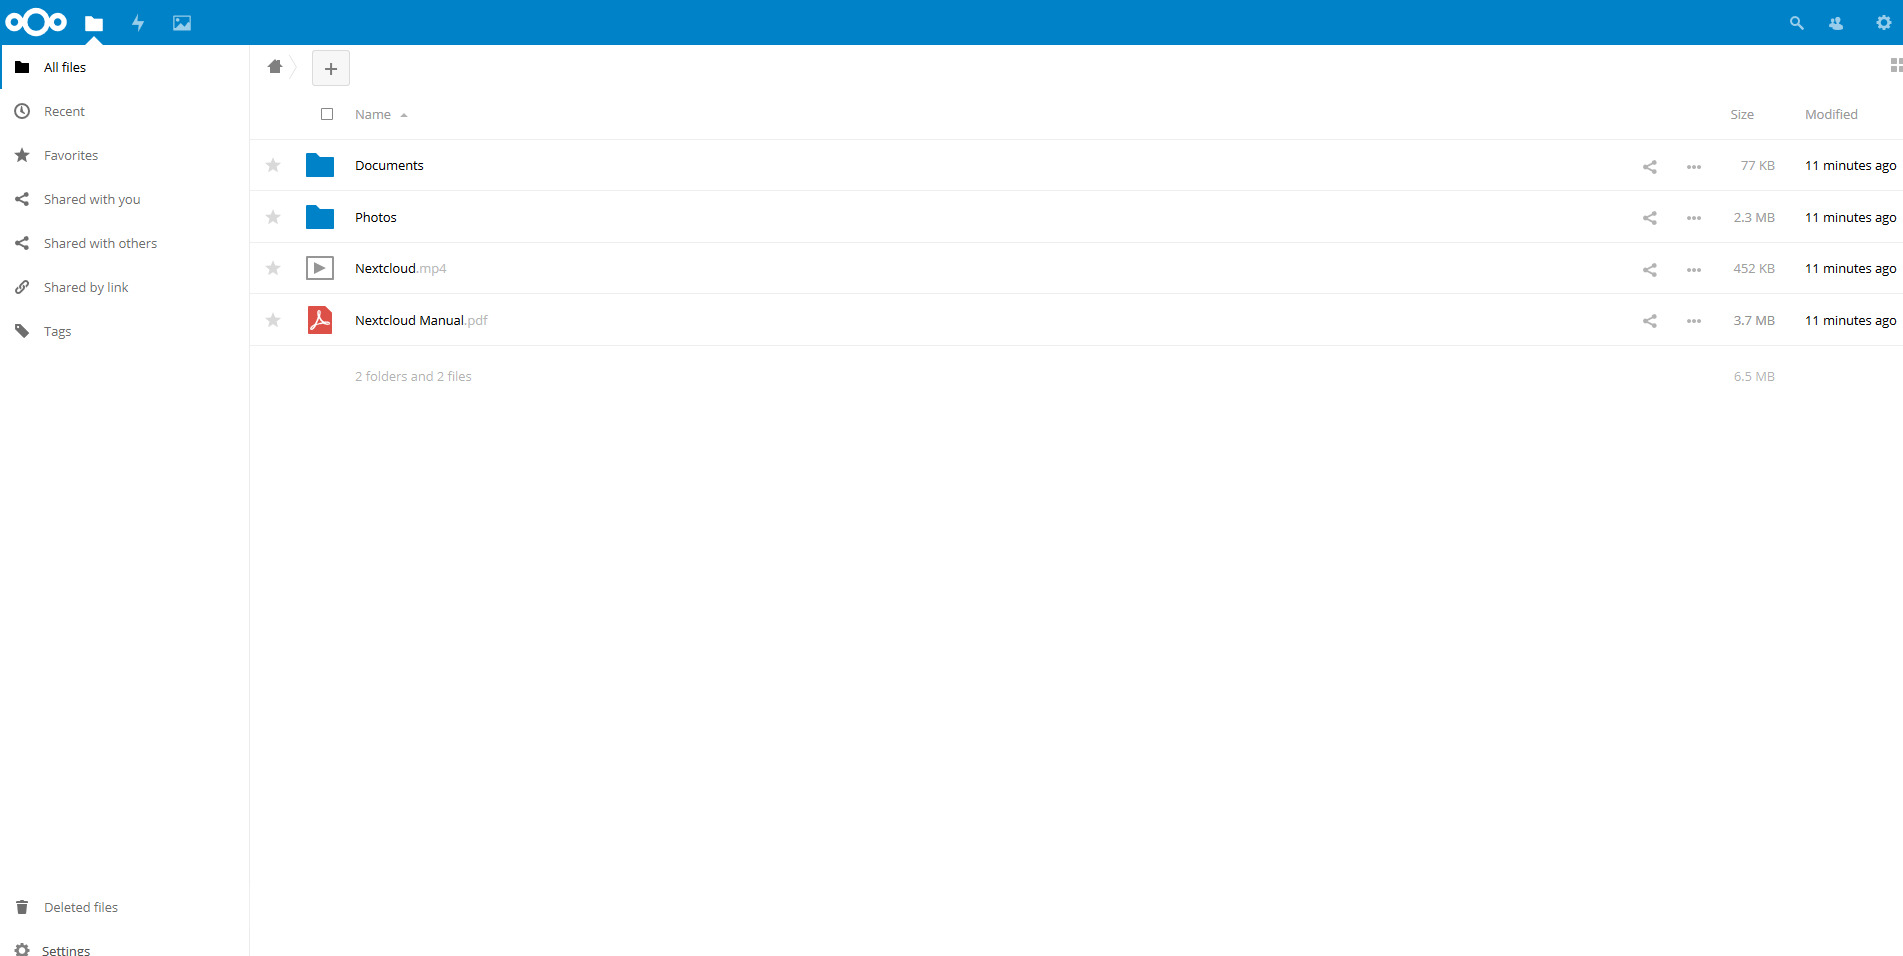
Select an administrator username and password, then you can select the data folder, but if you don’t know what you’re doing it’s best if you leave it with the default value. Then click on “Storage & Database” to select the database you chose during step 2. Fill everything and if you’ve followed all the steps correctly you should be seeing the Files app:
Nextcloud 12 Files App
Image courtesy of mark | markse