How to Add Linux and Windows Hosts on Centreon 2.8
 Centreon has the particularity to simplify the process of adding hosts and services to monitor with an intuitive method. This process has changed with the new version of Centreon which includes now a new functionality called IMP (Instant Monitoring Platform) which play a primordial role on Centreon. The new versions of Centreon don't need to have Nagios installed because it already exists a monitoring engine which is centreon-engine.
What is centreon IMP?
Centreon IMP uses the new generation of Plugins Pack available online. It offers some templates of monitoring ready to use including monitoring procedure that allows starting your monitoring few minutes after the installation of your Centreon monitoring platform. On a fresh installation, Centreon doesn't have any examples of configuration, services, commands, and templates available unless you install the plugins pack via centreon IMP. We can check through Configuration -> Commands -> Checks

or Configuration -> Hosts -> Templates

You can see that we don't have any host template or command. Centreon IMP provides to your server a default access to six (06) Plugin Packs. You have the possibility to create an account which you can be used to connect your Centreon platform so that it will provide you access to five (05) additionals Plugin Packs:
- default plugin pack: base-generic, Centreon, Centreon DB, Centreon Poller, Cisco standard, Linux SNMP, MySQL DB, Printer standard, UPS Standard, Windows SNMP,
- additional plugin pack: DHCP Server, DNS Service, FTP Server, HTTP Server, LDAP Server
You will see a list of plugin packs but some are not available until you choose one offer of centreon IMP. By subscribing to an offer, you will have access to +170 Plugin Packs is around 2000 monitoring indicators which allow deploying your monitoring easily and quickly.
1) Activation of Centreon IMP and plugin pack
To be able to add a host, you must first install plugin through plugins packs of Centreon IMP. To do that, your centreon server need to have access over internet.
A Plugin Pack contains a set of objects to monitor for example an equipment, a database, an application, etc. These objects are:
- Commands to execute monitoring plugins
- Preconfigured host templates to deploy quickly monitoring
- Preconfigured services templates which use commands and define how to execute plugins
During installation of the plugin packs, new objects are added to Centreon in read-only mode. To use these objects, the Centreon Plugin Packs Manager module will create additional objects which inherit the plugin packs objects
a) Activate Centreon IMP
Then, we must activate the two modules Centreon Plugin Pack Manager and Centreon Licence Manager through "Actions" column.


You have seen the list of the five more additional plugins pack which can be useful for critical service such as LDAP or HTTP server. So we will subscribe to an offer through Configuration -> Plugin Pack -> Setup -> Subscription

Then you will be asked to choose an offer as below. The Centreon IMP offers you a catalog which is divided into 3 sub catalogs:
- Standard catalog: available with Centreon Web 2.8 installation.
- Free catalog: available with the creation of a Centreon IMP “discovery” account, once the Centreon platform is linked online.
- Full catalog: available with a paid Centreon IMP subscription online.

Then, you will be asked to create an account and to log into the site. Now return to the centreon's administration page to activate our subscription in order to access to the additional plugin packs: Administration -> Extension -> Subscription then, enter your email and password used during the subscription process

You will have something as below. We will use the offer of eleven (11) plugins: 6 natives and 5 free

Then you will see the additional plugin pack available as below in red color

b) Activate plugin pack
To activate every plugin pack, just click on the plus-sign (+) which appears to the right of every plugin when you move your mouse on it. You can access to the description of a pack by clicking on its icon which also offers the possibility to install it as below

Do it for the different packs which you want to install. When the plugin pack is installed, you have a green icon (stick) to symbolize the activation. Sometimes it can happen that the installation of certain plugins needs another plugin to be installed first as the package's dependencies on Linux. For example, if you try to install first Centreon plugin, it will notify you that it will install packages for linux-snmp which means that it will install Linux-SNMP plugin too as below

The plugin Centron DB need MySql plugin to be installed too as below. You can see that the Linux SNMP plugin is installed

You can see that Centreon plugin has installed Linux SNMP and Centreon DB need to install MySql DB below
Another icon like a book sends you on the documentation of the plugin pack and the green icon (stick) symbolizes the activation

If you skim through the installed plugin pack with the mouse, a red cross will be displayed on the right given the possibility to deactivate the plugin. But sometimes the deactivation can fail because some other packs are used (associated) with the one you try to deactivate, like dependencies packages on Linux.

You can see the error which occurred when I tried to uninstall Linux SNMP plugin so, you will need to deactivate the plugins in the right order.
2) Add a Linux host
Normally to add your Linux hosts on Centreon, you need to configure the SNMP agent and the community string as on the Centreon server to allow a good communication.
Centreon advises to select the template suffixed by -custom instead of read-only template to have the possibility to overwrite pre-configured settings when deploying the monitoring of a host.
For certain Plugins Pack on the monitoring server, you could need to download one or several corresponding packages indicated in the documentation for pollers. For example, for Plugin Pack Linux SNMP, click on the documentation (the book on the right) to have the steps to follow.
Before continuing, we must check if we have host template and commands


You can see that now we have commands and templates installed. So the plugins pack have installed some configuration and examples files.
a) Add the centreon server as host
Now we will first create a new host which represents our Centreon server. Our centreon server already contains the SNMP package well configured.

Now we can create our new host. Use a name of your choice. It exists some templates but we will choose for our server App-Monitoring-Centreon-Central template.

Don't forget to created services linked to the template. Now configure the scheduling options.

Don't save now, we need to edit notifications too.

Configure the notifications options> :
- The Notification Enabled field enables us to enable or disable the notifications concerning the object.
- The Notification Options define the statuses for which a notification will be sent (Down, Unreachable, etc).
- The Notification Interval indicates the time between sending each notification when the status is Not-OK
- The Notification Period field indicates the time period during which the notifications will be enabled.
- The list of Linked contacts indicates the contacts which will receive the notifications.
Then save. You will see the result as below

You can see that our Centreon server has been added and is enabled. But, you can see on the top that Centreon hasn't detected our host and services yet. This is because we need to reload the configuration of our poller.
We can check which services have been added as below

You see that we have services configured and enabled but Centreon doesn't detect it yet. These services have been added through the link with template option validated earlier.
Now let'us reload our poller configuration. You can see that it has detected a change on the configuration

Now we need to export the poller configuration. Now we need to stick the first two option. These options will generate the configuration files into a temporary repertory and will check the generated file for errors as below


Don't worry about the warning messages.
Now you can apply the configuration by sticking the next two options and export which will move each configuration file to the right folder of Centreon server and restart the monitoring engine with the Reload method as above. You can notice on the top after few seconds that, our Centreon server detects now our host with its services.

We can check the status of our host with its services by choosing Monitoring -> Status Details. You can see that Centreon is checking the status of the configured services.

You can check the status of the host as below

You can see that our host has the status ON. That is why on the top you can see the green number one (1) where there is the number of hosts.
When we return to our services status, we can see that all the status are up

It is possible to have a graphical representation of the monitored services through Monitoring -> Graph, use Chart (step 4) to add the elements. When you use it, you will have the graphic representation. You can apply some other filter but we don't need it for the moment. But you can play to test it. below it is the CPU service

Here you have the Load and Memory services on the screenshot below

Now you have the Swap and the Ping services.

The graphic representation is a plus offered by centreon.
b) Add a remote Linux host
Now we will try to add a Linux server of our network. Your Linux server need to have snmp installed and well configured. The community string and version must be the same as the server. Normally new Linux systems come with snmp already installed. The server in our case is another Centos 7
Before configuring, you can check in command line on the server if snmp is working with the Linux host. We will check some services on our Linux host with some plugins commands
# /usr/lib/nagios/plugins/check_centreon_snmp_cpu -H 192.168.140.47 -C public -v 2c -w 40 -c 70
CPU utilization percentage : 1%|avg=1%;40;70;0;100 cpu0=1%
# /usr/lib/nagios/plugins/check_centreon_snmp_memory -H 192.168.140.47 -C public -v 2c
Total memory used : 13% ram used : 36%, swap used 0% | used=179728384o size=1305808896o
So, to add our Linux host we will reproduce the same procedure as for the server through Configuration -> Host -> Add

You can notice that our centreon is present and enabled. You must indicate the IP of the server, the snmp version and community and choose OS-Linux-SNMP-Custom for the template. Don't forget to link services to the templates. The Centreon mechanism to deploy indicators based on services templates that are linked to host templates you have selected to deploy are only defined on custom host(s) and service(s) templates.

You are must notice that the link between custom templates will not be updated during an update of a plugin pack.
Configure the scheduling options and the notification as we did for the centreon server, then save

Our new server appears but don't forget that it is not recognized yet. This is why services and hosts information on the top are not updated.

We can try to see which services have been added. The services are presents but not update to centreon server.

Now let'us activate the configuration through the poller. We will export the configuration


You can see that the new configuration files see our new Centos server

Now we will apply the configuration. You can see on the top that the information has been updated. Our host is properly detected with its services but our Centreon is checking the services. This is why you can see ten (10) services but only five (05) are up (green color) and you can see the five (05) other services which are in blue color (also on the right top) because the check is not finished yet.

Now let us check the service properly.

After few minutes the status of the services change and all are up. You can also the change on the top, we have ten (10) services and all are in green color

Now our new Centos server is up with its services.
3) Add a windows host
I will show you how to add your Windows server to Centreon. Our server is Windows Server 2012 Standard Edition. You need first to configure the SNMP on your server to be able to communicate with Centreon.
a) Install SNMP and Configure the community string
So, connect to your windows server and install the SNMP feature. Follow the path Windows Key > Server Manager

Then choose the option Add roles and features on the dashboard which appears

At this step it is very simple, just follow the standard proposition

Just click Next. Don't change anything here and use the default choice

Let the default choice File and Storage Services

Now scroll and stick SNMP service and add the features

confirm the installation

When the installation will finish, close the confirmation windows.

Now that it is installed, we need to configure the service so click on Windows Key -> Administrative Tools -> Services


Now scroll to modify the SNMP service.

To edit the service, you must do a right-click and choose Properties.

Now click on the Security tab and add first the community string. By default it is public. Be sure to make it Read Only, not Read Write. We must also configure only the servers allowed to communicate with our windows host then, add the IP addresses of the allowed servers as above then apply and close the window.

Now we must verify that our SNMP protocol is not blocked by our firewall. From the task bar of the Server Manager, in the right-hand side of the top navigation bar, click Tools -> Windows Firewall with Advanced Security.

So we configure the windows server's firewall to restrict the SNMP for the allowed server too.We need to configure the inbound traffic so Inbound Rules. Scroll to SNMP Service then modify by right-click -> properties

Now edit the scope to add the allowed addresses.

Now that we have configured our Windows server, we can back on our Centreon server to add our Windows host.
We can check if it is fine on our centreon server in command line as below
# /usr/lib/nagios/plugins/check_centreon_snmp_remote_storage -H 192.168.140.50 n -d 1 -t bu -w 22000 -c 25000 -C public -v 2c
Disk OK - C: TOTAL: 29.656GB USED: 18.291GB (61%) FREE: 11.365GB (39%)|size=31843151872B used=19639570432B;7005493411840;7960787968000;0;31843151872
You can see that our snmp works well on our windows server.
b) Add the windows host on Centreon
Now connect to your centreon server and add a new host

Now configure the host. Don't forget to give the good community string. For our windows host, we will choose the OS-Windows-SNMP-custom template and we will create services.

Now configure the scheduling options and the notification the save.
 You can now see our server which appears. The modification are not applied yet.

Now let's check the services to monitor

All the services are enabled. Now let's configure the poller

As you know our new windows server is not detected yet. Now let us generate and check the configuration files


You can see that all is ok. Don't worry about the warning messages. Just notice that our Windows server appears on the generation.
Now let'us properly apply the modifications by moving the conf files and reloading the monitoring engine. You can see that our new Windows host has been detected with services. On the 14 services, 10 (green color) are up and 4 (blue color at the top right, the new ones) are on checking status when the configuration is well detected and applied. But, you can see that we have 3 actives hosts (green color) so, our new is directly up.

Now let check the status of the new host and services


You can confirm that the host is up and services are being checked. After few minutes, you can see that all the services work well


Our Windows server works well.
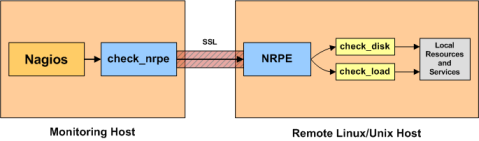
Centreon offers a simple procedure to add a host. You don't lose time for some configuration on the server and the client. You only need to well configure SNMP on your hosts because the check_centreon_snmp* commands work with the information given by SNMP from your hosts but check_nrpe or check_nt (default on Nagios) use an agent. This is why on Nagios you need to install an agent but not on centreon if you use the check_centreon_snmp* commands. The default is to have a good comprehensionSNMPsnmp if a problem occurs during the communication. Now you know how what to do in order to have a functional Centreon server for your professional environment.