Onlien Editor ini adalah aplikasi editor online yang membantu aktifitas kerja. Aplikasi ini memudahkan kita dalam mengedit dan membuat dokumen dengan menggunakan browser (firefox). Untuk membangun aplikasi ini dibutuhkan spesifikasi hardware pendukung dibawah ini :
RAM 2 GB atau lebih
Hard Disk 2 GB Free Space
Untuk aplikasi pendukung yang harus dipenuhi adalah sebagai berikut:
Mono dengan versi 4 atau 4 keatas
Mysql dengan versi 5.6.4 atau 5.6.4 keatas
Nginx dengan versi 1.3.13 / keatas
Nodejs versi 0.10 / keatas
Libstdc++6 versi 4.9 / keatas
Instalasi Paket
Langkah instalasi paket-paket yang diperlukan adalah sebagai berikut:
1.$ sudo su
2.#apt-get install mysq-server
3.#apt-get install nginx
4.#apt-get install nodejs
5.#apt-get install libstdc++6
Untuk aplikasi mono sebelumnya melakukan sedikit konfigurasi seperti dibawah ini:
Kemudian dilanjutlan dengan langkah instalasi sebagai berikut:
1.# apt-get install mono-complete
Tahap Instalasi Aplikasi OnlyOffice
Setelah aplikasi terpasang dengan baik tanpa ada error / kesalahan , langkah selanjutnya adalah melakukan tahap instalasi aplikasi OnlyOffice sebagai berikut:
Langkah 1
Membuka Browser kesayangan anda (firefox). Ketikkan pada URL IP Address Anda. Kemudian akan tampil gambar sebagai berikut:
Langkah 2
Klik Choose File untuk memulai.
Langkah 3
Proses compatibility, setelah proses klik Edit.
Selanjutnya adalah Edit File (Gambar 4). Menu File (Alt+F), terdiri dari Save, Dowload as, Print, Document Info, Advanced Setings, Help , Go to Documents, lihat contohnya di gambar 5
Gambar 5
Tampilan Format Dokumen. Nah, bagaimana PalComSter? Caranya mudah kan? Selamat mencoba ya.
ONLYOFFICE adalah, perangkat lunak open source gratis yang membantu untuk mengatur kerja sama tim yang online.Versi Linux saat ONLYOFFICE terdiri dari fitur berikut:
manajemen dokumen termasuk integrasi dengan sistem penyimpanan file, seperti Google Drive, Box, onedrive, Dropbox dan SharePoint;
manajemen proyek dengan Gantt Chart;
CRM dan faktur;
set alat untuk kolaborasi dalam tim termasuk chatting, blog, forum, berita, wiki dll
email aggregator.
Panduan ini akan menunjukkan cara menginstal ONLYOFFICE pada Ubuntu.Ini juga akan bekerja pada Debian dan turunannya.
Persyaratan sistem
Untuk ONLYOFFICE pekerjaan yang benar mesin Anda harus memenuhi beberapa persyaratan sistem dan memiliki beberapa komponen tambahan yang terpasang:
RAM: 2 GB atau lebih
Swap file: minimal 2 GB
HDD: minimal 2 GB ruang bebas
mono: versi 3.2 atau yang lebih baru
MySQL: versi 5.6 atau yang lebih baru
nginx
Jika beberapa komponen ini hilang dalam sistem Anda, lihat berikut link ini .
Instalasi ONLYOFFICE
Untuk menginstal ONLYOFFICE dari repositori, pertama-tama Anda harus mendownload ONLYOFFICE GPG kunci penandatanganan:
Kemudian tambahkan ONLYOFFICE repositori ke daftar disimpan dalamfile /etc/apt/sources.list.Buka file ini menggunakan editor teks apapun yang tersedia (misalnya nano):
sudo nano /etc/apt/sources.list
Tambahkan catatan berikut:
deb http://download.onlyoffice.com/repo/debian~~MD~~aux memeras utama
Memperbarui cache paket:
sudo update apt-get
Sekarang untuk menginstal ONLYOFFICE dari repositori jalankan perintah berikut:
sudo apt-get install onlyoffice
menjalankan ONLYOFFICE
Untuk membuka kantor Anda di web browser, masukkan localhost (http://127.0.0.1) di address bar browser Anda.Halaman Selamat Datang akan terbuka:
Masukkan password dan menentukan alamat email yang akan Anda gunakan untuk mengakses ONLYOFFICE waktu berikutnya.
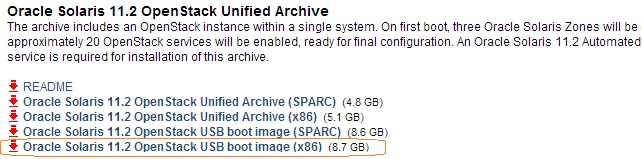
Oracle Solaris 11.2 has integrated with openstack for cloud computing. Many of the Oracle Solaris administrators would like to try the openstack stuffs but deployment is not so easy on it. Since Openstack is new to Solaris administrators, oracle provides the Pre-built templates to install Oracle Solaris 11.2 with openstack package to setup in few minutes . This template can be deployed as kernel zone or bare metal installation(Install directly on physical machine). There are two type of template is available on Oracle downloads. One is UAR file(Unified Archive) which can be used to install the kernel zone with openstack functionality.The second one is USB bootable image which can be used to install global zone (physical servers).
Solaris 11.2 Openstack download
You can deploy the pre-built openstack template as kernel zone..Download “Oracle Solaris 11.2 Open Stack unified Archive (x86)” and keep the file in /var/tmp. Then just use the below commands to create a kernel zone with Pre-built Openstack image.
When you want to deploy this template on physical servers, You need to download “Oracle Solaris 11.2 Open Stack USB boot image (x86)” file on any Solaris 11.2 server. Login to Solaris 11.2 server and connect USB pen drive (>9 GB Size).Use usbcopy command to copy the downloaded USB file to pen drive. (Which makes bootable pendrive)
UA-GLOBAL# usbcopy sol-11_2-openstack-x86.usb
Found the following USB devices:
0:    /dev/rdsk/c9t0d0p0    15.8 GB    DTV      USB 2.0          8.07
Enter the number of your choice: 0
WARNING: All data on your USB storage will be lost.
Are you sure you want to install to
DTV USB 2.0 8.07, 16179 MB at /dev/rdsk/c9t0d0p0 ?  (y/n) y
Once the copying is done, then you can use this pen drive to install Oracle Solaris 11.2 with Pre-configured openstack on physical machines by booting from USB device.
What about installing Oracle Solaris 11.2 with openstack(USB boot image) on VMware workstation ? or Oracle Virtual Box ?
I have been trying to install USB image on VMware workstation or Virtual box from last 3 days but failed .The first problem with VMware workstation is to boot from USB device. The default VMware workstation bios will not support USB boot. After lot of research , i found that by adding below mentioned parameter on virtual machine’s *.vmx file will allow to boot from USB and i was able to boot from USB successfully.
firmware = "efi"
But when the installation kicks ,I got the error saying that “SCSI time out retrying…and finally….Giving up “. After lot of research, i found that VMware workstation is using generic driver to USB and that creates the problem.Sometimes console services will not start when the installation begins and system will ask for user name and password for maintenance mode.
As a second option, i thought of converting USB image to ISO but ISO supports maximum 4GB where Oracle Solaris 11.2 with openstack image size is more than 8GB.
Then finally ,I have switched to Virtual box.I have installed plop boot manager on laptop which will give a option to boot from USB device for virtual box’s VM.
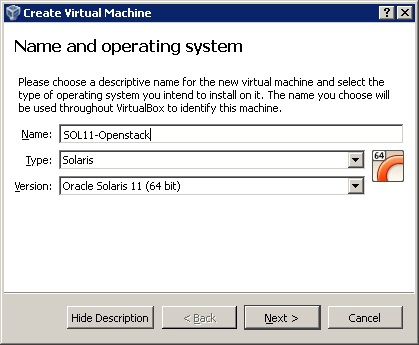
1.Open a virtual Box and create the virtual machine for oracle Solaris 11 64 bit.
Name and Operating system
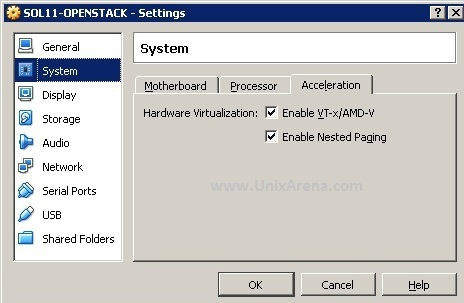
2.Make sure the hardware virtualization is enabled for created VM.
Enable Hardware Virtualization
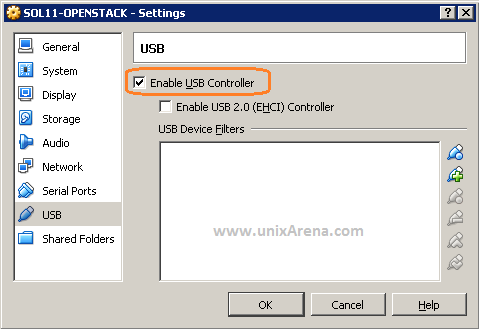
3.Make sure that USB port is enable for new VM.
Make sure USB port is enabled
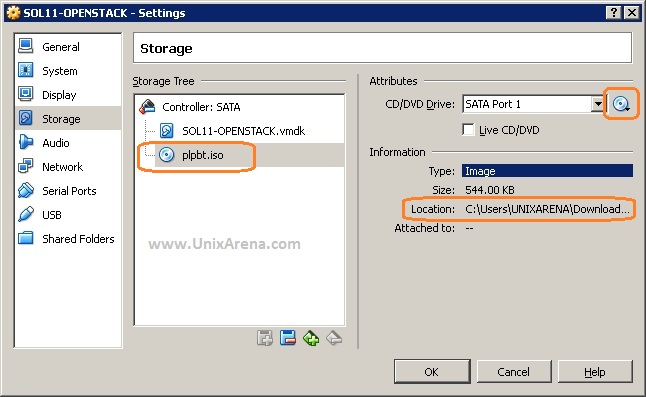
4.Download the plopboot manager and extract it .In this extracted files, you can see plpbt.iso . Just attach this file to VM .
Image has been attached
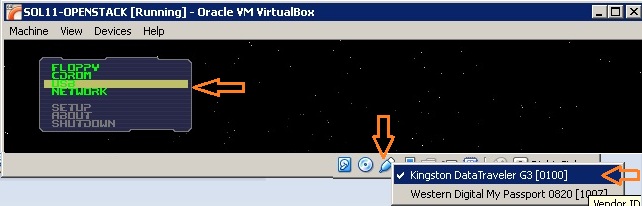
5.Make sure that you have connected the USB pen drive (which we have created in beginning) on the host system (windows 7 or Linux ) and power on the VM. Once you have powered on the VM , you can see that VM has been booted from plop manager.In the bottom, just click the USB icon and connect the pen drive(which we have created in beginning ). Select USB from that list and press enter.
USB boot – plop manager
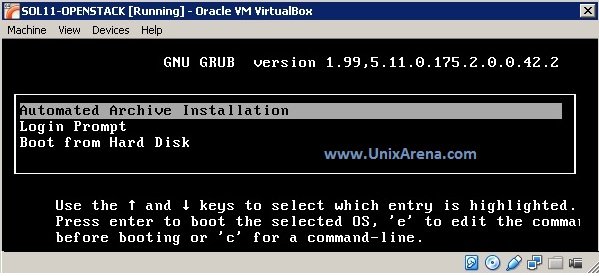
6.Select the installation as “Automated Archive installation”
Automated Archive Installation
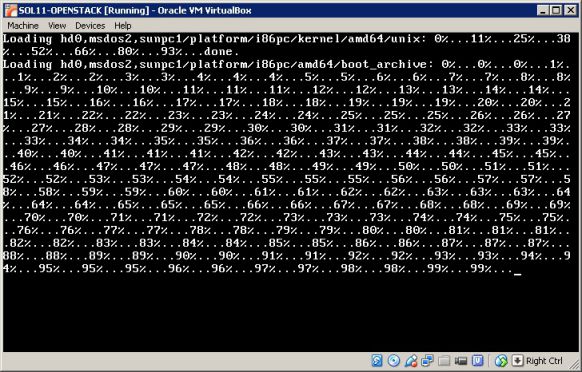
7.You can see that Oracle Solaris is booting from USB drive.
Solaris is booting from USB
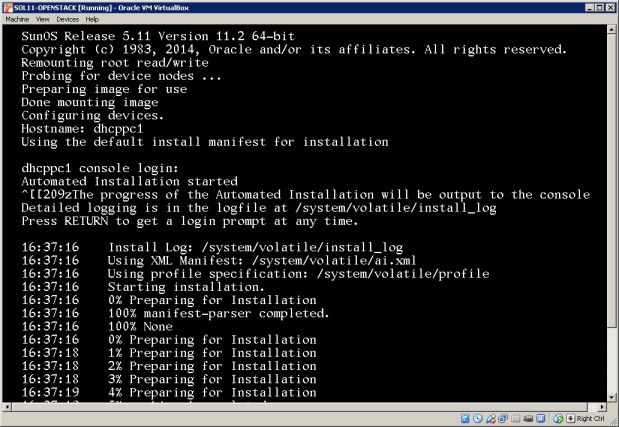
8.Once the boot image is loaded,You can see that installer will be preparing for the system installation.
Preparing for OS installation
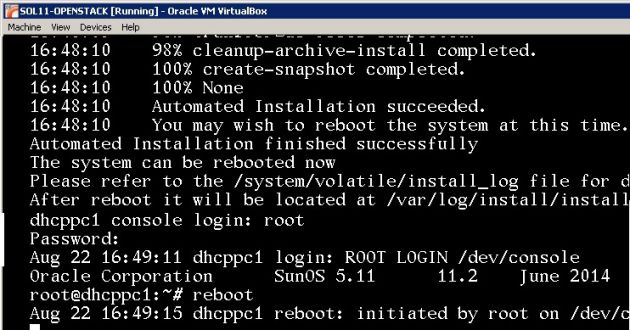
9.Once the image deployment is completed, just login to the system and reboot it .
Reboot the system after installation
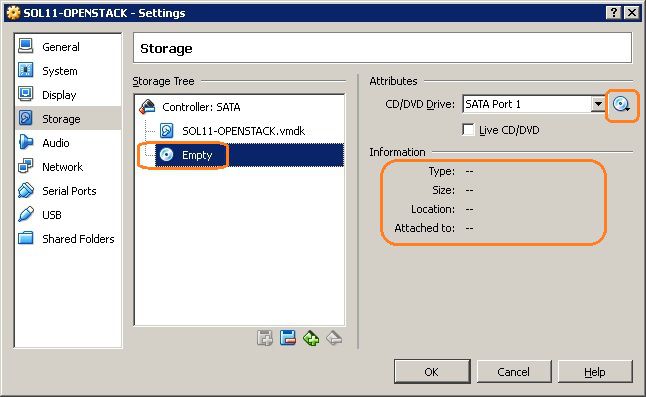
10. Just power off the virtual machine and remove the plop manager ISO which we have attached. You can also remove the pen drive which is connected to the host.
Remove the plop manager iso and boot it
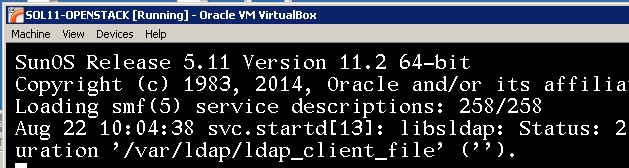
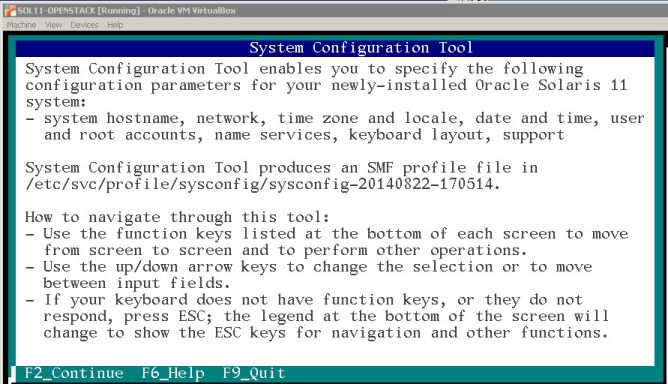
11.Power of the Virtual machine .It should boot from the hard drive.